
Oh my goodness, you have to try making ice cream at home! There’s just nothing that compares to that rich, smooth texture you get right out of the churner. Forget those icy, store-bought tubs—when you make it yourself, you control everything!
I’ve taken my absolute favorite weekend dessert, classic Italian tiramisu, and transformed it into the dreamiest frozen treat imaginable. We’re talking about the marriage of strong, aromatic coffee and impossibly velvety cream. This Tiramisu Ice Cream is truly special because I spent ages perfecting the custard base. I needed it to carry that deep, authentic tiramisu flavor without becoming hard as a rock in the freezer. Trust me, after testing batch after batch, I finally nailed the perfect ratio to make sure every scoop melts perfectly on your tongue!

Why This Tiramisu Ice Cream Recipe Works
I know what you’re thinking—homemade ice cream is too much work. But this recipe cuts out the fluff and focuses only on what makes tiramisu legendary. It’s a recipe I stand behind because it truly delivers on both flavor and feel. You’re going to love how simple the payoff is!
- Authentic Flavor Profile in Your Tiramisu Ice Cream: We aren’t messing around with weak coffee here. The combination of strong espresso and that optional splash of coffee liqueur really locks in that true Italian dessert experience.
- Superior Creamy Texture Achieved: This is a true French-style custard base, which means we cook the egg yolks slowly. That custardy richness coats the ice crystals perfectly, stopping that awful icy crunch. The result is the best Tiramisu Ice Cream you’ll ever churn.
Essential Ingredients for Perfect Tiramisu Ice Cream
Okay, assembling this is the easy part! Don’t even think about swapping out the main players here. Getting the measurements and preparations right for these ingredients is what separates a good dessert from truly spectacular Tiramisu Ice Cream.
You’ll need six big egg yolks, which give us that lovely richness. Don’t throw out those whites—maybe make some meringue! We need 3/4 cup of regular granulated sugar to whip up fluffy with those yolks.
For the dairy, get 1 1/2 cups of heavy cream and 1 cup of whole milk. Crucially, you need 1/4 cup of really strong brewed espresso, and make absolutely sure it is completely cooled down before it hits the warm custard. A little coffee liqueur is optional but divine, so grab that if you have it! Finally, a touch of vanilla extract and, of course, cocoa powder finish the job.
Mastering the Custard Base for Tiramisu Ice Cream
This is where the magic—and maybe a little bit of kitchen tension—happens! The custard base is what separates great Tiramisu Ice Cream from something disappointing. We need to build a rich, stable foundation first, which involves those lovely egg yolks and the hot cream and milk mixture. Don’t rush this part; patience pays off hugely here!
My first time trying to temper eggs for a frozen dessert was an absolute disaster. I poured too fast, and ended up with sweet, creamy scrambled eggs in my pan! Oops! But now I know the secret sauce:slow and steady wins the race.
Tempering the Egg Yolks Safely
Take your hot cream and milk from the stove and start drizzling it into your yolks and sugar mixture—the yolks you whisked until they were pale. But here’s the trick: only add the hot liquid a tiny bit at a time while whisking like crazy! We call this tempering. You are slowly asking the yolks to raise their temperature without shocking them into cooking instantly. Keep that whisk moving constantly!
Cooking Custard to Nappe Consistency
Once everything is combined back in the pot over low heat, start stirring with a wooden spoon, making sure to scrape the bottom edges. You are aiming for what they call ‘nappe consistency.’ If you pull the spoon out and run your finger across the back, the line should stay defined and not run back together. Seriously, if you have one, a digital thermometer is your best friend here—you want to hit about 170°F, but heaven forbid you hit a boil, or it’s over! Boiling ruins the structure.
Infusing and Chilling Your Tiramisu Ice Cream Base
Okay, we survived the cooking part—that’s a huge win! Now we need to get those big, bold coffee flavors right into the custard while it’s still warm. Pull that beautiful, thickened base off the heat. Now is the time to stir in the star players: your strongly brewed, cooled espresso and that optional coffee liqueur. If you’re skipping the booze, maybe add a nice splash of vanilla extract here too for good measure!
Once everything is mixed, you MUST strain that custard. Don’t skip this step! It catches any tiny bits of overcooked egg yolk that might have snuck in. I learned that lesson the hard way on batch four—no one wants gritty Tiramisu Ice Cream.

Next, cover the surface right with wrap—hello, no skin formation! Then, the most important part for texture: chill it. While you can churn it after four hours, I’m telling you, aging this base overnight is a game-changer. Letting it chill completely allows the fats and liquids to fully hydrate, which is the actual secret to super smooth, non-icy final Tiramisu Ice Cream.
Churning Technique for Smooth Tiramisu Ice Cream
Alright, the base is cold, luscious, and ready for its big moment! You’ve made the custard, you’ve chilled it until it’s properly impressed, and now we get to churn it. This step is pretty straightforward if you follow the rules for your specific machine, but there are a few little things I learned that made my Tiramisu Ice Cream go from good to ‘I need three bowls’ good.
First off, make sure your ice cream maker bowl is frozen solid. I mean, rock hard! If it’s just slightly cool, your churning time will double, and that means more time for ice crystals to form. We want speedy freezing!
If you’re using a standard machine, pour that perfectly chilled custard right in there and let it do its work. You’re looking for a consistency that’s thicker than heavy cream but still noticeably soft, like soft-serve ice cream from a machine. It usually takes about 20 to 30 minutes, but always check your manufacturer’s guide.
When it comes out of the machine, it won’t be ready to scoop neatly right away. It’s going to look a little loose, almost like a fluffy, coffee-flavored pudding. That’s totally normal! It hasn’t reached its final texture yet. That firm, scoopable dessert you want comes next, right out of the deep freeze.
Freezing and Finishing Your Tiramisu Ice Cream
The machine has done its best work, and now your Tiramisu Ice Cream is beautifully soft-serve consistency. But honestly, that’s only halfway there! You need to give it a nap so it firms up into proper, scoopable dessert. This hardening stage is almost as important as the churning itself if you want to avoid a slushy mess later.
Take that soft churned ice cream and transfer it immediately to an airtight container. I always use a shallow loaf pan or a freezer-safe glass container. The critical thing here is getting it into the deep freeze as fast as possible. If it slumps around on the counter softening too much, you’ll lose some of that beautiful airiness you just churned in.

It needs at least two hours in the coldest part of your freezer to firm up properly. Don’t try to rush this by setting it on the outside shelf—it needs serious time to lock in that structure. Once it’s firm, we move to the best part!
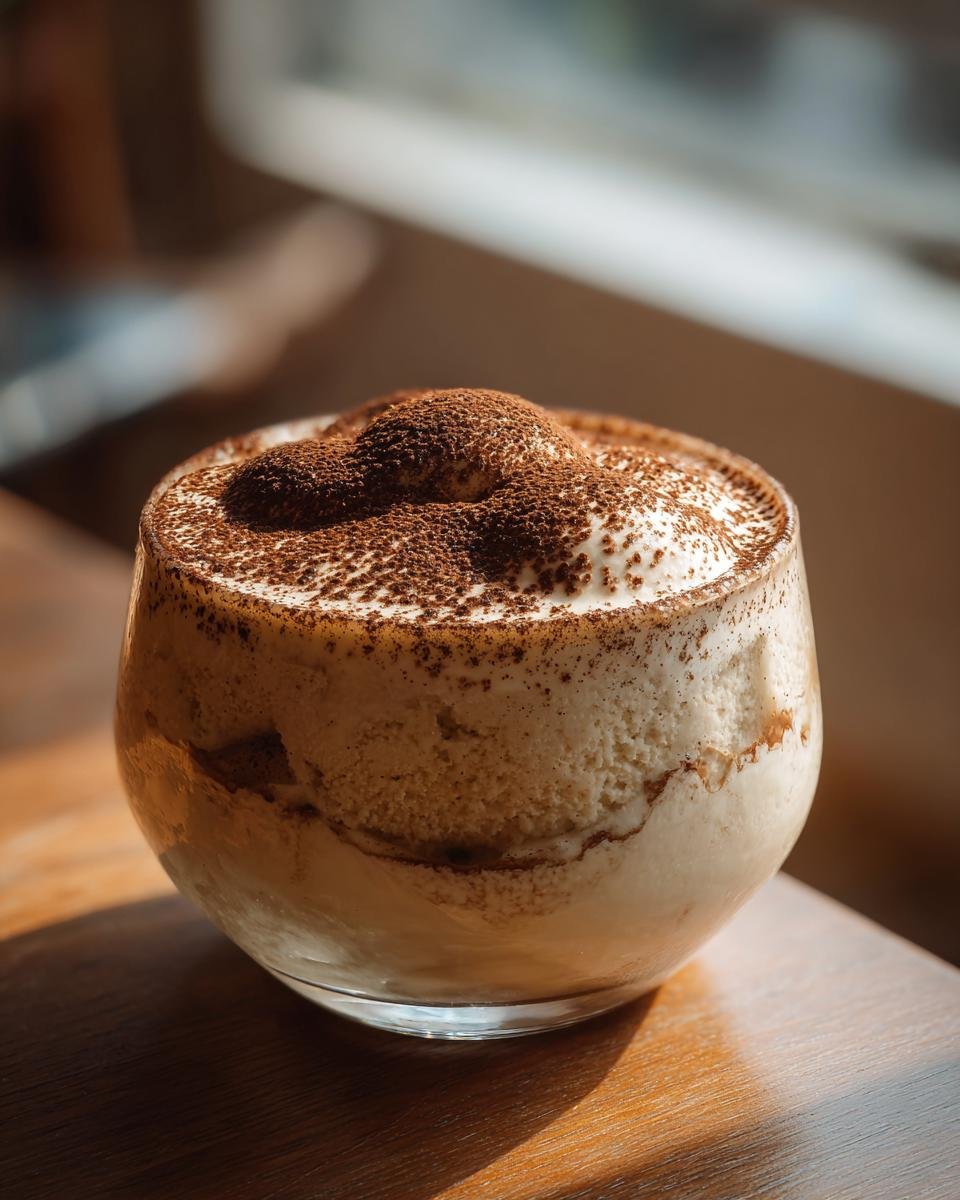
Tiramisu isn’t tiramisu without that signature dusty cocoa top, right? Right before you serve this incredible Tiramisu Ice Cream, take a fine-mesh sieve, load it up with unsweetened cocoa powder, and dust the entire surface generously! It gives you that slightly bitter, gorgeous contrast to the sweet, coffee-laced cream underneath. It’s the absolute perfect finishing touch!
Tips for the Best Tiramisu Ice Cream Results
I’ve made this recipe so many times that I’ve collected a few little tricks that really push this Tiramisu Ice Cream over the top. Honestly, the difference between a good batch and one that makes people beg for your recipe is usually just a tiny bit of extra attention to detail. These tips are my go-to moves every single time I fire up the machine!
Coffee Strength Matters for Tiramisu Ice Cream
This is vital, you guys. When you freeze anything, the cold actually muffles the flavor profile. So, if you use regular, mild drip coffee, you’ll end up with something that tastes faintly like sweet milk when it’s rock solid. No thank you! I always use espresso that I brewed myself—it needs to be strong enough to make you blink!
If you use instant coffee granules, make sure you are dissolving them in way less water than the packet suggests. You want a concentrated, powerful coffee kick going into that custard base. If it tastes a little bit too strong when it’s a liquid, don’t worry—it will be absolutely perfect once it completely firms up in the freezer.
Acceptable Substitutions for Coffee Liqueur
I know the coffee liqueur adds a wonderful depth and complexity, but maybe you don’t keep Kahlúa or Tia Maria in the house, or maybe you’re trying to keep things alcohol-free. That’s totally fine!
The recipe notes mention swapping it out, and this is a great trick: if you skip the coffee liqueur, try adding in about one teaspoon of rum extract. Rum pairs beautifully with coffee and vanilla, so it mimics that slight alcoholic complexity that the liqueur provided without actually having to use the bottle. Make sure you only use one teaspoon, though, because extracts are usually super strong! Adding a little extra vanilla extract if you skip the booze also helps round out that flavor profile nicely.
Storing and Serving Your Homemade Tiramisu Ice Cream
Once your Tiramisu Ice Cream is fully hardened, getting it to stay gorgeous in your freezer is the next challenge. You absolutely need an airtight container. I usually press a piece of plastic wrap right against the surface before I seal the lid—that stops the sneaky little ice crystals from forming on top.
It’s best enjoyed within two weeks for peak flavor, though it will keep longer. When you’re ready to scoop, pull it out about five to ten minutes before you plan to serve. That tiny bit of softening time makes scooping so much easier and keeps that silky texture from the custard base intact!
Frequently Asked Questions About Tiramisu Ice Cream
I always get questions after people try my frozen Italian desserts, and that’s fair! Making something like this Tiramisu Ice Cream from scratch can feel intimidating, but I promise, most issues are easily fixed. Here are a few things people ask me most often when they are making this at home.
Can I make Tiramisu Ice Cream without an ice cream maker?
Oh, definitely! I know not everyone has one of those big machines lying around. If you’re going the manual route, you need to treat that custard base exactly the same way—chill it completely, strain it, everything! Then, pour it into a shallow metal container.
The trick is to scrape it every 30 to 45 minutes for the first three to four hours. Use a sturdy whisk or a fork and really beat the frozen edges back into the softer middle. It takes dedication, but it does break up those ice crystals so you end up with a much smoother scoopable Tiramisu result instead of a solid block.
How long does homemade Tiramisu Ice Cream last in the freezer?
Because we used a genuine custard base with high fat and sugar content, this keeps pretty well! If you seal it up tight, airtight, usually I’d say you’re looking at about three to four weeks before the texture starts to change noticeably. After that, it can get a little harder, or you might see some little ice crystals starting to form on the top, but it’s still safe to eat as long as it stays well frozen.
But honestly, face it—a quart of amazing homemade ice cream like this never lasts that long around my house anyway! You’ll be making a second batch before you hit that four-week mark, trust me on that one.
Is the coffee flavor too strong in this Tiramisu Ice Cream?
This is the best question! When I first heard people whisper that they were scared of the coffee being too much, I totally understood. But here’s the deal: the dairy (heavy cream and milk) and the sugar content do a fantastic job of balancing out the bitterness of the espresso and liqueur.
When the ice cream freezes, the cold dulls the intensity of flavors, especially bitterness. So, yes, you want the base to taste intensely coffee-forward when it’s warm, almost *too* strong for your liking. That way, when it’s frozen solid after setting in the deep freeze, you get that perfect, aromatic coffee note balancing the sweet creaminess. It’s exactly how a good tiramisu should taste!
Print
Tiramisu Ice Cream
- Total Time: 5 hours 35 min
- Yield: About 1 quart 1x
- Diet: Vegetarian
Description
A frozen dessert combining the flavors of classic tiramisu.
Ingredients
- 6 large egg yolks
- 3/4 cup granulated sugar
- 1 1/2 cups heavy cream
- 1 cup whole milk
- 1/4 cup strong brewed espresso, cooled
- 2 tablespoons coffee liqueur (optional)
- 1 teaspoon vanilla extract
- Cocoa powder, for dusting
Instructions
- Whisk the egg yolks and sugar together in a medium bowl until pale and thick.
- In a saucepan, heat the heavy cream and milk over medium heat until steaming, but not boiling.
- Slowly temper the hot cream mixture into the egg yolk mixture, whisking constantly.
- Return the mixture to the saucepan and cook over low heat, stirring constantly with a wooden spoon, until the custard thickens enough to coat the back of the spoon (about 170°F). Do not boil.
- Remove from heat and stir in the cooled espresso and coffee liqueur, if using. Stir in the vanilla extract.
- Strain the custard through a fine-mesh sieve into a clean bowl. Cover the surface directly with plastic wrap and chill completely in the refrigerator, at least 4 hours or preferably overnight.
- Churn the chilled custard in an ice cream maker according to the manufacturer’s instructions.
- Transfer the churned ice cream to an airtight container and freeze for at least 2 hours to firm up.
- Before serving, dust generously with cocoa powder.
Notes
- If you skip the coffee liqueur, add 1 teaspoon of rum extract for a similar flavor profile.
- For a smoother texture, age the custard base overnight before churning.
- Prep Time: 25 min
- Cook Time: 10 min
- Category: Dessert
- Method: Churning
- Cuisine: Italian
Nutrition
- Serving Size: 1/2 cup
- Calories: 350
- Sugar: 25
- Sodium: 50
- Fat: 24
- Saturated Fat: 14
- Unsaturated Fat: 8
- Trans Fat: 1
- Carbohydrates: 28
- Fiber: 0
- Protein: 6
- Cholesterol: 180
Keywords: Tiramisu, Ice Cream, Coffee, Dessert, Frozen