
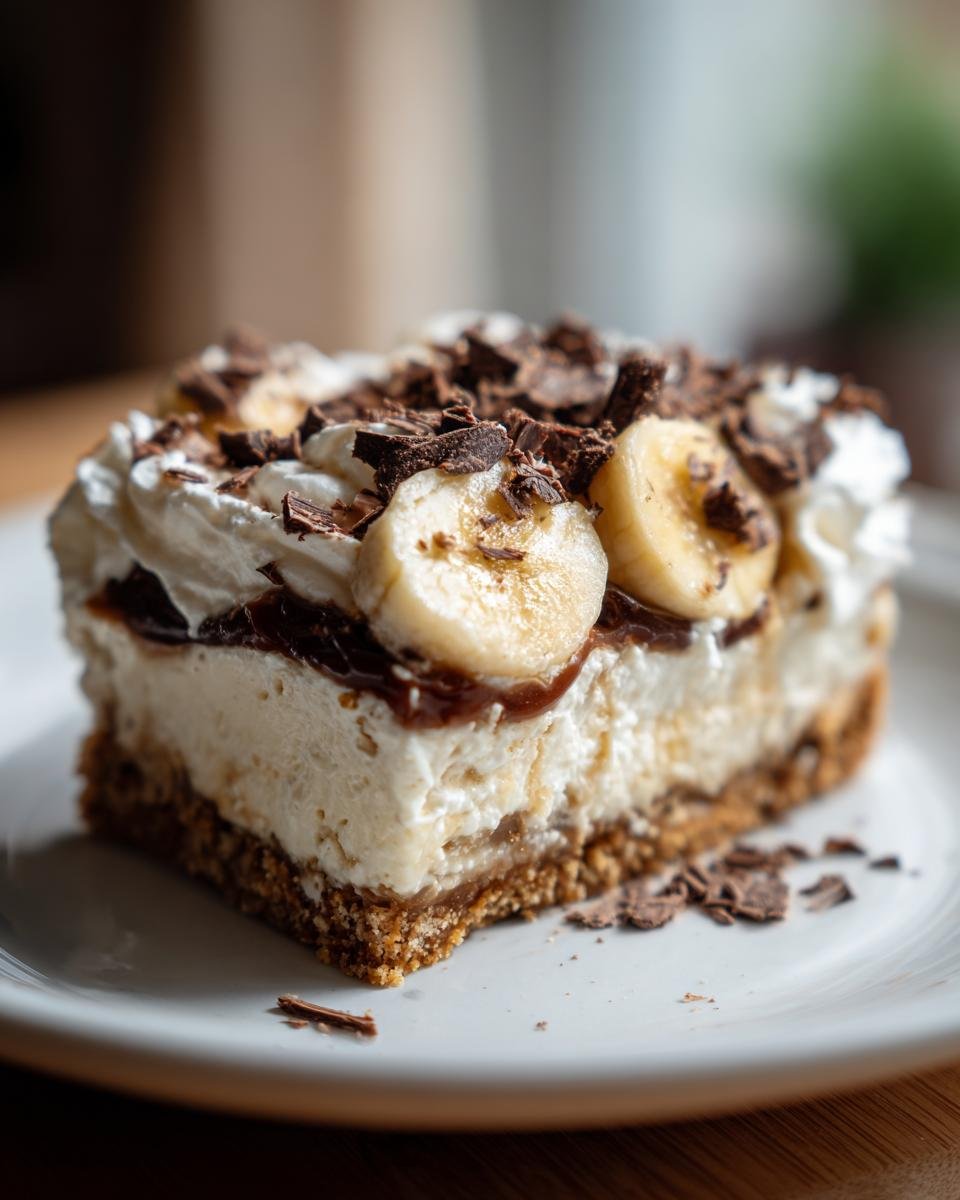
There are desserts that feel like a celebration, and then there’s classic Banoffee Pie. Oh, that gorgeous combination of crunchy base, gooey toffee, sweet bananas, and fluffy cream—it just hits different, doesn’t it? This British import is one of those show-stoppers that everyone assumes takes hours of complicated work. Well, I’m here to tell you that is simply not true! This version is pure magic because it requires zero time standing over a hot oven. My first attempt at making the toffee was a disaster; I tried to hurry the boiling process and ended up with a sticky mess on my stovetop! Now I know the patience required, and I promise, this straightforward method results in the absolute easiest, most perfect Banoffee Pie you’ll ever serve.
Why This Simple Banoffee Pie Recipe Stands Out
I know what you’re thinking: “Another pie recipe? Does it involve a pastry crust I need to blind bake?” Absolutely not! That’s why I love this dessert so much. It’s the effortless assembly that makes it a weeknight hero, even though it tastes like a weekend luxury.
- It uses simple, pantry-friendly components—no weird specialty ingredients needed!
- The texture is unbeatable: a crunch from the base, sticky from the toffee, and airy from the cream.
- We save all the time by skipping the oven entirely. You can find more quick, no-bake ideas over here if you like no-bake strawberry desserts!
No-Bake Convenience for Your Banoffee Pie
Seriously, this is a dream for catering or for those hot summer days when you just can’t turn the oven on. You aren’t cooking anything in there! Your commitment time is just the 30 minutes it takes to mash biscuits, melt butter, and layer everything up. The rest of the magic happens quietly in the fridge while you’re totally ignoring it.
Perfect Balance of Sweetness in Every Banoffee Pie Slice
If you’ve had a great Banoffee Pie, you know it should never attack your teeth with sweetness. The secret here is those fresh bananas cutting through that super-rich, buttery toffee. And then, the unsweetened (or very lightly sweetened) whipped cream floats right on top, balancing everything out. It’s harmony in a crust, trust me!

Gathering Ingredients for Your Classic Banoffee Pie
Okay, let’s talk about what you’ll need because the ingredient list for this Banoffee Pie is surprisingly short, but quality truly matters here. I always keep staples like digestive biscuits on hand. If you’re feeling clever, you can make some amazing banana bread coffee cake another time, but for the crust, standard digestives are the way to go. This pie is forgiving, so don’t stress too much, except for one thing I’ll mention in a minute!
If you are short on time, listen closely: you can absolutely grab a jar of pre-made dulce de leche instead of boiling that can of condensed milk for three hours. I won’t tell anyone! See? It’s all about what works for your schedule.
Biscuit Base Components
For the foundation, you only need two things: your digestive biscuits, which must be crushed until they look like fine sand—I mean finely crushed—and the butter, which absolutely has to be melted completely before mixing it in. Think of it like building the foundation of a little house; it needs to be solid!
Toffee and Fruit Layer
This is where the richness comes from. You’ll need that cooked-down condensed milk, or the store-bought toffee. Then, you need bananas! But hey, make sure they are actually ripe—you want them sweet, but still firm enough that they don’t turn to mush when you slice them. If they are too green, the pie tastes funny, so aim for that classic yellow peel shine.
Whipped Cream Topping
Don’t skimp on the dairy here! Grab the good stuff—heavy whipping cream. We sweeten mine lightly with granulated sugar and a splash of pure vanilla extract. Don’t use that imitation stuff; the vanilla needs to be strong enough to perfume the cream against that heavy toffee underneath.
Step-by-Step Instructions to Assemble the Banoffee Pie
Alright, this is where the fun starts, and trust me, it goes together fast once you have your toffee ready. If you’re looking for quick results, you can check out my super fast roll recipe here, but for this pie, patience during the setting process is key! Don’t rush the chilling, or your beautiful layers will just slide right out when you try to cut a slice.
Preparing the No-Bake Base
First things first: those biscuits need to be crumbs, not chunks! Put them in a zip-top bag and smash them mercilessly with the bottom of a heavy glass or rolling pin until they are fine. Mix those crumbs really well with the melted butter—it should feel like slightly damp sand.
Now, press this mixture straight into your 9-inch pie dish. And here’s my important tip: press it firmly! Use the flat bottom of a drinking glass to really compact it into the base and up the sides a little. This is what stops your bottom layer from falling apart when you serve it. Pop that base into the fridge for a solid 30 minutes to firm up while you work on the good stuff.
Making the Toffee (Dulce de Leche)
If you chose the DIY route for the toffee—bless your heart!—you need that can of condensed milk boiled for about three hours. Remember, the can must stay completely covered by water the entire time, so check it every half hour. Oops! If the water level drops, add more boiling water to top it up. Seriously, never open the can while it’s hot; these things can explode. Once it’s done, take it out and let it cool completely, like, room temperature cool, before you even think about opening it.
Layering the Banoffee Pie
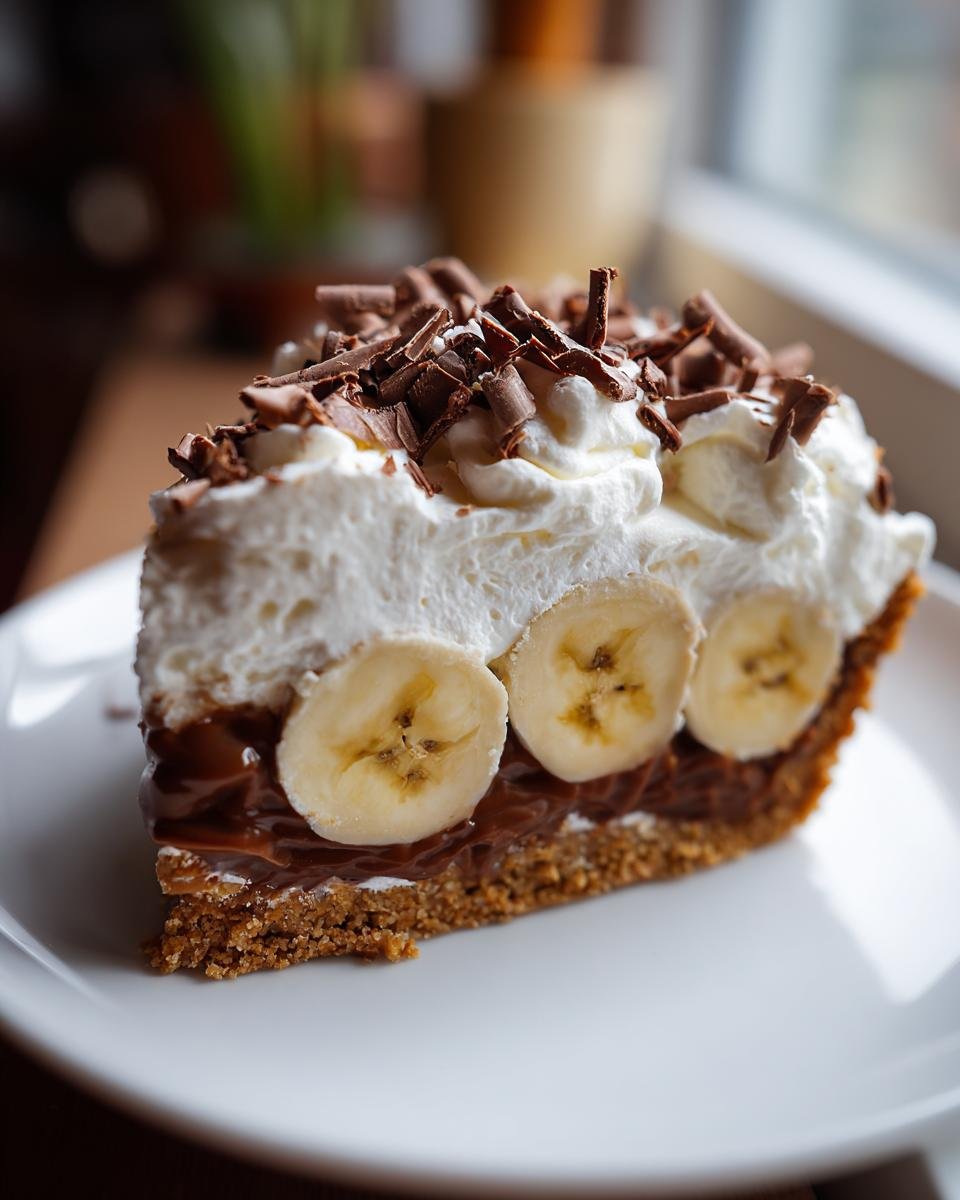
Once the base is set and your toffee is cool, spread that thick, gorgeous toffee evenly over the biscuit foundation. Don’t leave any biscuit peaks showing! After the toffee is smooth, lay your sliced bananas right on top. Remember what I said? Use bananas that are perfectly yellow, slightly firm. If they are too soft, the weight of the cream will turn them into invisible banana goo below the surface.
Whipping the Cream and Final Chill
Get your heavy cream, sugar, and vanilla, and whip them until you can lift the beaters right out, and the cream holds stiff peaks that don’t flop over. Spoon that lovely cloud of cream right over the banana layer, making nice swirls if you feel artistic! Then, the hardest part: you must refrigerate the whole thing for at least two hours. This final chill time is when the Banoffee Pie really sets up beautifully, making clean slices possible. You can read about making Mile High Cinnamon Rolls here, but this pie needs time to settle!
Expert Tips for the Ultimate Banoffee Pie
You’ve assembled the pie, but if you want that ‘wow’ factor that makes people ask for your recipe, listen to these finishing tips. These little details turned my pie from ‘good’ to something truly special and unforgettable. It’s all about managing your fruit and making sure that topping is as light as possible. If you’re a fan of the rich, comforting flavors, you might also love my notes on ultimate homemade cornbread!
Banana Selection and Timing
I can’t stress this enough: don’t use the mushy brown bananas hanging near your fruit bowl! They are too soft for this application. You want bananas that are perfectly ripe—sweet, of course, but they should offer just a little resistance when you press them. If they start browning the moment you slice them, don’t panic too much. The heavy layer of toffee and then the cream does a great job protecting them from the air, but faster assembly means fresher fruit flavor.
Achieving Perfect Whipped Cream Peaks
If you’ve ever whipped cream only to have it turn thin and runny after five minutes, I feel you! The old trick is the best one: chill your mixing bowl and your whisk attachment in the freezer for about 15 minutes before you start. Seriously, make it ice cold! When you whip the heavy cream, add your sugar gradually, and stop whipping the second you see stiff peaks that stand straight up when you lift the mixer. Over-whipping means you’re halfway to making butter, and we definitely don’t want that in our Banoffee Pie topping.

Variations on the Classic Banoffee Pie
Even though this simple Banoffee Pie recipe is fantastic just as it is, sometimes you want to jazz things up a bit, right? I love experimenting once I nail the classic version. Modifying this no-bake dessert is super easy because the core components—the crunch, the goo, and the fluff—can handle a little switch-up. Thinking about another fantastic dessert? Check out my thoughts on pecan pie brownies for serious richness!
Crust Swaps for Your Banoffee Pie
If you can’t find digestives at your store, or just want a slightly different snap underneath all that sweetness, don’t worry! Graham crackers work beautifully; they give a marginally sweeter, warmer base that pairs nicely with the banana flavor. Shortbread cookies are another divine option if you want something ultra-buttery and tender!
Flavor Twists on the Toffee Layer
This is my absolute favorite thing to play with. Once you have that lovely cooled toffee spread out, try sprinkling just a tiny pinch of flaky sea salt over the top before you add the bananas. It sounds minimal, but that salt elevates the caramel flavor instantly. For grown-up gatherings, I sometimes stir in just half a teaspoon of dark rum extract into the toffee. Suddenly, your Banoffee Pie has a little kick that makes everyone ask what your secret ingredient is!
Storing and Serving Your Homemade Banoffee Pie
This Banoffee Pie is best made the day you plan to eat it, mainly because of those gorgeous bananas sitting right under the cream. If you try making it two days ahead, the bananas are going to start oxidizing and turning a bit brown, even protected by the cream. It’ll still taste okay, but it never looks as striking, you know?
Always cover the pie loosely with plastic wrap before putting it in the fridge. If you wrap it too tightly, the cream might start sweating and getting watery, which just ruins that beautiful texture we worked so hard to whip up. You can check out how I keep my pound cakes fresh differently over here at my pineapple pecan cream cheese pound cake guide!
Best Practices for Storing the Banoffee Pie
The absolute best presentation happens if you chill it for at least two hours but eat it within 18 hours. That gives the base time to absorb some of that toffee moisture without getting soggy. And please, please only add those chocolate shavings right before you take the pie to the table. If you grate the chocolate too soon, it looks dusty and sad by the time dessert rolls around!
Common Questions About Making Banoffee Pie
I always get a ton of questions after I post a recipe like this because people are worried about getting that toffee texture just right! Don’t worry, I’ve gathered the most common concerns about making this amazing no-bake dessert and answered them right here. If you’re interested in other quick winners, I have a post on 5 delicious quick bread recipes that also require minimal fuss!
Can I make the toffee ahead of time for my Banoffee Pie?
Oh, please do! That’s actually my favorite way to tackle it. Once you boil that can of condensed milk, let it cool completely, and then transfer that thick, gorgeous toffee into any container you’ve got. You can keep it sealed up in the fridge for a week or just leave it covered on the counter for a couple of days once it has cooled down to room temperature. It’s ready whenever you are!
What happens if I don’t chill the biscuit base?
If you try serving this Banoffee Pie straight out of assembly, you’re going to have a disaster on your hands, trust me. That chilling time is essential! If you skip it, you’ll push your spoon down to cut a slice, and the whole buttery crust will just crumble and slide everywhere. We need that base firm enough to support all that creamy, heavy topping.
How long does this no-bake dessert last?
Because we are using fresh bananas—which simply look sad after a couple of days, even under cream—this is one of those desserts that begs to be made and eaten quickly. Honestly, it is perfect about four to six hours after it comes out of the fridge, giving the base time to absorb some of that rich toffee. You can certainly keep it covered in the fridge for up to two days, but the bananas might start weeping a little on day three.
Estimated Nutritional Snapshot for Banoffee Pie
Now, I know we aren’t exactly baking this for our health—it’s a decadent treat, through and through—but I always get asked about the numbers, so here’s a peek! This is just a ballpark estimate based on standard measurements for one slice. Don’t hold me strictly accountable if your butter ratios are slightly different!
Keep in mind this is based on 8 generous servings:
- Calories: Around 450
- Sugar: Yikes, about 45g (that’s the toffee talking!)
- Fat: Roughly 28g
- Protein: A small boost around 5g
Since this is no-bake and rich, it certainly packs a punch! It’s definitely balanced out by the high-quality ingredients, but maybe save this one for special occasions!
Share Your Perfect Banoffee Pie Creations
Well, that’s it! You’ve made the simplest, most phenomenal Banoffee Pie, and now it’s chilling perfectly in the fridge. But my favorite part of running this little blog is hearing from you all!
Did you try boiling the condensed milk yourself, or did you take the shortcut with store-bought dulce de leche? I love seeing how everyone customizes their toppings. When you’ve sliced into that cold, creamy goodness, please come back and let me know how it went!
Drop a comment below, tell me what you thought of the biscuit crust mixture, and let me know if you added any secret flavor twists to your cream. I’m always looking for new ways to enjoy this classic dessert. If everything went smoothly, please give the recipe a quick rating—it really helps other bakers decide to try this amazing no-bake dessert next!
If you have any questions that I missed, or if you want to suggest a future recipe idea, you can always send me a note through my contact page. Happy baking, or should I say, happy chilling!
Print
Simple Banoffee Pie
- Total Time: 30 min
- Yield: 8 servings 1x
- Diet: Vegetarian
Description
A straightforward recipe for a classic English dessert featuring a biscuit base, toffee, bananas, and cream.
Ingredients
- 200g digestive biscuits
- 100g unsalted butter, melted
- 1 can (397g) sweetened condensed milk (cooked to make dulce de leche/toffee)
- 3 ripe bananas, sliced
- 300ml heavy whipping cream
- 2 tablespoons granulated sugar
- 1 teaspoon vanilla extract
- Chocolate shavings, for garnish
Instructions
- Crush the digestive biscuits finely. Mix the biscuit crumbs with the melted butter until fully combined. Press this mixture firmly into the base of a 9-inch pie dish. Chill the base for 30 minutes.
- If you have not already made the toffee, boil the sealed can of condensed milk in water for about 3 hours, ensuring the can remains fully submerged. Cool the can completely before opening.
- Spread the cooled toffee evenly over the chilled biscuit base.
- Arrange the sliced bananas over the toffee layer.
- In a separate bowl, whip the heavy cream, granulated sugar, and vanilla extract until stiff peaks form.
- Spoon or pipe the whipped cream over the bananas.
- Refrigerate the pie for at least 2 hours before serving.
- Garnish with chocolate shavings just before serving.
Notes
- To make the toffee quickly, you can use store-bought dulce de leche instead of boiling the condensed milk.
- Use firm, slightly under-ripe bananas to prevent them from becoming mushy.
- Prep Time: 30 min
- Cook Time: 0 min
- Category: Dessert
- Method: Chilling
- Cuisine: English
Nutrition
- Serving Size: 1 slice
- Calories: 450
- Sugar: 45
- Sodium: 150
- Fat: 28
- Saturated Fat: 17
- Unsaturated Fat: 11
- Trans Fat: 0.5
- Carbohydrates: 48
- Fiber: 2
- Protein: 5
- Cholesterol: 85
Keywords: Banoffee Pie, toffee, banana, cream pie, no-bake dessert, English dessert