
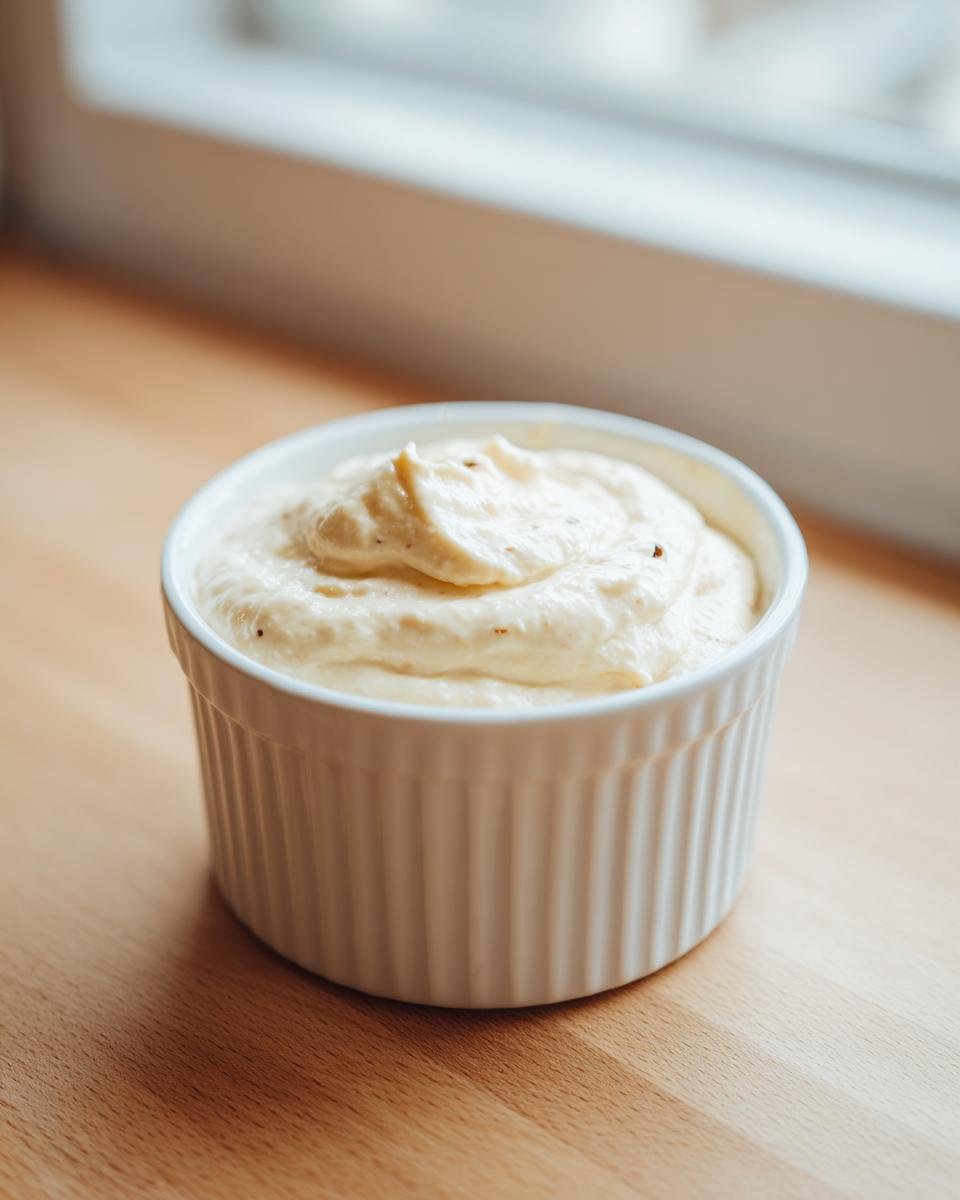
Forget everything you think you know about jarred, flavorless dips! There is nothing, and I mean *nothing*, like dragging a spoon through a luxurious, homemade condiment. That’s why I’m obsessed with this ultimate guide to making the best **Roasted Garlic Aioli** you will ever taste. We aren’t just making mayonnaise with garlic here; we are transforming entire heads of garlic into something sweet, nutty, and unbelievably rich. I still remember the first time mine came out perfectly creamy—it was a total game-changer for my burger nights. Trust me; once you taste this deep, caramelized flavor, you won’t ever go back to the stuff in the plastic tubs!
Why This Roasted Garlic Aioli Recipe Stands Out
This isn’t just an aioli; it’s an experience! So many recipes just dump raw garlic in, and honestly, it bites back a little too hard. My method takes those extra few minutes to roast the garlic, and that makes all the difference. It’s worth every bit of the effort, I promise. You’ll be amazed at how easily this comes together once the garlic is ready to go!
- Deep, Sweet Caramelization: Roasting the garlic completely transforms its harsh bite into a mellow, earthy sweetness that is utterly addictive.
- Incredible Texture: Because we use the fresh pulp, the aioli emulsifies into the thickest, creamiest sauce you can imagine—not thin or watery at all.
- No Artificial Anything: You control every single ingredient. No weird stabilizers or preservatives, just pure, glorious flavor.
- Perfect Consistency Every Time: By mastering the slow incorporation of the oil, you get stability that store-bought versions envy. It holds up beautifully.
- Versatility is Key: This sauce is robust enough for steak frites but creamy enough for delicate deviled eggs. It’s a true kitchen workhorse.
- It Tastes Like You Spent Hours: While the actual whisking is fast, the slow roasting gives it a fancy, slow-cooked flavor profile that will seriously impress your guests.
If you love building flavor layers like this, you absolutely have to check out my recipe for vibrant chimichurri sauce next. It’s a different beast entirely, but shares that same commitment to deep flavor!
Essential Ingredients for Perfect Roasted Garlic Aioli
Okay, let’s talk about what you need. Getting the right ingredients here is half the battle won! This recipe is deceptively short, which means we can’t skimp on quality or precision. You need to know exactly what each ingredient is doing, especially that egg yolk—that’s the binder that holds this creamy goodness together!
For the start of the show, you absolutely need one whole head of garlic. Don’t just mince it; we are roasting the entire thing! Then we rely on one large egg yolk for that essential emulsification magic. Don’t try to sneak in a whole egg; you need just the yolk here.
- 1 whole head garlic (for roasting)
- 1 large egg yolk (The emulsifying hero!)
- 1 teaspoon Dijon mustard (It helps stabilize everything)
- 1 teaspoon lemon juice (For brightness, gotta cut through that richness)
- 1/2 teaspoon salt and 1/4 teaspoon black pepper (Always adjust to your taste at the end!)
- 1 cup neutral oil (Canola or grapeseed is perfect—we need something light so the garlic shines through!)
See? Simple stuff, but done right, it creates gold. If you’re looking for another great component for dipping, you just *have* to try out my ultimate homemade cornbread recipe while you have the oven working!
Step-by-Step Instructions for Making Roasted Garlic Aioli
This is where the magic happens, but look, you have to pay attention, especially when we start adding oil! If you rush the emulsification, you end up with garlicy soup, and trust me, nobody wants that project. We are breaking this down into two very clear parts. First, we need to coax that sweet flavor out of the garlic, and second, we build the creamy base. Stay focused during Phase 2, and you’ll have the silkiest aioli ever!
If you want more garlic in your life, you should absolutely check out my recipe for delicious garlic breadsticks—they are the perfect companion for this sauce!
Phase 1: Roasting the Garlic for Your Roasted Garlic Aioli
First things first, get that oven heating up to 400°F (200°C). This is important! Take your whole head of garlic and, using a sharp knife, slice off just the top quarter inch—enough to expose all those little cloves underneath. Drizzle just a tiny bit of olive oil over the exposed tops, grab a piece of foil, wrap the whole head up snugly like a little present, and pop it into the oven. You’re looking for 30 to 40 minutes in there. You’ll know they are done when the cloves feel super soft and look deeply golden brown. Don’t burn them! Once they are done, pull them out and just let them cool down enough so you don’t burn your fingers.
When they are cool enough to handle, just squeeze the bottom of the head, and those little roasted, creamy cloves will pop right out! Mash that pulp up with a fork until it’s a smooth paste. It should look completely different from raw garlic—much sweeter and darker.

Phase 2: Emulsifying the Roasted Garlic Aioli Base
Now for the assembly! Grab a medium bowl. Whisk your egg yolk, Dijon mustard, lemon juice, salt, and pepper together. Get them nice and combined. Don’t worry; this is where we turn it into aioli. You need that neutral oil.
Pay close attention here: You must start adding the oil drop by drop. Seriously, almost one drop at a time while you whisk constantly and vigorously. If you pour too fast, the sauce will break, and all that hard work roasting the garlic will be wasted! Keep whisking until the mixture starts to look a little thicker—maybe after you’ve added about a quarter cup of oil. Once you see it starting to thicken and emulsify, you can relax just a smidge and pour the rest of the oil in a very thin, steady stream. Keep whisking like your life depends on it until every last drop of oil is incorporated and you have a thick, creamy sauce!
Give it a taste test, and maybe add a little extra salt or a splash more lemon juice if it needs balancing. That’s it! Pure magic made by your hands!
Expert Tips for a Stable Roasted Garlic Aioli
Listen, even the best of us have had an aioli break on us. It’s okay! Don’t panic and dump the whole thing down the drain. That thick, glossy sauce we worked so hard to create sometimes just decides it doesn’t want to be friends with the oil anymore, and it separates into oily sludge. But I’ve got the trick my grandmother taught me for just this situation—it’s an absolute lifesaver when you have a batch of beautiful roasted garlic pulp waiting to become sauce!
If your aioli splits, take one teaspoon of warm water—yes, just plain warm water—and whisk it into the broken sauce. Whisk slowly at first, and watch! Often, that little bit of warmth and moisture is just what the emulsion needs to pull itself back together. Keep whisking gently, and you might just save your entire batch!
Now, if you’re finding the constant whisking by hand makes your arm tired or you just prefer using tools, I totally get it. You can absolutely use a food processor or an immersion blender for this. The great thing about those gadgets is they do the hard, vigorous work for you, making the emulsification much easier to control. They cut down the time you spend whisking significantly.
When using a machine, remember the golden rule still applies: you need to add that neutral oil incredibly slowly at the beginning. If you dump the oil into the processor while it’s running at high speed, it *will* break. Start the machine, add your egg/garlic mixture, and then drizzle the oil in the thinnest stream possible through the feed tube until it’s thick. Once it’s holding its shape, you’re golden!
If you love the robust flavor of that roasted garlic but want to try it in a different setting, my recipe for flavorful roasted garlic mashed cauliflower shows off just how versatile these sweet cloves can be!
Serving Suggestions for Your Homemade Roasted Garlic Aioli
Now that you have this incredible, creamy, sweet, and savory **Roasted Garlic Aioli**, the real fun begins: eating it! Don’t just let this stuff sit in the fridge until you run out of something to dip. You’ve got to put it to work! I made about a cup, and I promise you, it disappears fast when you have the right accompaniments nearby.
Honestly, the absolute classic pairing is with thick, crispy french fries. Toss them in sea salt and then dunk them deep into this aioli. But don’t stop there! This roasted garlic goodness upgrades everything.
- Spread it thick on any sandwich or wrap instead of mayo—it makes grilled chicken taste gourmet!
- Use it as a dipping sauce for perfectly grilled steaks or pork chops. That depth of garlic pairs beautifully with a good sear.
- Whisk a touch into scrambled eggs right at the end for an instant flavor boost. Who needs fancy herbs when you have this?
- Dollop it generously over roasted root vegetables, especially asparagus or potatoes.
- If you’re feeling fancy, try stirring a spoonful into mashed potatoes. It adds that savory punch without having to mash extra garlic in.
If you happen to make extra aioli, you are going to need something spectacular to pair it with, like these garlic butter lobster bites. Trust me, the combo is unbelievable!
Storage and Make-Ahead Tips for Roasted Garlic Aioli
So you made a perfect batch of **Roasted Garlic Aioli**—congratulations! The hard part (the whisking!) is over. Now we need to keep it tasting amazing for as long as possible. Since we are relying on that fresh egg yolk for the creamy texture, we treat this exactly like homemade mayonnaise, which means we have to be smart about storage. You want to keep that gorgeous flavor locked in until you’re ready for the next dipping session!
The first thing you need is a good container. I always use a small, airtight glass jar. Glass is just better for storing homemade sauces, I feel like they keep flavors cleaner in the fridge. Seal it up tight, and pop it in the coldest part of your refrigerator—usually the back, not the door shelves.
Now, for the longevity part: Because this aioli contains raw egg yolk, you really need to be mindful. It’s best when eaten within about five to seven days. It might last a touch longer, but for the best texture and safety, I always aim to use it up within that first week. It’s so easy to make, though, that honestly, I usually just make small batches!
- Always store the **Roasted Garlic Aioli** in a clean, airtight container in the fridge.
- Aim to consume your homemade sauce within 5 to 7 days for the absolute best quality and safety, thanks to the fresh egg.
- If you find yourself with leftovers nearing the end of their prime, try blending them into something else! Mix the remaining aioli with a little hot sauce for a spicy dip, or thin it out with lemon juice for a fantastic salad dressing.
If you are interested in preserving other fresh goods, I have a fantastic guide on how to freeze fresh herbs in olive oil that might inspire you for next season!
Frequently Asked Questions About Roasted Garlic Aioli
I always get the same questions when I post this recipe! It makes sense, too—we want this **Roasted Garlic Aioli** to be perfect every time we make it. Here are the little things people usually wonder about before they start whipping up their own batch!
Can I use olive oil instead of neutral oil in this Roasted Garlic Aioli?
That is a great question! While you technically *can* use olive oil, you have to be really careful. Traditional mayonnaise uses mild oils because we want the other flavors—like our star, the roasted garlic—to really shine through. Extra virgin olive oil has a very strong, sometimes bitter flavor, and if you add a full cup of it, your aioli will taste overwhelmingly like olive oil, overpowering that sweet roasted note we worked so hard to achieve.
If you really prefer it, try using just a quarter cup of your nicest olive oil mixed with three-quarters cup of a neutral oil like canola or grapeseed. That way, you get a little hint of that fruity flavor without killing the beautiful taste of your **Roasted Garlic Aioli**!
How can I make a vegan Roasted Garlic Aioli?
Oh, absolutely! The tricky bit is replacing that egg yolk because that’s what acts as the main emulsifier. But don’t worry, there are fantastic swaps out there these days! The best thing I’ve found is using aquafaba—that liquid you find in a can of chickpeas. It whips up surprisingly well!
You would substitute about two tablespoons of aquafaba for the single egg yolk. Then, you just have to treat it exactly the same way you would treat the yolk: mix it with the Dijon, lemon, and spices, and then continue adding your neutral oil drop by agonizing drop at the start! The technique for slow oil addition is even more important when you use aquafaba to ensure your vegan **Roasted Garlic Aioli** comes together perfectly.
Can I roast the garlic ahead of time for my Roasted Garlic Aioli?
Yes, yes, a million times yes! Roasting the garlic is the longest part of this whole process, taking nearly 40 minutes. I often roast two heads at once when I’m feeling ambitious. Once the garlic is roasted and completely cooled, squeeze the pulp into a small container, cover it tightly, and pop it in the fridge.
It keeps beautifully for about a week. When you decide you want your **Roasted Garlic Aioli**, just bring that roasted garlic pulp to room temperature for about 20 minutes before you start whisking. That slight warming helps it incorporate into the base much better than starting with rock-cold garlic. It really speeds up your final assembly time!
Nutritional Estimate for Roasted Garlic Aioli
I always get asked about the numbers, and while making something this homemade and special isn’t exactly a diet food, it’s helpful to know what you’re piling onto your plate! Since this recipe relies heavily on oil to get that perfect, luxurious texture, the fat content is definitely what drives the calorie count.
We yield about one cup of aioli, and the breakdown per two-tablespoon serving size looks pretty straightforward based on the standard measurements. Remember, cooking is fluid, and your exact oil choice or how much salt you sprinkle in will change things slightly, so take these figures as a good guideline!
- Serving Size: 2 tablespoons
- Calories: 180
- Fat: 20g (Keep in mind, a lot of this is unsaturated fat, which is better for you!)
- Saturated Fat: 2g
- Carbohydrates: 1g
- Protein: 1g
- Sugar: 0g (How amazing is that? All that sweetness comes naturally from the roasted garlic!)
- Sodium: 150mg
Please keep in mind that these numbers are just an estimate! If you swap out a neutral oil for, say, extra virgin olive oil, or if you decide to add an extra pinch of salt because you like it zesty, the actual nutritional facts will shift a little. But overall, this gives you a solid idea of what you are dipping your fries into!
Share Your Homemade Roasted Garlic Aioli Experience
Whew! That’s it—you’ve done it! You’ve successfully transformed humble garlic into the most glorious, creamy, savory **Roasted Garlic Aioli** you could imagine. I’m so excited for you to try this, and honestly, I’m anxious to hear how it turned out for you!
This is the part where you tell me what you served it with! Did you make the incredible steak I suggested? Or maybe you smeared it on a leftover turkey sandwich? Did you try the aquafaba swap, or did you manage to whisk it perfectly by hand on the first try? Don’t be shy! I absolutely love seeing what you all are cooking up in your own kitchens.
Please take a second to leave a star rating right below this—it helps other home cooks find this recipe and feel confident giving it a try. And if you made any little tweaks while you were in the rhythm of things, toss those modifications in the comments too! Maybe you added some smoked paprika or a tiny dash of chili flakes. Sharing those secrets helps our whole community get even better at mastering that perfect roast.
If you have any burning questions that I didn’t cover in the FAQs, or if you just want to share a picture that I can’t see, you know where to find me. You can drop me a line on my dedicated contact page right here: Get in touch here! Happy dipping, everyone!
Print
Roasted Garlic Aioli
- Total Time: 50 min
- Yield: About 1 cup 1x
- Diet: Gluten Free
Description
A simple recipe for homemade aioli featuring the deep flavor of roasted garlic.
Ingredients
- 1 whole head garlic
- 1 large egg yolk
- 1 teaspoon Dijon mustard
- 1 teaspoon lemon juice
- 1/2 teaspoon salt
- 1/4 teaspoon black pepper
- 1 cup neutral oil (like canola or grapeseed)
Instructions
- Preheat your oven to 400°F (200°C). Slice about 1/4 inch off the top of the garlic head to expose the cloves. Drizzle with a little olive oil, wrap in foil, and roast for 30 to 40 minutes until the cloves are soft and golden brown. Let cool slightly.
- Squeeze the roasted garlic pulp out of the skins into a small bowl. Mash the pulp with a fork until smooth.
- In a medium bowl, whisk together the egg yolk, Dijon mustard, lemon juice, salt, and pepper.
- Add the mashed roasted garlic to the egg mixture and whisk until combined.
- Slowly, drop by drop initially, begin whisking in the neutral oil. Continue adding the oil in a very thin, steady stream while whisking constantly and vigorously. The mixture will begin to emulsify and thicken.
- Once about half the oil is incorporated and the mixture is thick, you can pour the remaining oil in a slightly faster stream, still whisking continuously until all the oil is incorporated and the aioli is thick and creamy.
- Taste and adjust salt or lemon juice if needed. Store covered in the refrigerator.
Notes
- If the aioli separates (breaks), whisk one teaspoon of warm water into the mixture to try and bring it back together.
- Use a food processor or immersion blender for easier emulsification if you prefer.
- The oil must be added slowly at the beginning to prevent the sauce from breaking.
- Prep Time: 10 min
- Cook Time: 40 min
- Category: Condiment
- Method: Whisking/Emulsifying
- Cuisine: Mediterranean
Nutrition
- Serving Size: 2 tablespoons
- Calories: 180
- Sugar: 0
- Sodium: 150
- Fat: 20
- Saturated Fat: 2
- Unsaturated Fat: 18
- Trans Fat: 0
- Carbohydrates: 1
- Fiber: 0
- Protein: 1
- Cholesterol: 45
Keywords: roasted garlic, aioli, garlic sauce, homemade mayonnaise, dip