
Oh my gosh, if you think making incredible, melt-in-your-mouth homemade candy is hard, you absolutely have to try these chocolate raspberry truffles! Seriously, forget thosefancy box chocolates you buy; these stunning little bites are worlds better, and the best part? They require virtually zero actual cooking. We’re talking about rich, decadent raspberry truffles that come together with just a handful of ingredients and a little patience waiting for the chill time.
I’ve made ganache for cakes and fillings countless times, and I’ve learned the absolute secrets to keeping it smooth and luscious. When done right, that ganache becomes the base for perfection, holding the rich chocolate and tart raspberry so beautifully. Trust me on this—once you nail this base technique, you’ll be whipping up batches of homemade candy for every occasion!
Why You Will Make These Raspberry Truffles Often
Honestly, I used to think truffles were reserved for expensive European chocolate shops, but these proved me totally wrong. They are so satisfying because the payoff is huge compared to the tiny effort you expend. See right here why they’re going to become your new favorite thing to whip up!

- They are astonishingly fast! Once you pour that hot cream over the chocolate, the hands-on time is maybe 15 minutes before they hit the fridge. That’s lightning speed for homemade candy.
- The flavor combination is pure luxury. That sharp raspberry cuts through the dark chocolate so perfectly. It’s like a grown-up treat, but totally addictive.
- You don’t need any fancy tempering skills whatsoever. We are making a simple ganache, which means no stressful temperature checks or marble slabs.
Perfect for Gifting Homemade Raspberry Truffles
If you need a quick, impressive gift, stop looking right now. These raspberry truffles look like you spent hours slaving over them! Just dust them heavily with good cocoa powder, pile them into a cute little box or tied bag, and nobody will ever believe you made them in under 20 minutes of actual work.
Essential Ingredients for Perfect Raspberry Truffles
Gathering your supplies is the next easy step. Since this recipe is so straightforward, the quality of what you use really shines through in the end. We aren’t hiding anything behind layers of frosting or cake!
For about twenty heavenly little bites, here is what you need:
- Eight ounces of good quality dark chocolate, chopped up small so it melts nicely.
- Half a cup of heavy cream—don’t skimp here, we need that fat content!
- One tablespoon of unsalted butter. It gives the ganache a little extra silkiness.
- A quarter cup of raspberry puree that has been strained super smooth.
- And finally, about half a cup of cocoa powder for rolling them all up at the end.
Ingredient Notes and Substitutions for Raspberry Truffles
I really push for dark chocolate here, around 60 to 70 percent cocoa. It gives the structure you need to actually roll these into balls without them turning into soup. Using milk chocolate works, but you need to chill it longer, and it gets messy fast.
About that raspberry puree? You MUST strain those seeds out—trust me! I use a fine-mesh sieve and push the pulp through. Nobody wants a crunchy **raspberry truffle**! The butter isn’t just for flavor; it helps create a lovely soft texture that isn’t too stiff once chilled.
My biggest tip on chocolate quality: if you wouldn’t happily eat a square of it on its own, don’t use it in your ganache. If you buy higher quality chocolate, your homemade candy will taste phenomenal.
Equipment Needed for Your Raspberry Truffles
Okay, gathering the tools is part of the fun! Don’t worry; you probably have almost everything in your kitchen already. We aren’t breaking out the complicated candy thermometer for this amazing recipe, thank goodness. Keeping things simple is the key to success with these raspberry truffles.
So, here is the short list of things you’ll need to make this happen:
- A good, sturdy heatproof bowl. It needs to be big enough to comfortably mix the ganache later on.
- One small saucepan for gently warming the cream and butter.
- A whisk—use a balloon whisk! It’s much better than a flat one for making smooth chocolate.
- A baking sheet lined with parchment paper. This is non-negotiable for easy cleanup and stopping them from sticking!
- A small spoon or, my personal favorite, a tiny melon baller for scooping out uniform little portions. It makes rolling them perfectly round so much faster.
That’s it! No fancy mixers or specialized gear required. Just grab those items, and we are ready to get messy with some beautiful chocolate.
How to Prepare the Best Raspberry Truffles Ganache
This is where the magic starts, but listen closely! We are creating a beautiful, silky ganache, and the biggest mistake people make is overheating the cream. You just need to heat up your heavy cream and that tablespoon of butter in a small saucepan over medium heat until you see just a tiny bit of steam—maybe you see one single bubble creeping up the side. That’s it! Do NOT let it boil hard, or you can scorch it, and honestly, that smell is the worst.
Once it’s hot and steaming, immediately pour that gorgeous liquid right over your chopped dark chocolate sitting in your heatproof bowl. Now, the hardest part: you wait! Set a timer for five minutes. Do not touch it. Don’t peek. That five minutes lets the residual heat melt the chocolate evenly. Once those five minutes are up, grab your whisk and gently start working from the center outwards until everything comes together into that smooth, glossy base. If you need inspiration on other chocolate treats, I wrote about a killer ganache frosting over on my chocolate ganache cupcakes post!
Incorporating Raspberry Flavor into Your Raspberry Truffles
Once your ganache is totally smooth—no lumps allowed!—it’s time for the star ingredient. Gently stir in the strained raspberry puree. You really want to mix this in easily and deliberately. Don’t beat it like you’re whipping cream! A gentle fold keeps the ganache emulsion stable and beautiful. Keep folding it just until the color is uniform throughout. That’s the secret to getting that stunning pink swirl inside your finished **raspberry truffles**.
Chilling and Shaping Your Raspberry Truffles
Now that you’ve got that gorgeous raspberry ganache mixed up, it’s time for the hardest part of this whole process: waiting! You absolutely need to let this mixture chill until it’s firm enough to handle. Don’t try to scoop it when it’s still runny; you’ll just make a chocolatey mess all over your counter.
Cover that bowl tightly—plastic wrap touching the surface helps prevent a skin from forming—and pop it into the refrigerator for a minimum of two hours. I usually let mine go four hours just to be safe, especially if my kitchen is warm. You want it firm enough that you can scoop it cleanly, but not so rock hard that it crumbles apart when you try to roll it.
Once it’s chilled, line up your baking sheet with parchment paper. This is crucial because chilled chocolate gets sticky really fast when it hits room temperature, and we don’t want our beautiful creations sticking to the pan!
Grab a small spoon or, if you want perfect spheres, a tiny melon baller. Scoop out portions—I aim for about a tablespoon’s worth—and quickly drop them onto your prepared sheet. Now, here’s the expert tip for rolling these raspberry truffles: work fast! The heat from your hands is what melts the chocolate just enough to shape it. If you spend too much time fussing over one ball, it’ll turn into runny sludge.
Roll it quickly between your palms—a couple of quick turns is all you need—and immediately drop it into the bowl of cocoa powder. That cocoa powder acts like a dry coat, firming up the outside and stopping it from getting messy when you handle the next batch. Keep rolling consistently, putting the finished, coated **raspberry truffles** back onto that parchment-lined tray.
Finishing Touches: Dusting Your Raspberry Truffles
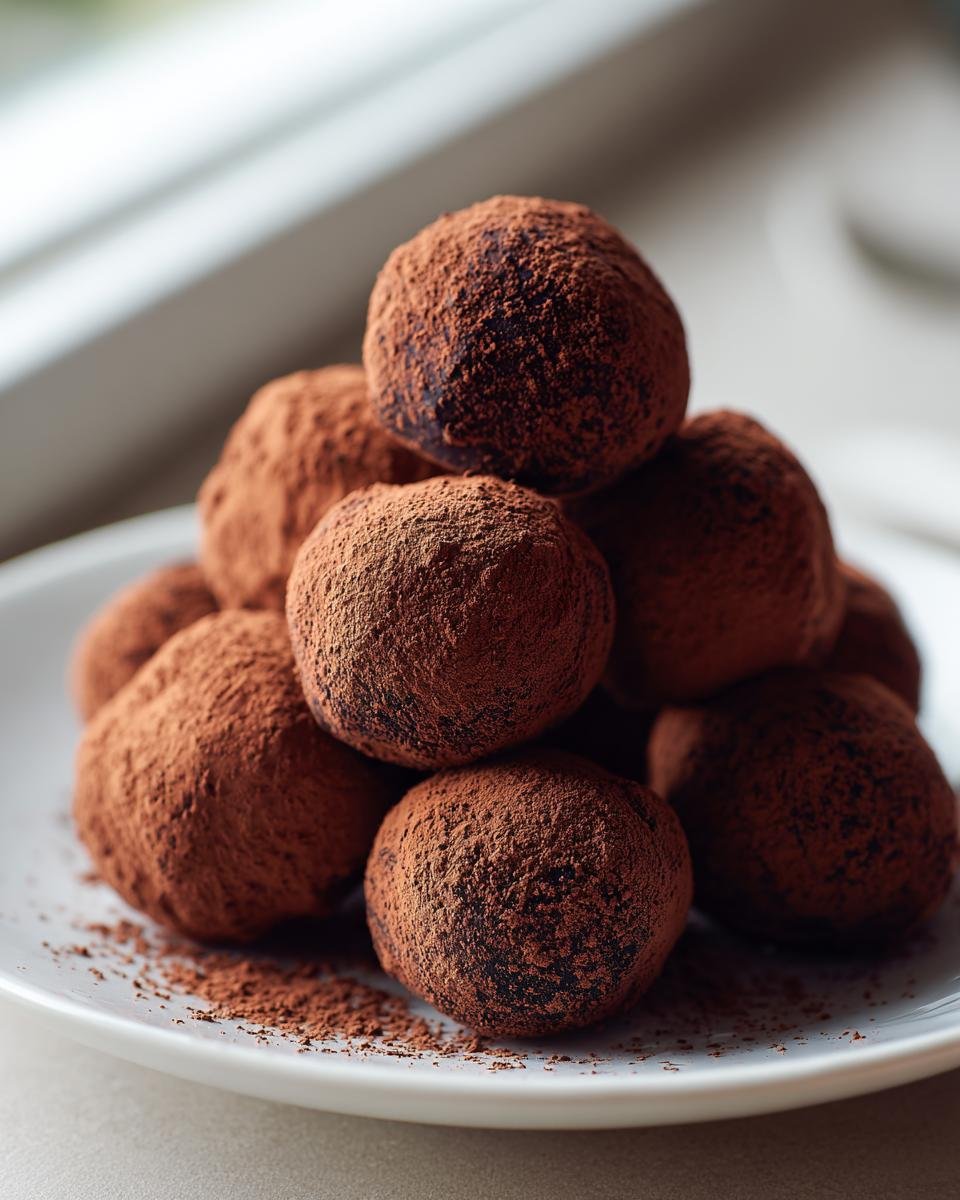
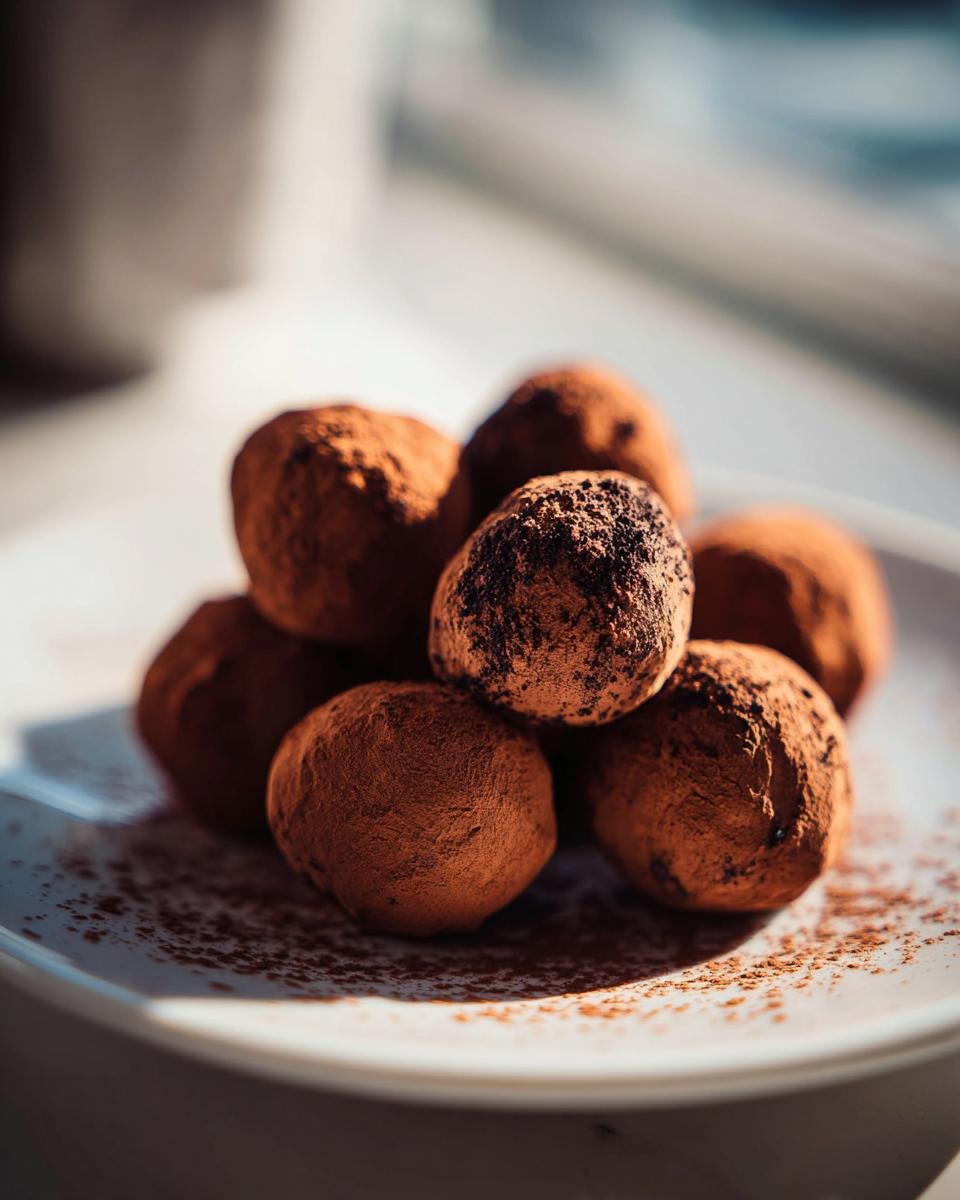
This is my favorite part! Once you’ve managed to roll all those sticky little ganache dollops into somewhat uniform balls—don’t stress if they aren’t perfect spheres, that just proves they’re homemade!—it’s time for their big cocoa powder coating moment. You want a decent amount of cocoa powder piled up in a shallow bowl or on a plate. We need serious coverage here.
Take one truffle at a time—work fast so the heat from your hands doesn’t melt the delicate raspberry ganache underneath—and drop it right into that powder. Gently roll it around, making sure every single bit of that sticky chocolate surface gets totally dusted. Think of it like giving your truffle a cozy, rich winter coat!
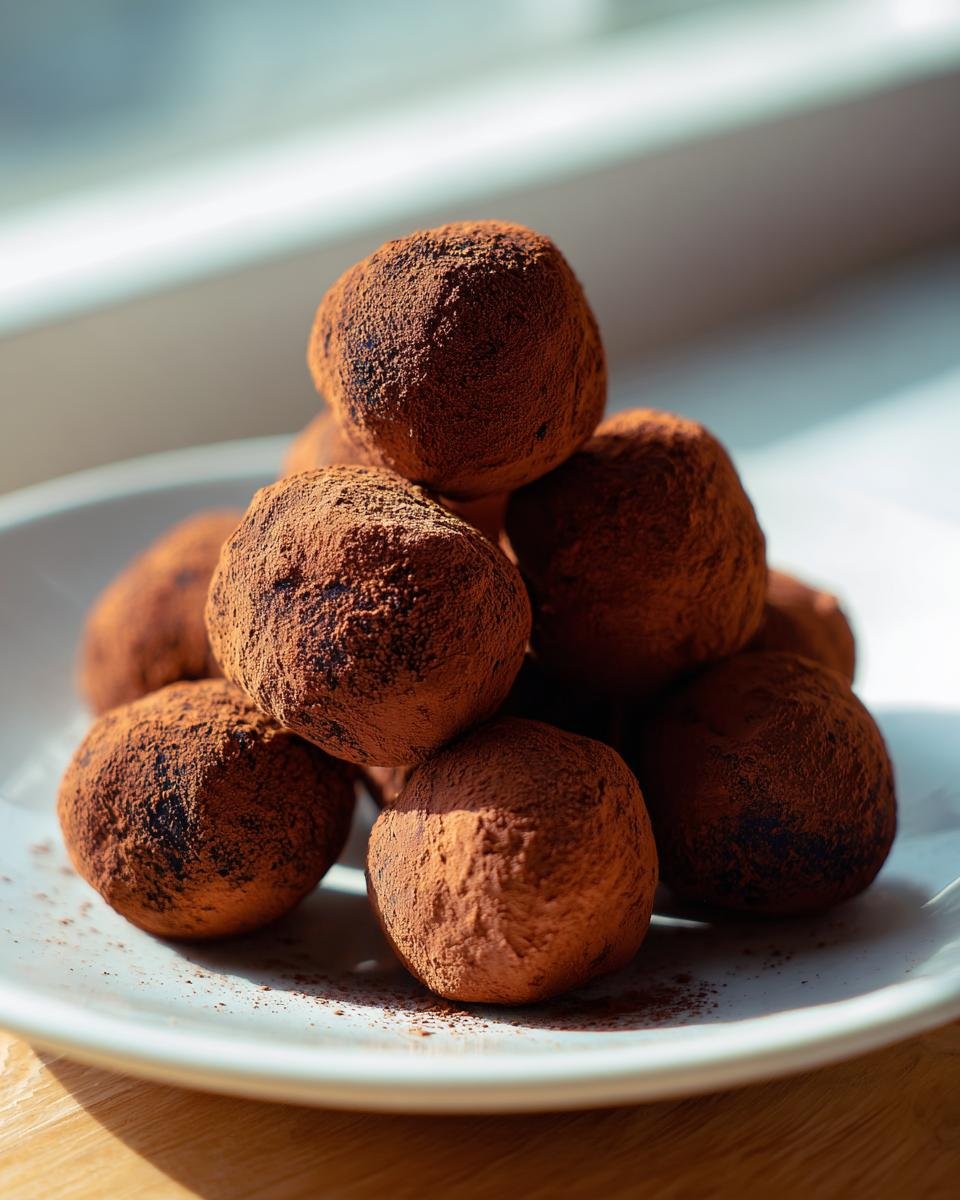
The cocoa powder not only looks amazing, giving it that classic, rustic candy appearance, but it also stops them from sticking to each other when you put them in the final container. If you’re looking for ideas on other great no-bake treats that use a similar rolling technique, check out my recipe for those amazing Peanut Butter Oreo Truffles! They are just as addictive.
Once they are completely coated, place them back onto the parchment-lined sheet. They are officially done with shaping! Just remember, that cocoa powder coating is the last thing that happens before they go into their airtight home for storage.
Storage and Serving Suggestions for Homemade Candy
Alright, so you’ve got a beautiful batch of **raspberry truffles** staring up at you! They look so perfect, and naturally, you want them to stay that way. Because we used fresh fruit puree and cream in our ganache, these definitely need to be treated like fresh candy, not shelf-stable chocolate bars.
The number one rule here is refrigeration. You must store these in an airtight container. If you don’t have a good lid, they can absorb smells from the fridge—and nobody wants a hint of last night’s onions in their luxurious chocolate! Because the ganache is quite soft, these **raspberry truffles** do best when they are kept cool.
You can keep them refrigerated quite happily for up to two weeks. Seriously, if you can manage to leave them that long untouched, you have more willpower than me! The slightly chilled temperature keeps the ganache firm enough to hold its shape beautifully while you eat it.
Now, for serving—this is important! If you serve them straight out of the fridge, they can be a little too firm, almost waxy, and you won’t get that beautiful flavor explosion when you bite in. So, take them out about 15 to 20 minutes before you plan to serve them. That little bit of time lets them temper just slightly. They get that perfect “snap” when you bite, followed by that immediate, rich, creamy melt. It’s the ideal texture for homemade candy, and it really lets that raspberry flavor shine through! Enjoy every single bite!
Troubleshooting Common Issues with Chocolate Ganache
Oh, I know the feeling! You follow every step perfectly, you waited the five minutes, and when you finally whisk it, the mixture looks… well, sad. It’s separated, grainy, or maybe it looks like oily chocolate soup. Don’t panic! This happens to everyone, even seasoned bakers. The first time my ganache split for a cake filling—a dark chocolate blackberry disaster, honestly—I thought I was doomed! But ganache is surprisingly resilient, so let’s talk about how we can bring your **raspberry truffles** base back from the brink.
The most common issue for any ganache, whether it’s for these truffles or a cake covering, is separation. This usually happens because the liquid (our hot cream mix) and the melted fat (chocolate) didn’t emulsify properly. Maybe the cream was too hot, or maybe you whisked too aggressively!
My Ganache Split! How to Fix Separated Chocolate
If your mixture looks oily and grainy, it needs one more little push to come back together. The fix is often simple! You just need a tiny bit more liquid to get everything to bind again. Try taking a tablespoon of fresh, room-temperature heavy cream—just a tiny splash—and whisk it into the separated mixture very slowly. If it still looks unhappy, try another tablespoon, but very slowly. Whisk gently, not vigorously! Sometimes, adding a teaspoon of softened butter works absolute wonders too, as the extra fat helps pull the emulsion back into glossy perfection. If you’re interested in saving chocolate when it gets overly hot, I have some tips that work great for my chocolate blackberry layer cake recipe too!
What If My Ganache is Too Soft or Too Hard?
After the initial mixing, you might run into consistency problems before you even chill it. If your chocolate chunks were large or your cream wasn’t quite hot enough, the mixture might be too thick right away to stir in the raspberry puree smoothly—you don’t want clumps!
If it’s too hard to stir, you can gently warm the bottom of the bowl over a pan of barely simmering water (a double boiler setup, but super gentle!) for just 30 seconds, then stir again. Don’t be tempted to microwave it, though! That will just lead to scorching and seizing.
Conversely, if your ganache for these **raspberry truffles** seems way too soupy after you add the raspberry, don’t fret about the chilling time. Just cover it up and stick it in the fridge for longer than the two hours. If it’s still too soft after four hours, just break off a piece and knead it briefly between your hands until it softens just enough to roll. You are totally in control of this messy, beautiful process!
Frequently Asked Questions About Making Raspberry Truffles
It’s funny how even the simplest recipes spark the most questions! People always want to make sure their homemade candy turns out absolutely perfect, especially when they include fresh fruit flavors like these raspberries. I’ve rounded up a few common things people ask me about making these fantastic raspberry truffles.
How long do these raspberry truffles actually last?
Because we are using fresh, strained raspberry puree in the ganache, these are definitely not shelf-stable. They need to stay chilled! Stored properly in an airtight container in the refrigerator, they stay fantastic for about two weeks. That’s usually long enough for me, but if you have amazing willpower, they can likely stretch a little longer!
Can I use frozen raspberries instead of fresh ones for the puree?
Yes, absolutely! Frozen raspberries work just as well, if not sometimes better, since they can be a bit juicier. The key is the straining process. Make sure you thaw them completely first, then press them hard through that fine-mesh sieve to get all the seeds out. Frozen fruit often releases a bit more liquid, so just make sure you get a good, thick puree before folding it into your chocolate ganache.
What’s the absolute best kind of chocolate to use for dark chocolate truffles?
I’m sticking firm on dark chocolate for the structural integrity, but the quality matters! I love using a good bittersweet chocolate bar, around 65% cacao. If you use anything lower than 50%, it can get really soft because there’s too much sugar and not enough cocoa solids to hold that shape once you roll them. Using a high-quality bar versus basic chocolate chips really elevates these from simple treats to true luxury homemade candy. If you want to try something different next time, my pecan pie brownies use bittersweet chocolate to balance the sweetness, too!
Do I have to roll them in cocoa powder?
Technically, no, you don’t *have* to, but honestly, I highly recommend it! The cocoa powder dusting is what gives them that beautiful matte, professional look, and it keeps them from sticking to everything else in the container. If cocoa powder is too intense for you, you can try rolling them lightly in powdered sugar, but you must do it very fast because the sugar will start to dissolve quickly into the soft ganache.

Simple Raspberry Truffles
- Total Time: 125 min
- Yield: About 20 truffles 1x
- Diet: Vegetarian
Description
A recipe for making basic raspberry chocolate truffles.
Ingredients
- 8 ounces dark chocolate, chopped
- 1/2 cup heavy cream
- 1 tablespoon unsalted butter
- 1/4 cup raspberry puree (strained)
- 1/2 cup cocoa powder for dusting
Instructions
- Place the chopped chocolate in a medium heatproof bowl.
- Heat the heavy cream and butter in a small saucepan over medium heat until it just simmers. Do not boil.
- Pour the hot cream mixture over the chocolate. Let it sit undisturbed for 5 minutes.
- Whisk the mixture gently until smooth and fully combined, forming a ganache.
- Stir in the raspberry puree until incorporated.
- Cover the bowl and chill the ganache in the refrigerator for at least 2 hours, or until firm enough to scoop.
- Line a baking sheet with parchment paper.
- Use a small spoon or melon baller to scoop out portions of the chilled ganache. Roll each portion quickly between your palms into a ball shape.
- Roll the finished truffles in cocoa powder until fully coated.
- Store the truffles in an airtight container in the refrigerator.
Notes
- For a smoother puree, press fresh or thawed raspberries through a fine-mesh sieve to remove seeds.
- Work quickly when rolling the truffles so they do not melt from the warmth of your hands.
- You can substitute milk chocolate for dark chocolate, but reduce the chilling time slightly.
- Prep Time: 20 min
- Cook Time: 5 min
- Category: Dessert
- Method: Chilling
- Cuisine: American
Nutrition
- Serving Size: 1 truffle
- Calories: 110
- Sugar: 8
- Sodium: 5
- Fat: 8
- Saturated Fat: 5
- Unsaturated Fat: 3
- Trans Fat: 0
- Carbohydrates: 10
- Fiber: 1
- Protein: 2
- Cholesterol: 20
Keywords: raspberry truffles, chocolate truffles, homemade candy, dark chocolate, raspberry ganache