
Oh, there’s nothing quite like breaking out a blanket on a patch of sunny grass, is there? That’s why I live for packing the perfect lunch, and when it comes to ease, nothing beats my trusty recipe for classic Picnic Sandwiches. Forget fussy layers that fall apart the second you look away! These are sturdy, satisfying, and they taste even better outdoors.

I remember one summer when we headed to the lake, and I completely forgot the paper plates—I almost panicked! But thankfully, these ham and cheese guys were wrapped up so tightly they held all their moisture. They were the heroes of that trip, seriously. I’ve been making variations of these things for years, and trust me, this simple formula is the winner for any outdoor meal.
Why These Picnic Sandwiches Are Perfect for Your Next Outing
Look, I know you have other recipes stored away for lunch, but these classics are truly built for travel. They aren’t fussy. If they survive being shoved into a cooler next to a slightly leaky potato salad recipe—which, by the way, you should check out—they are doing their job!
- They come together in under ten minutes. Seriously fast prep!
- They hold up beautifully; no squished or floppy bread here. That tight wrapping is key.
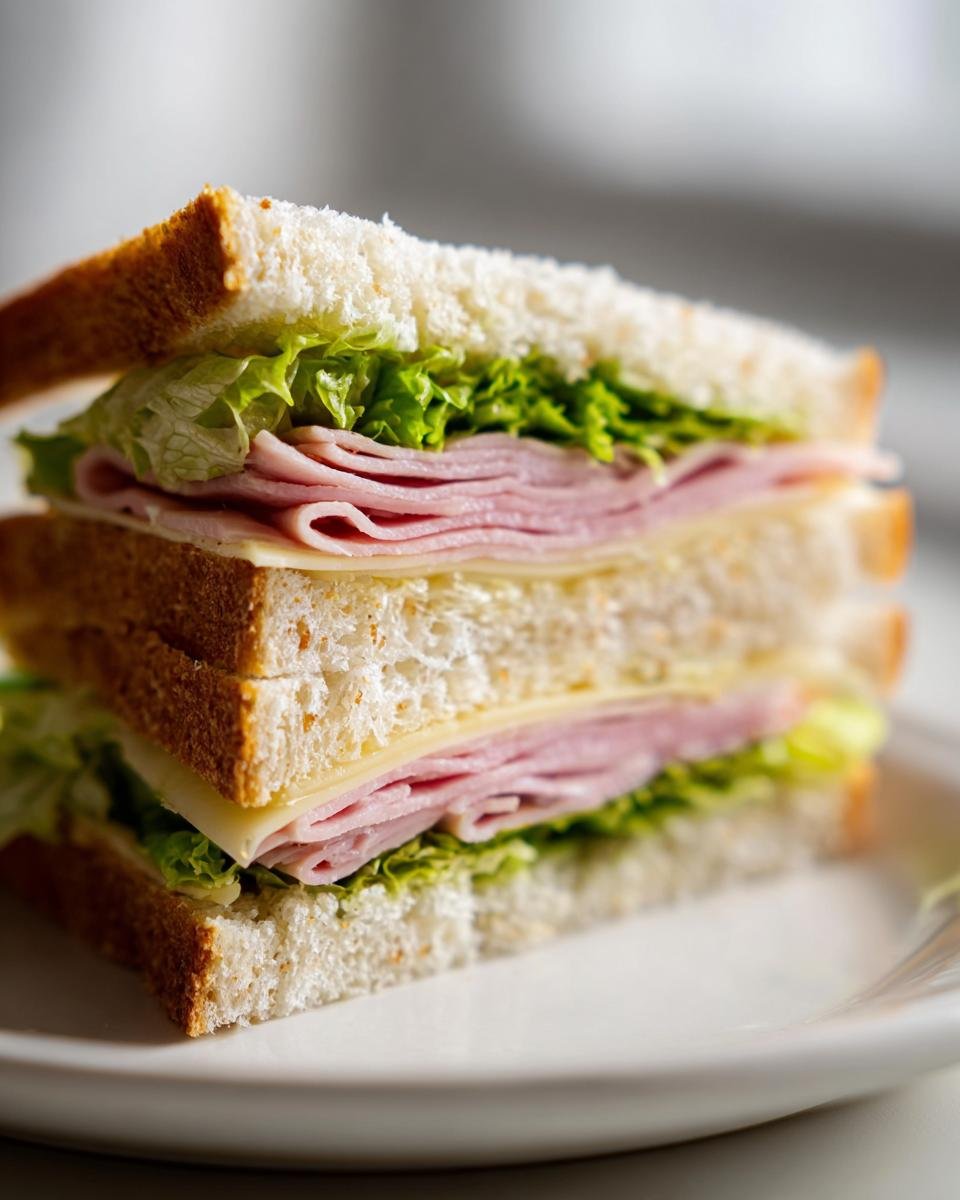
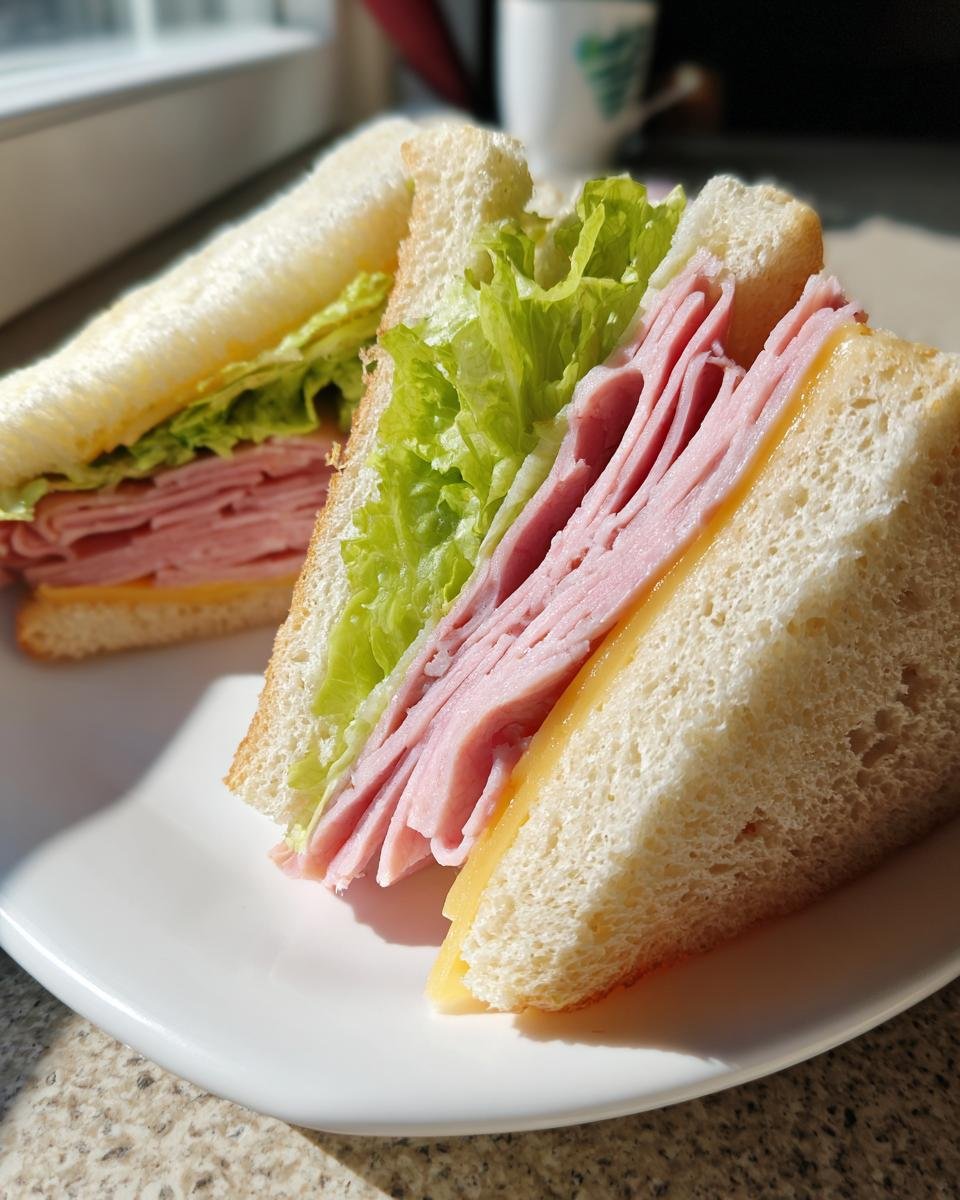
- The flavor combo of ham, sharp Swiss, and creamy mayo is classic—everyone loves these Picnic Sandwiches.
If you need something dependable that travels well, this exact formula is what you need. Don’t forget to check out how I handle a great potato salad for the rest of your basket!
Essential Components for Classic Picnic Sandwiches
When you’re making something this simple, the quality of the components really shines through, so try to use decent deli cuts if you can! I always lay everything out before I start assembling, just to make sure I have all my ducks in a row. It keeps that 10-minute assembly time honest!
We aren’t doing any fancy cooking here, just assembly, so precision matters when you’re measuring out the spreads. If you’re looking for some great sides that travel just as well, you absolutely have to see my ultimate homemade cornbread recipe!
Ingredients for the Ham and Cheese Picnic Sandwiches
- 8 slices white bread (grab the good sturdy stuff)
- 4 tablespoons mayonnaise (don’t skimp!)
- 4 teaspoons yellow mustard (don’t go too spicy)
- 8 thin slices deli ham
- 8 slices Swiss cheese
- 1 cup lettuce leaves (rinsed and patted very dry)
Step-by-Step Assembly of Your Picnic Sandwiches
Okay, this is the quick part, but pay attention to the layering! Since we aren’t baking, the order we put these things together is what traps the moisture and keeps our Picnic Sandwiches delicious for hours. I always get my hands ready before I start laying out the bread slices, because things move fast once the spreads hit the surface.
Preparing the Bread Base for Lasting Picnic Sandwiches
First, lay out all eight slices of bread, nice and flat. Now, grab your mayo—half a tablespoon per slice. You want to spread that mayo all the way to the edges, every corner! That creamy barrier is what keeps the bread from getting that sad, dry texture later on. Then, switch over to the mustard using a small spoon or offset spatula for the other side of each slice. It’s a little bit of work, but trust me, it stops those bites from being just plain bread!
Layering and Finishing Your Picnic Sandwiches
Now for the fun part, building them up! On just four of those slices, stack two pieces of ham, then two slices of Swiss cheese. Don’t forget that pretty little pile of lettuce leaves right on top of the cheese. This is your filling stack. Take the remaining four slices of bread—mayo and mustard sides facing IN toward the filling—and cap them off. You’ll end up with four solid mounds of goodness. The best finish? Cut them right across the diagonal! It just makes them easier to hold when you’re dodging crumbs on the grass, and it looks prettier too. If you want to see another fun way to use these flavors, go look at my recipe for ham and cheese cake pops!
Expert Tips for Making the Best Picnic Sandwiches
Listen, anyone can slap ham and cheese between two slices of bread, but if you want amazing Picnic Sandwiches that people talk about later, you need these little tricks. My biggest piece of advice? Skip the flimsy sandwich bread. If you use that super soft, airy stuff, the moisture from the spreads and lettuce will defeat you halfway to the park.
I swear by a slightly tougher white bread or even a good sourdough slice—something with a bit more structure. It holds up way better against the mayo barrier. Also, don’t under-cheese! The Swiss cheese isn’t just for flavor; it acts as a secondary moisture seal between the ham and the lettuce.

Before you pack them, take a peek at those great side dishes I mentioned—you really need to try the ultimate homemade cornbread alongside these!
Storage and Transport for Fresh Picnic Sandwiches
Alright, you nailed the assembly, but now you have to get them to the park without them turning into a sad, damp mess. This is where a lot of people fail with their Picnic Sandwiches! The key is wrapping them tightly—I mean *really* tight—as soon as you finish cutting them.
The recipe notes always tell you to wrap them in plastic wrap or parchment paper, and I follow that strictly. Why? Because that tight seal does two jobs at once. First, it physically compresses the sandwich just slightly, making it sturdier for travel, so those lettuce leaves don’t shift! Second, and this is the important part, it locks in the moisture from the mayonnaise and the bread!
If you leave them exposed, the mayonnaise side facing the bread will dry out, leaving a crusty perimeter. If you are using an ice pack nearby, the tightness also helps buffer them against excess outside moisture, preventing sogginess underneath. I usually wrap each half individually, then maybe toss them all into a reusable zip bag before they hit the cooler. It sounds like overkill, but it keeps everything perfect until lunchtime. Make sure you check out my cornbread recipe for a side, because that travels wonderfully too!
Variations on Classic Picnic Sandwiches
Now, I know everyone has their own favorite flavor profile, and while this ham and Swiss combo is my non-negotiable, it’s fun to tweak things up once in a while. The beauty of these simple Picnic Sandwiches is that they make a fantastic base for experimenting. You don’t need a whole new recipe; just swap out one or two key players!
If you are trying to keep the creamy texture but want to move away from ham, try swapping it out for thinly sliced roasted turkey breast. Turkey is a bit leaner, but it plays just as nicely with that sharp Swiss cheese. For a flavor boost, skip the American mustard and grab some Dijon—it adds a tiny little bite that wakes up the whole sandwich.
If you want something heartier but still need that guaranteed travel success, look into switching up the cheese. Gruyère is my current obsession! It melts slightly differently than Swiss, offering a nuttier flavor profile that goes amazing with the ham. You can check out how I use Gruyère in some really fun ways over at my savory ham and gruyere cake recipe if you’re feeling adventurous!
But honestly, the easiest switch is the lettuce. Sometimes I skip lettuce altogether and use a very, very thin spread of cream cheese on the bread instead of the mayo—just on the bread side, not coating the whole surface—and then layer on some crisp, thinly sliced cucumber rounds. They add crunch, stay relatively dry, and feel super refreshing when you’re out in the sun!
Frequently Asked Questions About Picnic Sandwiches
I always get questions about these simple cold sandwiches, especially when people worry about them lasting through a long afternoon outside. It’s funny, people think the hard part is the assembly, but really, it’s the logistics that make or break a good lunch basket!
Here are the things I hear most often when folks are prepping their own basket of Picnic Sandwiches.
Can I add tomato slices to my Picnic Sandwiches?
Oh, I love a good tomato slice, especially a nice heirloom one, but for travel, tomatoes are the enemy of a crisp sandwich! Tomatoes release a ton of water while they sit, and that moisture will absolutely seep into your bread, creating a soggy disaster by lunchtime. If you MUST have them, here’s my hack: slice them super thin, lay them on a paper towel, and gently pat them dry before adding them to the stack. Better yet, add them right before you eat rather than assembling them hours ahead of time.
What is the best bread to use for portability?
This is my biggest structural tip! Don’t reach for that fluffy, thin white bread unless you plan on eating them within 30 minutes. For true portability, you want a bread that has some body and a slightly tighter crumb structure. I find that a sturdy country white bread works great, or even a nice medium-density sourdough. They resist compression better in the cooler and stand up against the mayo and mustard just fine. If you’re making these for a crowd, you can also check out my fun ham and cheese cake pops recipe instead—they travel even better!
Another question I get often is whether you should make them the night before. I really try not to! While they hold up better than most sandwiches, they are just never quite as good as when they are made within an hour or two of eating. The freshness of the lettuce really makes a difference!
Estimated Nutritional Snapshot
Now, I know we’re out here making simple, happy food for a picnic, but if you’re tracking things, I always like to give you guys a rough idea of what’s in these classic ham and cheese superstars. Remember, this is just an estimate since we’re working with deli meats that vary wildly, but it gives you a good ballpark!
This ham and cheese combo is satisfying without being overly heavy, which is perfect when you’re chasing kids around the park or just want to settle in for a relaxing afternoon. I used the numbers based on standard white bread and typical deli cuts, so adjust if you go for that fancy thick-cut ham!
If you are looking for lighter recipes in general, have you seen my recipe for a light cake without butter and sugar? It’s a whole different vibe, but it proves you can have flavor without all the richness!
Here’s the quick breakdown per single sandwich serving:
- Calories: Around 350
- Total Fat: About 18g (Keep in mind that’s a mix of healthy fats and saturated fat from the cheese!)
- Protein: A solid 18g to keep you full!
- Sodium: Okay, this is the big one at 850mg because of the ham and cheese, so keep that in mind.
- Carbohydrates: Roughly 30g
Please take these as true guidelines rather than gospel, because one brand of Swiss cheese can change the numbers quickly! Enjoying food outdoors is all about not stressing over every tiny measurement!
Share Your Perfect Picnic Sandwiches Experience
Well, that’s truly all there is to it! A super straightforward recipe that produces the most dependable, delicious Picnic Sandwiches you could ever want. But now, I want to hear all about your adventures!
Did you try these out for a trip to the beach or maybe a backyard barbecue? Or perhaps you took them on a hike? Cooking is always better when you share the results, so please, don’t keep your triumphs to yourself!
If you made this recipe, please give it a rating using the stars below—it really helps other folks find this foolproof lunch idea. And if you have a favorite historic picnic spot or a killer local park where these sandwiches tasted extra good, hop down to the comments and tell me all about it! We can swap park recommendations!
If you have any specific questions about scaling these up for a massive crowd—say, for a family reunion—feel free to reach out through my contact page. I love helping folks plan perfect outings!
Happy picnicking, everyone! May your sandwiches always be sturdy and your weather always be perfect!
Print
Classic Ham and Cheese Picnic Sandwiches
- Total Time: 10 min
- Yield: 4 servings 1x
- Diet: Low Fat
Description
Simple, satisfying sandwiches perfect for packing for an outdoor meal.
Ingredients
- 8 slices white bread
- 4 tablespoons mayonnaise
- 4 teaspoons yellow mustard
- 8 thin slices deli ham
- 8 slices Swiss cheese
- 1 cup lettuce leaves
Instructions
- Lay out the 8 slices of bread on a clean surface.
- Spread 1/2 tablespoon of mayonnaise evenly on one side of each slice.
- Spread 1/2 teaspoon of mustard evenly on the other side of each slice.
- On four slices of bread, layer 2 slices of ham, 2 slices of Swiss cheese, and a few lettuce leaves.
- Top each filled slice with the remaining four slices of bread, mayonnaise and mustard sides facing inward.
- Cut each sandwich in half diagonally.
Notes
- Wrap sandwiches tightly in plastic wrap or parchment paper to keep them fresh.
- For best results, assemble the sandwiches just before leaving for your picnic.
- Prep Time: 10 min
- Cook Time: 0 min
- Category: Lunch
- Method: Assembly
- Cuisine: American
Nutrition
- Serving Size: 1 sandwich
- Calories: 350
- Sugar: 4
- Sodium: 850
- Fat: 18
- Saturated Fat: 8
- Unsaturated Fat: 10
- Trans Fat: 0
- Carbohydrates: 30
- Fiber: 1
- Protein: 18
- Cholesterol: 45
Keywords: Picnic Sandwiches, Ham and Cheese, Cold Sandwich, Easy Lunch, Deli Sandwich