
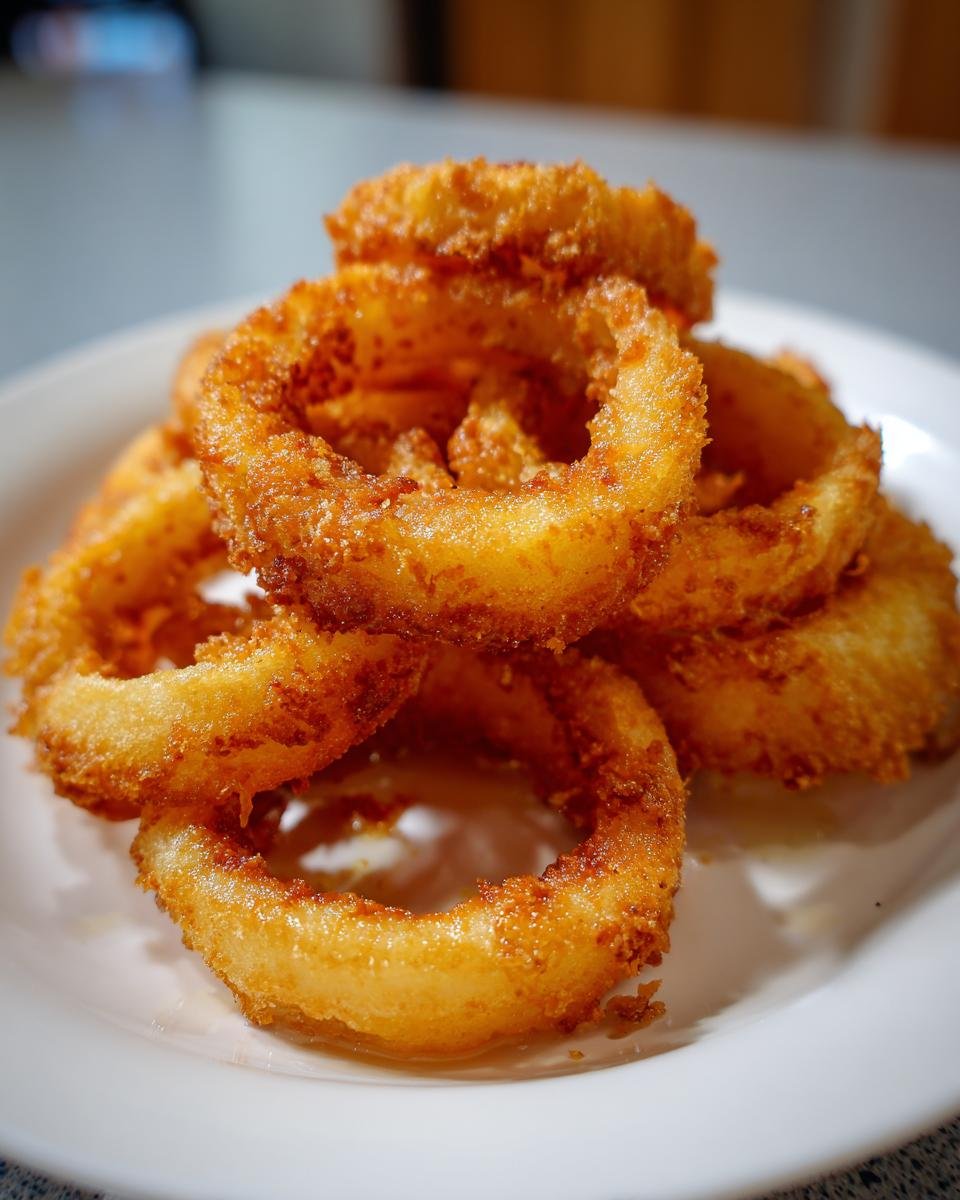
Everybody deserves a genuinely crunchy onion ring experience. Forget those sad, pale rings you get sometimes—I’m talking about golden perfection that snaps when you bite into it! Trust me, getting those classic, crispy Onion Rings like you find at the best roadside diners is totally achievable right in your kitchen. I spent ages messing with the batter consistency because when the coating slips off into the oil, it’s just heartbreaking. But once I dialed in the triple-dip method and managed the oil temperature, everything changed. These are just so much better when you make them fresh, and honestly, it’s barely any more work because we’re keeping the recipe simple!
Why You Will Love These Crispy Onion Rings
Seriously, ditch the frozen stuff and give this recipe a try. You’ll see why making homemade onion rings is worth it. They come out perfect every time once you get the hang of the coating!
- They are ridiculously crispy—no soggy bottoms here, I promise!
- The flavor is pure, classic comfort food, balanced perfectly.
- The setup is simple, using just three bowls for the breading station.
- Prep time is fast, so you can have these satisfying snacks ready in under 40 minutes total.

Essential Ingredients for Perfect Onion Rings
When we talk crispy, we’re talking about the balance between the flour coating and the breadcrumbs doing their job. This recipe keeps things totally straightforward, which is why it works so well for perfect Onion Rings—no complicated spices needed in the base layer, just pure texture!
For the Onion Rings
You can’t argue with the classics here. We need something sturdy for slicing, and then just enough oil to properly deep fry everything until it sings.
- Two big yellow onions. They need to be big enough to yield decent-sized rings!
- A good amount of vegetable oil for frying. You’ll need about 2 inches deep in your pot for this baptism by heat.
- Simple seasoning: just one teaspoon of salt, half a teaspoon of black pepper, and half a teaspoon of sweet paprika to give that dry flour mix a little color.
For the Breading Station
This is where the magic happens for that shatteringly crisp crust. Make sure your milk is just regular milk, nothing fancy needed, and have your eggs ready to go.
- One full cup of all-purpose flour—this is your base coat.
- One cup of milk.
- Two large eggs, whisked up really well with the milk so they blend smoothly.
- One cup of standard breadcrumbs. This final layer is the crunch shield!
Equipment Needed for Making Onion Rings
Listen, you can have the best recipe in the world, but if your gear isn’t up to snuff, those beautiful onion rings are going to fight you every step of the way. We aren’t doing anything too crazy here, but trust me on the thermometer—it saves so much grief!
First off, you need something deep to hold that oil. A heavy-bottomed, deep pot works perfectly fine if you don’t have a dedicated fryer. We need enough space so the rings can swim freely and cook evenly, not just sit there sadly soaking up oil.
Two absolute must-haves for successful breading are three separate, shallow bowls. I mean it—one for dry flour, one for the wet egg/milk mix, and one for the breadcrumbs. Don’t try to smash two steps into one bowl; they’ll just turn into a weird paste!
And here’s the pro tip that will make you feel like a total chef: get yourself a reliable candy or deep-fry thermometer. We need that oil to hold steady at 375°F (190°C). Too cold, and you get greasy, soggy sponges. Too hot, and the breading burns before the onion is tender. Temperature control is the secret heartbeat of great fried snacks!
Once they are done, have a slotted spoon ready to fish them out quickly, and line a plate with paper towels. That simple setup ensures you lift all that excess oil right off the coating so they stay crisp as they cool down just a tiny bit.
Step-by-Step Instructions for Crispy Onion Rings
Okay, this is the part that separates the good appetizers from the truly amazing ones you find in the best appetizer menus. Follow these steps exactly, and you’ll have onion rings that hold their crunch, even if you set them down for a minute to grab a drink. It’s all in the patience during the coating stage!
Preparing the Onions and Breading
First things first, we need rings! Peel those big yellow onions and slice them carefully into rings about 1/4-inch thick. Please try to keep them uniform in size, okay? Once they are sliced, gently pull them apart into individual rings. It might take a little finesse so they don’t break.
Now, set up your assembly line. That means three shallow bowls lined up right next to your oil station! Bowl one gets your seasoned flour mix (flour, salt, pepper, paprika). Bowl two holds your wet ingredients—give that milk and those two eggs a good whisk until they look totally combined. Bowl three is just waiting patiently with those beautiful breadcrumbs.
Coating the Onion Rings
This triple-dip is non-negotiable for crispy perfection. Take an onion ring and dip it first into the flour mixture. Shake it gently—I mean it, use your wrist to shake off any excess that’s just clinging on for dear life.
Next, drop that floured ring into the milk and egg bath. Let the extra drip off for just a second. Then, it’s straight into the breadcrumbs! Make sure every bit of that wet surface is covered completely. Press them lightly into the crumbs so they stick well.
Here’s my personal secret, remember that tip about chilling? Once a few rings are coated, lay them on a plate and pop them in the fridge for about 15 minutes while you heat your oil. This chilling time is gold; it makes the batter set up firm, so it won’t fall off when it hits the hot fat.
Frying the Perfect Onion Rings
Time to get hot! You absolutely must get your vegetable oil up to 375°F (190°C). Do not guess this! If you don’t have a thermometer, you risk ruining the batch, so check that temperature.
Carefully drop your chilled, coated rings into the oil. Only add a few at a time. If you overcrowd the pot, the temperature instantly drops, and suddenly your crispy onion rings turn into sad oil sponges—we don’t want that mess! Fry them for about 2 to 3 minutes on one side until they are that gorgeous deep golden brown, flip them gently, and cook the other side until it matches.
When they are ready, use a slotted spoon to retrieve them quickly and set them right onto your paper-towel-lined plate to drain off any extra oil. Serve them immediately while they are piping hot!
Expert Tips for the Best Homemade Onion Rings
You’ve managed the coating, you’ve nailed the temperature—now let’s talk about keeping that oil happy throughout the entire batch. A lot of people think once the oil starts frying, they can just leave it alone, but that’s a rookie mistake! Once the temperature dips, your onion rings start soaking up fat instead of crisping up.
If you’re frying lots of batches, you’ll notice bits of coating break off and float around. You should skim those out between batches using a fine-mesh sieve. Keeping the oil clean helps maintain that perfect frying temperature and prevents your later rings from getting weird, dark speckles.
Also, don’t skip the shaking step after the flour dredge! That little shake is vital because it removes the extra surface flour that would otherwise dissolve immediately into your egg wash, making the wash too thick too fast. If your wash gets too thick, you can thin it back down with just a splash of milk, or check out how I make my basic homemade cleaning sprays—sometimes using slightly less liquid is the key to keeping things concentrated when you need it!
Variations on Classic Onion Rings
Once you’ve mastered the basic technique of the triple dip—and I know you will, because you’re paying attention!—it’s time to play with the flavors. These simple onion rings are such a great base because they take seasoning so beautifully. You don’t have to stick to just salt and pepper if you’re feeling adventurous; we can easily customize both the spice level and the final crunch factor!
In the flour mixture, you can totally swap in some different seasonings. Paprika is lovely, but I sometimes throw in a teaspoon of garlic powder or a pinch of cayenne pepper for a little sneaky heat. Don’t go crazy with overly powerful spices right away, though; we don’t want them to fight the onion too much.
But where you can really switch things up is the final coating. If you want an absolutely next-level crunch that holds up even if they sit for five minutes, swap out those regular breadcrumbs for Panko breadcrumbs. Panko flakes are bigger and lighter, and they fry up incredibly crisp. Just make sure you press them onto the egg wash firmly, since they tend to be a bit looser than traditional breadcrumbs.
And hey, once you have these glorious crispy rings, you need something amazing to dip them into, right? Forget just ketchup! If you want something bright and fresh to cut through the richness of the fried coating, you have to whip up some amazing chimichurri sauce. The herbs and vinegar are just a shocking, wonderful pairing after you’ve been eating rich, fried goodness!
Serving Suggestions for Your Onion Rings
Honestly, these golden, crackly onion rings are fantastic all by themselves—they taste like pure happiness right out of the fryer. But if you’re serving them up for a crowd, or maybe just want to make dinner feel a little more exciting, you need a dip! A good sauce cuts through the richness of the oil perfectly and keeps people coming back for more.
You could go classic with some good old barbecue sauce, and nobody would complain! But I think when you’ve put this much effort into getting that perfect crunch, you ought to match it with a dip that’s just as exciting. I always fall back on something creamy and tangy.
If you want to take your snack game up a serious level without spending all afternoon stirring things, you should absolutely check out my post on the ultimate party dip lineup. Seriously, even if you only make one of those dips, your onion rings will thank you.
My personal favorite pairing is a simple spicy aioli. You just mix mayonnaise with a dash of hot sauce, a squeeze of lemon juice, and maybe a little garlic powder. It’s quick, creamy, and the heat brings out the sweetness of the onion inside the crispy shell. That contrast is what makes a great appetizer unforgettable!
Storage and Reheating Instructions for Onion Rings
Okay, let’s be real for a second: once these beautiful, freshly fried onion rings leave the paper towels, they are on a timer. Deep-fried food is always, always at its absolute peak glory within the first five minutes. They’re hot, they’re crunchy, and they haven’t had time to steam themselves into a softer texture. So, my number one piece of advice? Eat them immediately!
If, by some miracle of willpower, you actually have leftovers—which I highly doubt, but I’ll share the method just in case your family is more restrained than mine—you cannot, I repeat, *cannot* just toss them in the microwave. Microwaving heats the water inside the breading, and you’ll end up with hot, chewy disks of sadness. We worked too hard for sad disks!
The secret to salvaging any leftover onion rings is dry heat. You want to pull that moisture back out of the coating and crisp it up again. I swear by the oven or, even better, an air fryer if you have one!
Best Reheating Method: The Oven Trick
To reheat in a conventional oven, you need to preheat it pretty high, around 400°F (200°C). Lay your cold onion rings out in a single layer across a metal baking sheet. Crucially, don’t pile them up! If they overlap, they just steam each other. Put them directly on the rack if you can, or use a wire rack set over the baking sheet. That lets air circulate underneath, which is key to getting the bottom crispy again.
Bake them for about 8 to 10 minutes. Keep an eye on them, though! Since they were already cooked, they are just waiting to burn. You are looking for that deep golden color return and a firm, crispy surface when you tap them lightly. This usually only takes about 8 minutes in a hot oven.
The Air Fryer Magic For Crispiness
If you have an air fryer, this is your best friend for reheating fried things. It mimics the experience of a second, quick fry without the oil mess. Set your air fryer to about 375°F (190°C).
Again, lay them in a single layer in the basket—don’t overload it! You might have to work in batches. Air fry them for only 4 to 5 minutes, shaking the basket once halfway through. This method usually gets them back to that fresh-out-of-the-fryer texture quicker than the oven and with better results, honestly. They’ll be ready to dunk!
Frequently Asked Questions About Onion Rings
I know you’ve got questions, because when you’re making something as iconic as a truly great onion ring, you want to make absolutely sure you nail it! Don’t worry; this section is designed to clear up any confusion so you can move on to dipping glory. We want crispy, not chewy, remember?
Can I use pre-sliced onions for Onion Rings?
Oh, please don’t! Pre-sliced onions from the store are usually already separated, which is great, but they almost never have that perfect 1/4-inch thickness we need. If they are too thin, they burn instantly. If they are too thick, they end up steaming inside the coating instead of getting tender. You really need to slice them yourself so you can control the thickness and ensure you can gently pull those rings apart so the batter adheres to both sides evenly.
What is the secret to keeping Onion Rings crispy?
There are two huge secrets that work together! First, you absolutely must chill those coated rings for 15 minutes before they even think about meeting the hot oil—this sets the breading. Second, never, ever let your frying oil drop below 375°F (190°C). If the temperature dips, the fat starts absorbing into the coating, and boom: soggy onion rings. Keep that oil hot and steady!
Can I bake these Onion Rings instead of frying?
You can, yes, but I’ll be honest: you won’t get the same glorious, commercial-grade crunch from baking as you do from deep frying. Baking is healthier, no doubt, and you can get a decent coating if you spray them really liberally with oil beforehand and bake them at a high temperature like 425°F (220°C). However, they won’t have that all-the-way-around golden, bubbly crust that the fried version delivers. If you’re going for maximum authenticity, stick to frying!
If you’re looking for more party snack ideas that are less messy, you should check out my guide to the ultimate party dip lineup for inspiration!
Nutritional Estimates for Homemade Onion Rings
I always feel a little bad sharing the numbers because, let’s face it, fried food isn’t exactly on the “health food” list! But knowledge is power, right? You should know what you’re enjoying when you sneak an extra ring or two off the plate. These figures are based on the recipe as written, assuming you’re using standard white flour and breadcrumbs and serving up about five rings per person.
I always recommend using these numbers as a reliable guideline, but remember, your oil choice, the brand of breadcrumbs, and even the size of the onions you pick can make things shift a bit. It’s homemade, so it’s naturally variable, which is part of the fun!
We’ve got a solid serving size of five rings each, so here’s the approximate breakdown for that portion:
- Calories: Around 350
- Fat: 20g total fat (About 4g of that is saturated fat, which is pretty standard for something deep-fried nicely.)
- Sodium: 450mg (This is where you can really control things next time; go light on the salt in the flour mixture if you’re watching sodium!)
- Carbohydrates: 38g
- Protein: 7g
It’s clearly an appetizer meant for enjoying sometimes, not every day! The cholesterol count is right in the middle, around 50mg. The beauty of making homemade Onion Rings is that you control every single thing that goes into that golden, crispy crust!
Share Your Crispy Onion Rings Experience
Okay, now that you’ve got oil sputtering, onions coated, and that incredible smell filling your kitchen, the very best part happens: enjoying them! But I really, really want to hear how they turned out for you. Did the chilling trick work wonders? Did you manage to keep your oil temperature steady for that perfect golden crisp?
Seriously, don’t be shy! Drop a star rating for the recipe right down below so other folks know what you thought. And if you took a picture of your glorious, towering plate of homemade Onion Rings, snap it and tag me on social media! I absolutely love seeing your finished dishes come to life.
If you found a little tweak that worked even better for your setup—maybe you used panko and it blew your mind, or you found the perfect dipping sauce—please, share that genius tip in the comments! We are all in this together, trying to make the crispiest, best appetizer possible. I read every single comment, and your feedback helps me keep refining these recipes we all love!
Happy frying, and enjoy every perfectly crunchy bite!
Print
Simple Onion Rings
- Total Time: 35 min
- Yield: 4 servings 1x
- Diet: Vegetarian
Description
A recipe for making classic, crispy onion rings at home.
Ingredients
- 2 large yellow onions
- 1 cup all-purpose flour
- 1 teaspoon salt
- 1/2 teaspoon black pepper
- 1/2 teaspoon paprika
- 1 cup milk
- 2 large eggs
- 1 cup breadcrumbs
- Vegetable oil for frying
Instructions
- Peel and slice the onions into 1/4-inch thick rings. Separate the rings.
- In a shallow bowl, whisk together the flour, salt, pepper, and paprika.
- In a second shallow bowl, whisk together the milk and eggs.
- In a third shallow bowl, place the breadcrumbs.
- Dip each onion ring first into the flour mixture, shaking off excess.
- Next, dip the floured ring into the milk and egg mixture, letting excess drip off.
- Finally, coat the ring thoroughly in the breadcrumbs. Place coated rings on a plate.
- Heat about 2 inches of vegetable oil in a deep pot or fryer to 375°F (190°C).
- Carefully place a few onion rings into the hot oil, avoiding overcrowding.
- Fry for 2 to 3 minutes per side, until golden brown and crisp.
- Remove the rings with a slotted spoon and drain on paper towels. Serve immediately.
Notes
- For extra crispiness, chill the coated rings for 15 minutes before frying.
- Use a thermometer to maintain the correct oil temperature for best results.
- Prep Time: 20 min
- Cook Time: 15 min
- Category: Appetizer
- Method: Deep Frying
- Cuisine: American
Nutrition
- Serving Size: 5 rings
- Calories: 350
- Sugar: 8
- Sodium: 450
- Fat: 20
- Saturated Fat: 4
- Unsaturated Fat: 16
- Trans Fat: 0
- Carbohydrates: 38
- Fiber: 2
- Protein: 7
- Cholesterol: 50
Keywords: onion rings, fried onions, appetizer, crispy, snack