
Oh, Mother’s Day! It rushes in so fast sometimes, doesn’t it? You want to make something beautiful for the amazing women in your life—moms, grandmas, aunts, or just the mentors who stepped up—but you don’t want to be stuck in the kitchen all day when you should be spending time with them.
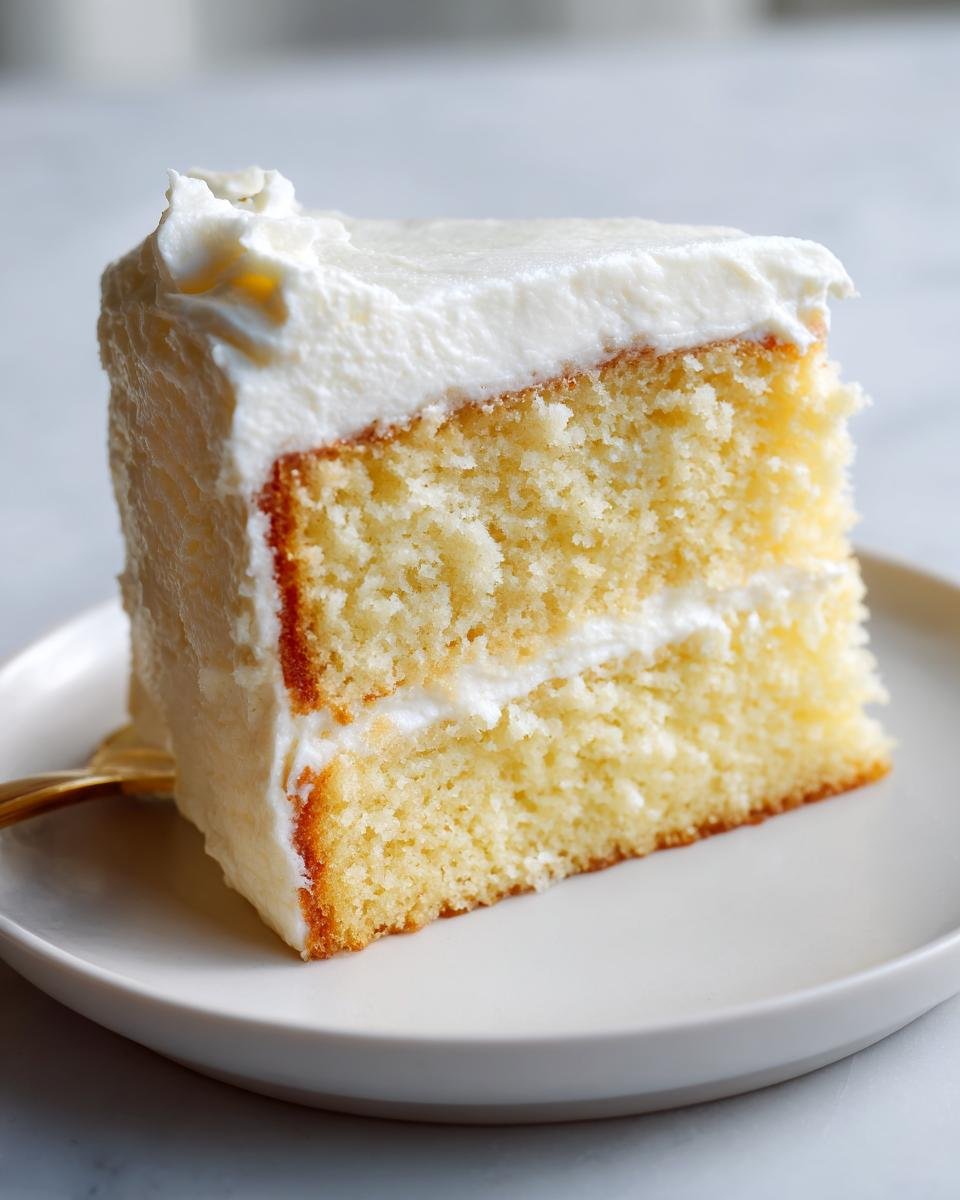
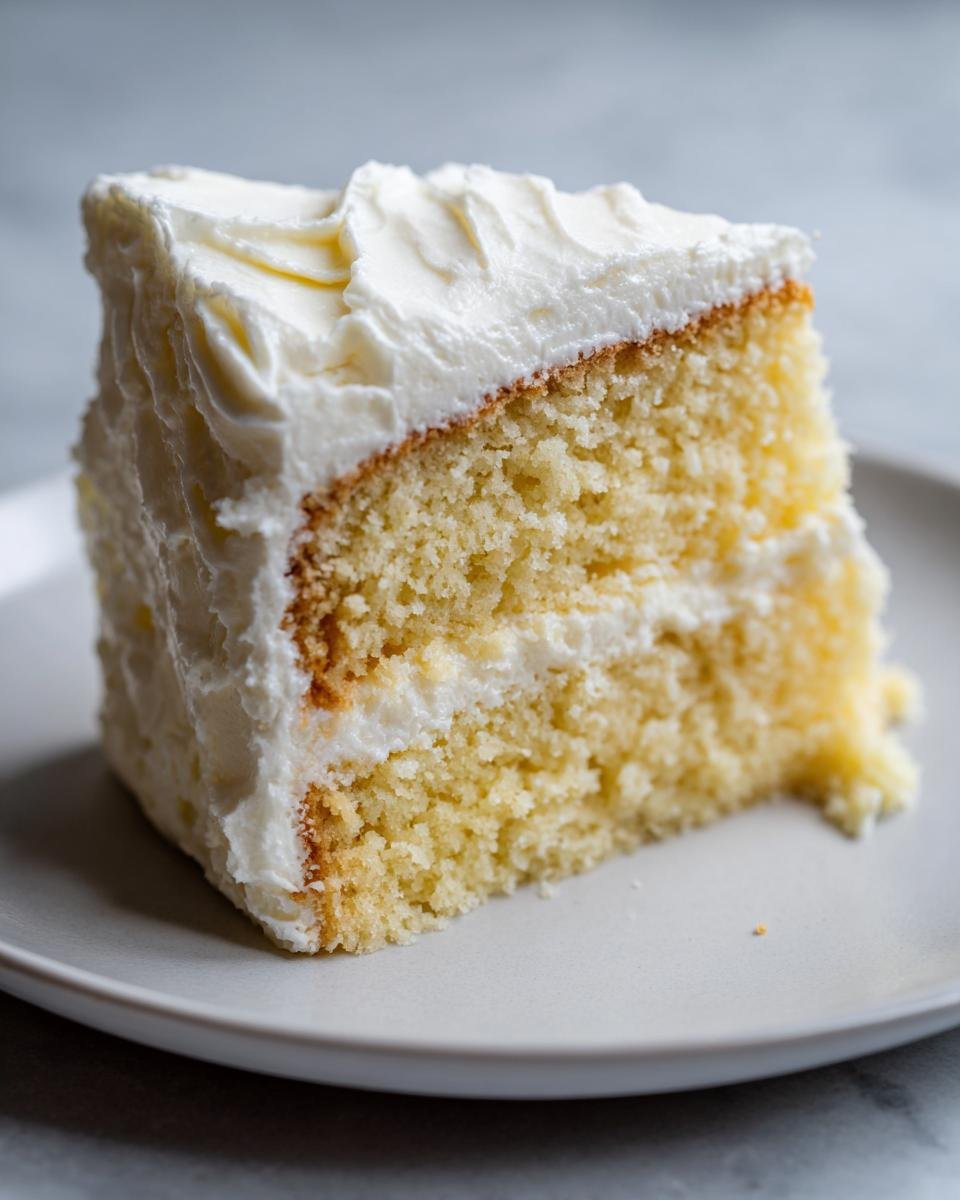
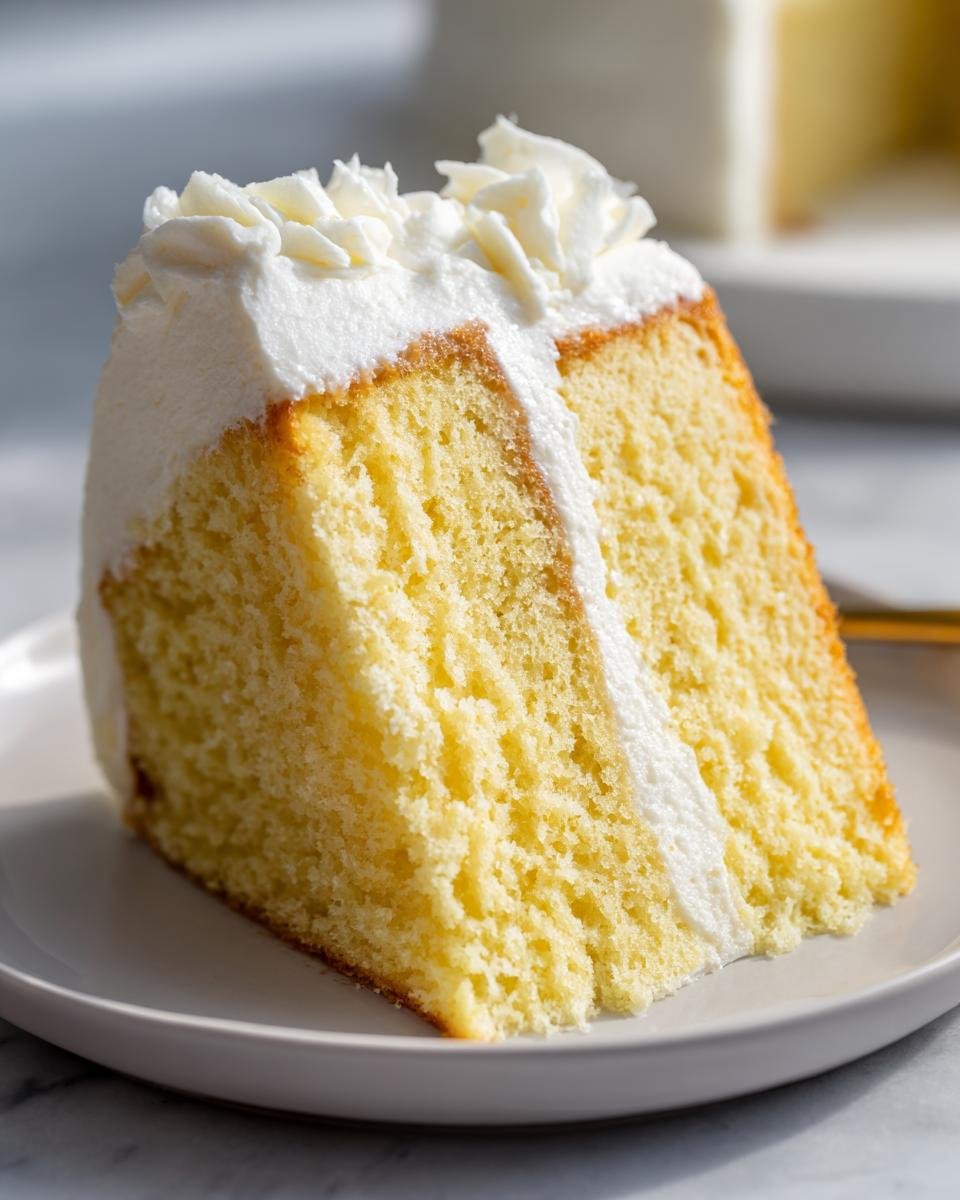
That’s why I’m telling you, this Simple Vanilla Layer Cake is my absolute go-to solution. It’s the bedrock of all my celebration baking. I’ve made this cake for birthdays, anniversaries, and yes, countless early Mother’s Day brunches. It always delivers that perfect, tender crumb and pure vanilla flavor everyone loves.
My own mother always asked for vanilla—no fancy extracts, just the good stuff. And she hated overly sweet frosting. This recipe, with its light, fresh whipped cream finish, is the one that always makes her smile. It’s proof that the most reliable recipes are often the simplest ones. Forget the fuss; we’re making delicious, heartfelt Mothers Day Cakes that taste like they took all day!
Why This Simple Vanilla Layer Cake is Perfect for Mothers Day Cakes
Seriously, when you’re juggling brunch plans and trying to make sure Mom feels totally spoiled, you don’t need a cake that needs hours of chilling or complicated syrups. This recipe strips away all the noise so you get huge payoff with minimal stress. It’s my secret weapon for turning out gorgeous, deeply satisfying Mothers Day Cakes without breaking a sweat. If you’re ever looking for inspiration on lighter cakes, you might check out this light cake without butter and sugar.
- It’s genuinely fast! The whole thing, prep and bake, clocks in at under an hour.
- The flavor is pure, classic vanilla—you can’t go wrong.
- It uses simple heavy cream frosting, which is lighter and less challenging than buttercream.
Quick Prep and Bake Time
I love that I can pull this together after my morning coffee and have it out of the oven before noon. We’re looking at only about 20 minutes for prep, and then 30 minutes baking time. That 50-minute total window is a lifesaver when you’re preparing for big celebrations like Mother’s Day, leaving you plenty of time to decorate or, better yet, wrap gifts!
Reliable Results for Perfect Mothers Day Cakes
The mixing technique here is so straightforward—no funny business! If you’ve ever successfully creamed butter and sugar, you can master this batter. This reliability is why I trust it every year for my important Mothers Day Cakes gatherings. It’s nearly foolproof, which means less time worrying about flat spots and more time enjoying the day.

Gathering Ingredients for Your Mothers Day Cakes
Okay, friend, listen up. The best part about this simple vanilla cake is that most of this is probably already in your pantry. But to get that cloud-like texture that makes it perfect for Mothers Day Cakes, we need to talk about temperature and quality. Don’t skimp on prepping these things before you start mixing!
If you’re looking for an incredible flavor contrast using buttermilk, you absolutely need to check out the amazing depth you can get in this buttermilk sour cream pound cake with caramel icing recipe, but for this light vanilla number, following this list exactly is the key.
Cake Batter Components
For the actual cake layers, you need to ensure your butter is soft enough to really beat air into—we call that “room temperature” for a reason! Eggs too? They need to be room temperature as well for a smooth emulsion. Don’t just eyeball these measurements; precision gets us that perfect height!
- Dry Crew: You’ll need 1 and 1/2 cups of all-purpose flour, 1 and 1/2 teaspoons of baking powder (make sure it’s fresh!), and a good pinch—1/2 teaspoon—of salt. Whisk these together first!
- The Golden Mix: Grab 1/2 cup of unsalted butter—softened, softened, softened!—and 1 full cup of granulated sugar. We need to make these two fluffy first.
- Liquids & Flavor: Two large eggs, dropped in one at a time. Then 1 teaspoon of pure vanilla extract. Finally, 1/2 cup of milk, which should also be at room temperature.
Simple Whipped Cream Frosting Ingredients
This frosting is what makes it feel so light and celebratory, perfect for spring! It whips up fast, but you must use heavy cream that has been kept very cold in the fridge. If it’s warm, it just won’t whip up into those nice stiff peaks we need to hold the layers together.
- The star here is 1 cup of heavy whipping cream. Make sure it’s cold!
- You only need 2 tablespoons of powdered sugar to sweeten it up just right.
Step-by-Step Instructions to Make Mothers Day Cakes
This is where the magic happens! Don’t be intimidated by the multiple steps; they are all designed to keep your vanilla cake unbelievably tender. If you want to see a cool way to mix things in a blender (though I prefer the mixer for this one!), you can grab some tips here: homemade blender cake magic recipe. Follow these steps closely, and you’ll have gorgeous Mothers Day Cakes ready in no time.
Preparing the Cake Layers
First things first: get that oven heating up to 350 degrees F (that’s 175 degrees C). While it warms, grab your two 8-inch round pans. You have to grease them *and* flour them—don’t skip either step, or you’ll be having a kitchen emergency later! Trust me on the greasing and flouring.
Now, grab your flour mixture (the dry stuff) and set it aside. In your big bowl, start beating that softened butter and the sugar together. Beat it hard until it looks light and fluffy. This is your air-pocket foundation! Next, add the eggs one at a time, mixing well after each one goes in. Don’t forget that teaspoon of vanilla!
Here comes the alternation trick. You’re going to add the dry ingredients and the milk together, but you must do it in stages. Start with a little flour mix, then a little milk. Then more flour, then more milk. You always want to *begin* and *end* with the flour mixture. Mix gently—just until everything comes together. The second you don’t see dry streaks, stop! Overmixing is the enemy of a tender cake here.
Baking and Cooling
Divide that beautiful batter evenly between your two prepared pans. Pop them in that preheated oven for 25 to 30 minutes. How do you know when they’re done? Insert a wooden pick right into the center. If it comes out clean, you’re golden!
Don’t rush to dump them out! Let the cakes hang out in the pans for exactly 10 minutes. This lets them firm up just enough. After 10 minutes, gently flip them onto a wire rack. They must cool completely on the rack. If you try to frost them even a little warm, that lovely whipped cream turns into a puddle. Ask me how I know!
Creating the Whipped Cream Frosting
While those layers are cooling, we tackle the frosting. You need that heavy cream to be super cold for this! Put it in your mixer bowl and whip it until it starts holding soft peaks—you know, when you lift the whisk and the tip curls over slightly.
Now, sprinkle in those 2 tablespoons of powdered sugar slowly while whipping. Keep going until you hit stiff peaks—the tips should stand straight up when you pull the whisk away. This needs to happen fast, so keep an eye on it. Whipped cream can go from perfect to soupy in seconds, especially if the bowl warms up!
Assembling Your Mothers Day Cakes
Once those layers are totally cool—and I mean touchable cool—we build this beauty. Place one layer on your serving plate. Take about a third of that glorious whipped cream frosting and spread it right across the top evenly. It doesn’t have to be perfect, remember? Mother likes simple!
Gently place the second layer on top. Use the rest of the frosting to generously cover the top and smooth it around the sides. That’s it! You have successfully created one of the loveliest Mothers Day Cakes imaginable without breaking into a sweat over complicated icing techniques. Pop it into the fridge until you’re ready to serve.
Expert Tips for Perfect Mothers Day Cakes
I’ve made this vanilla layer cake so many times over the years that I know the tiny details that make the difference between a good cake and *mom-is-going-to-cry-happy-tears* cake. When we are aiming for beautiful Mothers Day Cakes, we can’t just rely on the recipe card; we need a little bit of kitchen know-how!
If you’re ever looking for rich cake recipes, this Ms. Johnny Ruth Pound Cake recipe is amazing, but for this lighter vanilla celebration cake, temperature and mixing are everything.
Room Temperature Matters
I know, I know, most recipes say “room temperature butter and eggs,” but these aren’t suggestions—they are commands! If your butter is too cold, it won’t cream properly with the sugar. That creaming step is how we literally beat air into the cake batter, creating those microscopic air pockets that give us the light, fluffy crumb structure we want. If the butter is cold, the batter gets chunky, and the cake is dense. Same goes for the eggs: cold eggs can cause the creamed butter to curdle slightly when added. Trust me, taking 30 minutes to let those items sit on the counter pays off big time in your final bake!
Preventing Over-Mixing
Once you start adding the flour mixture, you have to remember you are switching from “building the structure” (creaming butter) to “holding the structure together.” As soon as flour meets liquid, gluten starts to form. Gluten provides strength, which is great if you’re making bread, but terrible if you want a tender cake!
My best advice? Mix on low speed, or stir gently by hand, and stop the minute you can’t see large, obvious streaks of white flour anymore. A few tiny flecks are totally fine—they will blend in during the final minutes of baking. If you mix until it looks flawlessly smooth, you’ve gone too far, and your Mothers Day Cakes might come out a little tough!
Ingredient Notes and Substitutions for This Vanilla Cake
Sometimes life happens, right? You go to make this gorgeous, simple vanilla cake, and you realize you’re out of heavy cream, or maybe you’re trying to lighten things up even more. That’s okay! This cake is so foundational that you can make a few swaps without completely ruining the celebration vibe. It just means the final texture or sweetness profile will change just a hair, but it’ll still be delicious for your Mother’s Day celebration.
If you are interested in trying different flours in your baking adventures, have a peek at this almond flour pound cake recipe for some fascinating alternatives!
The biggest potential substitution point is always that beautiful, light whipped cream frosting. If cold heavy cream is completely unavailable, don’t panic! You have a couple of other options for topping your vanilla layers.
- Simple Buttercream Swap: You can absolutely go for a classic American buttercream, though I warn you, it’s much sweeter and heavier than the whipped cream. For this recipe’s volume, you’d need about 1 cup of softened butter beaten with 3 cups of powdered sugar, plus a splash of milk and vanilla until it’s spreadable. This gives you a much sturdier frosting, great if you need to pipe decorations!
- Stabilized Whipped Cream: If you want to keep the cloud-like texture but need your cake to sit out longer at room temperature, you can stabilize the whipped cream. After you whip the cream and sugar, gently fold in about 2 tablespoons of instant vanilla pudding mix or 1 teaspoon of cornstarch mixed with 1 tablespoon of cold water (slurry). This helps lock in those air bubbles so your frosting doesn’t weep while you’re busy celebrating.
- Milk Alternatives: For the cake batter itself, if you don’t have regular milk, whole milk or half-and-half work perfectly fine. Almond or oat milk can work too, but be aware they can sometimes thin the batter slightly, so you might need to add just a tiny bit more flour (maybe half a teaspoon) to compensate if the batter looks soupy.
Keep in mind that anytime you swap out a high-fat element like heavy cream for something lighter, you lose some of that luxurious mouthfeel, but the vanilla cake base itself holds up just beautifully to anything you top it with!
Make-Ahead and Storage for Your Mothers Day Cakes
I am a huge fan of baking ahead, especially for big events like Mother’s Day. If you can get the cake layers done the day before, it just lowers the stress level immensely on the actual holiday! You’ve already mastered the baking part with this recipe, so let’s talk about keeping those tender layers perfect until you’re ready to frost and present your beautiful Mothers Day Cakes.
If you are storing other ingredients, like herbs preserved in oil, you might want to check out this great guide on how to freeze fresh herbs in olive oil—it has saved me so many times!
Storing Unfrosted Layers
The day before serving, once those cake layers are completely cool on the wire rack—and I mean totally cooled, no residual heat allowed!—it’s time to wrap them up. Grab some plastic wrap. Not wax paper, plastic wrap! You want a tight seal to keep all that moisture locked in.
Wrap each layer individually and they are totally fine sitting on the counter, covered tightly, overnight. If you need to give yourself more time, say you have a super busy Saturday, you can absolutely freeze these! Wrap them once tightly in plastic, then wrap them again with aluminum foil. They freeze beautifully for up to a month. If you freeze them, just pull them out the night before you plan to frost and let them thaw, still wrapped, on the counter.
Storing the Assembled Mothers Day Cakes
This is the one place we have to be a little careful because we chose that lovely, light whipped cream frosting for our Mothers Day Cakes. Whipped cream is dairy, and it doesn’t handle sitting out on the counter for hours the way a stiff buttercream does.
Once you have the cake assembled, cover it gently. You don’t want plastic wrap touching the frosting directly, or it will stick and tear everything off! Use toothpicks poked strategically around the perimeter of the cake to hold the plastic wrap up slightly above the icing before wrapping the whole thing loosely. Then, it needs to go straight into the refrigerator.
Just be mindful: because the frosting is pure whipped cream, it can sometimes look a little less stiff after sitting in the fridge overnight. Don’t worry! If you’re serving it after a few hours, just pull it out about 15 minutes before cutting. It will look and taste fantastic!
Serving Suggestions for This Simple Cake
The beauty of a classic vanilla cake is that it’s a fantastic blank canvas! Since we kept the frosting light and airy for this one, you can really dress it up without making the whole dessert too heavy or overly sweet, which is exactly what Mom wants after a nice lunch, right?
For a truly celebratory touch, I always love adding a simple fruit component. A light drizzle makes everything look gourmet but takes thirty seconds. If you’re looking for a sauce recipe that is criminally easy and pairs beautifully, you have to try this simple strawberry sauce recipe. It’s fantastic spooned right over a slice!
Here are a few of my favorite ways to serve this simple vanilla layer cake:
- Fresh Berries & Cream: Keep it classic! Pile a mix of fresh raspberries, blueberries, and sliced strawberries right on top of the slice, maybe with an extra dollop of that homemade whipped cream if you have extra saved. The tartness of the berries cuts through the richness perfectly.
- The Coffee Companion: This cake is a dream next to a perfectly brewed cup of coffee or espresso. The slight bitterness of the coffee balances the sugar in the cake and frosting beautifully. It’s my preferred way to enjoy the leftovers the next morning!
- A Light Dusting of Gold: If you skipped the full frosting, or just want a final flourish, dust the top lightly with powdered sugar right before serving. If you’re serving this on Mother’s Day, grab a small, pretty stencil (maybe a flower shape?) and dust cocoa powder over that for a gorgeous, temporary design.
- Toasted Nuts: Try gently toasting some slivered almonds or pecans in a dry pan for just a few minutes until golden brown and fragrant. Sprinkle those over the sides of the frosted cake. It adds the absolute best texture contrast to the soft layers.
No matter how you serve it, the focus is on spending time together, but a little extra presentation effort never hurt anyone!
Frequently Asked Questions About Mothers Day Cakes
It’s totally normal to have a few little questions bubbling up when you’re planning baked goods for a big event like Mother’s Day. This simple vanilla cake is super reliable, but the frosting tends to get the most questions! We want those Mothers Day Cakes to look as good as they taste, right?
If you’re looking for another quick and reliable bake that comes together fast, you should totally check out this super quick simple so tasty cake in 25 mins recipe for inspiration!
Can I use a different type of cream for the frosting on my Mothers Day Cakes?
Oh, absolutely! While I adore the lightness of fresh whipped cream, it is a bit delicate. If you need something sturdier for decorating or if you plan on assembling these Mothers Day Cakes a full day ahead, you should switch to a stabilized whipped topping. That means, after you whip the heavy cream and sugar, fold in just a tablespoon of cornstarch or a packet of vanilla instant pudding mix. That gives it structure, kind of like a stabilizing agent, so it holds its shape much better in the fridge!
Alternatively, a simple cream cheese frosting is divine with vanilla—it swaps out the lightness for a lovely tang, but it handles travel much better since it’s mostly butter and cream cheese.
How do I prevent the vanilla cake layers from sticking to the pan?
This is the million-dollar question for any layered cake, honestly! My method here is foolproof, but you have to follow it completely. You need to grease your pans *and* then flour them. I use a little dollop of butter to coat the entire inside surface of the pan—bottom and all the sides all the way up.
Then, I sprinkle in about a tablespoon of flour and turn the pan around, tapping it gently so the flour coats every bit of butter. Dump out any excess flour—you just want a light, dusty coating left behind. For extra insurance, especially if your pans have fiddly designs, cut a circle of parchment paper to fit the bottom exactly and place it inside after flouring. That layer is your backup plan, giving you a clean release every single time.
What is the best way to transport this layer cake?
Since we used fresh whipped cream frosting, refrigeration is your best friend here. Transporting layer cakes needs a stable base. First, make sure the cake is thoroughly chilled—at least an hour in the fridge after frosting—so the layers are totally set against the cream.
You’ll need a sturdy cake carrier or a flat-bottomed box that leaves plenty of room around the sides. Never carry a cake by the lid! Always carry it by the base. If you’re driving more than a few blocks, keep the air conditioning blasting in the car, and place the cake carrier on the floor behind the passenger seat—the floor stays the flattest surface in the vehicle, which helps keep those beautiful Mothers Day Cakes from sliding around on the seat!
Nutritional Estimates for This Vanilla Layer Cake
Now, let’s talk numbers briefly. I always bake because I love seeing the joy on people’s faces, not to count macros! But since this is for a celebration, and maybe some of us sneak a second slice (no judgment here!), I took a peek at what the recipe details suggest for general estimates.
Please remember that these figures are purely estimates based on the ingredients listed, and they can change depending on the exact brands of butter or sugar you use. If you’re feeling worried about clean eating, you might enjoy seeing how this compares to a light cake without butter and sugar for reference.
But for this delicious, simple vanilla layer cake, here’s the rough breakdown based on 8 servings:
- Serving Size: 1 slice
- Calories: About 350 calories per slice. It’s a treat, but totally worth it!
- Sugar Content: Roughly 30 grams. That sugar is what makes the cake tender, remember?
- Total Fat: Around 20 grams, with about 12 grams of that being saturated fat from the lovely butter we used.
- Carbohydrates: We’re looking at around 40 grams of carbs.
- Protein: A simple cake like this provides about 5 grams of protein.
- Sodium: Around 150mg.
It’s a classic American celebration cake, so it’s definitely a treat! Don’t forget that fresh whipped cream frosting keeps it lighter than a heavy, store-bought icing, which I always appreciate when I’m serving it up for Mother’s Day.
Share Your Simple Vanilla Cake Creations
Alright, you’ve got the recipe, you’ve made the most beautiful, simple vanilla cake for your Mother’s Day celebrations, and everyone loved it! Now, I desperately need to know how it turned out for you!
Baking is such a community event for me, and seeing your beautiful creations—whether you added a splash of food coloring to the cream or served it completely plain—lets me know I’ve helped make someone’s special day a little sweeter. This recipe is based on reliability, but every baker brings their own touch.
If you loved how straightforward this simple cake was, please take a minute to leave a rating down below! Five stars lets other busy cooks know they can trust this recipe for their own celebrations, like making special Mothers Day Cakes.
- Drop a Comment: Tell me what you paired it with! Did you go for the fresh berries, or did you try that toasted almond suggestion? Any little tweak you made? I read every single comment!
- Snap a Photo: If you shared a picture of your finished layer cake on Instagram or Facebook, tag me! I always love seeing my recipes dressed up for the holidays.
- Get in Touch: If you have any last-minute questions about ingredients or storage that weren’t answered above, don’t hesitate to reach out using the contact page here: Contact Me Here.
Thank you so much for letting this simple vanilla layer cake be part of your celebration. Happy Baking!
Print
Simple Vanilla Layer Cake
- Total Time: 50 min
- Yield: 8 servings 1x
- Diet: Vegetarian
Description
A straightforward vanilla cake recipe suitable for any celebration.
Ingredients
- 1 1/2 cups all-purpose flour
- 1 1/2 teaspoons baking powder
- 1/2 teaspoon salt
- 1/2 cup unsalted butter, softened
- 1 cup granulated sugar
- 2 large eggs
- 1 teaspoon vanilla extract
- 1/2 cup milk
- 1 cup heavy cream
- 2 tablespoons powdered sugar (for frosting)
Instructions
- Preheat your oven to 350 degrees F (175 degrees C). Grease and flour two 8-inch round cake pans.
- In a medium bowl, whisk together the flour, baking powder, and salt. Set aside.
- In a large bowl, beat the softened butter and sugar together until light and fluffy.
- Beat in the eggs one at a time, mixing well after each addition. Stir in the vanilla extract.
- Gradually add the flour mixture to the wet ingredients, alternating with the milk, beginning and ending with the flour mixture. Mix until just combined. Do not overmix.
- Divide the batter evenly between the prepared pans.
- Bake for 25 to 30 minutes, or until a wooden pick inserted into the center comes out clean.
- Let the cakes cool in the pans for 10 minutes before inverting them onto a wire rack to cool completely.
- For the frosting, whip the heavy cream until soft peaks form. Gradually add the powdered sugar and continue whipping until stiff peaks form.
- Once the cakes are completely cool, place one layer on a serving plate. Spread about one-third of the whipped cream frosting on top. Place the second layer on top and frost the top and sides of the cake with the remaining frosting.
Notes
- You can add a few drops of food coloring to the frosting if you want a different color.
- Use room temperature eggs and butter for better batter consistency.
- Prep Time: 20 min
- Cook Time: 30 min
- Category: Dessert
- Method: Baking
- Cuisine: American
Nutrition
- Serving Size: 1 slice
- Calories: 350
- Sugar: 30
- Sodium: 150
- Fat: 20
- Saturated Fat: 12
- Unsaturated Fat: 8
- Trans Fat: 0
- Carbohydrates: 40
- Fiber: 1
- Protein: 5
- Cholesterol: 80
Keywords: vanilla cake, layer cake, birthday cake, simple cake, cream frosting, Mothers Day Cakes