
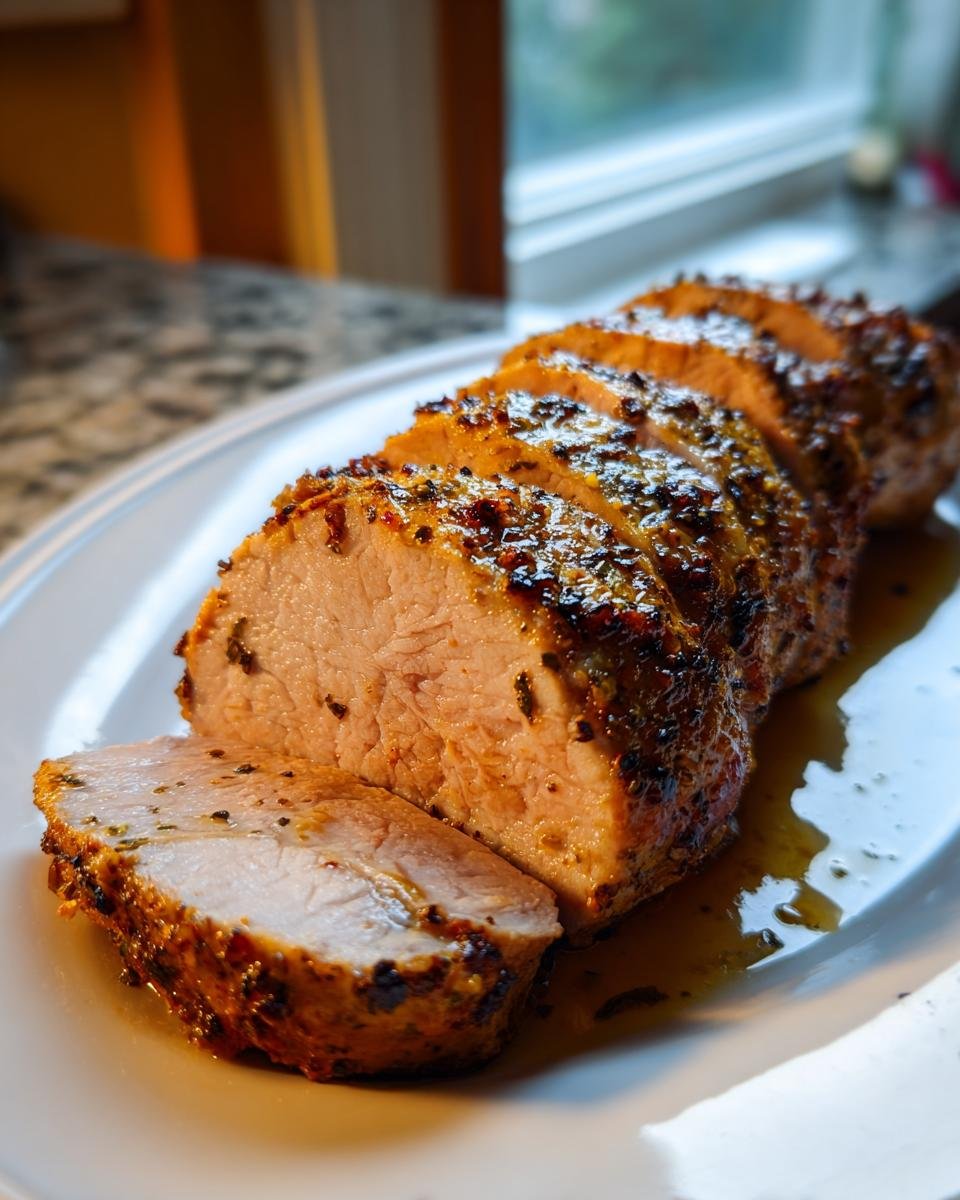
Oh my gosh, you guys! If you are anything like me, weeknights are a total sprint, right? You want something that tastes homemade and impressive, but you just don’t have an hour to stand over a stove. Well, I finally cracked the code for busy evenings, and it’s all thanks to my amazing electric pressure cooker! Seriously, this Instant Pot Garlic Pork Tenderloin is a lifesaver. It tastes like it simmered all day long—it’s so juicy and loaded with savory garlic and thyme—but it’s magically done in less than 30 minutes total. This recipe single-handedly saved my Tuesday night dinners, and I think it’s going to save yours too!
Why You Will Love This Instant Pot Garlic Pork Tenderloin
I’m telling you, once you see how fast this comes together, you won’t go back to the oven for pork tenderloin on a weekday. It’s just ridiculously good for how little effort you put in. If you’re looking for something quick that tastes gourmet, check out how fast we can whip up a stunning meal. You can even see other speedy meal ideas here: quick and easy recipes!
- It’s SO Fast: We are talking about having dinner on the table in basically 25 minutes total. Seriously, that’s faster than most takeout!
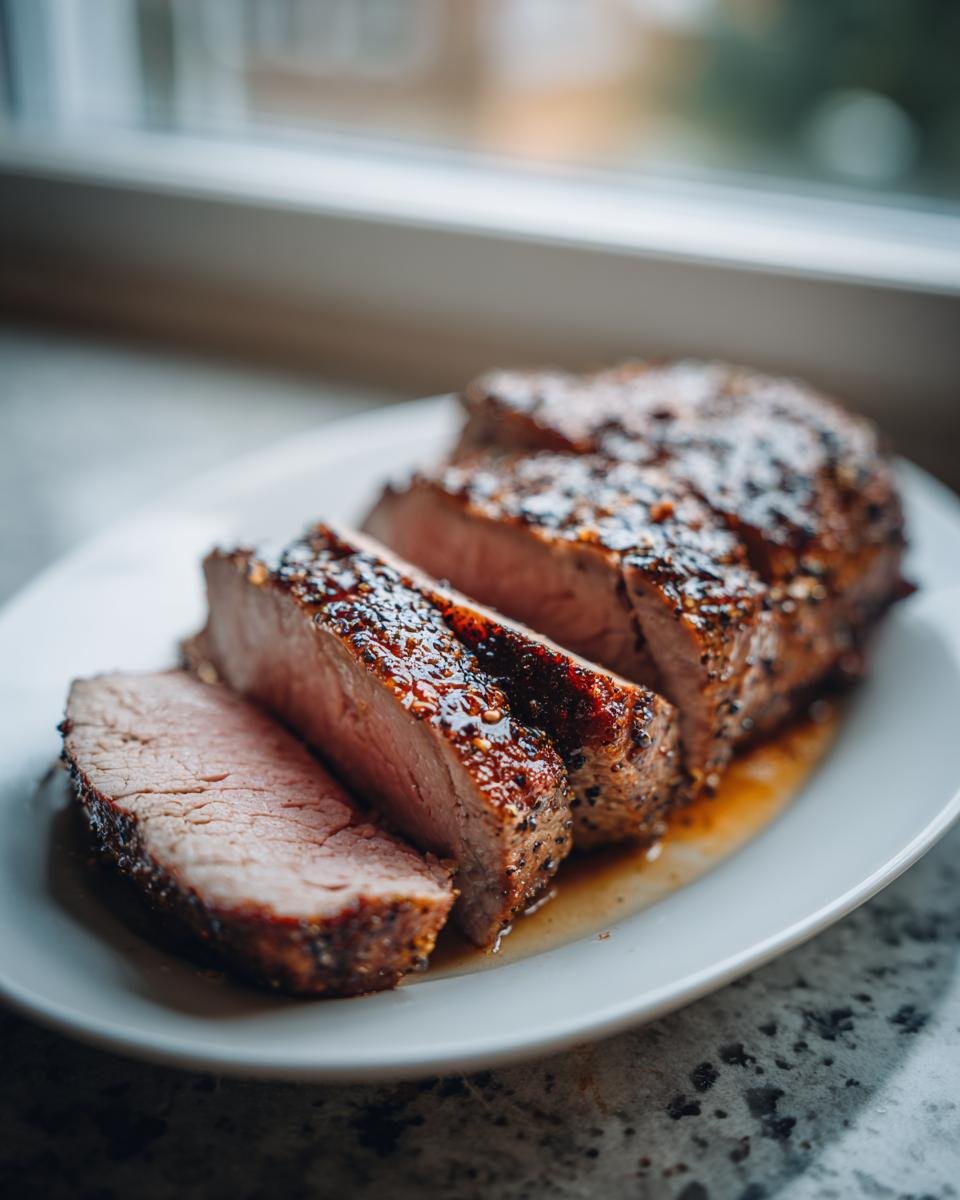
- Melt-in-Your-Mouth Tender: Pressure cooking locks in everything. The pork comes out unbelievably moist—no more dry, sad tenderloin here, I promise.
- Incredible Garlic Flavor: We sear that pork first, then build the garlic and thyme flavor right in the pot. That little bit of sauté time makes a huge difference in the final taste profile.
- Easy Cleanup: This is my favorite part! Everything happens right in the stainless steel pot. No splatters all over the stovetop, just rinse the pot when you’re done.
- Perfect for Beginners: If you’re new to the Instant Pot, this is your starter recipe. It’s hard to mess up because the machine does all the heavy lifting for you.
Ingredients for the Perfect Instant Pot Garlic Pork Tenderloin
Okay, now let’s talk about what you need to grab from the fridge and pantry. The best part about this savory dish is that it uses super simple ingredients you probably already have on hand, but they come together in a way that just tastes amazing. We aren’t doing anything fancy here; it’s all about the quality of the basics and making sure you measure right, which is how we build that trust in the recipe, you know?
For this recipe, you’ll need:
- One 1.5-pound pork tenderloin. Make sure it’s trimmed up nicely!
- A solid tablespoon of olive oil for searing. Don’t skimp here; that sear means flavor!
- One teaspoon of salt and about half a teaspoon of black pepper. Give it a good rub down.
- One teaspoon of dried thyme. This herb works so beautifully with pork and garlic.
- Four glorious cloves of garlic—and you really want these minced up fresh. It makes the sauce so much better than powder.
- Half a cup of chicken broth. This is what creates our wonderfully flavorful cooking liquid inside the pressure cooker.
That’s it! See? So easy. Just get those simple items together, and we are practically halfway to dinner time already. Remember, fresh garlic makes all the difference when you’re cooking something this quick!
Essential Equipment for Your Instant Pot Garlic Pork Tenderloin
So, before we start seasoning, let’s chat about what tools you absolutely need to pull this off perfectly. Since we are using the electric pressure cooker method, the star of the show is obviously the Instant Pot itself! I have a 6-quart model, and it works just fine for this size of tenderloin. If you have a bigger one, no sweat, the timing still works!
Beyond the main appliance, there are a couple of little helpers that make this recipe smooth sailing. Speaking of using the IP for other things, if you ever wondered about using it for side dishes, you should check out this neat Instant Pot potato salad idea!
Here is the gear you need within arm’s reach:
- Your Instant Pot (6-quart or larger): This handles the browning and the pressure cooking all in one go. That’s what makes it such a quick dinner powerhouse.
- Trivet or Steamer Rack: This is super important! We need to get that pork up out of the liquid so it steams perfectly instead of boiling. If you lost yours (don’t worry, I’ve done it!), almost any metal steamer basket will work in a pinch.
- Tongs: You’ll need these to handle the hot pork twice—once to sear it, and again to lift it out after it’s cooked.
- A Small Bowl for Seasoning: It’s just easier to mix your salt, pepper, and thyme together first before rubbing it onto the meat rather than shaking everything directly onto the counter.
- A Wooden Spoon or Silicone Scraper: This is crucial for the deglazing part. You need something safe for the inner pot liner to scrape up all those delicious browned bits after searing.
Having these items ready means the 10 minutes of prep time stays exactly at 10 minutes. We don’t want to be hunting for the trivet while the pot is screaming hot, right? Efficiency is key when you’re trying to get this delicious pork on the table fast!
Step-by-Step Instructions for Instant Pot Garlic Pork Tenderloin
Here is the exact order of operations I use every time I make this. Trust me, when you’re using a pressure cooker, following the right sequence is what separates a flavorful roast from a sad, flavorless piece of meat that gives you the dreaded “Burn” notice. If you’re new to the IP, you’ll find this method is incredibly straightforward. If you want some other really easy fixes while you wait, check out these quick bread recipes!
Preparing and Searing the Pork Tenderloin
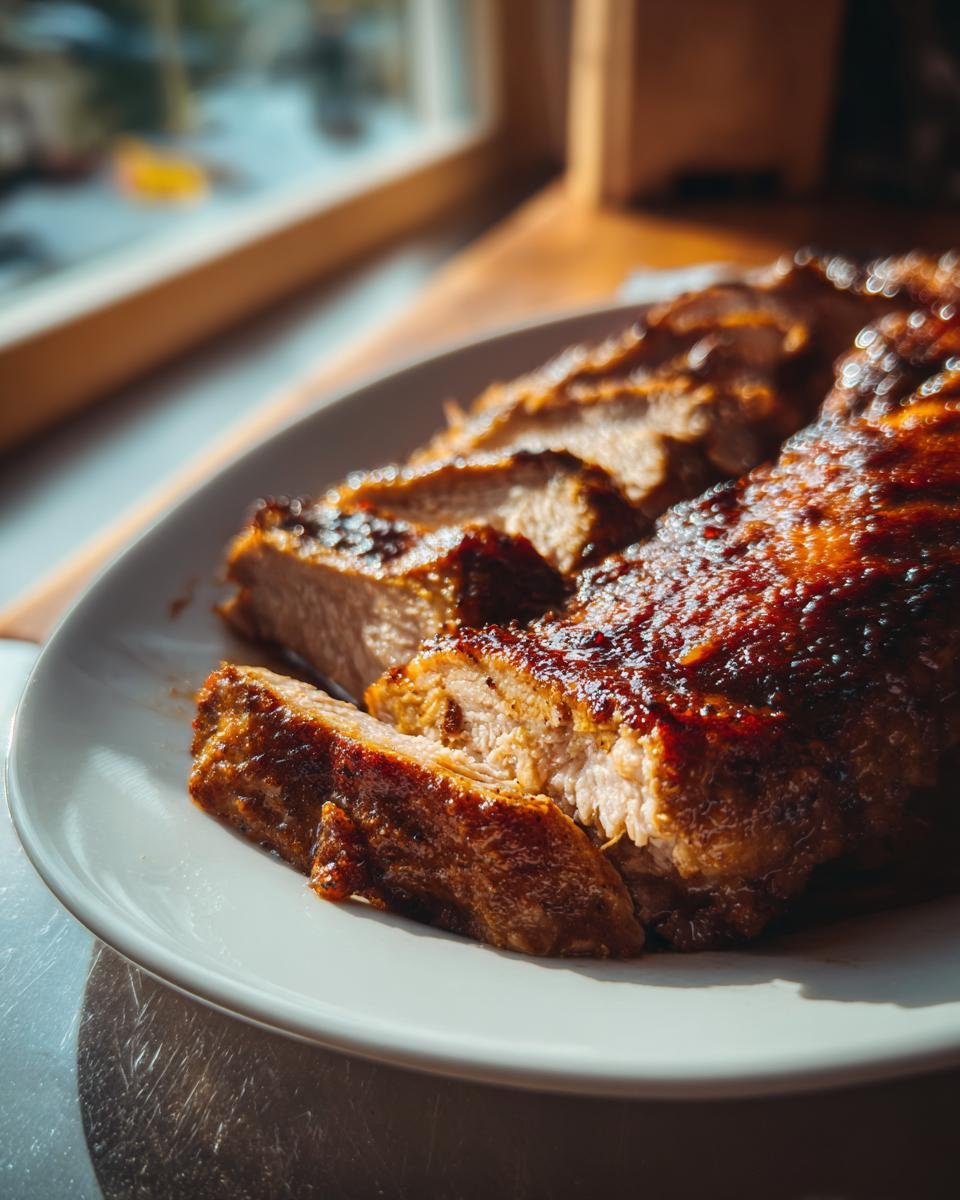
First things first: we need that gorgeous crust! Take your 1.5 lb pork tenderloin and pat it bone-dry with paper towels. This is one of those tiny steps that acts like seasoning—if it’s damp, it steams instead of sears, and we want that deep brown color for flavor! Rub it all over with your combined salt, pepper, and thyme mix. Next, set your Instant Pot to Sauté mode. Add that tablespoon of olive oil and when it shimmers, gently set the pork in. Sear it for about two minutes on each side. This step is what kicks our Instant Pot Garlic Pork Tenderloin up a notch.

Building the Flavor Base in the Instant Pot
Once all sides are beautifully browned, take the pork out and set it on a plate. Now, throw in those four cloves of minced garlic. You only cook this for about 30 seconds—any longer and it burns, and nobody wants burnt garlic flavor! Right after the garlic smells amazing, pour in that half-cup of chicken broth. Take your wooden spoon and aggressively scrape every single little brown bit off the bottom of the pot liner. That fond—those stuck bits—are pure flavor gold, and scraping them up is just called deglazing! It’s also the secret handshake to stop the dreaded “Burn” warning.
Pressure Cooking the Instant Pot Garlic Pork Tenderloin
Time to lock it in! Place your trivet inside the pot if you’re using one, and carefully lay your seared pork right on top of it. Secure the lid, make sure that valve is set to Sealing, and tell your Instant Pot to cook on High Pressure for exactly 8 minutes. When the time is up, don’t just open it! Let it come down naturally for 5 minutes—that’s the Natural Pressure Release (NPR) stage. After those five minutes, carefully manually release any extra hissing steam.
Resting and Serving Your Instant Pot Garlic Pork Tenderloin
Once the pin drops, open the lid away from your face (steam burns are no joke!). Use your tongs to remove the pork tenderloin. Pop it onto a cutting board. Now, this is non-negotiable for juiciness: let it rest for 5 full minutes before you slice into it. If you slice it right away, all those glorious juices you just created in the pressure cooker will run out onto the board. Resting lets those juices redistribute throughout the meat, guaranteeing that perfect slice every single time!
Tips for the Best Instant Pot Garlic Pork Tenderloin Results
Look, even with the best Instant Pot Garlic Pork Tenderloin recipe, sometimes things can go sideways if you skip the little expert checks. I’ve learned a few tricks over the years that help guarantee a perfect, juicy result, whether you’re a seasoned pressure cooker pro or you just dug your machine out of the cabinet.
First off, let’s talk herbs. Thyme is fantastic, but if you want to switch things up—maybe you already have some on hand—don’t hesitate to use fresh rosemary instead. Just use a little less, maybe three-quarters of a teaspoon of dried rosemary, since it has a stronger punch than thyme. It gives the pork a slightly earthier, woodsy flavor that is just divine, especially when paired with all that garlic!
You might also be wondering about checking the temperature, since the 8-minute cook time is based on a 1.5-pound tenderloin. If yours is fatter or thinner, the time changes a bit. The USDA recommended safe internal temperature for pork is 145°F. You must use a digital thermometer inserted into the thickest part of the meat (avoiding the trivet!). If it reads 145°F when you pull it out, you’re golden. Since we are doing that crucial 5-minute NPR, the temperature will creep up a couple of degrees while it rests, leaving you with tender, doneness-perfect meat.
Another thing I always suggest is making sure the broth you use isn’t straight-up salted. Most store-bought broths have a good amount of sodium already, and we added salt earlier when seasoning the pork. If you use low-sodium broth, you can always add a tiny pinch more at the end if it needs it. Nobody likes an overly salty dinner!
For more yummy garlic-focused mains that cook up beautifully, you should take a peek at my garlic butter lobster bites or maybe check out these garlic herb grilled shrimp recipes for summer nights!
Variations on the Instant Pot Garlic Pork Tenderloin
I love that this pork tenderloin recipe is basically a perfect blank canvas waiting for your favorite spices! While the garlic and thyme combo is my absolute go-to for a quick dinner, sometimes you just need to shake things up a little bit without adding any extra steps or fuss to the cooking process. These little tweaks are great for using up herbs you have sitting there or adding a tiny bit of sweetness to balance the savory garlic.
For one thing, if you like a tiny hit of sweetness with your savory pork—and I mean just a tiny bit—try whisking about a teaspoon of honey right into your chicken broth before you add it to the pot. It dissolves perfectly and gives the pork a really lovely, subtle glaze as it cooks. It doesn’t make it sticky or sweet, it just rounds out the flavor!
Another fun swap that makes a huge difference is changing up the dried herb. I mentioned rosemary as a great substitute in the last section, but you could also try dried sage. Sage and pork are just meant to be best friends! Just use about three-quarters of a teaspoon of dried sage alongside the thyme, or use it all on its own.
If you’re feeling really ambitious (and who has time for this on a Tuesday, honestly?), you can completely change the sauce profile after the pork is cooked and rested. Instead of just letting the broth sit in the pot, you could whip up a quick sauce. If you want something bright and fresh that cuts through the richness of the meat, you absolutely have to try making a homemade chimichurri sauce to drizzle over the top. Trust me, the fresh parsley, garlic, and vinegar are an incredible contrast to the warm, savory pork you just made in the pressure cooker. It feels fancy but takes less than five minutes to toss together!
See? The beauty of using the Instant Pot for this pork tenderloin is that the appliance keeps the meat perfect, so you have time to experiment with flavor boosters on the side!
Serving Suggestions for Your Instant Pot Garlic Pork Tenderloin
Now you have this beautifully tender, perfectly garlicky pork tenderloin—what comes next? You can’t serve a masterpiece like this on its own, right? We need some worthy companions on that plate! Since the pork is so tender and flavorful, I always lean toward side dishes that are either creamy and comforting or roasted until they soak up a little bit of that delicious pork flavor. It makes for such a satisfying, hearty dinner without having to spend a billion hours cooking three different things!
When I make this, I usually aim for something starchy to soak up any juices left in the pan, or maybe something green that’s super easy to roast while the pork is resting. For seriously impressive sides that are secretly simple, I have two recipes I turn to constantly.
Creamy Sides to Complement the Garlic Pork
For pure comfort, nothing beats a creamy side dish, especially when you have that savory garlic aroma hanging around the kitchen. You can use the pan juices from the Instant Pot (or just whip up the sauce separately) and pour it over anything soft and creamy.
My absolute favorite thing to serve alongside this is mashed potatoes, but to keep things *slightly* lighter, I sometimes substitute cauliflower. My recipe for flavorful roasted garlic mashed cauliflower is amazing because it gets that roasted garlic note which ties right back into the pork!
If you prefer the classic route, regular mashed potatoes are always a win. Just make sure you use plenty of butter and a touch of cream cheese to keep them rich. It’s a perfect pairing for mopping up the juices.
Roasted Vegetable Counterparts
If you need something that feels healthier but still roasts up beautifully alongside your main meal prep, roasted vegetables are the way to go. They need just a drizzle of oil, some salt, pepper, and maybe some dried herbs, and they go into the hot oven while the pork is pressure cooking.
For the best flavor that matches the pork, you absolutely have to try my recipe for delicious garlic herb roasted potatoes. Seriously, potatoes love garlic almost as much as pork does! If you aren’t doing potatoes, then broccoli or asparagus tossed with lemon zest are fantastic, bright additions.
You can roast those veggies while the pork is searing or while it’s resting—it’s that easy. Since the Instant Pot is handling the protein, the oven is totally free for perfectly crisp sides!
Simple Grains for Soaking up Sauce
If you just need something quick on its own without having to roast or mash, plain white rice or brown rice works wonderfully. Cook it up while the pork is under pressure, and you have a ready-made bed for that tender slice of pork.
Another great, slightly healthier grain option is quinoa. It cooks up really fast on the stovetop, often in about 15 minutes, which is right when you’re waiting for that 5-minute Natural Pressure Release to finish anyway. Just cook it with a little bit of your leftover chicken broth instead of water for an extra layer of savory flavor. Easy peasy!
Storage and Reheating Instructions for Leftover Instant Pot Garlic Pork Tenderloin
Oh man, if you miraculously end up with leftovers of this Instant Pot Garlic Pork Tenderloin, you are in luck! This pork reheats like a dream, and the garlic flavor actually gets a little deeper overnight. That’s the best kind of leftover, isn’t it?
But you have to store it right! The key to keeping it juicy is moisture retention, so forget just tossing it into a flimsy plastic bag or wrapping it loosely in foil. That’s a recipe for dry, sad pork the next day.
How to Store Your Leftover Pork Properly
First, make sure you slice the pork before you store it, but don’t slice the whole thing if you don’t need to. If you know you’ll only eat half tomorrow, just slice what you think you’ll need for that meal. Thicker slices or chunks tend to hold moisture a bit better than thin-sliced pieces.
Once sliced, you want to put that pork into a really good airtight container. I’m picky about this—I use containers where the lid seals really tight, maybe even one with a silicone gasket. Pack the pork in there, and if you have any of those lovely pan juices left (hopefully you saved a drizzle!), pour a tiny spoonful over the meat before you seal it up. That extra bit of liquid is your insurance policy against dryness!
In the fridge, it keeps beautifully for about three to four days. I wouldn’t push it past day four, just because pork is tricky, and we want to keep things safe!
Reheating Methods for Maximum Juiciness
I know what you’re thinking: “Can I just nuke it for 30 seconds?” Sure, you *could*, but you’ll sacrifice that amazing texture we worked so hard to achieve with the pressure cooker. If you want that pork to taste almost as good as fresh, ditch the microwave for the first reheating session.
The Stovetop Simmer (My Top Recommendation)
This is the best way—it’s fast and adds moisture back in. Grab a small saucepan and put in just a splash of chicken broth—maybe two tablespoons for a serving of leftovers. Heat it up over medium-low heat until it’s just barely simmering. Then, place your sliced pork right into that gentle broth bath. Let it warm up slowly, turning the slices once or twice, until it’s hot all the way through. It steams gently and stays ridiculously tender. Avoid boiling it at all costs—that’s how you get tough pork!
Using the Instant Pot Again (If You Have Time)
If you have your Instant Pot out anyway, you can use it again! Place the slices on the trivet just like before, add about half a cup of broth to the bottom of the pot, and steam it on Manual/High Pressure for just 1 minute—that’s it! Quick release immediately afterwards. This works great if you’re reheating a larger portion.
What to Avoid When Reheating
The main thing to avoid is high, dry heat. Do not put those slices on a scorching hot baking sheet or blast them in the toaster oven without covering them. That direct, intense heat will suck the moisture right out of the meat, turning it tough and stringy, no matter how perfectly you cooked it the first time around. If you absolutely must use the microwave, sprinkle a few drops of water over the pork before covering it loosely with a paper towel. It won’t be as good as the stovetop, but it’s better than nothing in a pinch!
Frequently Asked Questions About Instant Pot Garlic Pork Tenderloin
I totally get it—when you’re trying a new recipe, especially one using a gadget like the Instant Pot, you always have a few questions swirling around. I compiled the things people ask me most often about getting this Instant Pot Garlic Pork Tenderloin just right. Once you know these little secrets, this becomes the easiest, most dependable quick dinner you’ll ever make!
Can I skip the searing step when making this pressure cooker pork?
Oh, you really shouldn’t skip it! I know searing adds about four minutes to our prep time, but those four minutes are doing the heavy lifting for flavor. Searing the oil-rubbed pork creates that beautiful, browned crust. That crust gets stuck to the bottom of the pot, and when we deglaze, those browned bits become the foundation of our savory garlic sauce. If you skip it, you get plain steamed pork floating in broth, and honestly, that’s just sad. It turns into just another generic baked meat instead of the flavorful main course it should be!
What internal temperature should the pork reach for safety and texture?
This is a super important question for any pork recipe! For safety, you absolutely must get the pork up to 145°F. But here’s the trick for texture: pull the pork out of the Instant Pot when the thermometer reads 140°F or 142°F. Remember I mentioned the resting step? That five minutes of resting time is when the temperature continues to rise (that’s called carryover cooking), securely hitting that 145°F mark while also letting the juices settle back in. If you wait until it hits 145°F inside the pot, it will easily be overcooked by the time you cut it!
What happens if I don’t use the trivet?
If you skip the trivet, your pork tenderloin will sit directly in that half-cup of simmering broth, and frankly, it will end up boiling instead of steaming under pressure. While it will cook through, it won’t have that pleasant, firm texture we love; it’ll be softer and might even absorb too much liquid. Plus, if the meat touches the bottom of the pot directly, especially with the spices we used, you risk setting off that dreaded Instant Pot “Burn” warning. The trivet is non-negotiable for achieving that perfect, tender result in our pressure cooker pork recipe.
Can I double the recipe for a bigger family meal?
Yes, you definitely can, but you have to adjust your cooking time! The fat content stays the same, so the searing time doesn’t usually change much, but the thicker, heavier piece of meat needs more time under pressure. If you double the meat (so you have about 3 pounds total), bump your High Pressure cook time up from 8 minutes to 12 minutes. And here’s a big maintenance tip: always allow for a full 10-minute Natural Pressure Release instead of just 5 minutes when you double the meat size. This allows the center pieces to cook through evenly.
Does this recipe work well for meal prepping?
It’s fantastic for meal prepping! Since this pork is so moist due to the pressure cooking method, it holds up really well in the fridge. I find that slicing it after the first day makes it easier to portion out for lunches. If you are prepping meals for the whole week, just make sure you store the slices submerged slightly in a bit of broth, as I talked about earlier, to keep that moisture locked in. It’s the ultimate healthy, savory, and easy-to-pack make-ahead meal!
Nutritional Snapshot of This Quick Dinner
When I first developed this recipe, I was trying to keep things light since pork tenderloin is already so lean, but I really wanted that savory garlic punch. I was honestly shocked when I ran the numbers because, even with the olive oil sear, it comes in surprisingly low in calories while still packing an absolute punch of protein! It’s truly a great, feel-good meal for any night of the week.
Here is a quick look at what an average 4-ounce serving looks like. Remember, these are educated guesses based on standard ingredient values, so your specific sodium or fat content might vary slightly based on what brand of broth you use, of course!
- Calories: Around 250 per serving—that’s a steal for a full main course!
- Protein Power: A whopping 35 grams! This keeps you full for hours.
- Fat Content: Very reasonable, sitting around 10 grams total.
- Carbohydrates: Super low, right around 2 grams, making this friendly for lower-carb meals.
It’s low in sugar and satisfyingly low in saturated fat, which is exactly what I aim for when creating these fast, healthy main courses. For more ideas geared towards healthier eating, check out this great smoothie replacement guide!
Share Your Instant Pot Garlic Pork Tenderloin Success
Okay, I’ve shared all my secrets for getting this amazing Instant Pot Garlic Pork Tenderloin tender and juicy on a hectic weeknight. Now it’s your turn! I absolutely live to hear how recipes turn out for you at home. Did you use rosemary instead of thyme? Did you try a different side dish? I want to know everything!
When you make this, please stop back over here and drop a star rating under the recipe card—it really helps other busy cooks decide if they should give it a try! If you take a picture of your perfectly seared pork before you put it in the pot, or a snap of the final beautiful slices resting on the cutting board, tag me on social media! You can send me all your feedback and recipe photos right here: let’s connect! Happy cooking, friends, and enjoy your stress-free dinner!
Print
Instant Pot Garlic Pork Tenderloin
- Total Time: 25 min
- Yield: 3 servings 1x
- Diet: Low Fat
Description
A simple recipe for cooking tender pork tenderloin quickly using an electric pressure cooker.
Ingredients
- 1.5 lb pork tenderloin
- 1 tablespoon olive oil
- 1 teaspoon salt
- 0.5 teaspoon black pepper
- 1 teaspoon dried thyme
- 4 cloves garlic, minced
- 0.5 cup chicken broth
Instructions
- Pat the pork tenderloin dry with paper towels.
- Rub the pork with olive oil, salt, pepper, and thyme.
- Set the Instant Pot to Sauté mode and add the seasoned pork. Brown on all sides, about 2 minutes per side.
- Remove the pork and set aside. Add the minced garlic to the pot and cook for 30 seconds until fragrant.
- Pour in the chicken broth and scrape up any browned bits from the bottom of the pot.
- Place the trivet in the Instant Pot, if you have one, and place the pork on top.
- Secure the lid and set the valve to sealing.
- Cook on High Pressure for 8 minutes.
- When cooking finishes, allow a Natural Pressure Release for 5 minutes, then manually release any remaining pressure.
- Remove the pork and let it rest for 5 minutes before slicing.
Notes
- You can use fresh rosemary instead of thyme for a different flavor.
- If you do not have an Instant Pot, you can sear the pork in a skillet and then roast it in the oven at 400°F (200°C) for 15-20 minutes.
- Prep Time: 10 min
- Cook Time: 15 min
- Category: Main Course
- Method: Pressure Cooking
- Cuisine: American
Nutrition
- Serving Size: 4 oz cooked
- Calories: 250
- Sugar: 1
- Sodium: 350
- Fat: 10
- Saturated Fat: 3
- Unsaturated Fat: 7
- Trans Fat: 0
- Carbohydrates: 2
- Fiber: 0
- Protein: 35
- Cholesterol: 90
Keywords: Instant Pot, pork tenderloin, garlic, pressure cooker, quick dinner, easy pork