
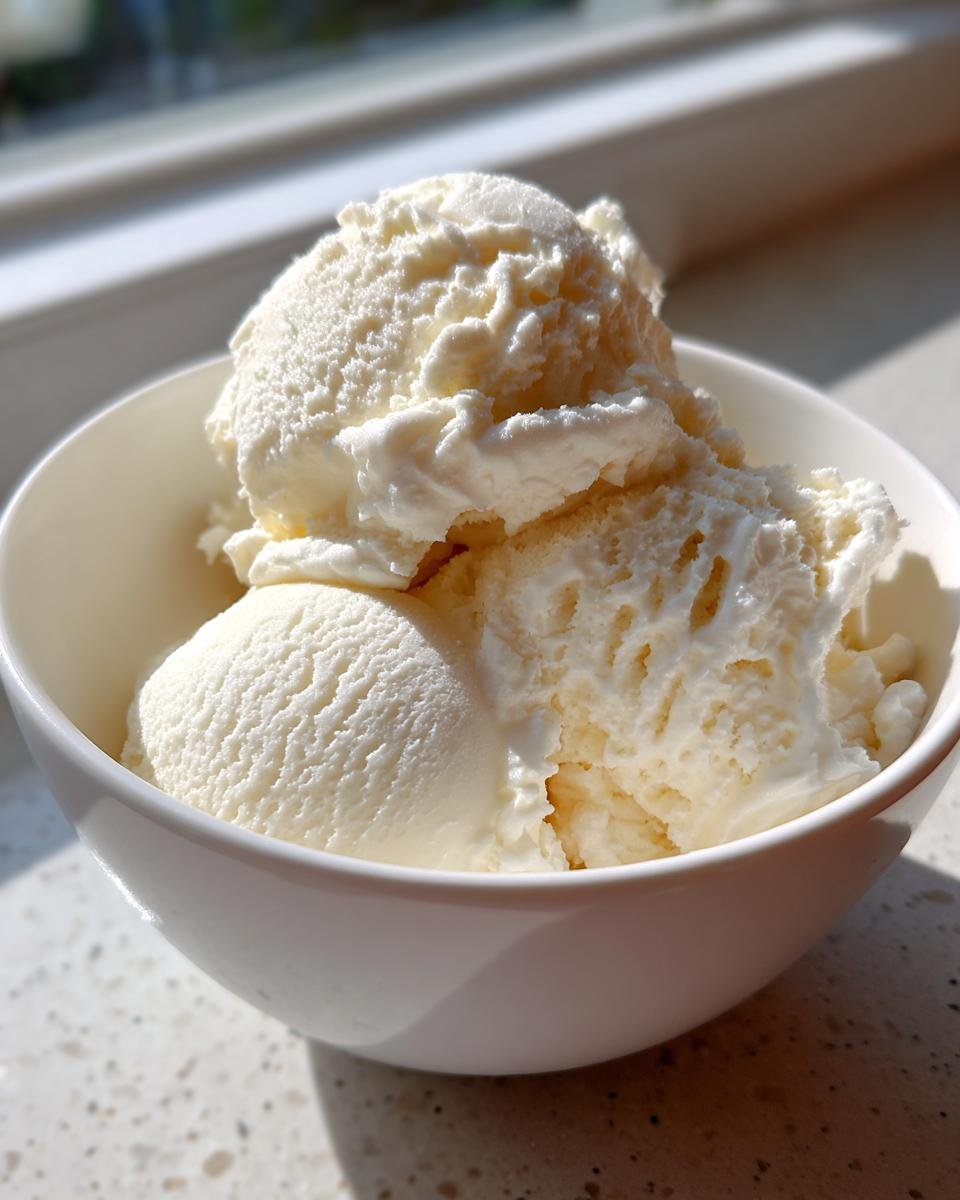
Oh man, there is just *nothing* better than digging a spoon into truly great homemade ice cream, is there? Forget those airy, mass-produced tubs! I spent what feels like a million summers testing recipes until I nailed this one—the perfect foundation. This simple vanilla ice cream base is my absolute go-to. Trust me, once you master this creamy starting point, you unlock a whole world of amazing Ice Cream Desserts. We’re talking about a base so rich and smooth, it practically guarantees success whether you’re adding sauce, swirls, or just eating it straight from the tub. It’s the best lesson in how quality ingredients pay off!
Why This Simple Vanilla Base Makes the Best Ice Cream Desserts
You might think vanilla is boring, but honestly, this base proves otherwise. When vanilla is this good, it’s the star! It’s all about building reader confidence so you know you’re doing things right.

- It’s ridiculously simple—no complicated tempering or cooking needed, which means less chance of a kitchen disaster!
- The flavor profile is pure and rich thanks to the cream and real vanilla.
- The texture you get after churning is that perfect density—no one wants icy Ice Cream Desserts.
- Plus, this recipe scales up or down like a charm. It truly is the backbone for all the awesome Ice Cream Desserts you’re about to dream up.
Ingredients Needed for Your Vanilla Ice Cream Desserts Base
Okay, measuring is key here, especially for frozen things! Don’t try to eyeball the sugar or you’ll end up with a rock instead of delightful Ice Cream Desserts. Keep everything nice and cold before you start mixing.
- 2 cups heavy cream – make sure it’s full fat, that’s essential!
- 1 cup whole milk – we need that for balance.
- 3/4 cup granulated sugar – measure this one carefully.
- 1 tablespoon vanilla extract – use the pure stuff if you can.
- Pinch of salt – just a tiny bit to wake up all the sweet flavors.
Now, for the fancy trick: If you want that deep, gorgeous flavor? Steep one whole vanilla bean pod right in the cream while it chills. Just remove that pod right before you churn it. That little step makes your finished Ice Cream Desserts taste like they came from a fancy European shop!
Step-by-Step Instructions for Perfect Ice Cream Desserts
Now we get to the fun messy part! Don’t rush this process, especially the waiting bits. That resting time is what separates a grainy dud from the smoothest base for your glorious Ice Cream Desserts.
Mixing and Dissolving the Base
Grab a big bowl—and I mean big, because you don’t want splashes everywhere when you start whisking! Gently pour in your heavy cream, milk, sugar, vanilla, and that pinch of salt. You need to whisk this until you can’t feel any sugar granules sticking to the bottom of the bowl. If you skip this bit, your final scoop will taste gritty. Trust me, you want that perfect dissolution for truly premium Ice Cream Desserts.
Chilling: The Key to Quality Ice Cream Desserts
This step is non-negotiable. Cover that bowl really well—plastic wrap pressed tight against the surface is best—and walk away. You need to chill this mixture for a minimum of two hours, but honestly, overnight is better. The colder the base goes into the machine, the smaller the ice crystals will be when it freezes. Less chilling equals bigger crystals, and nobody wants chunky ice cream!
Churning and Hardening for the Best Ice Cream Desserts
Once it’s icy cold, pour it into your machine and churn according to whatever gadget you bought—usually about 20 to 30 minutes until it looks like thick soft-serve. Here’s my personal rule: stop right when it looks ready. If you churn too long, the fat molecules can start to break down, and you lose that luxurious, fresh mouthfeel. Scoop that soft stuff into a solid, airtight container. Press another piece of plastic wrap right onto the surface—this prevents those freezer burns—and let it freeze for another 2 to 4 hours to firm up properly before you serve it up.
If you absolutely don’t have a machine, it’s way more work, but you can pour it into a shallow pan and stir it hard every 30 minutes for three hours until it sets up firm enough for mixing in things like caramel swirl or maybe even some of that amazing blueberry cheesecake topping I showed you how to make right here!
Expert Tips for Next-Level Ice Cream Desserts
So, you’ve got the cold base sitting pretty in the freezer. Now what separates your batch from everybody else’s? It’s all about the quality and when you add the fun stuff! For vanilla flavor, ditch the imitation stuff; real extract or even better, that vanilla bean trick I mentioned, makes the whole vibe richer.
If you’re planning to add swirls later—like fudge or caramel—you need to account for sweetness. Heavy mix-ins can make the final **Ice Cream Desserts** taste overly sweet because the sugar content gets layered. I usually cut back my base sugar by about one tablespoon for every cup of high-sugar swirl I plan to add later.
Texture control is everything, too. If you’re adding anything chunky like nuts or chocolate chips, only wait until the last five minutes of churning, *or* gently fold them in right before that final hardening stage. You want the ice cream to be just firm enough that the chunk sits perfectly without sinking to the bottom. It keeps things interesting! Speaking of layering things in, you should really check out my notes on making that amazing tiramisu ice cream, because the custard technique there is gold.
Creative Ways to Serve Your Vanilla Ice Cream Desserts
Listen, a scoop in a bowl is great, but we are talking top-tier Ice Cream Desserts here, right? Don’t just stop after it hardens up; that’s just the starting line! If you’ve got some of my best banana bread—you know, the truly moist loaf I showed you how to make right here—slice it thick, toast it lightly, and top it with a huge scoop. Seriously, the warm, dense bread with cold, creamy vanilla? That’s heaven on a plate.
You can also go retro with artisanal sodas for killer floats. Forget boring root beer sometimes; try a high-quality cream soda or even just sparkling water with a splash of raspberry syrup if you want something lighter!
And the ultimate test of quality? Warm brownies. If your vanilla ice cream melts slowly into the gooey chocolate edges without turning into soup instantly, you did the chilling and churning right. It’s the best way to celebrate a successful batch of homemade Ice Cream Desserts.
Storage and Reheating Instructions for Homemade Ice Cream Desserts
So you nailed the churning process! Now we have to protect our beautiful creation from freezer burn and ice crystals—they are the sworn enemy of smooth Ice Cream Desserts.
The number one rule for storage: airtight all the way! After you get that soft-serve quality ice cream into your freezer-safe container, take a piece of plastic wrap and press it *directly* onto the surface of the ice cream. This seals off the air space and stops those nasty ice crystals from forming. Then you put the lid on tight.
And please, don’t try to reheat your ice cream! When I say ‘reheating,’ I just mean you need patience. When you want a scoop, pull that container out of the deep freeze for about 5 to 10 minutes. That gives it time to soften just a bit so your scooper glides right through. Perfect, creamy scoops every time!
Ingredient Notes and Substitutions for Ice Cream Desserts
When you’re making something this foundational for all your future Ice Cream Desserts, you can’t just swap things out willy-nilly! I get asked all the time if you can use half-and-half instead of heavy cream. Nope! I’m sorry, but you really can’t. The low fat content in half-and-half won’t give you that rich, necessary structure, and you’ll end up with something thin and icy that definitely won’t hold up to any toppings.
Sweeteners are tricky, too. If you try to swap out the granulated sugar for something like stevia, you need to know that sugar isn’t just for sweetness; it lowers the freezing point! If you drastically cut the sugar, your ice cream will freeze rock hard, like a block of ice. You can check out some of my friends’ work on dairy-free alternatives if you need to go that route, but for this classic vanilla, stick to the sugar specified.
Stick to whole milk, too! Low-fat milk just doesn’t give you the creaminess you need for truly comforting Ice Cream Desserts. It might take a bit more patience to find the right ingredients, but the payoff is huge.
Frequently Asked Questions About Making Ice Cream Desserts
I knew you’d have questions! Honestly, the first few times I made ice cream, I was so nervous about getting the texture just right. It’s good to be cautious when you’re dealing with something so delicious. Here are the things people ask me most often about making their own frozen treats!
What is the best way to prevent ice crystals in my homemade ice cream desserts?
This is the secret sauce to good homemade ice cream! The primary method is getting that base mixture as cold as humanly possible before it even hits the churner; that’s why we chill it for hours. But when it’s done churning and you move it to the freezer for hardening? You have to stop the air from reaching the surface. Press a piece of plastic wrap or parchment paper directly onto the surface of the soft ice cream before putting the lid on. That eliminates the air gap where moisture collects and turns into those awful crunchy crystals! Stick to that, and your frozen dessert will stay unbelievably smooth.
Can I make this recipe without an ice cream maker?
Yes, you absolutely can, but you have to be prepared to babysit it a bit! I know not everyone has the extra appliance space, so don’t sweat it. Just refer back to the notes in the main instructions. You need to pour the chilled mixture into a shallow metal pan and put it in the freezer. Then, take it out every 30 minutes for about three hours and beat it like crazy with a whisk or a handheld mixer. It takes effort, but it mimics what the churning process does by breaking up the ice as it forms. It’s a bit of work, but it absolutely yields a scoopable result for your ice cream desserts.
Honestly, if you are going to make ice cream often, it’s worth investing in a decent machine, but this base is robust enough to handle the manual stirring process just fine!
Recipe Details and Nutritional Estimates
This vanilla base is fast to pull together, but you do have to respect the waiting time! I know waiting for something this good feels impossible, but those chilling and hardening steps are the difference between soft-serve and true, scoopable ice cream.
Here’s a quick snapshot of the commitment involved in making this amazing frozen dessert:
- Prep Time: 15 min (Just mixing!)
- Total Time: 2 hr 45 min (Mostly hands-off chilling)
- Yield: About 1 quart
And because I know some of you are tracking macros while enjoying your favorite ice cream desserts, here are the estimated numbers based on a standard half-cup serving. Keep in mind these are just guiding figures since we aren’t using industrial formulas, but they should give you a good idea!
Estimated Nutritional Data (Per 1/2 cup serving):
This is what my best calculations show for this rich vanilla base:
- Calories: 350
- Fat: 25g
- Carbohydrates: 32g
- Protein: 4g
It’s worth noting that the fat content comes from that rich cream, which helps keep the texture smooth and prevents it from freezing rock solid. It’s a necessary component for a fantastic frozen dessert!
Print
Simple Vanilla Ice Cream Base
- Total Time: 2 hr 45 min
- Yield: About 1 quart 1x
- Diet: Vegetarian
Description
A basic recipe for homemade vanilla ice cream.
Ingredients
- 2 cups heavy cream
- 1 cup whole milk
- 3/4 cup granulated sugar
- 1 tablespoon vanilla extract
- Pinch of salt
Instructions
- Combine the heavy cream, whole milk, sugar, vanilla extract, and salt in a medium bowl.
- Whisk the mixture until the sugar is completely dissolved.
- Chill the mixture in the refrigerator for at least 2 hours, or until very cold.
- Pour the cold mixture into your ice cream maker.
- Churn according to the manufacturer’s instructions, usually 20 to 30 minutes, until the ice cream is the consistency of soft-serve.
- Transfer the soft ice cream to an airtight container.
- Freeze for an additional 2 to 4 hours to firm up before serving.
Notes
- For a richer flavor, steep one vanilla bean pod in the cream mixture while chilling, then remove before churning.
- If you do not have an ice cream maker, you can freeze the mixture in a shallow pan, stirring vigorously every 30 minutes for the first 3 hours.
- Prep Time: 15 min
- Cook Time: 0 min
- Category: Dessert
- Method: Churning
- Cuisine: American
Nutrition
- Serving Size: 1/2 cup
- Calories: 350
- Sugar: 30
- Sodium: 30
- Fat: 25
- Saturated Fat: 15
- Unsaturated Fat: 10
- Trans Fat: 1
- Carbohydrates: 32
- Fiber: 0
- Protein: 4
- Cholesterol: 90
Keywords: ice cream, vanilla, frozen dessert, homemade ice cream, simple dessert