
Is there anything more satisfying than that perfect, salty, cheesy crunch? I swear, when that craving hits, nothing else will do! While I love some store-bought options for convenience, trust me when I say these Homemade Cheese Crackers blow any boxed version straight out of the water. I perfected this recipe years ago because my pantry was empty one rainy afternoon, and I just couldn’t stand settling for chips. Now, this savory little snack feels like cheating because it’s so easy and tastes incredibly fresh. You absolutely have to try these—they disappear instantly!
Why You Will Love These Homemade Cheese Crackers
- They have the most satisfying, airy crunch imaginable.
- You control the cheese! Go wild with sharp cheddar or mix it up.
- Way less sodium than the stuff that comes in a box.
- Baking them fills your house with the best savory smell.
- The chilling time is the perfect excuse to put your feet up!
Essential Ingredients for Perfect Homemade Cheese Crackers
This recipe keeps things wonderfully simple, which is exactly how I like it when I’m whipping up a batch of Homemade Cheese Crackers. We focus on high-quality components because there aren’t many places for mediocre ingredients to hide here. The secret weapon, as you’ll see below, is making sure everything stays cold while we’re mixing it up.
Here’s the lineup:
- 1 cup all-purpose flour
- 1/2 teaspoon salt
- 1/4 teaspoon baking powder
- 1/2 cup (1 stick) cold unsalted butter, cut into small pieces
- 1 cup sharp cheddar cheese, shredded
- 2 tablespoons cold water
- 1 large egg white, lightly beaten (for brushing)
Ingredient Notes and Substitutions for Homemade Cheese Crackers
A word on that cheese: please, please use sharp cheddar! Mild cheddar just doesn’t give that necessary flavor punch we want in our savory snack. If you must substitute, you can swap half for Parmesan, but make sure it’s freshly grated. Pre-shredded stuff is coated in starch that messes with the texture. And remember that water? It needs to be ice cold—helps keep the butter cold too, which is key for that flaky outcome. Don’t even try to use warm water; we are aiming for flaky, not tough!
The Simple Steps to Making Your Homemade Cheese Crackers
When you see all these steps laid out, it looks like a lot, but I promise you, this process flies by! It’s really just mixing, chilling, rolling, and baking. We’re leaning hard on that cold butter working its magic in the oven to create separation and crunch. If you’re looking for some more inspiration on getting baked goods super crispy, check out my one secret for crispy perfection—it really applies here!
Preparing the Dough for Homemade Cheese Crackers
First, marry the dry stuff—flour, salt, and baking powder—in a big bowl. Then comes the cold butter. This is where you need your fingertips or a pastry blender. You are “cutting in” that butter until the whole thing looks like coarse meal, no bigger than tiny peas. Now, toss in that shredded sharp cheddar and mix it in so it gets coated in the flour. Finally, trickle in that ice-cold water, just until the dough decides it wants to hold hands and form a ball. Stop immediately! Seriously, don’t knead it. Wrap it up tight and let it chill for at least 30 minutes in the fridge.
Rolling, Cutting, and Baking Your Homemade Cheese Crackers
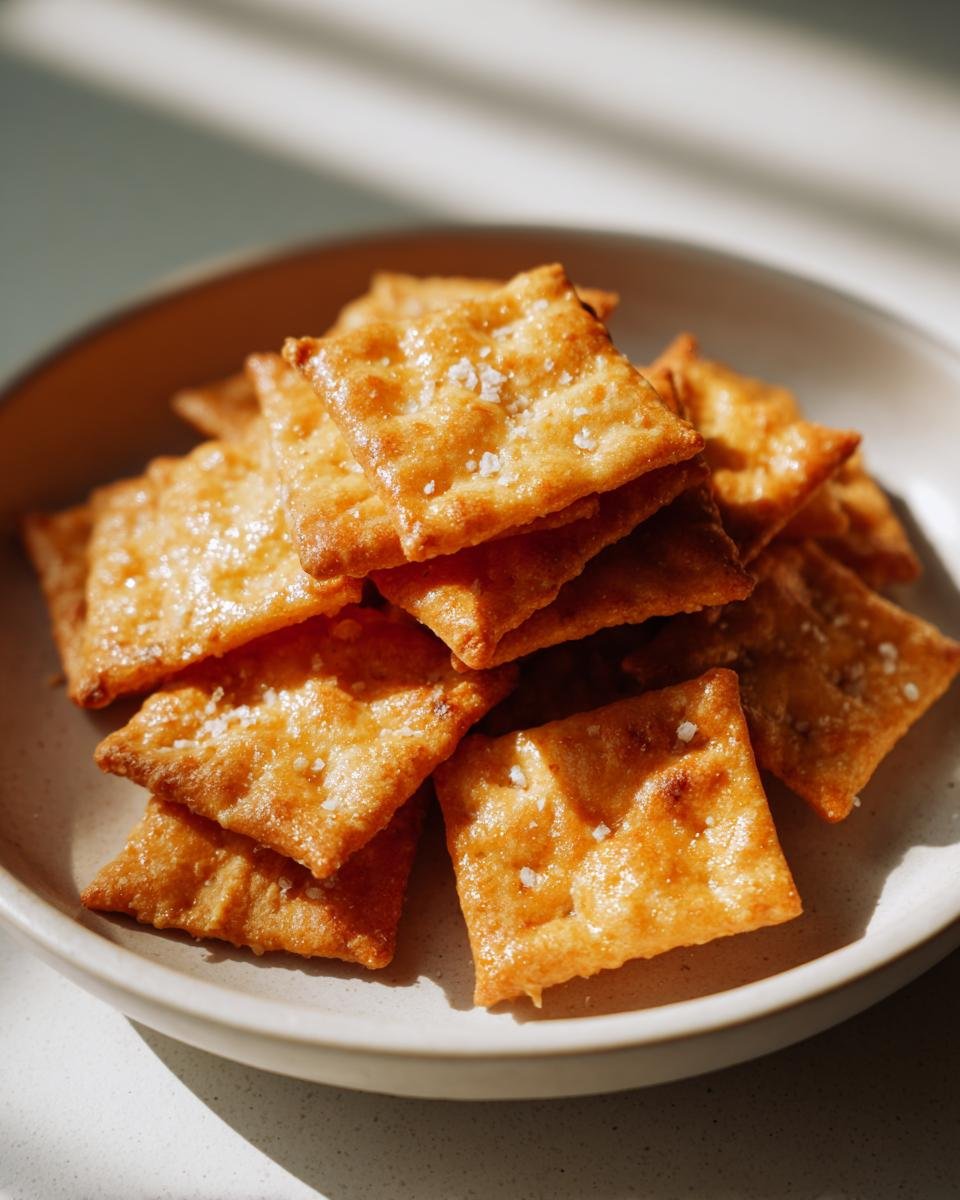
Preheat your oven to 375 degrees F while the dough is chilling. Get your sheets ready with parchment paper; it saves so much mess! Once chilled, dust your counter lightly—we need this dough paper-thin, about 1/16 of an inch. If it’s too thick, it won’t be crispy enough for our Homemade Cheese Crackers! Roll it, cut out your little squares or fun shapes, and make sure you prick each one a couple of times with a fork so they don’t puff up like balloons. Brush them lightly with that separated egg white—that’s what gives them that lovely golden sheen. Bake them for 10 to 14 minutes. You want edges that look just barely tanned.

Tips for Achieving Ultimate Crispness in Homemade Cheese Crackers
The difference between a good cheese cracker and an absolutely addictive one is pure crispness. If they come out soft, you just didn’t listen to the butter! First, you *must* roll the dough thin—thinner than you think is safe. If you can see your countertop clearly through the dough when you roll it, you’re probably doing it right. Thin dough equals maximum crispness after baking.
Second, keep your oven hot and steady at 375°F. If your oven runs cool, they bake slower and get tough instead of crisp.
My biggest tip, which I learned the hard way, is the cooling process. Don’t touch them until they are completely cool on the rack. They firm up as they cool down. If your dough seems sticky after chilling, don’t add more flour; just pop it back in for 10 more minutes! This is a trick I often use when I’m making things like my savory ham and Gruyère creation, patience is key!

Flavor Variations for Your Homemade Cheese Crackers
Once you master the basic cheesy flavor, the fun really begins! You can infuse so much personality into these crackers. For a spicy kick, always go for cayenne pepper mixed in with the dry ingredients. You can also use Italian seasoning, or even some smoked paprika for a deeper, almost barbecue-like note. If you want to get wild, try swapping the cheddar for Gruyère or maybe even smoked Gouda—just make sure whatever you use is finely shredded so it incorporates well.
Serving Suggestions for Homemade Cheese Crackers
These little guys are definitely stars on their own, but they are absolutely incredible serving as a vehicle for dips. Forget plain chips! Try them alongside a sharp, homemade pesto or maybe even my ultra-creamy white bean dip. I love serving them with a bowl of sharp olives, too. They are sturdy enough to handle thick spreads, which is what I always look for in a perfect cracker. If you are hosting a party, you have to serve them with this creamy cannellini bean feta dip!

Storage and Make-Ahead Guide for Homemade Cheese Crackers
The best news is you can totally make these ahead of time! The dough is perfect to wrap up and keep in the fridge for about two days before you bake it. If you need them further out, you can freeze the dough disk for up to a month—just let it thaw slightly before rolling. Once they are completely baked and cooled, store them in an airtight container at room temperature. They stay fantastic for a good solid week, assuming your family doesn’t gobble them all up on day one!
Frequently Asked Questions About Homemade Cheese Crackers
Can I use pre-shredded cheese for this recipe?
Oh, honey, please don’t! Pre-shredded cheese is often coated in anti-caking agents that stop it from melting smoothly and can keep your crackers from getting that satisfyingly greasy, rich texture. Freshly shredded cheese melts beautifully into the dough.
How thin should I roll the dough for the best crunch?
Aim for paper-thin, really! I specified 1/16 of an inch, and I mean it. If you can see your countertop clearly through the dough when you roll it, you’re probably doing it right. Thin dough equals maximum crispness after baking.
What happens if I skip brushing the tops with egg white?
Skipping it is fine taste-wise, but you lose that classic, beautiful golden hue and high shine. The egg white acts like a little glue for any extra spice you sprinkle on top, and it gives the finished crackers that professional, store-bought look. If you absolutely can’t use egg white, a tiny bit of milk will work in a pinch.
My crackers puffed up instead of staying flat! Why?
That’s usually due to one of two things: either your butter wasn’t cold enough when you started mixing, or you skipped pricking them with a fork! Pricking allows the steam to escape evenly, and cold butter ensures the layers separate instead of just melting together.
Can I freeze the cut-out crackers before baking?
Yes, you absolutely can! Cut them into shapes, lay them out on a parchment-lined tray, flash freeze them until solid, then transfer them to a freezer bag. I even have a great article on adjusting bake times for frozen dough starters if you want more freezer confidence!
Estimated Nutritional Snapshot of These Homemade Cheese Crackers
I always like to give a little heads-up on what we’re munching on, though remember these numbers are just estimates because my cheddar is probably sharper than yours! Per five crackers, you’re looking at about 85 calories. They are relatively low in sugar, clocking in around 0.2 grams, but they do contain 6 grams of fat, with about 3.5 grams of that being saturated goodness from the butter and cheese. Sodium comes in around 110mg per serving, keeping them nice and savory. Enjoy them mindfully!
Why You Will Love These Homemade Cheese Crackers
- They have the most satisfying, airy crunch imaginable.
- You control the cheese! Go wild with sharp cheddar or mix it up.
- Way less sodium than the stuff that comes in a box.
- Baking them fills your house with the best savory smell.
- The chilling time is the perfect excuse to put your feet up!
See? I told you these were easy to love! Isn’t that better?
Essential Ingredients for Perfect Homemade Cheese Crackers
This recipe keeps things wonderfully simple, which is exactly how I like it when I’m whipping up a batch of Homemade Cheese Crackers. We focus on high-quality components because there aren’t many places for mediocre ingredients to hide here. The secret weapon, as you’ll see below, is making sure everything stays cold while we’re mixing it up. If you’re making these for a party, you can check out my cheddar biscuits recipe for another buttery snack idea!
Here’s the lineup:
- 1 cup all-purpose flour
- 1/2 teaspoon salt
- 1/4 teaspoon baking powder
- 1/2 cup (1 stick) cold unsalted butter, cut into small pieces
- 1 cup sharp cheddar cheese, shredded
- 2 tablespoons cold water
- 1 large egg white, lightly beaten (for brushing)
Ingredient Notes and Substitutions for Homemade Cheese Crackers
A word on that cheese: please, please use sharp cheddar! Mild cheddar just doesn’t give that necessary flavor punch we want in our savory snack. If you must substitute, you can swap half for Parmesan, but make sure it’s freshly grated. Pre-shredded stuff is coated in starch that stops it from melting smoothly. And remember that water? It needs to be ice cold—helps keep the butter cold too, which is key for that flaky outcome. That coldness is non-negotiable for crispness!
The Simple Steps to Making Your Homemade Cheese Crackers
When you see all these steps laid out, it looks like a lot, but I promise you, this process flies by! It’s really just mixing, chilling, rolling, and baking. We’re leaning hard on that cold butter working its magic in the oven to create separation and crunch. I shared my secret for getting that perfect crunch when I talk about how to get crispy perfection in other baked goods, and it applies perfectly here when making these Homemade Cheese Crackers!
Preparing the Dough for Homemade Cheese Crackers
First, marry the dry stuff—flour, salt, and baking powder—in a big bowl. Then comes the cold butter. This is where you need your fingertips or a pastry blender. You are “cutting in” that butter until the whole thing looks like coarse meal, no bigger than tiny peas. Now, toss in that shredded sharp cheddar and mix it in so it gets coated in the flour. Finally, trickle in that ice-cold water, just until the dough decides it wants to hold hands and form a ball. Stop immediately! Seriously, don’t knead it. Wrap it up tight and let it chill for at least 30 minutes in the fridge.
Rolling, Cutting, and Baking Your Homemade Cheese Crackers
Preheat your oven to 375 degrees F while the dough is chilling. Get your sheets ready with parchment paper; it saves so much mess! Once chilled, dust your counter lightly—we need this dough paper-thin, about 1/16 of an inch. If it’s too thick, it won’t be crispy enough for our Homemade Cheese Crackers! Roll it, cut out your little squares or fun shapes, and make sure you prick each one a couple of times with a fork so they don’t puff up like balloons. Brush them lightly with that separated egg white—that’s what gives them that lovely golden sheen. Bake them for 10 to 14 minutes. You want edges that look just barely tanned.
Tips for Achieving Ultimate Crispness in Homemade Cheese Crackers
The difference between a good cheese cracker and an absolutely addictive one is pure crispness. If they come out soft, you just didn’t listen to the butter! First, you *must* roll the dough thin—thinner than you think is safe. If you can see your countertop clearly through the dough when you roll it, you’re probably doing it right. Thin dough equals maximum crispness after baking.
Second, keep your oven hot and steady at 375°F. If your oven runs cool, they bake slower and get tough instead of crisp. Don’t open the door for the first 10 minutes, or you risk them sagging!
My biggest tip, which I learned the hard way, is the cooling process. Don’t touch them until they are completely cool on the rack. They finish setting up and harden as they release steam. If your dough seems sticky after chilling, don’t add more flour; just pop it back in for 10 more minutes! That little bit of extra cold time makes all the difference for perfect Homemade Cheese Crackers.
Flavor Variations for Your Homemade Cheese Crackers
Once you master the basic cheesy flavor, the fun really begins! You can infuse so much personality into these crackers. For a spicy kick, always go for cayenne pepper mixed in with the dry ingredients. You can also use Italian seasoning, or even some smoked paprika for a deeper, almost barbecue-like note. If you want to get wild, try swapping the cheddar for Gruyère or maybe even smoked Gouda—just make sure whatever you use is finely shredded so it incorporates well.
For something really sophisticated, I sometimes swirl in a tiny bit of Dijon mustard right when I add the water. It makes the cheese flavor pop, kind of like I do when I make that savory ham and Gruyère creation. These Homemade Cheese Crackers are such a perfect canvas for experimenting!
Serving Suggestions for Homemade Cheese Crackers
These little guys are definitely stars on their own, but they are absolutely incredible serving as a vehicle for dips. Forget plain chips! Try them alongside a sharp, homemade pesto or maybe even my ultra-creamy white bean dip. I love serving them with a bowl of sharp olives, too. They are sturdy enough to handle thick spreads, which is what I always look for in a perfect cracker. If you are hosting a party, you have to serve them with this creamy cannellini bean feta dip! They disappear fast when paired with something cool and tangy!
Storage and Make-Ahead Guide for homemade cheese crackers
The best news is you can totally make these ahead of time! The dough is perfect to wrap up and keep in the fridge for about two days before you bake it. If you need them further out, you can freeze the dough disk for up to a month—just let it thaw slightly before rolling. Don’t try to roll rock-hard dough, or it will crack apart!
Once they are completely baked and cooled—and I mean *completely* cool, or they steam themselves soft—store them in an airtight container right on the counter at room temperature. They stay fantastic for a good solid week, assuming your family doesn’t gobble them all up on day one!
Frequently Asked Questions About Homemade Cheese Crackers
Can I use pre-shredded cheese for this recipe?
Oh, honey, please don’t! Pre-shredded cheese is often coated in anti-caking agents that stop it from melting smoothly and can keep your crackers from getting that satisfyingly greasy, rich texture. Freshly shredded cheese melts beautifully into the dough, giving you the best flavor for these Homemade Cheese Crackers.
How thin should I roll the dough for the best crunch?
Aim for paper-thin, really! I specified 1/16 of an inch, and I mean it. If you can see your countertop clearly through the dough when you roll it, you’re probably doing it right. Thin dough equals maximum crispness after baking. If you want extra guidance on dough handling, I talk about adjusting based on frozen dough here, but the thinness rule is universal!
What happens if I skip brushing the tops with egg white?
Skipping it is totally fine taste-wise, but you lose that classic, beautiful golden hue and high shine. The egg white acts like a little glue for any extra spice you sprinkle on top, and it gives the finished crackers that professional look. If you absolutely can’t use egg white, a tiny bit of milk or even just water will make them look a little better, but the egg white gives the crispest finish.
My crackers puffed up instead of staying flat! Why?
That’s usually due to one of two things: either your butter wasn’t cold enough when you started mixing, or you skipped pricking them with a fork! Pricking allows the steam to escape evenly, and cold butter ensures the layers separate instead of just melting together. It’s a simple fix for the next batch of Homemade Cheese Crackers!
Estimated Nutritional Snapshot of These Homemade Cheese Crackers
I always like to give a little heads-up on what we’re munching on, though remember these numbers are just estimates because my cheddar is probably sharper than yours! Per five crackers, you’re looking at about 85 calories. They are relatively low in sugar, clocking in around 0.2 grams, but they do contain 6 grams of fat, with about 3.5 grams of that being saturated goodness from the butter and cheese. Sodium comes in around 110mg per serving, keeping them nice and savory. Enjoy them mindfully!
- Serving Size: 5 crackers
- Calories: 85
- Fat: 6g (Saturated Fat: 3.5g)
- Carbohydrates: 5g
- Protein: 3g
- Sodium: 110mg
Since we are making these from scratch, your exact ingredient brands will change the final count, but this gives you a great idea of how wonderfully snackable these Homemade Cheese Crackers are!
Print
Homemade Cheese Crackers
- Total Time: 44 min
- Yield: About 4 dozen 1x
- Diet: Vegetarian
Description
Recipe for making crisp, savory cheese crackers at home.
Ingredients
- 1 cup all-purpose flour
- 1/2 teaspoon salt
- 1/4 teaspoon baking powder
- 1/2 cup (1 stick) cold unsalted butter, cut into small pieces
- 1 cup sharp cheddar cheese, shredded
- 2 tablespoons cold water
- 1 large egg white, lightly beaten (for brushing)
Instructions
- In a large bowl, whisk together the flour, salt, and baking powder.
- Cut in the cold butter using a pastry blender or your fingers until the mixture resembles coarse crumbs.
- Stir in the shredded cheese until evenly distributed.
- Add the cold water, one tablespoon at a time, mixing until the dough just comes together. Do not overmix.
- Shape the dough into a disk, wrap it in plastic wrap, and chill in the refrigerator for at least 30 minutes.
- Preheat your oven to 375 degrees F (190 degrees C). Line baking sheets with parchment paper.
- On a lightly floured surface, roll the dough out thinly, about 1/16 inch thick.
- Use a pizza cutter or knife to cut the dough into small squares or desired shapes. Prick each cracker a few times with a fork.
- Place the crackers on the prepared baking sheets. Brush the tops lightly with the beaten egg white.
- Bake for 10 to 14 minutes, or until the edges are lightly golden brown and the crackers are crisp.
- Let the crackers cool completely on a wire rack before serving.
Notes
- For extra flavor, add 1/4 teaspoon of garlic powder or onion powder to the dry ingredients.
- If you prefer a darker color, you can bake them for a minute or two longer, watching carefully to prevent burning.
- Store cooled crackers in an airtight container at room temperature for up to one week.
- Prep Time: 20 min
- Cook Time: 14 min
- Category: Snack
- Method: Baking
- Cuisine: American
Nutrition
- Serving Size: 5 crackers
- Calories: 85
- Sugar: 0.2
- Sodium: 110
- Fat: 6
- Saturated Fat: 3.5
- Unsaturated Fat: 2.5
- Trans Fat: 0.1
- Carbohydrates: 5
- Fiber: 0.3
- Protein: 3
- Cholesterol: 15
Keywords: cheese crackers, homemade crackers, cheddar crackers, baked snack, savory crackers