
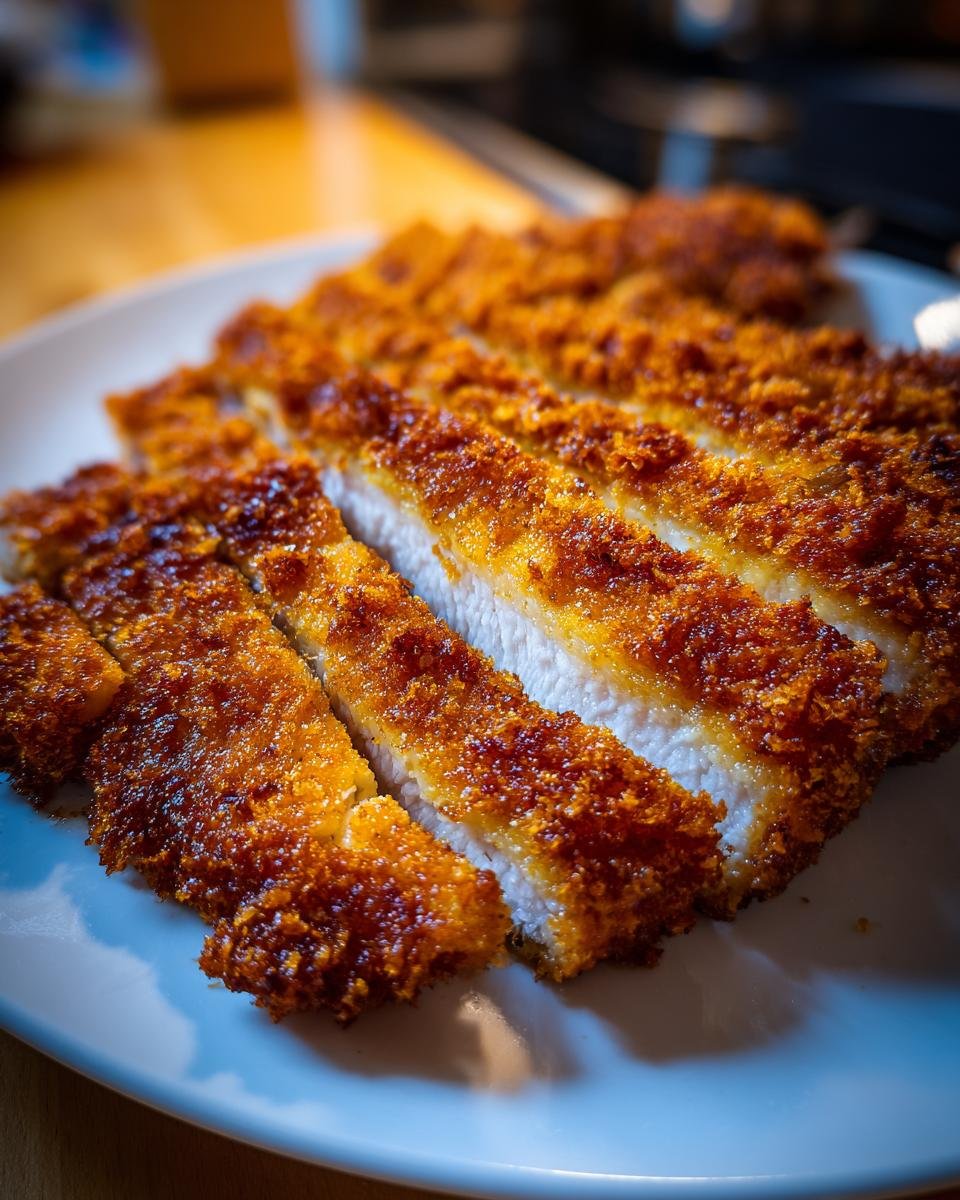
Listen, there’s nothing sadder than biting into a crust that immediately goes soft, right? When I first tried making Japanese fried pork cutlets at home, that was my biggest fear! But I figured out the secret sauce—or rather, the secret breading technique—to get that shatteringly crisp exterior every single time. Forget soggy takeout versions; this Pork Katsu recipe nails the texture you dream about. It’s so easy, too! The magic lives entirely in how you handle the breading station. Once you nail the press onto the panko, you’ll be an expert. Seriously, once you master this, you won’t look back. Get ready for the crispiest Pork Katsu you’ve ever cooked right in your own kitchen!
Why This Crispy Pork Katsu Recipe Works
I’ve made fried pork a million ways, trust me, but this specific method keeps bringing me back. It’s not just about dunking it in oil; it’s about preparing the meat and choosing the right coating. When you nail these two steps, you get that amazing crackle when you slice into it. It’s all about technique, not complicated ingredients! Following the steps in my pork chop guide really helped me nail this.
- We keep the oil temperature steady—no shocking the meat!
- We use panko, and that’s non-negotiable for crunch.
- We treat the pork gently so it stays tender inside.
Achieving the Perfect Thickness for Pork Katsu
Okay, step one is crucial: you have to pound those pork chops until they are super thin, about a quarter-inch. If they are too thick, the meat won’t cook through before the crust burns, or worse, you end up with chewy meat. Pounding them out tenderizes them beautifully, and that thinness is key for quick cooking, which is what makes amazing Pork Katsu!
The Importance of Panko Breadcrumbs in Pork Katsu
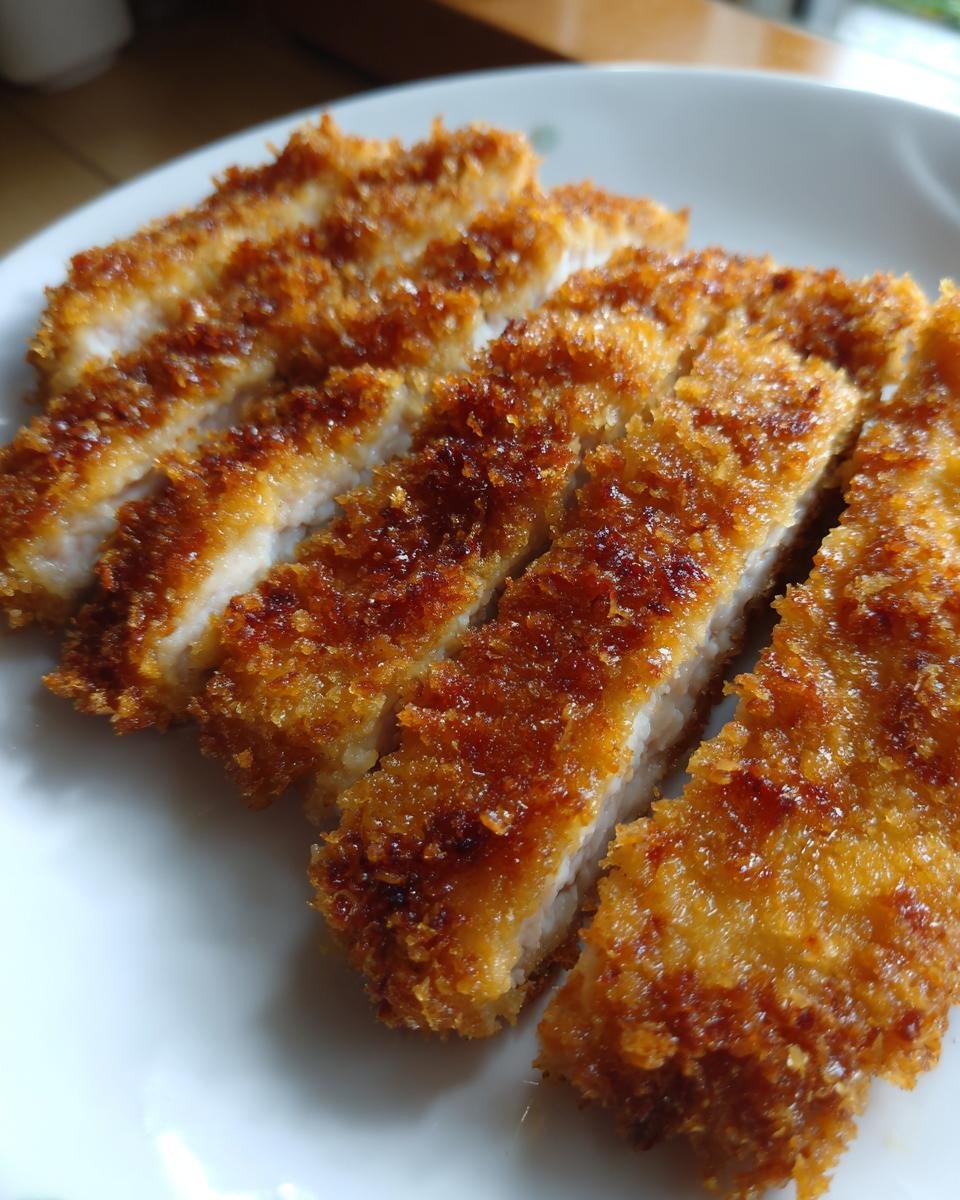
Please, ditch those fine, dusty breadcrumbs you might have in the back of the pantry. Ordinary breadcrumbs soak up oil like tiny little sponges and make everything soggy fast. Panko is different! Those Japanese breadcrumbs are light and airy, like little crisp shards. They fry up golden and stay crunchy, giving you that superior, light texture that defines great Pork Katsu.
Essential Ingredients for Authentic Pork Katsu
You don’t need a huge shopping list for this, honestly. The ingredients are simple, which is why the quality of each one matters so much! If you’ve ever tried making a classic pork schnitzel, you’ll recognize this standard breading setup, but trust me, that panko makes all the difference here.
Here is exactly what I always have out on my counter before I even touch the meat:
- 2 boneless pork chops (aiming for about 1/2 inch thick—this is important!)
- 1/2 cup all-purpose flour
- 2 large eggs, thoroughly beaten
- 1 1/2 cups panko breadcrumbs (the good stuff!)
- Salt and black pepper to taste (go easy on the salt until after you pound them)
- Vegetable oil for frying (enough to cover about an inch in your pan)
Ingredient Preparation Notes for Your Pork Katsu
Before anything hits the coating station, we have to prep the meat. Remember how I mentioned thickness? You need two thin cutlets, around 1/4-inch thick. If you use thick chops, they won’t cook evenly, and that’s the fast track to disaster when making Pork Katsu. Grab your meat mallet and give them a few good, solid whacks!
Also, make sure you measure out those panko breadcrumbs properly. I find that 1 1/2 cups is the sweet spot for two standard-sized cutlets. If you skimp on the panko, you risk bald spots, and no one wants a bald patch on their delicious, crispy Pork Katsu!
Step-by-Step Instructions to Make Perfect Pork Katsu
This is where the magic happens! The whole process moves pretty quickly once your ingredients are prepped, so have everything ready to go before you heat up that oil. I always keep a running eye on my thermometer because consistent heat means consistently amazing Pork Katsu. If you’re looking for other great pork methods, check out my tips for country-style pork ribs, which are totally different but just as tasty!
- First things first, take those pork chops and carefully pound them down to an even 1/4 inch thickness. Then, season both sides generously with salt and pepper. Don’t be shy back there!
- Next, set up your assembly line—your breading station. You need three shallow dishes lined up. The first gets the flour, the second gets your beaten eggs, and the third needs those beautiful panko breadcrumbs waiting patiently.
Setting Up Your Breading Station for Pork Katsu
The dredging sequence is non-negotiable if you want full coverage for your Pork Katsu! Take one piece of seasoned pork and dip it into the flour first. You absolutely must shake off any extra flour clinging to it—we only want a light dusting, otherwise, the egg won’t stick well. Then, dunk it into the egg mixture, letting the excess drip drip drip back into the bowl.
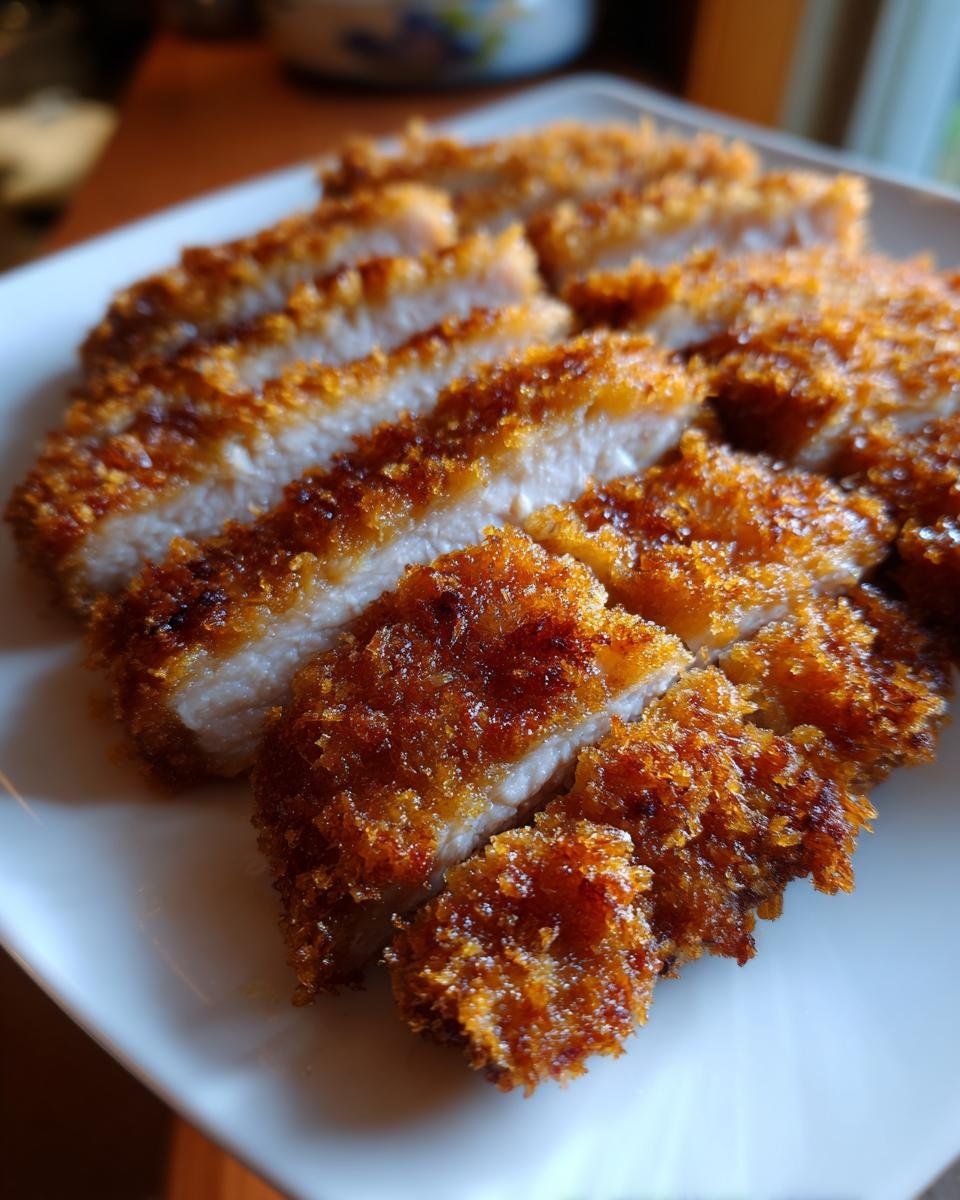
Finally, lay that damp cutlet right into the panko. This is the part where you need to be firm but gentle. Press the breadcrumbs all over the meat, encouraging them to stick well. You want a thick, craggy coating on your Pork Katsu, so really press them into the surface!

Frying Technique for Golden Brown Pork Katsu
Heating up your oil is the most important part of frying. You need about an inch of vegetable oil deep in your skillet, and we’re aiming precisely for 340°F (170°C). If it’s too cold, the pork gets greasy; too hot, and the crust burns instantly. Carefully slide one or maybe two cutlets in, but never crowd the pan! That lowers the oil temp instantly.
Fry each side for about 3 to 4 minutes. You should see it turn that gorgeous deep golden brown color. Don’t forget to check the internal temperature with a thermometer—it needs to hit 145°F (63°C) to be safe! Once they look perfect, pull them out immediately and let them drain on a wire rack. The last thing you do is slice the Pork Katsu into manageable strips.
Expert Tips for Unbeatable Pork Katsu Crunch
Okay, so you’ve got the breading right, but how do we lock in that crunchiness? My biggest tip revolves around what happens *after* the katsu leaves the oil. We can’t have them steeping in their own heat, right?
Don’t make the mistake of letting your freshly fried Pork Katsu sit on paper towels alone. Paper towels are great for the first minute to soak up the surface grease, but then they trap steam underneath, and steam is the enemy of crispiness! I always move mine right over to a wire cooling rack. It lets air circulate all around the cutlet—top and bottom.
If you’re frying a big batch, you can use your oven. Set it really low, maybe 200°F (95°C), and place the cooked Pork Katsu on that wire rack set inside a baking sheet. This keeps them warm while you finish frying without letting them get soggy. It’s a trick I learned when making my oven-baked pork chops for big family dinners—keeping things warm without steaming them is essential!
Serving Suggestions for Your Homemade Pork Katsu
You finally did it—you have this gorgeous, perfectly breaded, golden Pork Katsu sizzling hot! Now what? You can’t just eat it plain, right? Well, you *could*, but trust me, the traditional Japanese sides elevate this dish from just ‘fried pork’ to ‘an experience.’
The number one must-have accessory for your crispy cutlet is the sauce. You absolutely have to have Tonkatsu sauce. It’s usually thick, darkly colored, and has a wonderful mix of sweet, tangy, and savory notes all rolled into one. It just cuts through the richness of the fried pork cutlet perfectly. If you can’t find it, a mix of Worcestershire sauce and a touch of brown sugar or ketchup can get you close in a pinch, but the real deal is worth seeking out!
The second non-negotiable side, which keeps the whole thing from feeling too heavy, is mountain of finely shredded cabbage. Seriously, I mean pile it high! You toss the cabbage with maybe a dash of rice vinegar or just leave it raw. That light, cool crunch of the cabbage cleanses your palate between bites of that rich, juicy Pork Katsu. It’s the perfect textural contrast.
If you need a few more ideas to round out the meal, I often pair mine with fluffy white rice—perfect for soaking up any extra sauce—and maybe a small bowl of miso soup. It really makes the meal feel complete. Don’t waste any time getting your sides ready, because this gorgeous Pork Katsu is best eaten the second it comes off that rack!
Storage and Reheating Instructions for Leftover Pork Katsu
So, you actually had leftovers? Wow, that’s rare in my house because this Pork Katsu disappears so fast! But for those lucky few who save some for lunch the next day, you are facing the biggest enemy of all fried food: sogginess. We absolutely cannot let that amazing crispy crust just turn into damp breading overnight.
My number one storage rule is this: always store the Pork Katsu completely uncovered in the fridge for about 20 minutes before sealing it up. This helps the residual steam escape. If you seal it immediately after it cools to room temperature, that trapped moisture softens the Panko.
Once cooled, place the cutlets in a single layer inside an airtight container, maybe separated by a piece of parchment paper if you have to stack them slightly. Try not to smash them together! They usually last about three good days in the fridge, but honestly, they taste best around day one.
Reheating is the tricky part, and to restore that crunch, you need dry heat. Forget the microwave, please! That just steams the breading and makes things rubbery. If you are reheating more than one piece, the oven or toaster oven is your best friend. Set it to about 375°F (190°C) and lay the Pork Katsu right on the rack, just like we did when keeping them warm earlier. They usually need about 8 to 10 minutes to crisp back up nicely.
If you only have one small piece left, the air fryer actually works wonders in about five minutes on medium heat. It brings back that incredible crunch better than anything else. These reheating steps work for almost any deep-fried item—I use the same method when saving leftover chicken, like in my chicken fried rice meal prep!
Frequently Asked Questions About Pork Katsu
It’s totally normal to have questions when you’re trying something new, especially when deep-frying! I get asked all the time about swapping ingredients or tweaking the cooking method for this amazing Pork Katsu. Don’t stress if you want to try a lighter version; we can definitely work around it, but I always encourage trying the deep-fry method first for that true tonkatsu experience!
Can I bake or air fry the Pork Katsu instead of deep frying?
Oh, people always ask this! Yes, you absolutely can bake or air fry your Japanese fried pork cutlet. However, I have to be honest, the texture is just different. Deep frying lets the Panko crisp up instantly and evenly all around. If you bake or air fry, the crust tends to be a little drier, and it might not achieve that profound, puffy crunch you get when the cutlet hits properly heated oil. You just can’t beat the authentic texture of deep-fried Pork Katsu, but the air fryer is a decent second option if you’re cutting back on oil!
What is the best internal temperature for cooked pork?
Food safety is key, even when we are making something fun like this! For pork chops, especially pounded thin ones like we use for Pork Katsu, you want to make sure they hit a safe internal temperature. I always pull mine off the heat right when my thermometer reads 145°F (or 63°C). At that temp, it’s safe to eat and usually still perfectly juicy inside. Anything less, and you risk issues, so trust the thermometer on this one!
If you want more recipe inspiration that’s a little different, check out my thoughts on sweet and sour chicken—a totally different vibe, but just as delicious!
Estimated Nutritional Data for Pork Katsu
So, we’ve made this incredible, crispy Pork Katsu, but what about the numbers? I always look at the nutrition facts not to obsess, but just to get a general idea of what I’m serving up. Since this is a fried dish, you know the fat content is going to be noticeable, but because we pound the pork thin and don’t overcook it, we actually manage to keep some of the other stats pretty reasonable!
Keep in mind that these numbers are my best guess based on the typical components, like the lean pork and how much oil is absorbed (which varies wildly!). If you use leaner cuts or opt for an air fryer—which definitely impacts the fat absorption—your totals will shift. I always reference my ground turkey casserole data if I’m looking for lower-fat comfort food, but for true tonkatsu, this is the ballpark:
- Serving Size: 1 cutlet
- Calories: Approximately 450
- Protein: About 35g (That’s fantastic for keeping you full!)
- Fat: Around 25g (Remember, a good chunk of this is from frying oil)
- Carbohydrates: Roughly 25g (Mostly from that Panko coating)
- Sugar: Very low, around 2g
- Sodium: About 350mg (This can vary a lot depending on how much salt you add during seasoning!)
It’s a hearty meal, no doubt, packed with fantastic protein! Just balancing that richness with lots of shredded cabbage on the side definitely helps make it feel lighter overall. Enjoy that crunch!
Share Your Crispy Pork Katsu Success
Okay, friends, that’s it! You have officially mastered the art of homemade, shatteringly crisp Pork Katsu. I am so excited for you to try this—honestly, once you get that golden Panko crunch, you’ll wonder why you ever ordered it out. It’s seriously rewarding to pull that perfect cutlet from the oil!
But the process doesn’t end when you slice it up! I absolutely love seeing what you all create in your own kitchens. Did your breading stick perfectly? Were your cutlets super tender? Did you drown yours in Tonkatsu sauce like I do? Don’t keep the delicious secrets to yourself!
Please hop down to the comments section below and leave a rating for the recipe. Five stars if your crunch was audible, obviously! If you ran into any snags, let me know—maybe I can help trouble-shoot. I always try to answer every question about getting that perfect texture, whether you’re making this or my famous ultimate homemade cornbread!
And if you snapped a photo of your beautiful, golden Pork Katsu before you devoured it (which I know you did!), tag me on social media! Seeing those crispy slices makes my day. Happy cooking, everyone, and enjoy that amazing crunch!
Print
Pork Katsu
- Total Time: 25 min
- Yield: 2 servings 1x
- Diet: Low Calorie
Description
A recipe for making crispy Japanese breaded and deep-fried pork cutlets.
Ingredients
- 2 boneless pork chops (about 1/2 inch thick)
- 1/2 cup all-purpose flour
- 2 large eggs, beaten
- 1 1/2 cups panko breadcrumbs
- Salt and black pepper to taste
- Vegetable oil for frying
Instructions
- Pound the pork chops to an even 1/4 inch thickness. Season both sides with salt and pepper.
- Set up a breading station with three shallow dishes: one with flour, one with beaten eggs, and one with panko breadcrumbs.
- Dredge each pork chop in the flour, shaking off excess.
- Dip the floured pork into the egg, letting excess drip off.
- Coat thoroughly with panko breadcrumbs, pressing gently so the crumbs adhere.
- Heat about 1 inch of vegetable oil in a deep skillet to 340°F (170°C).
- Carefully place one or two cutlets into the hot oil, avoiding overcrowding.
- Fry for 3 to 4 minutes per side, until golden brown and cooked through (internal temperature reaches 145°F or 63°C).
- Remove the katsu from the oil and place it on a wire rack or paper towel-lined plate to drain excess oil.
- Slice the pork katsu into strips before serving.
Notes
- Serve immediately with tonkatsu sauce and shredded cabbage for the best texture.
- Maintain the oil temperature consistently for even cooking.
- Prep Time: 15 min
- Cook Time: 10 min
- Category: Main Course
- Method: Frying
- Cuisine: Japanese
Nutrition
- Serving Size: 1 cutlet
- Calories: 450
- Sugar: 2
- Sodium: 350
- Fat: 25
- Saturated Fat: 6
- Unsaturated Fat: 19
- Trans Fat: 0
- Carbohydrates: 25
- Fiber: 1
- Protein: 35
- Cholesterol: 110
Keywords: pork katsu, tonkatsu, japanese fried pork, breaded pork cutlet, deep fried pork