
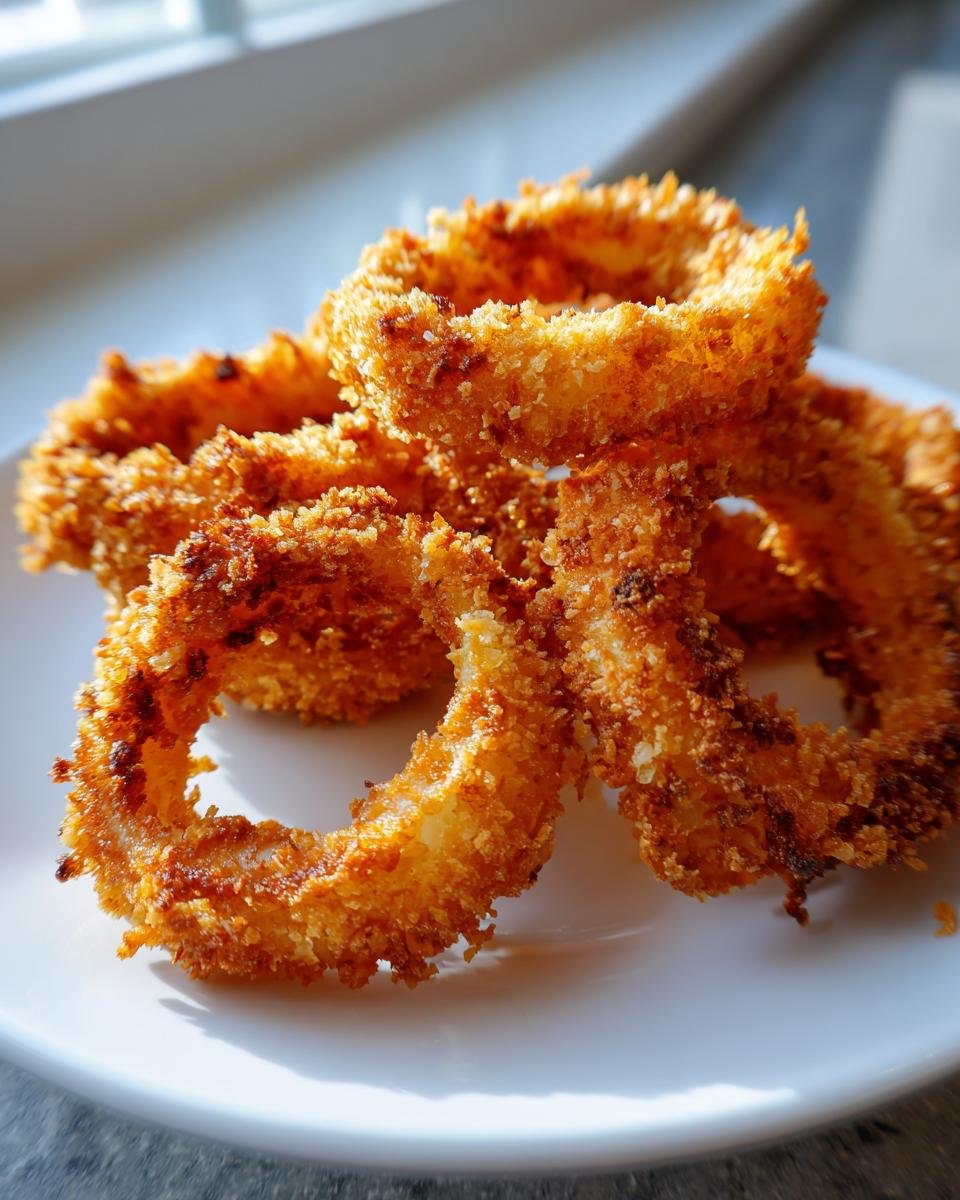
Okay, listen up, because this is the breakthrough you’ve been waiting for! We all love onion rings, but who actually wants to deal with that volcano of hot oil? I used to dread getting that soggy, floppy shell when I tried shortcuts, but not anymore. We cracked the code because I figured out the secret to getting seriously golden and crunchy results, right in the basket. Trust me, these **Crispy Air Fryer Onion Rings** will change your snack game forever. They’re light, they’re loud when you bite into them, and they’re ridiculously easy to make. Say goodbye to greasy fingers!
Why You Will Make the Best Crispy Air Fryer Onion Rings Every Time
Seriously, there’s no turning back once you try these. I’ve experimented with so many air fryer recipes, and usually, crispy things turn out… well, not very crispy. But these rings? They are the real deal. You’ll be telling everyone you know to ditch the deep fryer after this, I promise!

- Zero Deep Fryer Mess: Forget scrubbing oil out of every corner of your kitchen. Clean-up is a breeze, maybe just a quick wipe down.
- Incredible Crunch Factor: We managed to get that satisfying, loud crunch of a carnival ring using way less fat. That panko coating really shines here!
- Way Faster Than Traditional Methods: From slicing to serving, we’re talking less than 30 minutes total. That speed is perfect for those last-minute snack cravings.
- Lighter on the Waistline: You get all the amazing flavor and texture without drowning the poor onions in heavy oil. It’s a win-win for your taste buds and your conscience.
- Perfect for Weeknights: Because they cook so fast, these make a fantastic side dish for a busy Tuesday night dinner. They feel like a treat but are totally practical.
- Easy for Beginners: The dredging process sounds complicated, but once you set up your stations—flour, egg, panko—it becomes muscle memory. If you can make cornbread from a box, you can nail these. You’ll find our simple cornbread recipe is a great starter recipe if you need practice with breading!
Ingredients for Perfect Crispy Air Fryer Onion Rings
You don’t need a huge shopping list, which is part of why this recipe is so fast! The specific quantities here are what give us that perfect breading-to-onion ratio. Make sure you have your onions sliced specifically into 1/4-inch thick rings—thickness really matters for air frying uniformity. I always keep extra panko breadcrumbs on hand just in case I need to do a second press! If you’re worried about getting your dredging stations right, check out our cornbread post—the same three-step method applies!
- Two big yellow onions, sliced into 1/4-inch rings and separated, please!
- One cup of plain all-purpose flour for our first dredging station.
- Just a teaspoon of salt and half a teaspoon of black pepper for seasoning.
- Half a teaspoon of paprika—it gives the flour that lovely hint of color.
- Two eggs, whisked up with a quarter cup of milk for the wet dip.
- A full cup of panko breadcrumbs. Seriously, don’t try to substitute these; panko is the crunch secret weapon.
- Cooking spray, because we still need a little bit of oil help in the air fryer.
Expert Tips for Achieving Crispy Air Fryer Onion Rings
Listen, anyone can toss something in the air fryer, but making it actually crispy takes a little know-how. I’ve learned a few tricks over the years that guarantee you ditch that sad, limp texture. First thing: you absolutely must give the coated rings some cold time. If you can manage it, chill those breaded beauties in the fridge for about 15 minutes before they hit the basket. That short chill sets the coating beautifully!
The other non-negotiable rule is avoiding overcrowding. The air needs space to circulate. If you pile them up even slightly, you’re steaming them, and bye-bye, crunch. You have to work in batches, trust me on this one. And speaking of getting things golden, don’t be shy with the cooking spray! You need that light mist both on the basket *and* directly on top of the rings before they cook. It’s the magic ingredient that replaces the deep fryer oil bath.
The Secret to Extra Crispy Air Fryer Onion Rings Coating
The coating is everything, right? That’s why we ditched regular breadcrumbs; they just don’t hold up the same way. See, panko breadcrumbs are flakier and lighter, which means they puff up and crisp without absorbing tons of moisture. That’s the key difference!
Our process is methodical: Flour first—shake off the excess so it doesn’t clump later. Then the egg wash, letting any extra drip completely back into the bowl. Finally, press hard into that panko so every little nook and cranny is covered. If you want to go pro-level, like I mentioned, pop those fully coated rings onto a wire rack and chill them for 15 minutes. It sounds like an extra step, but it locks that coating in place so your rings stay super crispy, even alongside some perfectly crisp nuggets!
Step-by-Step Instructions for Crispy Air Fryer Onion Rings
Don’t let the three bowls scare you! Once you see how fast this comes together, you’ll realize this is the easiest way to get fantastic results. We need to get everything prepped before the air fryer even thinks about heating up. Remember, speed is our friend here, but prepping the coating properly is the gatekeeper to crispness. Once we start frying, it moves quickly, so have your dipping sauces ready to go! If you’ve already mastered air frying some chicken nuggets, you know the drill for success!
Preparing the Onions and Breading Stations
First, take those two big onions and slice them exactly 1/4-inch thick. Don’t be lazy—separate all those slices into individual rings right away. Now, set up your production line. Bowl one gets the flour mix—that’s flour, salt, pepper, and paprika all whisked up. Bowl two needs the egg and milk, whisked well. Bowl three is just waiting patiently with your beautiful panko breadcrumbs.
Air Frying Your Crispy Air Fryer Onion Rings
Time to heat things up! Preheat your air fryer right now to 380F (that’s 195C). While that’s warming, give your air fryer basket a good, light coating of cooking spray. Now, take your breaded rings and arrange them in that basket in a **single layer**. Seriously, no overlapping! Once the rings are neatly arranged, hit the tops with another gentle spray of cooking spray. Pop them in and cook for 8 to 12 minutes total. Remember to flip them halfway through so both sides get wonderfully golden brown. If you followed the breading like you should, these will look phenomenal!
Serving Suggestions for Your Crispy Air Fryer Onion Rings
You’ve made the crispiest things known to the air fryer world—now what? You cannot just eat them plain, though I am certainly guilty of that when I step away from the kitchen! These rings deserve fantastic partners.
We all know ketchup is a classic, and ranch dressing is always fantastic. If you want to spice things up, try making my super simple homemade ranch dressing recipe. It’s way fresher than the bottled stuff, and you can find the details right here!
But let’s talk about main dishes. Forget sad frozen patties! These rings are the ultimate upgrade for any burger night. Seriously, piling three or four of these crunchy beauties right onto a juicy cheddar burger? Forget about it, that’s restaurant quality!
They are also amazing alongside juicy pulled pork sandwiches, or even just served up on a platter next to some amazing turkey club sandwiches. For a lighter touch, use them instead of fries next to simple grilled chicken breasts. They add just that satisfying crunch that makes any plate feel special. Don’t forget a little squeeze of fresh lemon juice over them right before serving for an unexpected zing!
Storage and Reheating Crispy Air Fryer Onion Rings
I really hope you made enough, because these don’t usually last long in my house! If, by some miracle, you have leftovers, we need to treat them right so they don’t turn sad and spongy overnight. You want to get them air tight as soon as they are totally cool; don’t trap any steam in there!
Pop those cooled rings into a sturdy, airtight container. I usually try to stack them with a little piece of wax paper between the layers if I’m worried about them sticking together, but honestly, they usually disappear before that becomes an issue. You can safely keep them like this in the fridge for maybe two days—no longer than that if you want that great texture.
Now, the reheating part! Absolutely, positively, *do not* pull out the microwave. That’s a guarantee for sogginess. Your best friend here is going to be that air fryer again. It’s perfect for reviving them because air circulation is what brings the crispiness back!
Set the air fryer temperature a little higher than you cooked them at initially, maybe around 390F or 200C. You only need about 3 to 5 minutes. Just lay those cold rings in a single layer—again, no crowding! A quick spray of cooking spray helps wake up that panko coating. Pull them out when they are piping hot and loud when you tap them. Boom! Almost as good as fresh batch!
Common Questions About Making Crispy Air Fryer Onion Rings
I get so many notes and emails asking about tweaks, and that’s totally fair! We all want to make sure this great recipe works perfectly in everyone’s kitchen. These little questions actually make the recipe better when shared, so I pulled together the most common ones I hear about getting that perfect crunch.
Can I use regular breadcrumbs instead of panko for Crispy Air Fryer Onion Rings?
Oh, this is such a classic question! You *can* technically use regular fine breadcrumbs, but please, please use the panko if you can. Remember how I kept talking about that satisfying crunch? Well, regular breadcrumbs tend to absorb more moisture once they hit that egg wash. They create a denser, heavier crust.
Panko is light, flaky, and airy—it basically fries up crispier even without the oil, which is what we need in the air fryer. If you only have regular crumbs, try toasting them very lightly in a dry pan first, or you might want to try that chilling trick for a bit longer to help them set up better. But for the absolute *best* results? Panko is the MVP here!
What is the ideal temperature for cooking Crispy Air Fryer Onion Rings?
I really locked in on 380F (that’s 195C) after burning a few batches at higher heat—oops! At this temperature, you get the best of both worlds. It’s hot enough to really drive the moisture out of the panko coating quickly, which makes it crisp up beautifully, locking in that amazing texture. If you go hotter, say 400F, you risk the coating browning or burning before the onion inside has a chance to soften just slightly.
If you’re reheating leftovers, you can bump it up to 390F as discussed, but for the initial cook, 380F is the sweet spot for golden perfection without any accidental smoke alarms. It keeps those homemade chicken nuggets from getting too dark before they are finished!
What’s the best kind of onion to use for this recipe?
I specify yellow onions because they give you that perfect balance of sweet and pungent flavor once they cook down. They hold their shape really well when sliced into those 1/4-inch rings, which is critical for handling the breading and surviving the air fryer tumbling. Sweet Vidalia onions are also a great choice if you want something milder, but I’d still keep them thick!
Why do my rings feel sticky after the flour step?
That usually means the onions weren’t totally dry when you started, or maybe you didn’t shake off the excess flour properly. When you dip the flour-coated ring into the egg wash, you need that layer of dry flour acting like a binder. If it’s too thick, the egg wash just makes a paste that turns sticky when it hits the panko. Remember to tap off the loose flour *before* it goes into the egg!
Estimated Nutritional Data for Crispy Air Fryer Onion Rings
Now, listen, I’m a home cook, not a registered dietitian, so take these numbers with a little grain of salt—pun intended! This information is just an estimate based on the ingredients listed in the recipe above. Since we are skipping the deep fryer bath, these clock in way lower on the fat content than traditional versions, which I absolutely love.
This breakdown is for one serving size, which we decided was about five rings. That means you get all that satisfying crunch for a modest nutritional footprint. When you compare this to hitting up your favorite greasy burger joint, you’ll see why baking them yourself is the way to go!
- Serving Size: About 5 rings
- Calories: 250
- Total Fat: 8 grams (Which is fantastic for a fried food stand-in!)
- Carbohydrates: 38 grams
- Protein: 7 grams
- Sugar: 6 grams (Mostly from the onions themselves!)
We’re keeping the sodium and saturated fat figures quite low here too, thanks to being able to control the salt and only needing a little cooking spray for that final crisping step. It’s proof that you don’t have to sacrifice flavor for convenience!
Share Your Crispy Air Fryer Onion Rings Experience
Okay, that’s it! You’ve got the power to make the crispiest, crunchiest, most satisfying onion rings without the whole messy deep-frying ordeal. I’m genuinely eager to hear how these turned out for you at home!
When you get a chance to try them out, swing back down below in the comments section and let me know! Did you stick to the basic panko, or did you try dusting yours with a little garlic powder for an extra kick? I love seeing the fun variations you all come up with on these core recipes.
If you think these **Crispy Air Fryer Onion Rings** totally nailed the crunch factor, please give this recipe a rating! A simple five-star review helps boost visibility so other people who are scared of their air fryers can discover how easy this snack is!
I’m really hoping you loved them as much as my crew does. Happy air frying, everyone!
Print
Crispy Air Fryer Onion Rings
- Total Time: 27 min
- Yield: 4 servings 1x
- Diet: Vegetarian
Description
A recipe for making onion rings crispy using an air fryer.
Ingredients
- 2 large yellow onions
- 1 cup all-purpose flour
- 1 teaspoon salt
- 1/2 teaspoon black pepper
- 1/2 teaspoon paprika
- 2 large eggs
- 1/4 cup milk
- 1 cup panko breadcrumbs
- Cooking spray
Instructions
- Slice the onions into 1/4-inch thick rings and separate them.
- In one shallow bowl, mix the flour, salt, pepper, and paprika.
- In a second shallow bowl, whisk the eggs and milk together.
- In a third shallow bowl, place the panko breadcrumbs.
- Dip each onion ring first into the flour mixture, shaking off excess.
- Next, dip the floured ring into the egg mixture, letting excess drip off.
- Finally, press the ring firmly into the panko breadcrumbs to coat completely.
- Preheat your air fryer to 380F (195C).
- Lightly spray the air fryer basket with cooking spray.
- Arrange the onion rings in a single layer in the air fryer basket, avoiding overcrowding.
- Spray the tops of the onion rings lightly with cooking spray.
- Air fry for 8 to 12 minutes, flipping halfway through, until golden brown and crisp.
- Serve immediately.
Notes
- For extra crispness, you can chill the breaded rings for 15 minutes before air frying.
- Serve with your preferred dipping sauce, such as ketchup or ranch dressing.
- Prep Time: 15 min
- Cook Time: 12 min
- Category: Appetizer
- Method: Air Frying
- Cuisine: American
Nutrition
- Serving Size: 5 rings
- Calories: 250
- Sugar: 6
- Sodium: 350
- Fat: 8
- Saturated Fat: 1
- Unsaturated Fat: 5
- Trans Fat: 0
- Carbohydrates: 38
- Fiber: 3
- Protein: 7
- Cholesterol: 50
Keywords: onion rings, air fryer, crispy, appetizer, breaded