
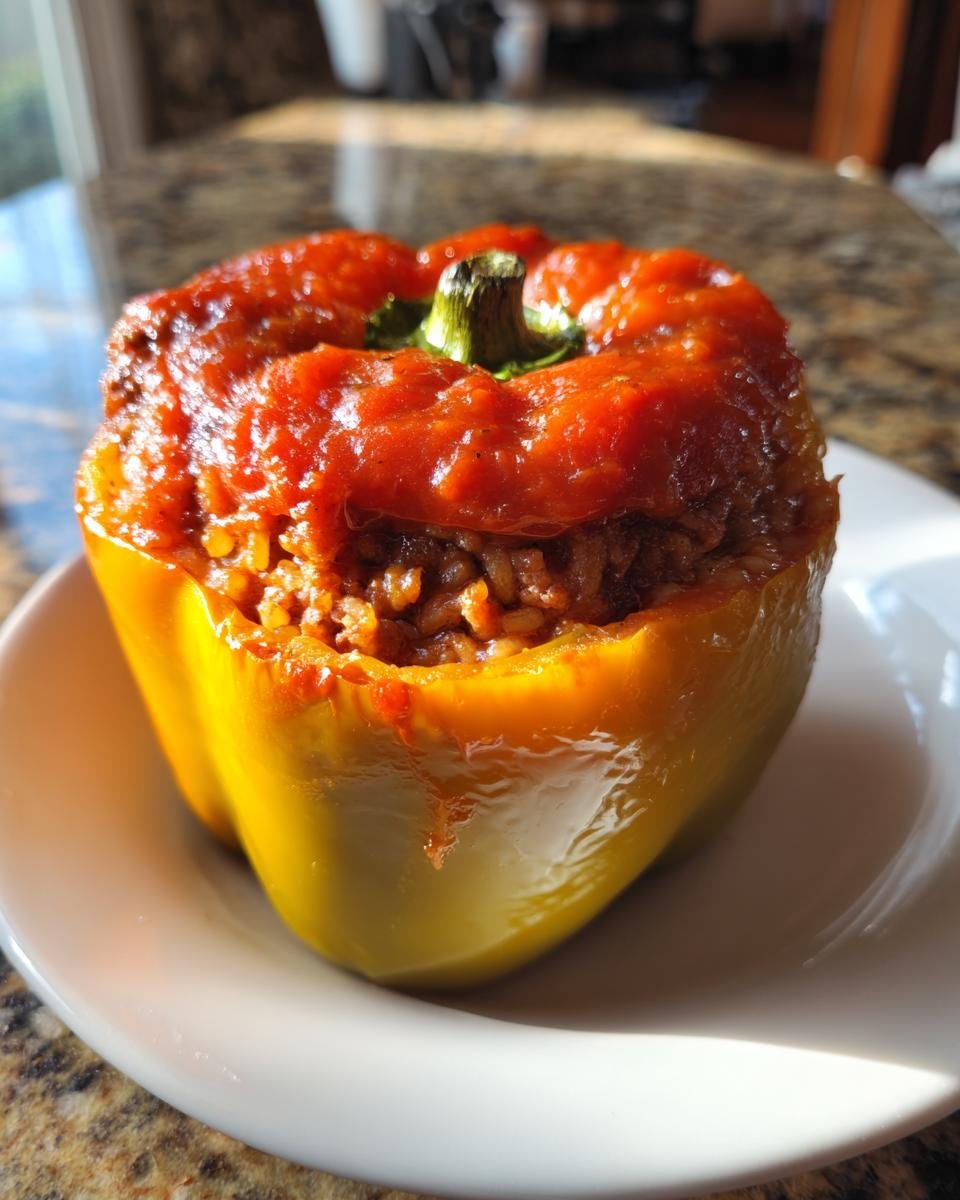
Oh, you know those nights? The ones where you just need a meal that wraps you up like a warm blanket? That’s exactly what happens when I pull a tray of these Classic Stuffed Bell Peppers out of the oven. Forget fancy casseroles or complicated sauces; this is pure, honest-to-goodness comfort food winning the dinner table every time.
My dad used to make these every Sunday when I was little, and the smell of that baking tomato and savory meat filling is actually tied to my happiest childhood memories. Trust me when I say this recipe is my absolute gold standard for the perfect stuffed pepper—they stay tender, they don’t fall apart, and the filling never dries out. If you want the ultimate, foolproof version of Classic Stuffed Bell Peppers, you’ve found your new go-to recipe!

Why You Will Love Making Classic Stuffed Bell Peppers
Honestly, there are a million ways to stuff a pepper, but my family always comes back to this exact version. It’s just timeless! I love it because it checks all the boxes for a perfect weeknight or weekend meal. You get meat, rice, and veggies all tucked neatly into one little edible bowl. Plus, cleanup is a dream!
If you want to see a slightly different approach using ground chicken instead, check out my recipe for Irresistible Chicken Stuffed Peppers, but for the classic comfort vibe, stick with this one. Here’s why this specific recipe always makes it onto our rotation:
- Pure Comfort Food: There is nothing more satisfying than a tender pepper soaking up that rich tomato sauce while baking. It’s home in a dish!
- So Customizable: Feel free to swap out the beef for turkey, or change up the rice if you want. It’s flexible, which I love.
- Easy, One-Dish Cleanup: Almost everything happens right there in the skillet, and then it all bakes together in one casserole dish. Less scrubbing means more time for relaxing!
- Perfectly Portioned: We all get one whole pepper, and nobody argues over who got the biggest piece because everyone gets the same amount of filling!
Essential Ingredients for Perfect Classic Stuffed Bell Peppers
Okay, let’s talk ingredients. This is where the magic starts, and I promise you, this recipe keeps it deliciously simple. When you’re dealing with a classic like this, you don’t need a million fancy items; quality matters more than quantity!
First off, the peppers themselves. You need four nice, sturdy ones—bell-shaped is best! Pick ones that are firm to the touch and about the same size so they all cook evenly. I tend to grab whatever color I see first, but green tends to have a slightly sharper flavor that cuts through the richness of the meat filling. Don’t skip that step where we remove all the white membranes, because nobody wants a bitter bite!
For the filling, we keep it grounded—literally. You need a full pound of ground meat; I usually reach for ground beef, but turkey works just as well if you want something a little lighter.
Here is what you need assembled before you even turn on the stove:
- Four large bell peppers (make sure they’re hefty!)
- 1 tablespoon of olive oil
- 1 pound of ground beef or turkey
- 1 medium onion, which you’ll want to chop up nice and fine
- 2 whole cloves of garlic, minced super thin
- 1 (14.5 ounce) can of diced tomatoes, and don’t drain the juice! That juice is flavor!
- 1 cup of white rice that’s already cooked—this is important!
- 1 teaspoon of dried oregano for that classic Italian flavor
- 1/2 teaspoon salt and just a pinch (1/4 teaspoon) of black pepper
- And finally, 1/2 cup of simple tomato sauce just for spooning over the top before baking.
See? Nothing scary! Just good, honest stuff ready to be mixed into the most comforting dinner you can imagine.
Equipment Needed for Your Classic Stuffed Bell Peppers
This recipe is great because it doesn’t require any specialized equipment, which is always a win in my book! You likely have everything you need sitting right there in your kitchen cabinets. It’s the beauty of a simple, classic meal.
You’ll definitely need a good, sturdy cutting board for prepping those peppers. Make sure you have a large skillet—one you can trust on the stovetop for browning the meat properly. And for the grand finale, grab a basic, average-sized baking dish, deep enough to hold the peppers snugly upright. That’s it! No fancy mixers or special tools needed for this one.
Step-by-Step Instructions for Classic Stuffed Bell Peppers
This is the part I love—turning the ingredients into a real meal! Don’t look at the list of steps and get intimidated; we are going to build flavor layer by layer. Since these are baked, layering the cooking process ensures everything tastes exactly how it should when it hits the table. If you want your baked peppers to be extra soft, you can check out my slightly different approach in my Roasted Stuffed Bell Peppers post, but for the classic, stick right here with me!
Preparing the Peppers and Oven
First things first: we need heat! Preheat that oven to 375 degrees Fahrenheit (190 degrees Celsius). While it’s heating up, grab your cutting board. Take the tops right off your four peppers—think of it like giving them little hats! Scoop out all the seeds and any white papery bits you see inside. We want them totally clean. Lightly grease your baking dish so nothing sticks later. Don’t throw those pepper tops away; we sneak those back on later, so just set them aside for now.
Creating the Flavorful Filling for Classic Stuffed Bell Peppers
Now for the hearty part! Heat your tablespoon of olive oil in a big skillet over medium heat. Toss in that chopped onion and cook it down until it gets nice and soft; I usually count about five minutes for that. Once the onion is happy, add your pound of ground meat. You need to use a spoon to break that meat up as it browns—I always watch closely to make sure there’s no pink left. As soon as it’s browned, drain off any excess fat. Nobody wants greasy peppers!
Next, stir in the minced garlic—it should only take about 30 seconds for it to smell heavenly. Then, dump in the entire can of diced tomatoes (juice and all!), the cooked rice, the oregano, salt, and pepper. You mustn’t skip stirring this mixture for about 5 full minutes. This little simmer lets the rice soak up all those amazing tomato and meat juices, which is key to keeping the filling perfectly moist later on. Turn off the heat once that’s done.

Stuffing, Topping, and Baking Your Classic Stuffed Bell Peppers
Time to assemble! Spoon that flavorful filling evenly into your hollowed-out peppers. Try to pack it in there nicely, but don’t smash it down too tightly. Stand them up, one by one, right in your prepared baking dish. If you’re worried about them wobbling, try lining them up snugly against the sides of the dish. Pop those little pepper tops right back on like lids!
For the final touch, take that half-cup of tomato sauce and just drizzle it right over the top of each pepper. This keeps them moist while baking! Slide the whole dish into the hot oven. They need to bake for about 45 to 55 minutes. You’ll know they are ready when the peppers themselves look tender when you poke them with a fork, and the filling is piping hot all the way through.
Tips for Success with Classic Stuffed Bell Peppers
You know, sometimes you follow the recipe exactly and it’s still just… okay? Achieving truly great Classic Stuffed Bell Peppers means taking a couple of tiny steps that make a huge difference in texture and flavor depth. My philosophy is always: why do it halfway?
If you want those peppers to be super tender—not crunchy, but not totally mushy—try giving them a quick blanch first! Just drop the hollowed-out peppers into boiling water for about three minutes before you stuff them. Drain them really well, pat them dry, and then fill them. It softens them up just enough so they get melt-in-your-mouth soft with that 45-minute bake time.
Another thing I learned early on is about the seasoning. Taste your filling mixture right before you stuff the peppers! Seriously, grab a tiny spoonful. Does it taste a little bland? Add a sprinkle more salt or oregano. Since the rice soaks up a lot of the seasoning, you want the raw mixture to taste slightly *too* seasoned, because it mellows out during the bake.
If you’re curious about how they handle major flavor twists, I experimented with a spicy version recently—you can peek at the results in my Jambalaya Stuffed Peppers post for inspiration! But honestly, for the classic, those two tiny tips—blanching and tasting the filling—are what separates a fine pepper from a fantastic one.
Ingredient Notes and Substitutions for Classic Stuffed Bell Peppers
This recipe is wonderfully adaptable, which is probably why it’s stuck around for so long! The core components—meat, rice, and tomato—are super flexible. If you want to make these a bit lighter on the digestion, swapping ground beef for ground turkey is a breeze; you really won’t notice much difference once it’s mixed with all that savory sauce and rice.
Now, about the rice. I always use plain white rice because it absorbs the flavor beautifully while staying tender. If you swap it for brown rice, you’ll need to add a little extra liquid to the filling, like maybe a splash of water or that extra tomato sauce Mom suggested, because brown rice takes longer to soften up in the oven.
And yes, you can absolutely make these vegetarian! Just ditch the meat entirely and bulk up the mixture with either lentils, finely chopped mushrooms, or even crumbled vegetarian sausage. When you do that, you usually have extra room in the pepper, so don’t be afraid to add extra chopped celery or carrots to the onion mix for texture!

Serving Suggestions for Classic Stuffed Bell Peppers
Since these Classic Stuffed Bell Peppers are such a complete meal all on their own—meat, starch, and veggie included—you really don’t need a ton of fuss on the side. That’s the beauty of it! We keep the sides light so the pepper remains the star of the show.
If I’m serving these on a weeknight, I usually just pull out a bag of mixed greens and toss it with the simplest vinaigrette I can make—you know, olive oil, red wine vinegar, salt, and pepper. A little freshness cuts right through the richness of the ground beef filling perfectly.
But, if I’m feeling like we deserve a real feast, I absolutely have to have something to mop up those extra juices that gather at the bottom of the baking dish. Nothing does that job better than crusty bread. Seriously! If you need an amazing recipe for dipping service, you have to try these Garlic Breadsticks. They are unbelievably good alongside that tomato sauce.
Storage and Reheating Classic Stuffed Bell Peppers
Leftovers? Yes, please! These peppers are almost better the next day once all those flavors have really had time to cozy up together overnight. When you’re done eating, let them cool down just a little, then tuck them into an airtight container. They’ll keep great in the fridge for about three to four days. I always make sure to keep any extra sauce in there with them, too!
When it’s time to eat them again, skip the microwave if you can! Microwaving them makes the pepper skin a little rubbery, and nobody wants that. The absolute best way to reheat them is back in the oven at about 350 degrees until they’re warmed through. If you like that saucy top layer, just cover the dish with foil first. It brings them right back to life!
Frequently Asked Questions About Classic Stuffed Bell Peppers
Can I prepare the Classic Stuffed Bell Peppers ahead of time?
Oh, that’s a smart question! Yes, you absolutely can prep these ahead of time, which helps immensely on a busy weeknight. You can mix up the entire meat and rice filling and stuff the peppers completely—lids and all!—the night before you plan to bake them. Just cover the baking dish tightly with plastic wrap and tuck them into the fridge. When it’s dinner time, pull them straight out of the cold and add that final half-cup of tomato sauce on top, then pop them right into the preheated 375-degree oven. You’ll likely need to add about 10 to 15 minutes to the baking time since they are starting cold.
How do I keep the filling moist in my Classic Stuffed Bell Peppers?
Moisture is everything! The two main things we do in this recipe to guarantee moisture boil down to the cooked rice and the tomatoes. Not only does the pre-cooked rice soak up that delicious seasoning, but it also absorbs meat juices during baking, preventing a dry crumb. Also, make sure you use the entire can of diced tomatoes, juice and all! That liquid steams inside the pepper as it bakes, keeping the meat filling soft and succulent.
What if my peppers are too small or oddly shaped?
Don’t you worry if you grab a couple of little oddballs from the store! If your peppers are smaller than the four big, standard ones this recipe calls for, you’ll just end up with more filling than you need, which is never really a problem, is it? You can bake the extra filling right alongside the peppers in a small, oiled ramekin or small casserole dish. It cooks up tasty, and you can stir it into a side salad later! If they are small, just keep an eye on the baking time; they might be done closer to the 40-minute mark.
Print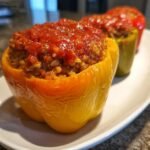
Classic Stuffed Bell Peppers
- Total Time: 70 min
- Yield: 4 servings 1x
- Diet: Low Fat
Description
A recipe for traditional bell peppers filled with a mixture of ground meat, rice, and tomato sauce, then baked.
Ingredients
- 4 large bell peppers (any color)
- 1 tablespoon olive oil
- 1 pound ground beef or turkey
- 1 medium onion, chopped
- 2 cloves garlic, minced
- 1 (14.5 ounce) can diced tomatoes, undrained
- 1 cup cooked white rice
- 1 teaspoon dried oregano
- 1/2 teaspoon salt
- 1/4 teaspoon black pepper
- 1/2 cup tomato sauce (for topping)
Instructions
- Preheat your oven to 375 degrees Fahrenheit (190 degrees Celsius). Lightly grease a baking dish.
- Cut the tops off the bell peppers and remove the seeds and membranes. Set the tops aside.
- Heat the olive oil in a large skillet over medium heat. Add the onion and cook until soft, about 5 minutes.
- Add the ground meat to the skillet. Cook, breaking it up with a spoon, until browned. Drain any excess fat.
- Stir in the minced garlic, diced tomatoes (with juice), cooked rice, oregano, salt, and pepper. Cook for 5 minutes, stirring occasionally.
- Spoon the meat mixture evenly into the hollowed-out bell peppers. Place the peppers upright in the prepared baking dish. Place the pepper tops back on the peppers.
- Pour the 1/2 cup of tomato sauce over the tops of the stuffed peppers.
- Bake for 45 to 55 minutes, or until the peppers are tender and the filling is heated through.
Notes
- You can substitute ground turkey for ground beef for a lighter version.
- If you prefer a saucier filling, add an extra 1/4 cup of tomato sauce to the meat mixture before stuffing.
- Prep Time: 20 min
- Cook Time: 50 min
- Category: Dinner
- Method: Baking
- Cuisine: American
Nutrition
- Serving Size: 1 pepper
- Calories: 350
- Sugar: 8
- Sodium: 450
- Fat: 15
- Saturated Fat: 5
- Unsaturated Fat: 10
- Trans Fat: 0
- Carbohydrates: 25
- Fiber: 4
- Protein: 30
- Cholesterol: 75
Keywords: stuffed bell peppers, ground meat, rice filling, baked peppers, classic dinner