
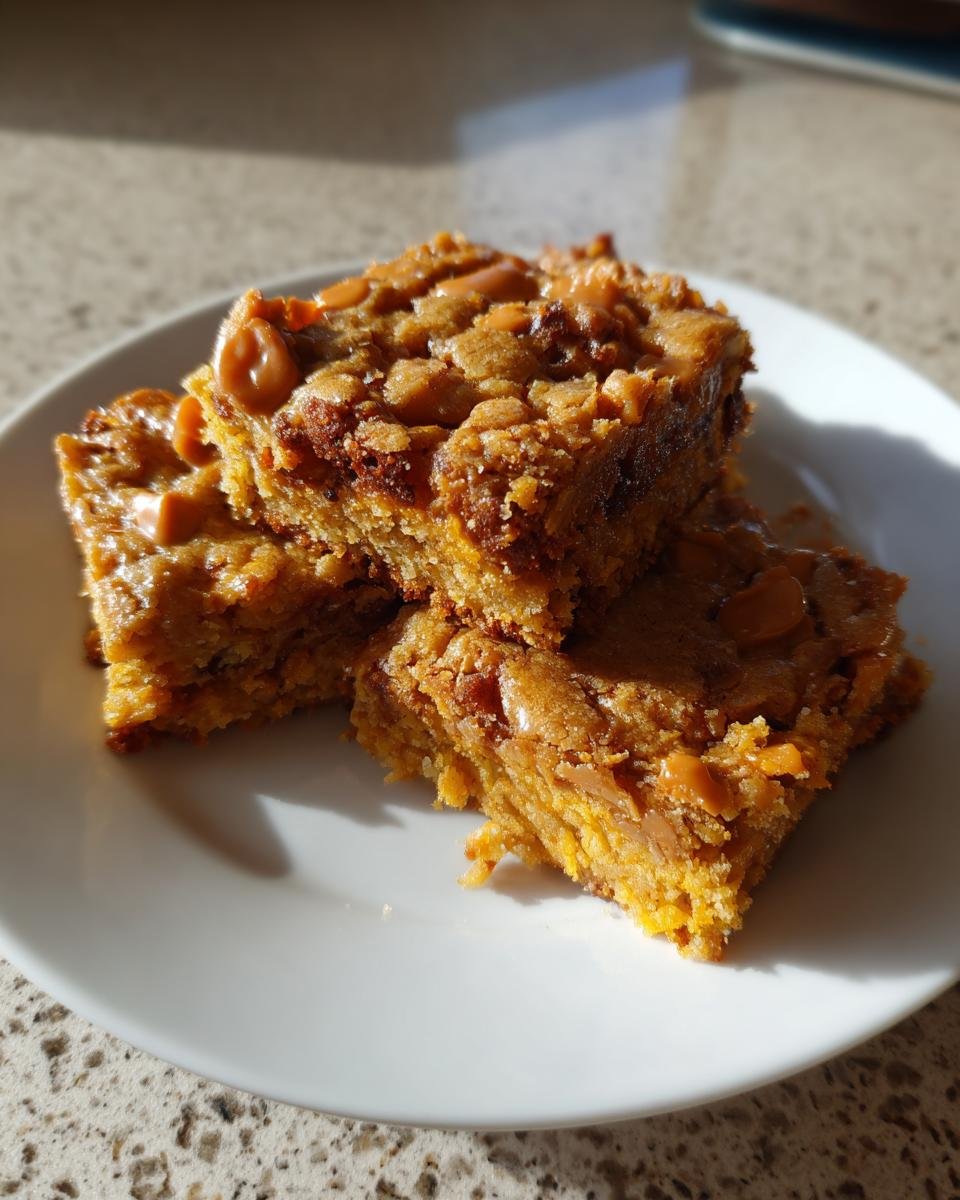
Some days you just need pure, unadulterated comfort food, right? Forget fussy frostings or tricky layering—I’m talking about something you can whip up in about 15 minutes and have coming out of the oven smelling like heaven. These Butterscotch Bars? Oh my goodness, they are my emergency happy dessert. I swear I perfected this recipe during a terrible snowstorm a few winters back when I was completely out of chocolate chips but *desperately* needed something sweet.
The beauty of these bars is their texture. They are perfectly chewy in the center, a little crisp around the edges, and just wonderfully saturated with that rich, toffee-like butterscotch flavor. If you need a sweet treat that delivers maximum payoff for minimum effort, you have found your winner. Seriously, pull out your mixer!

Why You Will Love These Simple Butterscotch Bars
I honestly can’t count how many times I’ve made these Butterscotch Bars when I needed dessert fast. They just tick every single box! You’re going to keep coming back to this recipe time and time again, trust me.
- They come together unbelievably fast—we’re talking under 15 minutes of active mixing time before they hit the oven.
- The flavor is pure, concentrated sweetness. That deep, buttery, toffee hug from the butterscotch chips is unmatched.
- Seriously, they are perfectly chewy! Not cakey, not crumbly—just that wonderful, satisfying chew.
Quick Prep Time for Your Butterscotch Bars
If you’re staring down a time crunch, these are your hero cookies, I mean, bars! We’re only looking at about 15 minutes of prep work before they go into the 350-degree oven. Throw the ingredients together, and that’s practically it. Fast, easy, done.
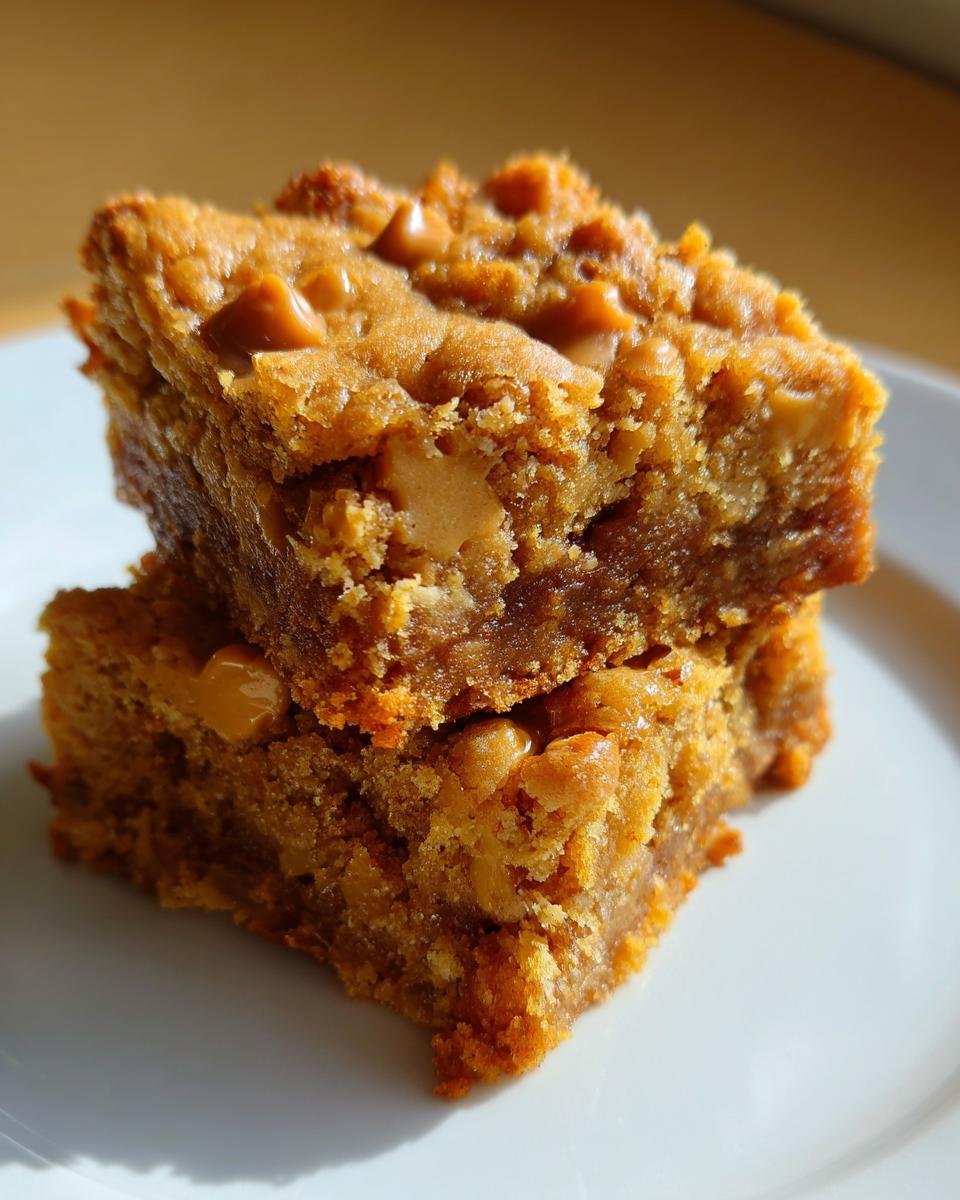
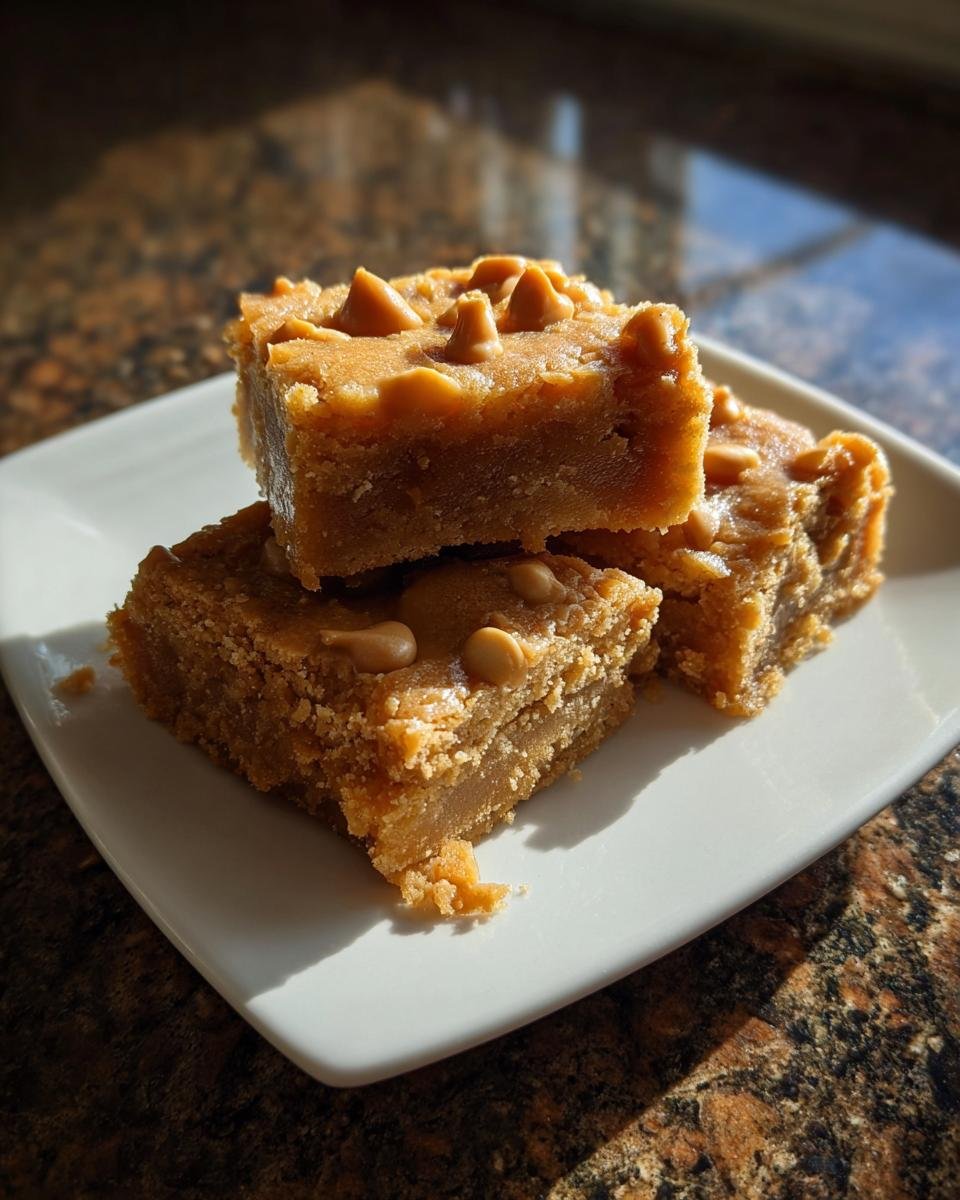
The Perfect Chewy Texture in Your Butterscotch Bars
This is where the magic happens! We use just the right amount of butter and sugar here, which stops them from puffing up too much. You want those slightly crisp, golden edges that give way to a meltingly soft, dense, and wonderfully chewy center. That’s the signature texture of a truly great batch of Butterscotch Bars.
Essential Ingredients for Perfect Butterscotch Bars
You only need a handful of things for these bars, which is why I love them for weeknights! But listen, just because the list is short doesn’t mean you can swap everything out. The quality of that base is key to getting that rich, toffee flavor. I always grab real, unsalted butter; none of that margarine nonsense in my sweet baked goods! You want the butter softened, not melted—that’s crucial for that creamy beat later on.
Here’s what you’ll need to gather for your 8×8 pan:
- 1 cup of all-purpose flour
- Just half a teaspoon of baking soda, and a quarter teaspoon of salt to wake everything up
- 1/2 cup of glorious unsalted butter, making sure it’s nice and soft
- 1/2 cup packed light brown sugar, plus 1/4 cup straight granulated sugar
- One large egg and a little splash of vanilla extract
- And the star: One full cup of butterscotch chips!
If you’re looking for the full rundown on ingredients, you can glance over the original ingredient list, but honestly, just follow those measurements above, and you’re golden!
Ingredient Notes and Substitutions for Butterscotch Bars
A couple of pointers before you jump in! First, that butter needs to be soft enough that you can easily press a finger into it, but please don’t microwave it until it’s greasy puddles! Softened is the goal. Second, don’t panic if you run out of butterscotch chips mid-recipe. The notes mention you can swap some out for semi-sweet chocolate chips if you want a slight swirl of chocolate mixed in. I’ve done it, and honestly, it’s delicious, but classic butterscotch is what I make 90% of the time!
Step-by-Step Instructions to Make Butterscotch Bars
Okay, let’s get baking! The instructions here are super straightforward, which is why I love that these glorious bars come together in such a short amount of time. Our total active time clocks in around 40 minutes total, including the bake time, which is just amazing for a dessert this rich.
First things first: Get that oven preheated to 350°F (175°C). Don’t forget to prep your 8×8 inch pan—a little grease and a dusting of flour will make sure none of those sugary edges stick on you later. You can always double-check my method for non-stick pans over at my blondie guide if you want an extra layer of insurance!
Mixing the Wet and Dry Components for Butterscotch Bars
We start by whisking our dry ingredients—the flour, baking soda, and salt—in a medium bowl and setting them aside. Now, for the big show: In a separate large bowl, you need to cream that softened butter with both your brown and granulated sugars. Beat it until it looks genuinely creamy and light. Beat in your egg and vanilla until they are *just* combined. That’s important—we don’t want to over-agitate the eggs!
Here is my E-E-A-T tip: When you add the dry mixture back in, go low and slow with your mixer. As soon as you see those last streaks of flour disappear, stop! Seriously, do not overmix. Overmixing develops gluten and turns these wonderfully chewy bars into something closer to a hard biscuit. After that, gently fold in your cup of butterscotch chips.
Baking and Cooling Your Butterscotch Bars
Once your batter is spread evenly in the pan, pop it into the preheated oven. They bake for about 20 to 25 minutes. You’re looking for the edges to turn a light, beautiful golden brown. When you test the center with a toothpick, you want moist crumbs clinging to it—not wet batter, but definitely not bone dry! That ensures they stay chewy.
And here’s the hardest part: You have to let them cool completely in the pan. I know, I know, they smell amazing hot from the oven, but if you try to cut them now, they will turn into a sugary mess. Patience is a virtue, especially when making bars!
Tips for Achieving the Best Butterscotch Bars Texture
So we’ve baked them, they smell incredible, and they look perfect waiting for you on the cooling rack. But resist the urge to slice immediately! I learned this the hard way, believe me. The very first batch I ever made? I was so excited I grabbed a knife after about fifteen minutes of cooling. Big mistake.
What I ended up with wasn’t squares; it was a sweet, gooey pile of buttery regret—delicious, sure, but impossible to serve! Now, I follow my own strict rule: They must cool completely in the pan first. That allows the sugars and fats to reset and finish setting up their structure.
For truly professional-looking slices, though, you need one more trick, which I picked up reading through some old baking notes, kind of similar to how certain pecan pie brownies need extra time to firm up. After they are totally cool (room temperature), wrap the whole pan carefully in plastic wrap and pop it into the refrigerator for at least 30 minutes.
When they are chilled, they firm up beautifully. I promise you, using a sharp knife while they are slightly chilled gives you the cleanest, most perfect squares imaginable! No more leaning towers of butterscotch crumbs on the plate. A little chill time makes all the difference between a rustic dollop and a neat, satisfying bar.
Storage and Reheating Instructions for Leftover Butterscotch Bars
Now, the real challenge with these Butterscotch Bars is keeping any leftovers! Seriously, they disappear fast in my house, but if, by some miracle, you have any remaining the next day, you need to store them correctly to maintain that glorious chewiness.
The good news is, they are fantastic at room temperature, which is how I generally keep them. You just need to make sure they are sealed up tight. I use an airtight container, and if you stacked them, put a little square of parchment paper between the layers. Trust me, you don’t want them sticking together! Stored like this at room temperature, they stay wonderfully soft and chewy for about three to four days. The flavor almost gets deeper by day two, honestly.
Okay, what if life gets busy and you need them around longer? You can absolutely freeze these bars! Once they are completely cooled and cut into squares (and definitely separated by parchment paper), seal them tightly in a freezer-safe bag or container. Try to press out as much air as you can; air is the enemy of deliciousness!
They freeze beautifully for up to three months. When you’re ready for one, just pull one or two squares out and let them thaw on the counter for about an hour. They come back to life perfectly. I’ve never really bothered reheating them because they are just as good room temperature, but if you like them slightly warm, pop a square in the microwave for 10 seconds—careful, though, too long and you might melt the chips completely!
Variations on Classic Butterscotch Bars
While I stand by the simplicity of the classic recipe—it’s perfect for a reason!—I absolutely adore playing around once the base recipe is nailed down. Once you’ve mastered the perfect chew, you’re ready to start tinkering. I’ve got a couple of easy additions that elevate these Butterscotch Bars without adding any real effort, which means more flavor with zero extra fuss!
The first thing I always encourage people to try is adding nuts. If you’re not worried about allergies, about half a cup of chopped pecans or walnuts mixed in with the chips is fantastic. They give you a lovely little crunch that contrasts beautifully with the smooth butterscotch. Just toss them in when you stir in the chips; that’s all there is to it!
Another variation I love, especially around the holidays, is leaning into that salty-sweet dynamic. Try swapping out about a third of those butterscotch chips for dark chocolate chips, like I mentioned earlier. But if you want to get really fancy, try adding a sprinkle of flaky sea salt right over the top of the batter *before* it goes into the oven. That little bit of salt just makes the butterscotch flavor explode, kind of like how a pinch of salt really works wonders in that pineapple pecan cake my neighbor makes.
You can also play with extracts, though I stick to vanilla in the base recipe. If you have some good quality almond extract, try swapping half the vanilla for almond. It gives the bars a very sophisticated, almost marzipan-like undertone that pairs really nicely with the brown sugar.
Honestly, these bars are so sturdy and forgiving, you don’t need to worry about complex steps. Just stir in your favorite additions right at the end with the chips, spread it in the pan, and bake! It’s baking by intuition at its best, and I love sending people off with recipes that allow for that kind of creative freedom!
Serving Suggestions for Your Homemade Butterscotch Bars
These Butterscotch Bars are rich, buttery, and deeply sweet, so they pair wonderfully with things that cut through that sweetness a little bit. They don’t really need anything else since they are so decadent on their own, but finding the right drink or sidekick can take them from a great snack to an amazing dessert moment!
My absolute favorite way to enjoy one—especially after they’ve been chilled and sliced perfectly—is warm with the world’s best cup of coffee. The heat of the coffee melts that butterscotch just a tiny bit, and the bitterness of the coffee balances the sugar load perfectly. If I’m serving them after dinner, I always go for a scoop of high-quality vanilla bean ice cream. The cold creaminess against that warm, chewy bar is seriously divine.
If you’re serving these to little ones or just don’t want dairy, a tart drink works miracles. Try serving them alongside a sparkling cranberry spritzer or even just some unsweetened iced tea. That little bit of tartness cleanses the palate between bites, making sure you can eat more than one! I actually saw a recipe for a citrus glaze for coffee cake the other day, and I swear, a tiny drizzle of lemon glaze on these bars would be the next thing I try, just for that bright contrast!
Ultimately, they are portable little squares of happiness. Eat them standing over the sink, eat them wrapped in a napkin on the way to a picnic—but definitely eat them with something alongside them to help wash down all that amazing brown sugar flavor!
Frequently Asked Questions About Butterscotch Bars
I hear from so many of you asking the same things once you get this recipe pulled up, and that’s totally normal! Bar recipes can sometimes be fussy about texture, so I’m happy to clear up any confusion about storage or swaps for these Butterscotch Bars.
Can I make these Butterscotch Bars ahead of time?
Oh, absolutely! In fact, I highly recommend it! As I mentioned in the tips section, these bars are even better the next day once they’ve fully set up. You can bake them completely—let them cool, chill them, and slice them—all a day ahead of time. Just store them in an airtight container at room temperature, and they are ready to go when needed! They are fantastic for parties because you get all the stress out of the way the day before!
What is the best way to store leftover Butterscotch Bars?
For the best texture—that perfect chew—keep them layered with parchment paper in an airtight container at room temperature for up to four days. If you live somewhere really humid, you can pop them in the fridge, but I find refrigeration makes them a bit firmer than I prefer. If you do refrigerate, just let them sit on the counter for about 20 minutes before serving so they soften up a hair.
Can I use margarine instead of butter in my Butterscotch Bars?
You *can*, but honestly, I wouldn’t suggest it if you want that rich, classic flavor. Butter provides a richness and fat content that margarine just can’t replicate, especially when paired with the brown sugar. If you try margarine, your bars might spread a little more and the flavor won’t be as deep and satisfying. Real butter is worth it here for the texture alone!
Why did the centers of my bars sink after cooling?
That usually happens for two reasons, and don’t worry, it’s a super common fix! First, make sure you’re using the correct amount of leavening agent—the baking soda. Too little, and the bar doesn’t get enough lift. Second, check your sugars! If you packed the brown sugar down too hard when measuring, you might have too much sugar, which causes instability as it cools. Always gently spoon the sugar into the cup and level it off!
Estimated Nutritional Snapshot of These Butterscotch Bars
Now, I have to give you the usual little disclaimer here: I’m a baker, not a nutritionist! These numbers are just an estimate based on the ingredients I use, so take them with a grain of salt—or maybe a tiny sprinkling of that sea salt I mentioned earlier! These Butterscotch Bars definitely fall into the “treat” category, as expected from something so rich and buttery.
For one serving (that’s one of those perfectly cut squares), here is what we are looking at:
- Calories: 180
- Sugar: 18g (Yep, it’s sweet!)
- Fat: 10g
- Carbohydrates: 21g
- Protein: 2g
It’s a lovely little indulgence, perfect with a cup of coffee. Enjoy them knowing you made them entirely from scratch!
Print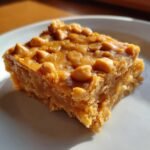
Simple Butterscotch Bars
- Total Time: 40 min
- Yield: 16 bars 1x
- Diet: Vegetarian
Description
A straightforward recipe for making sweet and chewy butterscotch bars.
Ingredients
- 1 cup all-purpose flour
- 1/2 teaspoon baking soda
- 1/4 teaspoon salt
- 1/2 cup (1 stick) unsalted butter, softened
- 1/2 cup packed light brown sugar
- 1/4 cup granulated sugar
- 1 large egg
- 1 teaspoon vanilla extract
- 1 cup butterscotch chips
Instructions
- Preheat your oven to 350 degrees F (175 degrees C). Lightly grease and flour an 8×8 inch baking pan.
- In a medium bowl, whisk together the flour, baking soda, and salt. Set aside.
- In a large bowl, beat the softened butter, brown sugar, and granulated sugar with an electric mixer until creamy.
- Beat in the egg and vanilla extract until just combined.
- Gradually add the dry ingredients to the wet ingredients, mixing on low speed until just combined. Do not overmix.
- Stir in the butterscotch chips.
- Spread the batter evenly into the prepared baking pan.
- Bake for 20 to 25 minutes, or until the edges are lightly golden brown and a toothpick inserted near the center comes out with moist crumbs attached.
- Let the bars cool completely in the pan before cutting into squares.
Notes
- For cleaner cuts, chill the cooled bars in the refrigerator for about 30 minutes before slicing.
- You can substitute semi-sweet chocolate chips for some of the butterscotch chips if you prefer.
- Prep Time: 15 min
- Cook Time: 25 min
- Category: Dessert
- Method: Baking
- Cuisine: American
Nutrition
- Serving Size: 1 bar
- Calories: 180
- Sugar: 18
- Sodium: 75
- Fat: 10
- Saturated Fat: 6
- Unsaturated Fat: 4
- Trans Fat: 0
- Carbohydrates: 21
- Fiber: 0
- Protein: 2
- Cholesterol: 25
Keywords: butterscotch bars, dessert, easy baking, sweet treat, butterscotch