
Oh my gosh, if you need a dessert in a hurry that tastes like you spent three days slaving over it, this is your answer. Seriously, I have made this layered dream for every single potluck I’ve attended for the last five years, and I swear, the plate is always clean before I even get a chance to grab a second serving! We’re talking about these incredible *Butterfinger Desserts* today, and the best part? It’s mostly no-bake, which means less time wrestling with the oven and more time enjoying that spectacular crunch.
That sweet, salty, peanut-buttery crunch from the candy bars layered on top of that cool, creamy filling? It’s pure genius. When I tell people it comes together so fast, they never believe me. This recipe is ridiculously satisfying, especially when you need a showstopper without the stress. Trust me, you’ve got to try this version.

Why This No-Bake Butterfinger Desserts Recipe Shines
I live for desserts that deliver maximum payoff for minimal effort, and this recipe is the reigning champion in my kitchen lineup. When you need something sweet and decadent fast, you really can’t beat this layered wonder. It’s become my go-to for last-minute celebrations because it just disappears!
- Ready in Minutes: Other than the essential chill time, you are actually mixing and assembling the layers in under 30 minutes total. We’re talking real-deal quick satisfaction here!
- The Crunch Factor is Unreal: That signature Butterfinger snap against the soft cream cheese? It’s the absolute best texture combination. It keeps the dessert interesting from the first bite to the last crumb.
- It’s a Crowd-Pleaser, Guaranteed: If you bring this to an event, be prepared to share the recipe. I’ve watched people skip right over the fancy-looking layer cakes to grab a slice of this beauty.
- Super Simple to Customize: Don’t stop at just Butterfingers! You can easily swap out the candy bar for chopped peanut butter cups or even crushed Oreos if you like. It’s so flexible, which is great when you’re staring into your pantry trying to figure out what to make. For more easy, chilled ideas, you should definitely check out my guide on no-bake strawberry desserts!
Gathering Ingredients for Your Butterfinger Desserts
Okay, time to chat about what you need to grab from the store. The beauty of this recipe is that it uses pantry staples mixed with one very important, crunchy star! I always make sure my cream cheese is sitting out for at least an hour before I start, because lumpy cream cheese is the enemy of a smooth layer, trust me.
If you’re thinking about making a totally no-bake version, skip the first section entirely and just press some graham cracker crumbs mixed with melted butter into the pan instead. But if you follow the classic way I’ve written it out, you’ll need these specific items for the best results. For serious cream cheese tips, make sure you check out how to keep it perfectly smooth when you read my guide on cream cheese gelatin recipes!
For the Crust
Even though some people skip baking this part, I love that slightly crisp, shortbread-like base. It gives the whole dessert structure so the layers don’t entirely merge while chilling. You want this base to hold up to all that creamy goodness loaded on top!
- 1 cup all-purpose flour
- 1/2 cup cold unsalted butter, cubed (Keep it cold so it crumbles nicely!)
- 1/4 cup granulated sugar
- 1/4 teaspoon salt
For the Cream Cheese Layer
Please, please, please, make sure your cream cheese is soft! I mean, room temperature soft. If it’s cold, you’ll get little cream cheese lumps in your beautiful filling, and nobody wants that texture surprise when they are expecting smooth heaven.
- 1 (8 ounce) package cream cheese, softened
- 1 cup powdered sugar
- 1 teaspoon vanilla extract
For the Topping and Assembly
This is where the magic happens! You need enough topping to gently smother the cream cheese layer, and enough chopped candy bars to make every single bite memorable. Don’t be shy with the Butterfingers!
- 1 (12 ounce) container frozen whipped topping, thawed (Make sure it’s completely thawed but not runny!)
- 1 cup chopped Butterfinger candy bars (Chop these a little roughly; you want texture!)
Step-by-Step Instructions for No-Bake Butterfinger Desserts
Alright, here’s where we put it all together! Now, I need to address something important right away: the recipe card says to bake the crust, but the title promises *no-bake*! Since this is such a popular potluck favorite, I’m giving you the quick, true no-bake method, which saves time and keeps everything cool and creamy. If you want that slight shortbread snap, you can follow the original 15-minute bake, but honestly, pressing it in cold works just as well!
If you are ditching the oven entirely, just skip those first three steps and move right into pressing that crumb mixture firmly into the bottom of your dish. I really stress the “firmly” part—you want a solid base that won’t crumble when you cut into those layers later. For more great low-prep ideas, take a look at my thoughts on no-bake cookie dough recipes!
Preparing the Crust for Your Butterfinger Desserts
First up, let’s mix up that amazing base. You just want to combine your flour, cold cubed butter, sugar, and salt right in a bowl. Use your fingers or a pastry cutter until it looks like coarse sand. Once it’s mixed, press it down evenly into the bottom of your 9×13 inch pan. Don’t be gentle here—pack it tight so it holds everything together once it chills! If you choose to bake it, put it in a 350-degree oven for just 15 minutes, then you absolutely must let it cool completely. If you’re going the no-bake route, straight into the fridge it goes!
Creating the Cream Cheese Filling for Butterfinger Desserts
Next is the filling that dreams are made of. Beat your softened cream cheese until it’s just silky smooth—no lumps allowed! Seriously, take your time here; a smooth base means a smooth dessert. Once it’s perfect, mix in the powdered sugar and vanilla. Now, here’s the delicate part: gently fold in HALF of your thawed whipped topping. You don’t want to beat the air out of it, so use a rubber spatula and cut down the middle and sweep it around until it’s just combined. It should look light and fluffy!
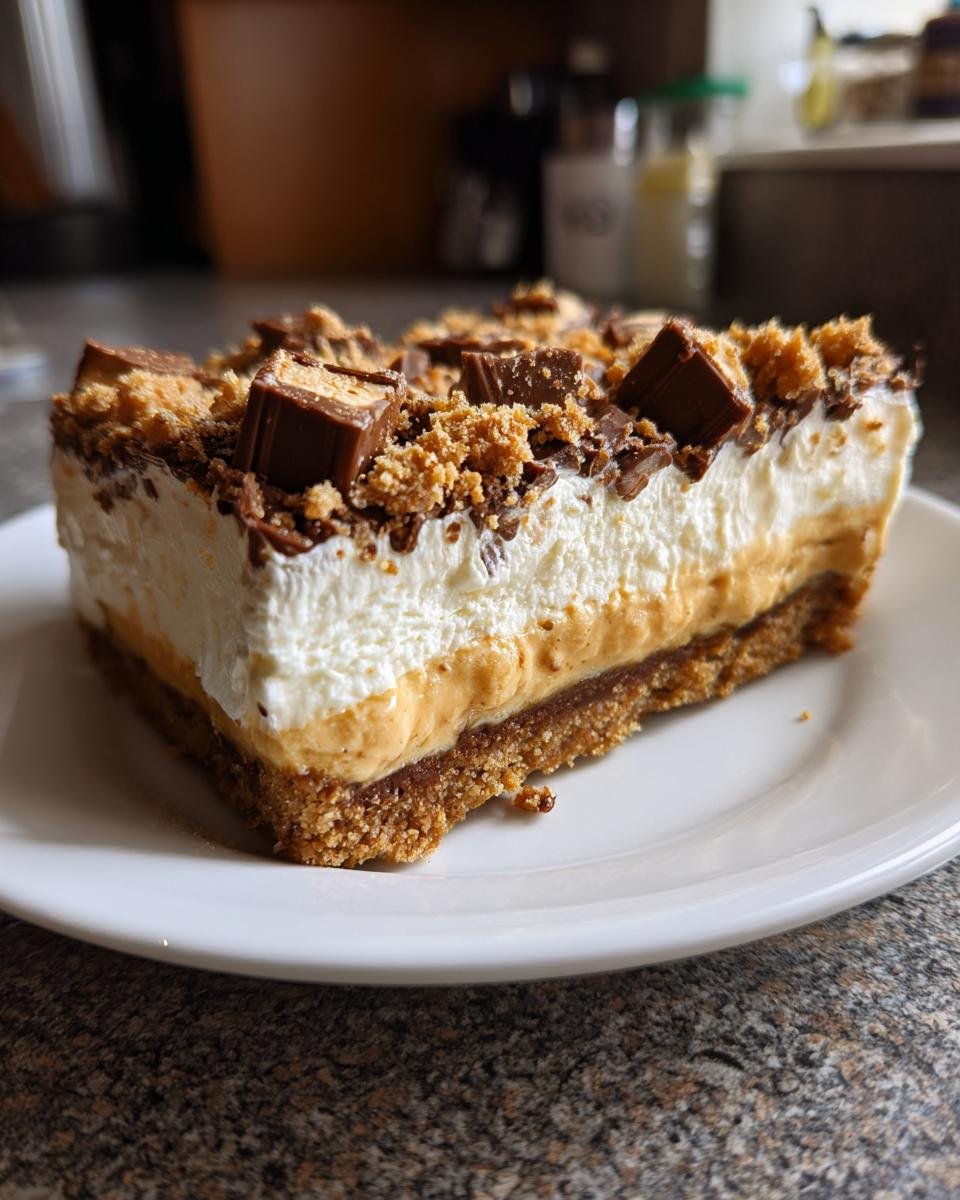
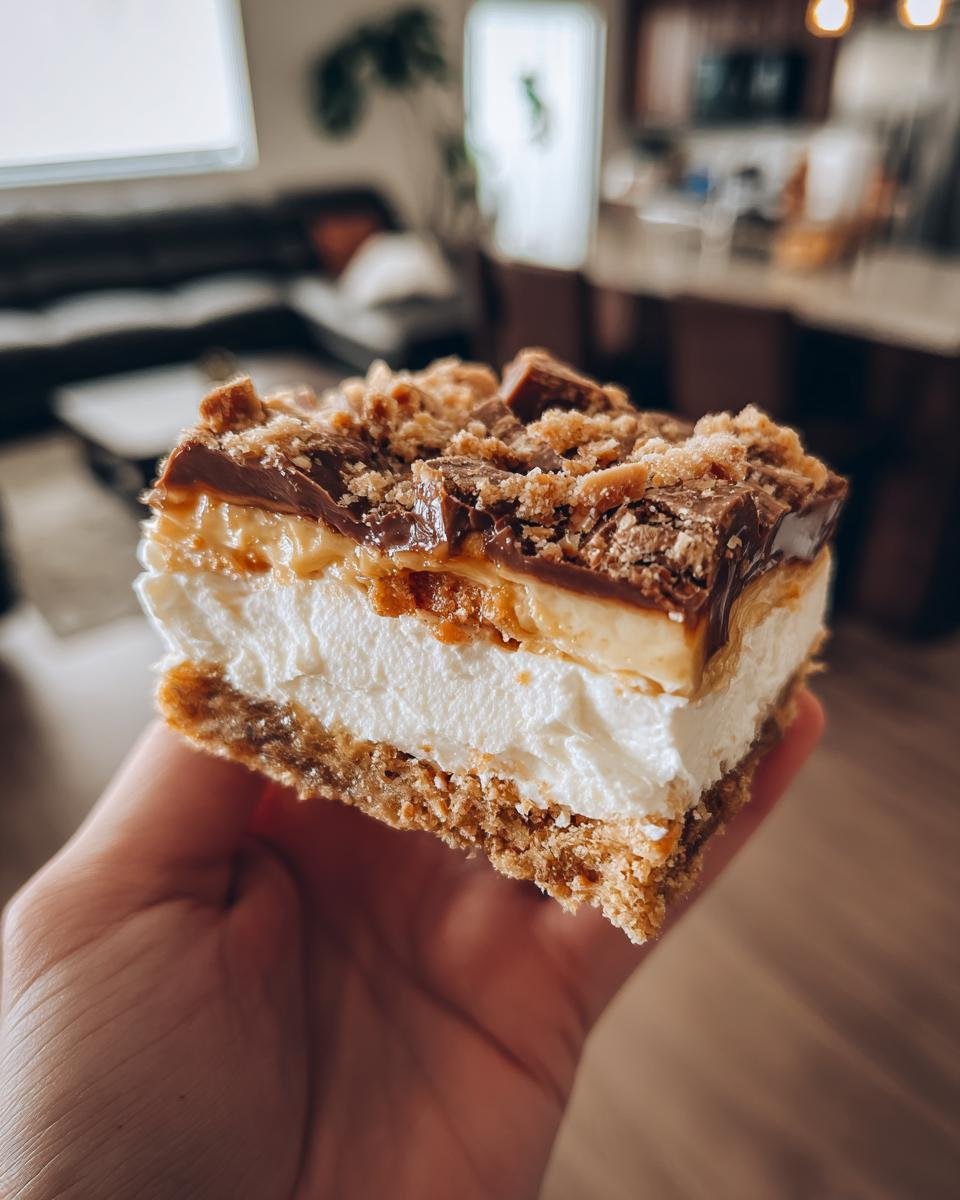
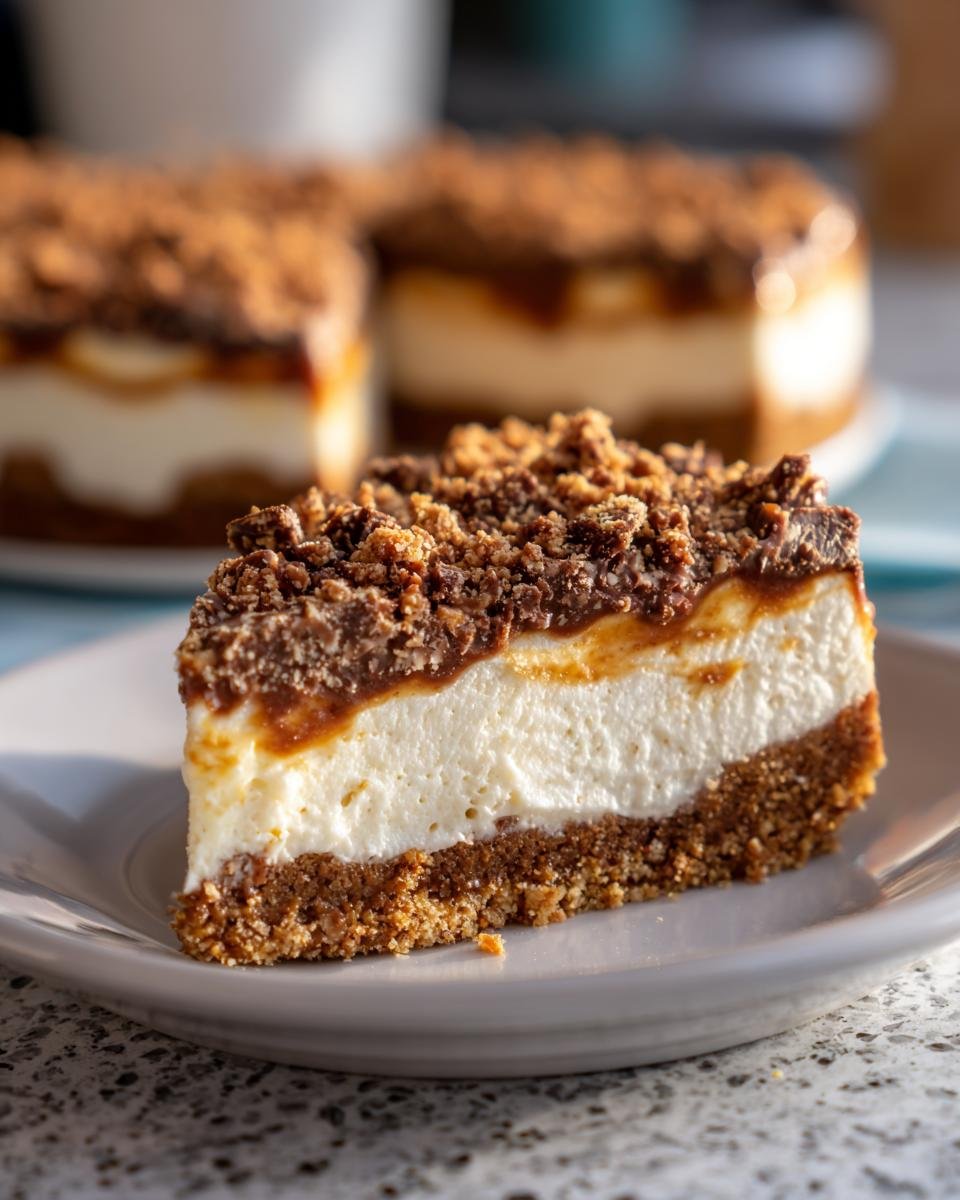
Assembling the Layers of Your Butterfinger Desserts
Time to build this tower of yum! Spread that glorious cream cheese mixture right over your cooled or pressed crust. Make sure you get it evenly spread right to the edges. Sprinkle half of your chopped Butterfinger bars right on top of that soft layer. Then, gently spread the remaining whipped topping right over the candy bars—again, smooth and even! Finally, sprinkle the rest of your chopped Butterfinger bars all over the very top. That final layer is pure visual appeal! Cover it up and send it to the fridge for at least four hours. Patience pays off here!
Tips for Perfecting Your Butterfinger Desserts
I’ve made this layered treat so many times that I’ve figured out the little tricks that separate a good dessert from the BEST dessert. It’s not just about throwing things in a dish, you know? A few tiny adjustments make all the difference in texture and presentation, especially when it comes to that wonderful topping!
My first rule if you are using frozen whipped topping—make sure it’s actually thawed until it’s soft but not liquidy. If it’s still icy, you’ll deflate all the air when you try to fold it in, and then your top layer will be dense instead of fluffy. If you decide to make your own whipped cream instead of using the thawed stuff, listen up: use a cold bowl and cold beaters! It whips up so much faster and you get way more volume, which is what you want on top of all that richness.
Next up: the chopping of the Butterfingers. If you try to chop those things with a standard knife, they shatter everywhere and you end up with mostly dust. I like to toss them in a sturdy zip-top bag, seal it up—making sure to press the air out—and then give them a good whack with a rolling pin or the bottom of a heavy saucepan. Aim for pieces that are about the size of a lentil to a small pea. Too small, and they blend into the cream cheese; too big, and you can’t get a clean slice later.
Now for the chilling. I know, I know, waiting four hours feels like an eternity when something smells this good. But trust me, if you cut into it too soon, the layers are going to slide around, and that beautiful cream cheese layer will squish out everywhere. That minimum four hours lets everything set up firmly. If you can manage it, making this the night before is genuinely the best plan for clean slices. If you’re worried about keeping that cream cheese layer perfect, I highly recommend checking out my notes on handling cream cheese for perfectly smooth mixtures!
Ingredient Notes and Substitutions for Butterfinger Desserts
I always get questions about how strict I am with ingredients, especially when people are staring down a dessert that needs to be made *right now*! The good news is that this recipe is pretty forgiving, but there are a couple of spots where you can either save time or change the texture profile completely.
So, let’s talk about that crust again. If you are really pressed for time—maybe you realized at 5 PM you need a dessert for an 8 PM party—you can totally ditch mixing the flour, butter, sugar, and salt. You can use a pre-made shortbread crust! It’s a lifesaver. You just crumble that store-bought base into the pan, and you’re good to go. It won’t have that slightly buttery, shortbread flavor we get from the homemade version, but it cuts your prep time down by a solid 15 minutes, which is huge.
When it comes to the whipped topping, the recipe calls for the frozen kind, and that’s because it’s stable and thick. If you don’t have that container, you can absolutely make your own heavy whipping cream into whipped cream until stiff peaks form. Just remember what I said earlier: use a cold bowl! If you use homemade versus thawed, your top layer might deflate just a tiny bit as it sits, but the flavor is totally fresh, so you get a trade-off there. If you’re interested in how you can lighten up on some of these richer components in general, check out my article on making lighter cakes without butter and sugar.
The Butterfingers themselves are non-negotiable for this specific dessert, obviously, but if you absolutely must substitute, peanut butter cups are my second choice. Just know that peanut butter cups will melt a lot more into the cream cheese layer compared to the crisp coating of the Butterfingers, so you might lose some of that distinct crunchy layer!
Storage and Reheating Instructions for Leftover Butterfinger Desserts
So, you managed to save some? Good for you! This dessert is fantastic the next day—in fact, I think the flavors really settle in overnight—but because we are dealing with layers of cream cheese and whipped topping, storage is super important. My biggest piece of advice here is simple: keep it cold, keep it covered.
This isn’t one of those rustic, rustic desserts you can just leave sitting on the counter. It’s got dairy, so we need refrigeration, no question! Make sure you use an airtight container or press plastic wrap directly onto the surface of the dessert before covering the whole dish tightly with foil. If you leave it uncovered, the whipped topping will start to dry out and look sad within a few hours, and nobody wants a sad, crusty top layer!
How Long It Stays Good in the Fridge
I find that this dessert tastes best within the first three days. After that, the crust starts to get a little soggy—that’s just the nature of moisture migrating through those lovely layers! You might push it to day four, but Day One and Day Two are the absolute peak for this specific confection. Trust me, it goes so fast, you probably won’t have to worry about Day Four anyway!
Can You Freeze Butterfinger Desserts?
This is a tricky one. If you try to freeze it completely, you’re going to have texture issues when it thaws. The cream cheese layer will likely get grainier, and the whipped topping turns into weird icy puddles. That’s a big no from me!
However, I have had success freezing the *uncut* squares if you wrap them super tightly—like, wrap them in plastic wrap, then in foil, then put them in a Ziploc bag—for up to a month. When you want to eat it, let it thaw *slowly* in the refrigerator overnight. Do not try to speed this up on the counter! Once thawed, add a fresh sprinkle of chopped Butterfingers on top because the original ones might have gotten soft during thawing.
A Note on Reheating (Spoiler Alert: Don’t!)
Please, please, please do not try to heat this up! If you put this layered dessert in the microwave, you’re going to end up with melted cream cheese soup on the bottom and a deflated whipped topping pool on top. It’s designed to be served chilled, straight from the fridge. If you want to serve it “warm-ish,” just take it out of the fridge about 15 minutes before you plan to cut slices. That lets the cream cheese soften up just a hair, making it easier to scoop, but keeps the dessert cool and firm enough to hold its shape.
Serving Suggestions for Your Layered Butterfinger Desserts
This dessert is rich, right? It’s sweet, it’s creamy, and it has that salty peanut butter note coming through. Because it’s such a knockout all on its own, you don’t need a ton of fussy sides, but a little something to cut through that richness can make the experience even better. I usually go for something hot to balance the chill!
My first and number one pairing suggestion is always a hot beverage. You simply cannot beat a strong, hot cup of coffee alongside this. The slight bitterness of the coffee just cuts through all that sugar and fat beautifully, making you ready for the next bite immediately. I’m talking about a nice dark roast, not some super sugary latte!
The Great Coffee Pairing
Seriously, try it. If you serve this after dinner, skip the heavy wine and just pour a good cup of freshly brewed coffee. It cleanses your palate perfectly. My sister even likes a simple, slightly bitter black tea if she’s avoiding caffeine, and it works just as well for cutting the sweetness.
When You Need a Little Brightness
Sometimes, even I admit that chocolate and peanut butter need a little something bright and acidic to keep things interesting, especially if you’re serving a huge platter of this stuff. Since the Butterfinger centers have that slight peanutty tang, a bright fruit sauce works wonders. It might sound weird pairing fruit with candy bars, but trust me on this one.
If you want to try something really fresh to balance the heavy cream cheese, make a quick, slightly tart sauce. I find a bright raspberry or strawberry sauce is incredible here. It adds a gorgeous color to the plate, too! If you don’t want to go totally overboard, check out my super easy recipe for simple strawberry sauce recipe; it takes about ten minutes and makes a world of difference because of that acidity!
Alternatively, if you want to keep it super American and cozy, skip the sauce and just serve it with a small scoop of vanilla bean ice cream. The cold-on-cold contrast is divine, but you’ll need a bigger bowl to catch any drips!
Frequently Asked Questions About Butterfinger Desserts
I always get a ton of questions whenever I post this recipe online because people are usually trying to figure out how to make it even faster or how to make it last longer. And honestly, I love hearing from you all! It shows how much everyone loves these amazing layered desserts!
Can I use peanut butter cups instead of Butterfingers?
Yes, you absolutely can! I mentioned this earlier, but I wanted to put it here because so many people ask. If you substitute peanut butter cups—like Reese’s, for example—you need to know you’re trading the signature crunchy candy coating for smooth chocolate and peanut butter. The final dessert will be much richer and softer overall. You still get that great chocolate/peanut butter vibe, but you lose the specific “crunch” that makes this version famous. If you’re a Reese’s fan, you might love my guide on Reese’s Oreo balls, which is another amazing candy bar dessert!
How long can I make this ahead of time?
This is a fantastic make-ahead dessert, which is why it’s my potluck secret weapon! You can assemble the whole thing and chill it for up to 24 hours before serving. If you chill it overnight, the crust might soften up just a tiny bit more from the moisture migrating up, but honestly, I think it gets even better because all those cream cheese and candy bar flavors really meld together. Just keep it tightly covered in the fridge!
Will those Butterfinger pieces stay crisp?
This is the million-dollar question for any layered dessert with crispy inclusions! Because we have that fluffy cream cheese layer and the whipped topping, some softening is inevitable, especially after the first day. I’d say on Day One, you have about 80% crispness retained. By Day Two, that crunch becomes a pleasant chewiness rather than a sharp snap. If crispness is your absolute top priority, only sprinkle half the candy bars on the middle layer, and save the other half to sprinkle on *right* before you serve it on Day Two. Moisture is the enemy of crunch, but this dessert is still delicious even when slightly softened!
My crust seems too dry/crumbly. What did I do wrong?
Oh, I hate that feeling! If you were making the baked crust, it usually means your butter wasn’t cold enough, or you over-baked it by a minute or two. If you went the no-bake route (which is my preference!), it means you didn’t press it down hard enough in the pan. That crust needs to be compacted like a paving stone to hold up to the layers. If it’s already crumbly, don’t panic! Just gently take a few extra tablespoons of softened butter and drizzle it over the top and press it in again before chilling. It will firm right up!
Sharing Your Butterfinger Desserts Creations
I hope you’re getting excited to make this layered treat because I promise you, it’s one of those recipes that brings pure joy. Once you’ve made it and had everyone raving about that incredible crunch and creamy filling, I really want to hear all about it!
Did you follow my advice and use the no-bake crust? Did you sneak a taste before the mandatory chill time was up? Don’t keep those triumphs—or any questions you still have—to yourself!
Head over to [Our Social Channel Link Here] and tag me in your photos when you serve up these awesome *Butterfinger Desserts*. I love seeing them sitting on your dessert tables, and seeing how you decorated the top layer! Let me know in the comments below how quickly your family polished off the pan—mine never lasts past dinner!
Sharing Your Butterfinger Desserts Creations
I hope you’re getting excited to make this layered treat because I promise you, it’s one of those recipes that brings pure joy. Once you’ve made it and had everyone raving about that incredible crunch and creamy filling, I really want to hear all about it!
Did you follow my advice and use the no-bake crust? Did you sneak a taste before the mandatory chill time was up? Don’t keep those triumphs—or any questions you still have—to yourself!
Head over to Instagram or Facebook and tag me in your photos when you serve up these awesome Butterfinger Desserts. I love seeing them sitting on your dessert tables, and seeing how you decorated the top layer! Let me know in the comments below how quickly your family polished off the pan—mine never lasts past dinner!
Print
No-Bake Butterfinger Dessert
- Total Time: 4 hr 35 min
- Yield: 12 servings 1x
- Diet: Vegetarian
Description
A simple, layered dessert featuring crushed Butterfinger candy bars.
Ingredients
- 1 cup all-purpose flour
- 1/2 cup cold unsalted butter, cubed
- 1/4 cup granulated sugar
- 1/4 teaspoon salt
- 1 (8 ounce) package cream cheese, softened
- 1 cup powdered sugar
- 1 teaspoon vanilla extract
- 1 (12 ounce) container frozen whipped topping, thawed
- 1 cup chopped Butterfinger candy bars
Instructions
- Preheat oven to 350 degrees F.
- Combine flour, cold butter, granulated sugar, and salt in a bowl. Press mixture into the bottom of a 9×13 inch baking dish.
- Bake the crust for 15 minutes. Let it cool completely.
- Beat the cream cheese until smooth. Add powdered sugar and vanilla extract, beating until combined.
- Fold in half of the whipped topping. Spread this mixture over the cooled crust.
- Sprinkle half of the chopped Butterfinger bars over the cream cheese layer.
- Spread the remaining whipped topping over the candy bar layer.
- Top with the remaining chopped Butterfinger bars.
- Chill for at least 4 hours before serving.
Notes
- You can use a pre-made shortbread crust to save time.
- Keep the dessert refrigerated until ready to serve.
- Prep Time: 20 min
- Cook Time: 15 min
- Category: Dessert
- Method: Baking and Chilling
- Cuisine: American
Nutrition
- Serving Size: 1 slice
- Calories: 310
- Sugar: 25
- Sodium: 210
- Fat: 19
- Saturated Fat: 10
- Unsaturated Fat: 9
- Trans Fat: 0
- Carbohydrates: 33
- Fiber: 1
- Protein: 4
- Cholesterol: 35
Keywords: Butterfinger, no-bake, dessert, candy bar, cream cheese, layered