
Oh, I know those weeknights when you look in the fridge at 6:00 PM and think, “There is no way I can make a good dinner before everyone melts down.” Trust me, I have been there! That’s why this recipe for **baked tacos** has become my absolute holy grail. We’re talking about the easiest, crispiest tacos you will *ever* make, and they come together faster than ordering takeout. Seriously, you just need a sheet pan and about 20 minutes total. I’m not kidding, these simple baked tacos saved our Tuesday last week when soccer practice ran ridiculously late. The shells get this perfect snap without any of the grease splatter that comes with frying. You’re going to adore how simple this is!
Why You Will Love These Simple Baked Tacos
I stand by these baked tacos; they truly solve the ‘what’s for dinner’ panic attack every time. I’ve tried every trick in the book, and honestly, baking is the superior method for that satisfying crunch. Forget wrestling with hot oil!
- The speed is unmatched! We’re looking at about 10 minutes of hands-on time before these go into the oven. It’s the definition of a fast weeknight success story.
- Forget soggy bottoms! Baking them upright locks in the heat and makes the shells shatteringly crisp in a way that pan-frying never quite manages without burning the edges.
- Cleanup is a dream. Since everything happens on one simple baking sheet, you are practically done once the final toppings are piled on.
Quick Prep and Cook Time for Baked Tacos
Listen, if dinner isn’t on the table fast, I’m probably grabbing takeout. That’s why I love this. With only 10 minutes of prep and another 10 minutes baking, having fantastic **baked tacos** ready in 20 minutes total is just brilliant. You can make your salad and prep your cheese topping while the beef simmers. It’s perfect when you’re exhausted but still want something homemade and satisfying.
Achieving Maximum Crunch in Baked Tacos
This is the big secret, really. Traditional frying works, sure, but it’s messy and often leaves the shell greasy before it’s even fully crisp. When you bake these **baked tacos**, the dry heat of the oven dries out the corn shell perfectly, creating a texture that is almost airy and so much cleaner tasting. They come out beautifully rigid, ready to hold all your toppings without immediately collapsing under the weight.

Essential Ingredients for Perfect Baked Tacos
I always say that if you want fantastic results, you have to start with decent building blocks, right? The ingredients list for these is so short, you barely need to go grocery shopping. I write everything down exactly as it appears on my trusty recipe card because I don’t mess with the core elements of this fast dinner. For six servings, you are going to need about one solid pound of ground beef—that’s the standard for us. Don’t skip draining the fat; we want flavor, not an oil slick!
Then you absolutely need that packet—yes, the store-bought taco seasoning! I know some people make their own, and bless their hearts for the effort, but when you need dinner in 20 minutes, that packet blend is just magical. You mix that with half a cup of plain water, and that’s your sauce. It looks too thin, but trust me, it thickens up beautifully while simmering. For the shells, you’ll grab twelve hard taco shells—the classic crunchy kind. And for the finishing touches, one easy cup of shredded cheddar cheese is perfect, along with just half a cup of lettuce and a quarter cup of salsa. That’s it! Everything is pre-measured and ready to go.
Ingredient Notes and Substitutions for Baked Tacos
Now, I stick to ground beef because I love that traditional hearty flavor, but if you are trying to lighten things up or just ran out of beef, you can absolutely swap it! Ground turkey works like a charm, and ground chicken is also fantastic in these **baked tacos**. They cook up just as fast, so the timing stays exactly the same, which is huge for me.
If you don’t have cheddar, use Monterey Jack or a Mexican blend—whatever melts nicely is fine. The only thing I won’t substitute, honestly, is the hard shell itself. If you swap these for soft tortillas, you miss the whole point of the crispy baked experience we are going for here! Keep the seasoning packet, keep the shells, and you’re golden.
Step-by-Step Instructions for Crispy Baked Tacos
Okay, deep breath! This is where the magic happens, and I promise you, it’s faster than watching a rerun. I always get my baking sheet ready first, because once the filling is done simmering, we need to move fast to keep everything piping hot. Don’t you dare use a cold oven! Get that temperature set to 350 degrees Fahrenheit right away so it’s screaming hot when we are ready to fill those shells.
I’ve got a cool trick for you, too. If you want them truly shatteringly crisp—and who doesn’t?—you can pop the empty shells onto the sheet pan and give them a 5-minute head start in that hot oven before you even add the meat. This is my pro move for anyone who loves an extra sturdy shell. If you try this, just remember you might only need 5 or 6 minutes of baking time later on instead of the full 10, since they are already halfway done!
Preparing the Ground Beef Filling for Baked Tacos
First thing: Get your ground beef into a skillet over medium heat. We need to brown this up thoroughly. Once it looks totally cooked through, and this is important—please drain off all that excess grease! You don’t want the bottom of your meat mixture swimming in fat; it makes the filling heavy and can steam the shells later. I just tilt the pan over the sink and hold the meat back with a spoon.
Next, stir in that whole packet of taco seasoning mix and the half cup of water. Bring that whole mixture up to a gentle simmer, meaning just a few little bubbles breaking the surface. Let it bubble away nicely for about five minutes, stirring every now and then until it thickens up just enough to coat the meat. It should look rich and ready to go. This is when you’re almost ready to assemble your **baked tacos**!
Baking the Shells and Assembling Your Baked Tacos
Once your meat mixture is ready, line up those hard taco shells right there on your prepared baking sheet. Stand them up nice and neatly—I usually have three rows of four shells. Then, using a spoon, scoop the seasoned beef mixture evenly into each one. Don’t overstuff them, or they will definitely spill out when they bake!
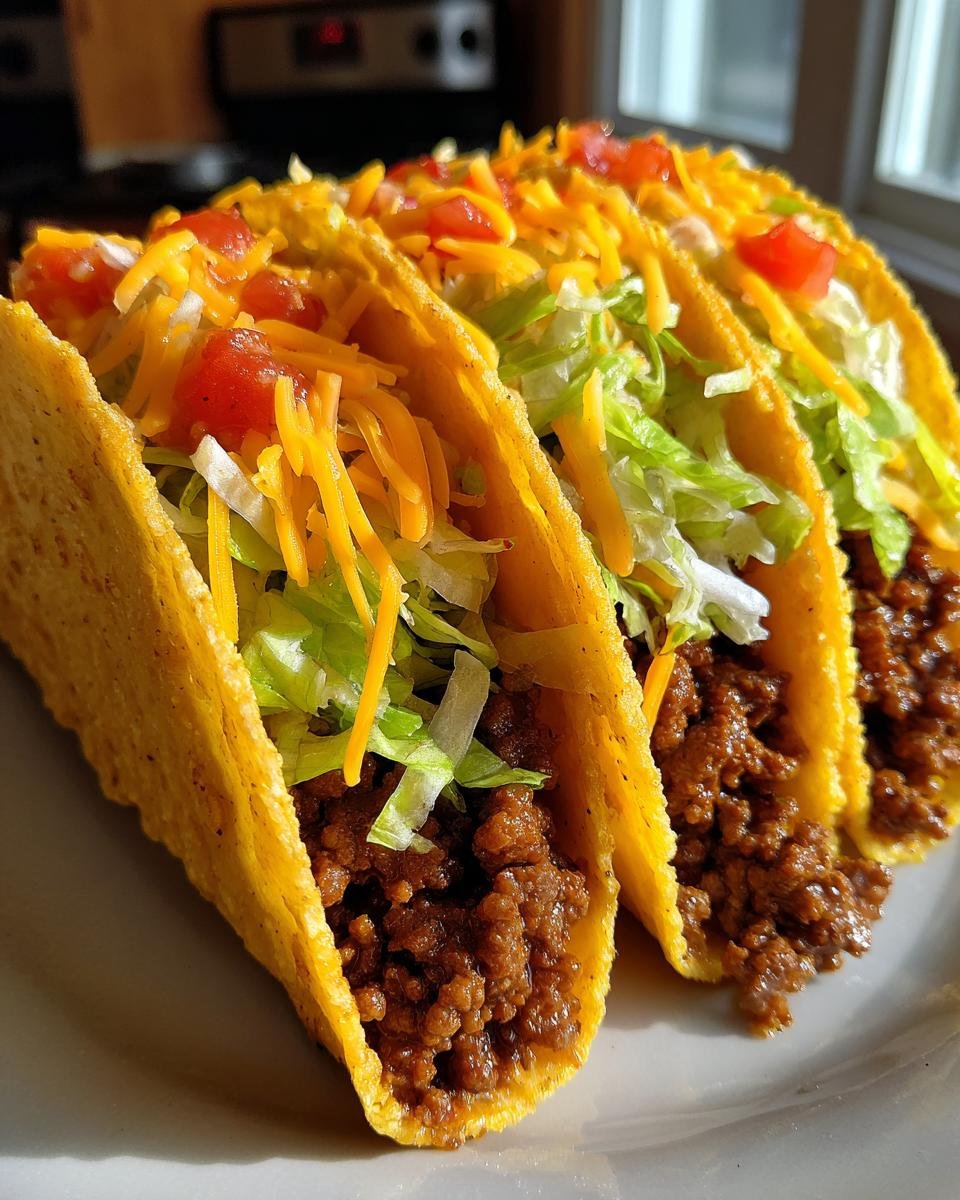
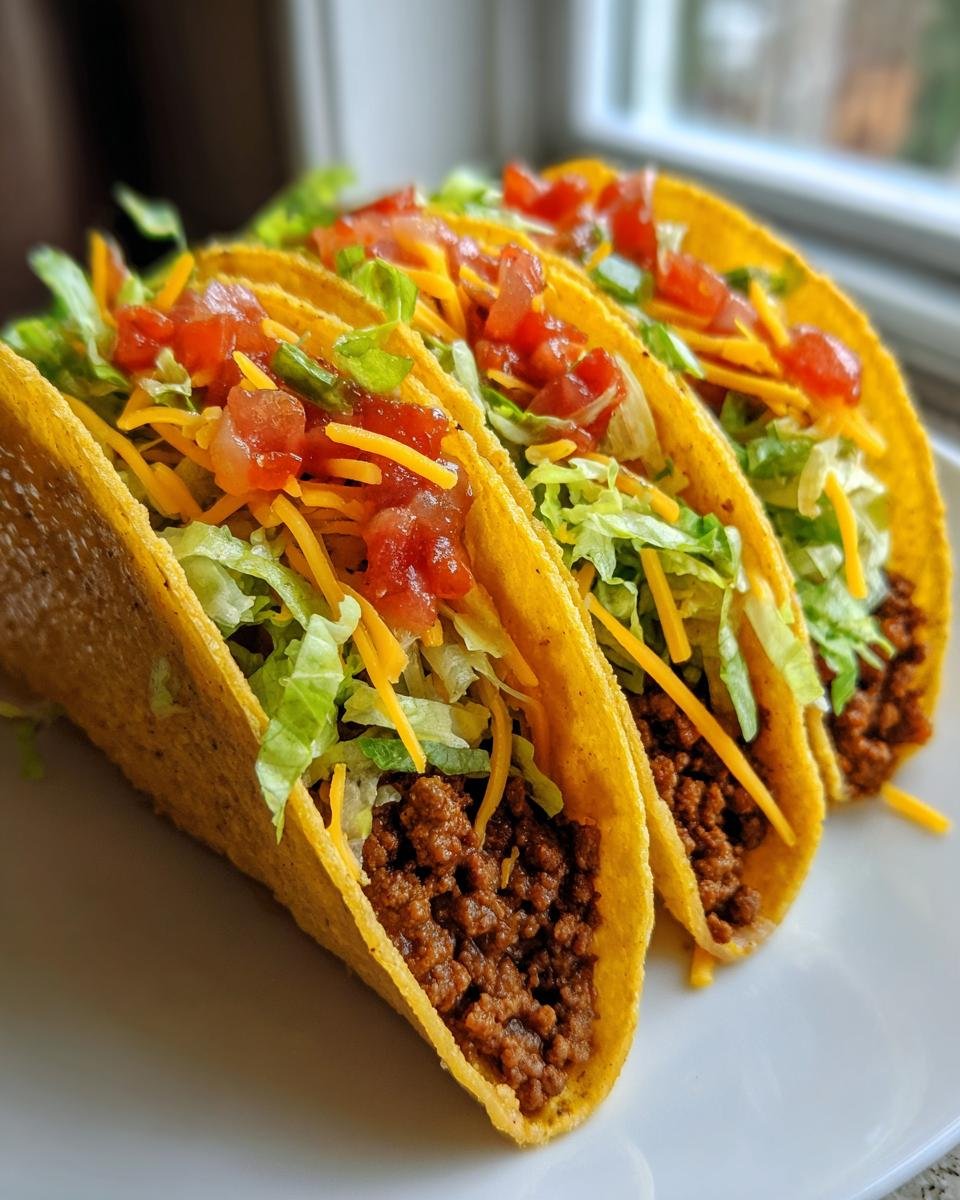
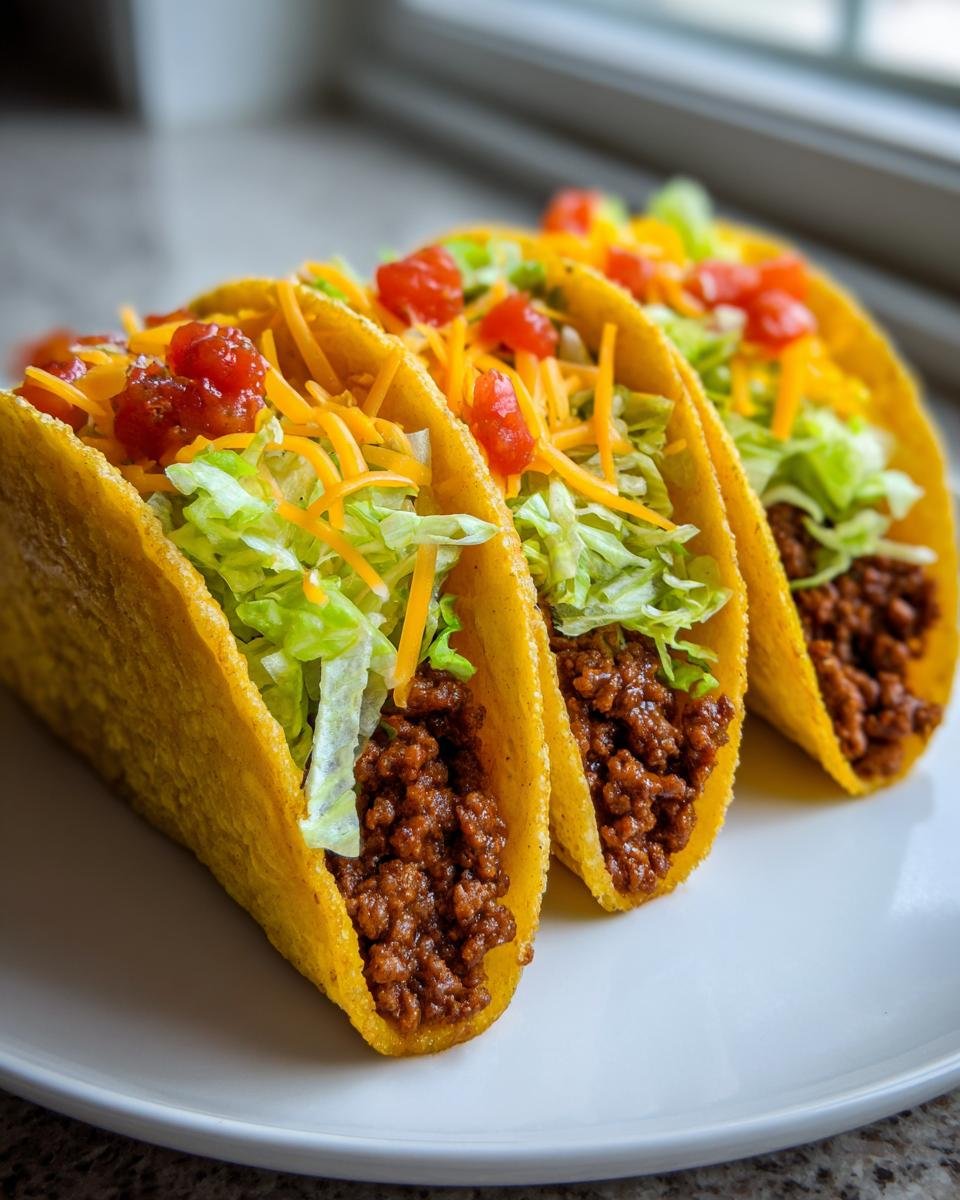
Now, slide that loaded sheet into your 350°F oven. Let them bake for about 8 to 10 minutes. You are waiting for two things: the shells to be heated all the way through, and for them to get just a touch crispier than they already are. It’s only a short bake! When they come out, quickly dust each one with your shredded cheddar cheese—the residual heat melts it perfectly. Then you can load up the lettuce and salsa. See? Super simple assembly for the best **baked tacos**!
If you want to see another one-pan dinner magic trick, check out my recipe for Walking Taco Casserole—it uses similar meat filling but turns it into a big dish!
Tips for Success When Making Baked Tacos
You’ve got the meat cooked and the oven hot—that’s the hard part done! But trust me, a couple of tiny tricks can take these from ‘good’ to ‘I can’t believe I made these myself’ territory. Mastering the assembly phase is what truly separates the everyday taco maker from the expert.
First up: stopping the tipping! Nothing is more frustrating than having your perfectly filled taco shells flop over halfway through baking, spilling that gorgeous, seasoned beef all over the sheet pan. How do I stop this disaster? I always fold a tiny, rolled-up piece of aluminum foil and tuck it snugly between two shells to prop them up against each other. Or, if you have a muffin tin handy, place two shells inside each two-cup section! They stay perfectly upright, and you don’t have to worry about leaks.
The second tip circles back to the grease: after you drain the beef, give the meat a quick, quick pat down with a paper towel right in the skillet. You’ve tilted the pan, but sometimes a little oil still pools. A quick dab removes that excess fat without drying out the meat mixture, ensuring your final **baked tacos** are crisp, not oily.
Finally, while you are prepping toppings, consider making a quick batch of my Ultimate Homemade Cornbread mix later. It sounds strange for a taco night, but trust me, freshly baked cornbread on the side makes any simple meat night feel like a real feast. It’s just a little something extra that elevates the whole meal!
Serving Suggestions for Your Baked Tacos
So, you’ve got your perfectly crispy, piping hot **baked tacos** straight out of the oven, sprinkled with that beautiful cheddar. Now comes the truly fun part: customizing them! My basic recipe only calls for lettuce, cheese, and salsa, but honestly, that’s just the starting line, not the finish line. You need texture and flavor explosions in every single bite, right?
For a quick upgrade, you can never, ever go wrong with a big dollop of cool sour cream. It cuts through the spice from the seasoning packet perfectly. If you happen to have avocado lying around, smash it up with a fork, a little salt, and maybe a squeeze of lime juice to make the quickest guacamole. That creamy avocado against the crunch of the shell? Heaven.
But if you want to get really adventurous—and I highly recommend you do—you need some heat and depth. I’ve been obsessed lately with swapping out boring bottled hot sauce for something with more body. Check out how easy it is to whip up a fresh Chimichurri Sauce! It sounds wild on a crispy taco, but the bright, herbaceous flavor with a little kick of vinegar is surprisingly amazing against the ground beef. It turns taco night into *gourmet* taco night with almost zero extra effort.
Other things I always put out on the table include diced white onion for a sharp bite, pickled jalapeños if you like serious heat, and maybe some crumbled cotija cheese if you want that salty, dry counterpoint to the melted cheddar.
Storage and Reheating Instructions for Leftover Baked Tacos
Look, I get it. Sometimes you make a batch of these fast dinners and realistically, there are leftovers! That’s fine, but we have to be smart about storage, or by tomorrow, those fantastic crispy shells will be sad and floppy. The absolute biggest mistake you can make is storing the assembled tacos together in one container. Don’t do that; it’s a recipe for soggy doom!
For the best results, you need to keep everything separate so you can rebuild the crunch when you’re ready to eat them again. Store the seasoned ground beef mixture in an airtight container in the fridge. It stays good for about three days, no problem. Then, put your lettuce, cheese, salsa, and any other cold toppings into their own separate little containers. Keep them cold.
The shells are the tricky part. If you have any leftover plain, un-filled shells, they store great in their original box or a zip-top bag on the counter. They rarely go bad unless they get damp.
Restoring the Crunch to Leftover Baked Tacos
You *must* reheat the shells if you want that amazing snap back. Do not microwave them; microwaving turns them chewy instantly. The best method, hands down, is the oven, just like we did the first time! Preheat your oven—or toaster oven, which is great for just two or three shells—to 350 degrees Fahrenheit. Lay those leftover shells right on your baking sheet, just like before.
Give them about 5 to 7 minutes to bake until they feel completely heated through and crisp again. Once they are piping hot, pull the sheet out and immediately start loading them up with your meat filling. That hot shell will warm the beef right up, and you can add your cold toppings at the very last second. This process brings these **baked tacos** right back to life!
Can I store the meat filling with the seasonings already mixed in?
Yes, absolutely! In fact, I sort of hope you have leftovers! The flavor of the taco seasoning actually seems to deepen overnight when it sits with the meat and the residual moisture. Just make sure you let the meat cool down completely before you seal the container and put it in the fridge. Keeping the cooked meat warm while you seal it creates condensation, and that moisture will ruin your storage efforts. Cool first, seal second!
Frequently Asked Questions About Baked Tacos
I know folks sometimes have questions when they try a new weeknight dinner method, especially when messing with the traditional way of making tacos. That’s totally fine! I’ve answered the top things people ask me about perfecting these **easy tacos** and getting that guaranteed crunch every time.
Can I use corn shells instead of flour for these Baked Tacos?
That is a phenomenal question! You absolutely can use corn shells, but I have to give you a little warning: corn shells are far more delicate than the standard flour-based hard shells the recipe seems to imply. Corn shells are often thinner and crispier from the start—which sounds great, but they can break easily when you fill them.
If you use corn shells, I highly recommend following my tip from before: bake them plain for a solid 5 minutes before adding any meat. Just set them on the sheet pan at 350°F. This sets the structure so they don’t crumble the second you try to stand them up or fill them. They still make for great **crispy tacos**, just handle those corn ones with a bit more gentle love!
How do I keep my Baked Tacos from getting soggy?
Sogginess is the sworn enemy of the **baked taco**, and it usually comes from one of two places: excess grease in the meat or toppings that are too wet sitting directly on the shell.
First, make sure you drain that beef really well, like I mentioned earlier, but here is the extra moisture trick: When you are spooning the meat into the shell, try to leave behind any watery liquid lurking at the bottom of the skillet. You want the seasoned meat, not the extra liquid base.
Second, the toppings! If you plan on making these ahead of time, definitely store the toppings—especially the salsa and any chopped fresh tomatoes—separately. When you’re ready to eat, place a very thin layer of cheese directly onto the warm meat first. That cheese acts like a little moisture barrier between the hot beef and your cold toppings, keeping the shell crisp for longer!
If all else fails and you have a massive spread planned, you can always serve these tacos alongside my recipe for Seven Layer Taco Dip. That way, people can load up chips instead of weighing down their tacos!
Estimated Nutritional Information for Baked Tacos
Okay, so while the focus here is speed and incredible crunch, I know some of you are counting macros or just curious about what you’re eating! Please remember that because we use a standard seasoning packet and store-bought shells, these numbers are just a good ballpark estimate. The exact values change wildly depending on what kind of ground beef you use, how much salsa you pile on, and what kind of cheese you grab.
This information is based on the recipe yielding 6 servings, with each serving being two of the **baked tacos**. When I ran these through my tracker, here’s what popped out for that two-taco serving size:
- Calories: Roughly 320 per serving. Not bad for a full dinner base!
- Fat: About 18 grams total, which includes about 7 grams of saturated fat. If you’re using 93% lean beef, this number drops beautifully, so keep that in mind.
- Protein: We are looking at a fantastic 22 grams of protein, which keeps everyone full until breakfast rolls around.
- Carbohydrates: Around 18 grams, mostly coming from the corn shells.
I always advise readers that if you are trying to keep sodium down, definitely look for lower-sodium taco seasoning mixes or use half the packet and add your own chili powder and cumin for extra flavor instead. Enjoy your easy tacos!
Share Your Experience Making These Baked Tacos
Whew, that’s the whole process! Now that you know how fast and easy it is to get these **baked tacos** on the table, I truly want to know how they turned out for you. This recipe is a staple in my house, and I’m so eager to hear how it fits into your busy schedule!
Did you try my little trick of baking the shells naked for 5 minutes longer? Tell me if it made a difference for you! Please take a moment to leave a star rating right down below the recipe card; those ratings help other overwhelmed cooks find meals that actually work for them.
And I absolutely live for topping suggestions! What did you put on top of your crispy shells? Did you use sour cream, or maybe you got wildly creative? Snap a picture of your dinner spread and tag me on social media—seeing your homemade tacos brightens my whole week. I’m already planning what I’ll make next, maybe a pan of this amazing casserole later this week to use up the rest of that ground beef!
Go enjoy those crispy tacos! It’s always a win when dinner is this fast and this good.
Print
Simple Baked Tacos
- Total Time: 20 min
- Yield: 6 servings 1x
- Diet: Low Fat
Description
A straightforward recipe for making crispy baked tacos.
Ingredients
- 1 pound ground beef
- 1 packet taco seasoning mix
- 1/2 cup water
- 12 hard taco shells
- 1 cup shredded cheddar cheese
- 1/2 cup shredded lettuce
- 1/4 cup salsa
Instructions
- Preheat your oven to 350 degrees Fahrenheit.
- Brown the ground beef in a skillet over medium heat. Drain any excess grease.
- Stir in the taco seasoning mix and water. Bring to a simmer and cook for 5 minutes, stirring occasionally.
- Arrange the hard taco shells open-side up on a baking sheet.
- Spoon the cooked meat mixture evenly into each taco shell.
- Bake for 8 to 10 minutes, or until the shells are heated through and slightly crispier.
- Remove from the oven. Top each taco with shredded cheese, lettuce, and salsa.
Notes
- You can substitute ground turkey or chicken for the ground beef.
- Bake the shells plain for 5 minutes before adding the filling if you prefer extra crispiness.
- Prep Time: 10 min
- Cook Time: 10 min
- Category: Dinner
- Method: Baking
- Cuisine: Mexican
Nutrition
- Serving Size: 2 tacos
- Calories: 320
- Sugar: 3
- Sodium: 550
- Fat: 18
- Saturated Fat: 7
- Unsaturated Fat: 11
- Trans Fat: 0
- Carbohydrates: 18
- Fiber: 2
- Protein: 22
- Cholesterol: 65
Keywords: baked tacos, easy tacos, ground beef tacos, crispy tacos, quick dinner