
Oh, you know those nights when all you crave is something warm, sweet, and just a tiny bit rustic? You don’t want fussy layers or fancy piping—you just want that deep, comforting flavor that screams ‘home!’ That’s exactly why I keep this recipe on repeat. Seriously, this is the absolute best, straightforward **Apple Crumble** recipe I have ever used. It’s got the perfect ratio of sweet, spiced apples swimming underneath a buttery, crunchy blanket. I have tried fancier desserts, but when the air turns crisp, I always come back to these simple measures. It’s the ultimate no-fail dessert, and trust me, it only takes minutes to put together before it goes into the oven!
Why This Simple Apple Crumble Recipe Works So Well
I love this dessert because it doesn’t demand a huge chunk of my evening, which is a huge win after a long day. It’s one of those recipes where simple ingredients truly shine.
- Quick Preparation for Your Apple Crumble: You genuinely only need about fifteen minutes to get this whole thing assembled. Toss the apples, mix the topping, sprinkle, and bake! That speed is why this **Apple Crumble** shows up on my table mid-week, not just for special occasions.
- Perfect Texture Balance: What makes it special is the contrast. You get that soft, warm, cinnamon-spiced layer of cooked apples peeking out from underneath that wonderfully crisp, golden oat topping. It’s the crunch against the soft filling that keeps everyone coming back for just one more spoonful.
Essential Ingredients for the Best Apple Crumble
Okay, let’s talk supplies! You cannot shortcut this. Because this recipe is straightforward, every single ingredient needs to be treated with respect. Seriously, don’t try to substitute low-quality butter here; it makes all the difference in the topping’s flavor! I’ve broken down exactly what you need to make sure your **Apple Crumble** comes out picture-perfect every single time. If you’re ever looking for more ways to use cinnamon in the morning, check out these apple cinnamon muffins!
For the Apple Filling in Your Apple Crumble
For the fruit, I always go for a mix—maybe two Granny Smiths for that tart bite and four sweeter ones, all peeled, cored, and sliced up nicely. You want them uniform so they cook evenly! Then we wake those apples up with just a quarter cup of white sugar and one teaspoon of cinnamon. Don’t forget the squeeze of lemon juice; it keeps the apples bright and stops them from browning too much before they hit the heat. This combination results in the best flavorful base for your **Apple Crumble**.
Creating the Perfect Crumble Topping
This is where the real texture comes from! You need one cup of flour, a half cup of that wonderful dark brown sugar—the molasses notes are essential—and a half cup of rolled oats. The key, the absolute non-negotiable part, is the butter. It must be cold unsalted butter and cut into tiny little cubes. If your butter is warm, you’ve already lost the battle against soggy bottoms!
Step-by-Step Instructions for Making Apple Crumble
Getting this dessert into the oven is so exciting because the smell starts filling your house almost immediately! We are going to move quickly here so we can get to the tasting part. If you love baked fruit goodness, you will definitely want to see how I make my cinnamon apple French toast casserole—it’s another great way to use those fall spices!
Preparing the Apple Base for Your Apple Crumble
First things first, turn that oven on to 375 degrees F (that’s 190 C for my international friends). Grab an 8×8 baking dish and give it a nice light grease. Now, take those seasoned apples you mixed up and spread them out across the bottom of that dish so they are in a nice, even layer. This helps them cook evenly under that gorgeous topping you’re about to build for your **Apple Crumble**.
Mixing and Applying the Crumble Topping
In a separate clean bowl—don’t worry about washing the apple bowl—just toss together that flour, brown sugar, and oats. Now, bring in your cold butter cubes. This is my favorite part! You need to use a pastry blender, or honestly, just use your fingertips if you don’t have one. Work the butter into the dry mixture super fast until it looks like coarse, uneven crumbs. Don’t overwork it! We want those little pieces of butter to stay distinct so they melt into crunchy pockets.
Baking Time and Visual Cues for Perfect Apple Crumble
Sprinkle that beautiful coarse topping evenly right over those spiced apples. Pop the whole thing into your preheated oven and let it bake for about 35 to 40 minutes. You’ll know it’s done when the topping is a lovely golden brown color, and you can actually see the apple filling underneath bubbling happily around the edges. That bubbling is the sign your **Apple Crumble** is ready to come out and cool down just a bit before serving!

Expert Tips for the Ultimate Apple Crumble
Listen, I know the recipe looks simple, but the difference between a good **Apple Crumble** and a legendary one is often just one tiny, well-kept secret. I’ve learned over the years exactly which small tweaks make this dessert sing. If you treat these tips like gospel, I promise you won’t be disappointed! You know, if you’re looking for other ways to play with cinnamon and fruit, you should peek at my recipe for apple cinnamon muffins; they are super popular!
Choosing the Right Apples for Your Apple Crumble
Don’t just grab any apple from the bin! For the best texture stability, you need apples that hold up to the heat without turning into total mush. Granny Smith apples are my ride-or-die because they bring that necessary tartness and resist softening too much. But here’s my trick: mix them! I use two Granny Smiths and four Honeycrisp or Fuji apples. This gives you that complex flavor profile while ensuring your **Apple Crumble** filling has real body when you dig into it!
Preventing a Soggy Bottom
Oh, the dreaded soggy bottom—every baker’s nightmare, especially with juicy baked fruit! My absolute favorite defense against this is actually in the fruit prep phase. After you toss your apples with the sugar and cinnamon, let them sit for about five minutes. During that time, they release a lot of liquid. You can carefully drain off the very top layer of liquid before putting them in the baking dish, or you can stir in about one teaspoon of all-purpose flour with the spices. That flour acts like a little sponge, soaking up that excess juice so it steams the apples instead of making the bottom crust waterlogged. It works like magic every time!
Serving Suggestions for Your Warm Apple Crumble
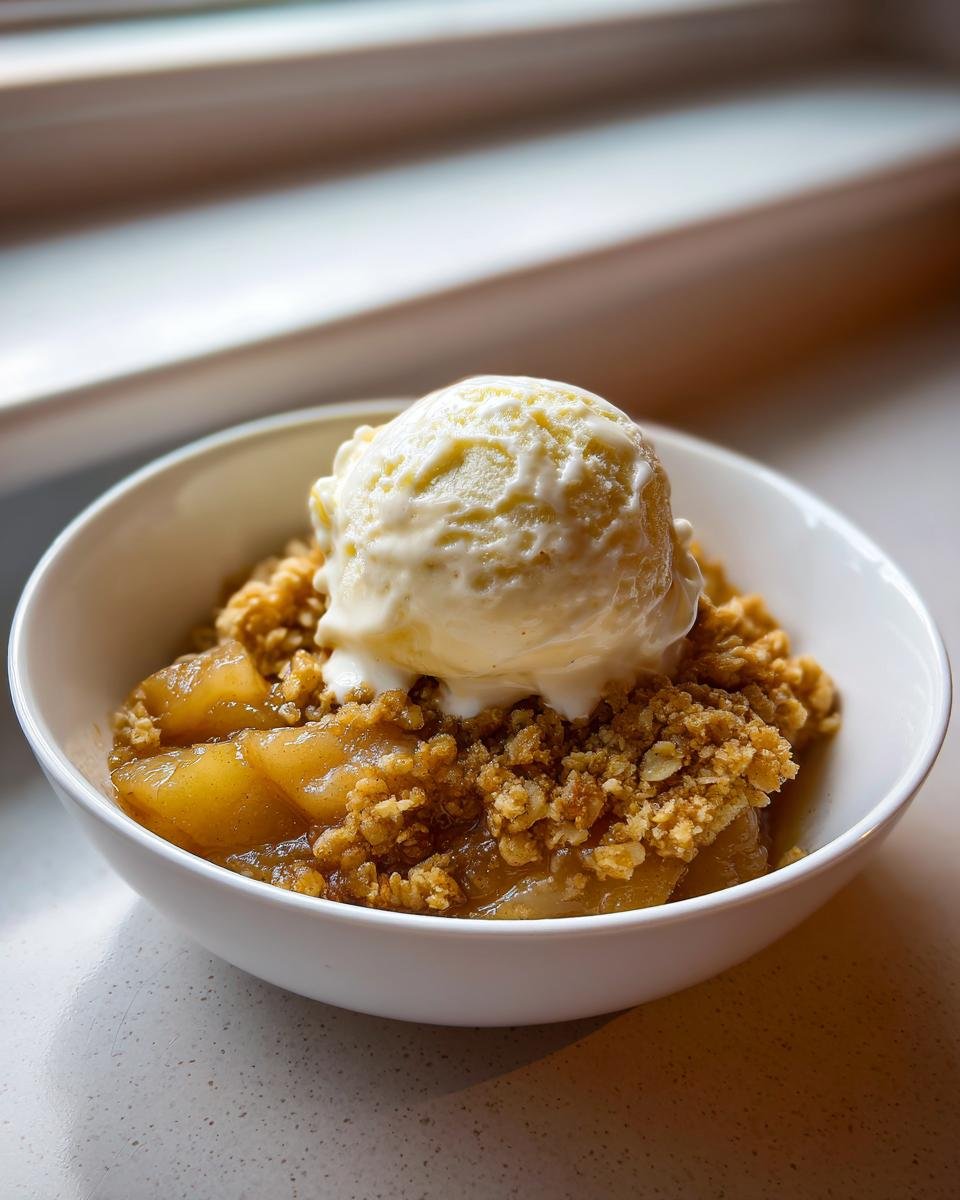
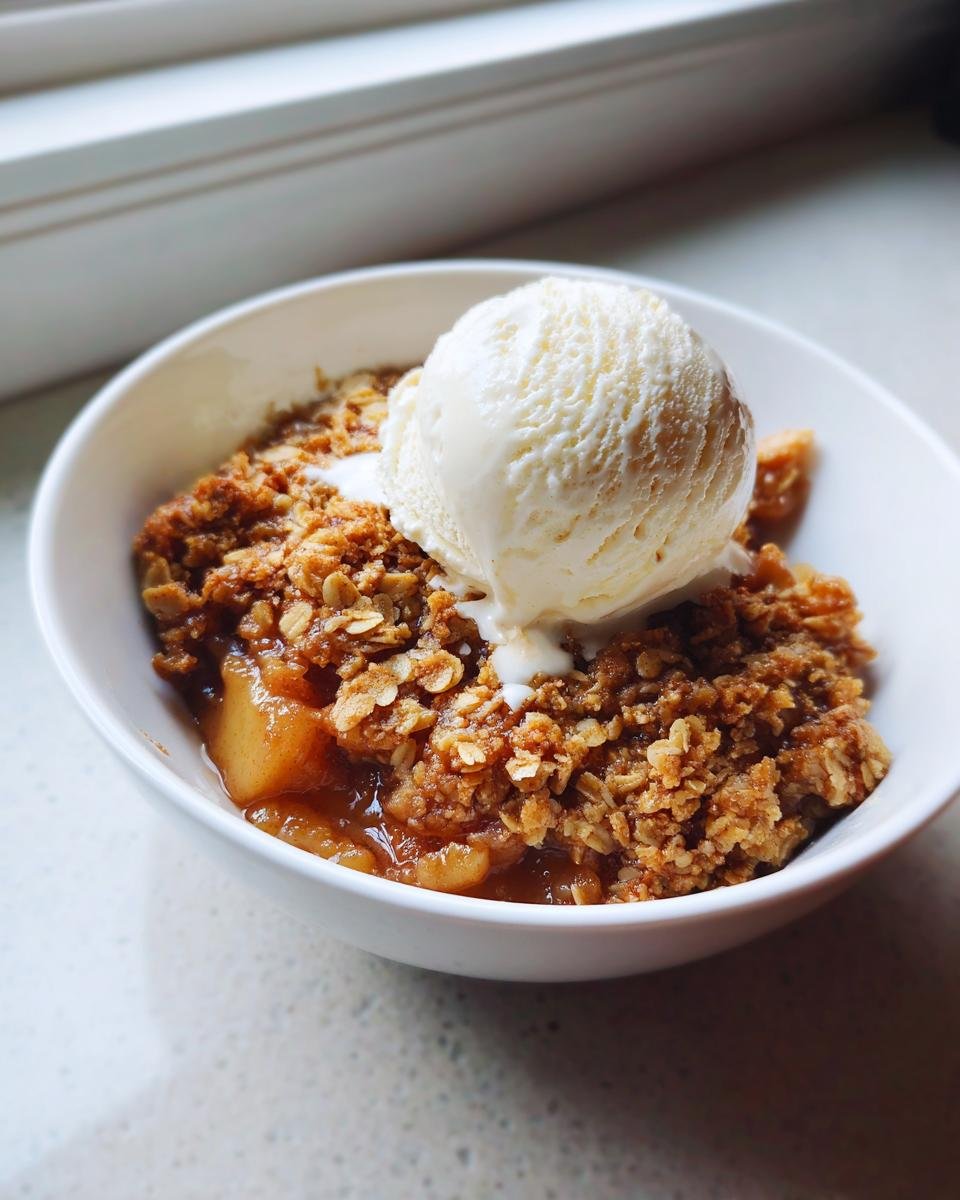
You absolutely cannot serve this straight from the oven without a cold partner waiting nearby! The contrast between the piping hot, spiced fruit and the cold topping is what truly elevates this dessert, making it taste completely indulgent. Honestly, my number one choice is always good quality vanilla ice cream, just letting it melt slowly down the sides of the dish.

But if you’re feeling a bit more old-school, some thick, creamy custard is phenomenal! If you want to try making a quick homemade version, I have an amazing recipe for custard base that would pair beautifully.
Also, a dollop of freshly whipped cream, maybe lightly sweetened with a tiny drizzle of maple syrup, is incredible. Whatever you choose, make sure it’s ready to go the second your **Apple Crumble** comes out of the oven!
Storage and Reheating Your Leftover Apple Crumble
It’s a rare day when we actually have leftovers, but when we do, you need to know how to keep that topping crunchy! Nobody wants sad, soft **Apple Crumble** the next day, right? Look, if you have any left, wrap that dish up tightly with plastic wrap or foil and stick it right in the fridge. It should hang out there happily for about three or four days, though frankly, mine never lasts that long.
Now, when it comes time to reheat—this is crucial—you absolutely want to avoid the microwave if you care about that beautiful oat crust. The microwave turns that lovely crunch into something chewy and sad, and we don’t do sad crusts around here!
Your best bet? Reheat it in the oven or even your toaster oven if you’re just warming up a single serving. Set your oven to about 325 degrees F (160 C). Pop the dish in for about 10 to 15 minutes. The low, gentle heat warms the apples through while crisping up that buttery topping again. If the apples seem too done, you can simply cover the dish with foil for the first 10 minutes, then pull the foil off to crisp the top for the last 5 minutes. Seriously, the texture is almost as good as when it first came out! Enjoy that second helping of **Apple Crumble**!
Variations on the Classic Apple Crumble Topping
You know, while I swear by the basic oat topping for this dessert, sometimes you just need to mix things up a little bit, right? Keeping the apple base the same, but changing the topping is a fantastic way to keep things exciting without re-inventing the whole wheel. It’s all about those little extra touches that make people stop and ask, “What did you sneak into this?”
I always tell people that the topping is your playground. If you look through my recipe for those apple cinnamon muffins, you’ll notice I love playing with warming spices. You can absolutely bring some of that spice library over to your crumble topping!
Here are a few easy ways I switch it up when I’m feeling particularly adventurous. These require almost no extra work, but they add a whole new layer of flavor!
- Hello, Nuts!: If you have some pecans or walnuts lying around, chop them roughly and mix about a half cup right in with your flour and oats. Toasting them slightly before you add them to make the topping gives you an even richer, deeper flavor once it bakes.
- A Little Nutmeg Kick: Cinnamon is great, but sometimes I feel like the apple filling needs a deeper partner. Right before you cut in the butter, add about a quarter teaspoon of ground nutmeg to your dry topping mix. It gives the whole dessert such a warm, cozy hug; it’s perfect for cooler evenings.
- For a Richer Texture: If you happen to have almond flour, try substituting about a quarter cup of the all-purpose flour with it. Almond flour is naturally rich in fat, and it makes the topping come out tasting almost shortbread-like—super tender and rich. Just be mindful that you might not need as much butter if you use a lot of almond flour, but in this recipe, swapping just a little bit works beautifully.
The beauty of this dessert is its flexibility. Take the base recipe, trust it, and then feel free to experiment with spices or textured additions on that topping. You can’t really go wrong!
Frequently Asked Questions About Making Apple Crumble
I know when you first look at a recipe, you always have a few burning questions swimming around in your head. It’s normal! We all want our baked apples to be perfect, right? I’ve gathered up the things people ask me most often down at the market about making this dish extra special. If you’re interested in another great way to use those warm spices, you should definitely check out my apple cinnamon muffins—they are a reader favorite!
Can I use pre-sliced apples for this Apple Crumble?
You can, sure, if you are in a real pinch for time! But please believe me when I say it’s not the best way to go. Pre-sliced apples are often dryer and sometimes a bit bruised from sitting around. When you slice your own fresh apples, they release beautiful juices during baking, which is exactly what we want coating the bottom of the dish. If you use the pre-sliced stuff, you might find your filling a bit lackluster, and you’ll definitely need to add that extra teaspoon of flour we talked about to combat the lack of natural liquid.
What is the difference between Apple Crumble and Apple Crisp?
This is such a classic debate! Most baking folks agree that the main difference is the oats. If the topping has rolled oats in it—like this fantastic recipe does—it’s often called an **Apple Crisp**. If the topping is purely flour, butter, and sugar, barely any oats, or none at all, then it’s usually called an **Apple Crumble**. Honestly, though, language varies everywhere you go! For me, if it’s crunchy and delicious, I’m happy, but this recipe definitely leans toward the ‘crisp’ side due to the oats!
Can I make this Apple Crumble ahead of time?
Yes, you absolutely can do part of the prep in advance, which is great for busy nights! You should slice and season your apples and keep them in the fridge sealed tightly for up to 24 hours. However, I strongly advise against putting the topping on until just before you bake. If you put that buttery oat mixture on ahead of time, the butter starts to warm up and soak into the flour and sugar, losing that beautiful, coarse crumb texture we worked so hard to achieve. Assemble the topping right before it goes into the oven!
Nutritional Estimate for Your Apple Crumble Serving
Now, I always tell people that the best part of this dessert isn’t why we eat it, right? It’s pure comfort food! But if you are tracking what you eat or just curious about what’s in each serving, I took a look at the main components to give you a rough idea. I used the base recipe proportions for this estimate, which serves six lovely portions.
Please remember, this is just a ballpark figure! If you load yours up with extra brown sugar or use salted butter, those numbers will definitely shift around. It all depends on your specific ingredients and how generous you are with the toppings!
- Serving Size: 1 serving
- Calories: 350
- Sugar: 30g
- Sodium: 50mg
- Fat: 18g
- Saturated Fat: 11g
- Unsaturated Fat: 7g
- Trans Fat: 0g
- Carbohydrates: 48g
- Fiber: 4g
- Protein: 5g
- Cholesterol: 45mg
See? Not terrible, especially when you consider how much happiness one warm, spiced serving brings! Enjoy knowing what you are enjoying!
Print
Simple Apple Crumble
- Total Time: 55 min
- Yield: 6 servings 1x
- Diet: Vegetarian
Description
A straightforward recipe for a classic apple crumble dessert with a buttery topping.
Ingredients
- 6 medium apples, peeled, cored, and sliced
- 1/4 cup granulated sugar (for apples)
- 1 teaspoon ground cinnamon
- 1 tablespoon lemon juice
- 1 cup all-purpose flour
- 1/2 cup packed brown sugar (for topping)
- 1/2 cup rolled oats
- 1/2 cup (1 stick) cold unsalted butter, cut into small pieces
Instructions
- Preheat your oven to 375 degrees F (190 degrees C). Lightly grease an 8×8 inch baking dish.
- In a bowl, toss the sliced apples with the granulated sugar, cinnamon, and lemon juice. Place the apple mixture evenly in the prepared baking dish.
- In a separate bowl, combine the flour, brown sugar, and rolled oats for the topping.
- Cut in the cold butter using a pastry blender or your fingertips until the mixture resembles coarse crumbs.
- Sprinkle the crumble topping evenly over the apples.
- Bake for 35 to 40 minutes, or until the topping is golden brown and the apple filling is bubbling.
- Let cool slightly before serving.
Notes
- Serve warm with vanilla ice cream or custard.
- You can use Granny Smith or a mix of sweet and tart apples for the best flavor.
- Prep Time: 15 min
- Cook Time: 40 min
- Category: Dessert
- Method: Baking
- Cuisine: American
Nutrition
- Serving Size: 1 serving
- Calories: 350
- Sugar: 30g
- Sodium: 50mg
- Fat: 18g
- Saturated Fat: 11g
- Unsaturated Fat: 7g
- Trans Fat: 0g
- Carbohydrates: 48g
- Fiber: 4g
- Protein: 5g
- Cholesterol: 45mg
Keywords: apple crumble, apple crisp, baked apples, cinnamon dessert, oat topping