
Forget those sad, pale crusts that crack the second you look at them! I’ve spent years wrestling with puff pastry and fussing over blends of fats, but I always, always come back to this one basic recipe. If you want that shatteringly flaky, rich pastry that makes your Thanksgiving pumpkin pie look downright professional, you’ve found it. This **All Butter Pie Crust** is my absolute go-to, and honestly, it’s unbelievably simple. We’re only talking four ingredients here, folks! I’ve used this exact technique for giant fruit pies for every major holiday for over a decade now, and it never fails me. Trust me, once you master this simple method, you’ll never buy a frozen crust again.
Why This All Butter Pie Crust Recipe Works So Well
It feels like magic, but honestly, it’s just science working in your favor! The reason this all butter pie crust recipe is so superior to anything else is entirely down to temperature control. We aren’t trying to make bread here; we are trying to create layers. If that butter melts before it hits the oven, poof—no layers, just a hard, greasy, solid crust. We want those little pieces of cold butter to survive.
I always tell people, if you want a truly flaky crust, you have to respect the cold! I even keep my flour bowl in the freezer for about ten minutes before starting. Here are the two main rules that make this all butter pie crust consistently incredible:

The Importance of Cold Ingredients for Flaky All Butter Pie Crust
When those cubes of ice-cold butter hit the hot oven, they rapidly turn to steam. That steam pushes its way between the layers of flour, effectively creating little air pockets—that’s what you see when you slice into a perfect pie. That is flakiness! Trust me, if you see soft butter, you might as well stop. For the water, I always keep a few ice cubes floating around in the measuring cup until the absolute last second. You want that water near freezing.
Achieving the Perfect Texture in Your All Butter Pie Crust
When you’re cutting in the butter, don’t aim for a uniform powder. You actually want it to look a bit messy! We are looking for small crumbs, yes, but also those distinct, slightly bigger, pea-sized bits of butter. Those are your flavor bombs and your lift sources. The second you add water, you switch gears. Stop messing with it! Overmixing develops gluten, and gluten loves to make things chewy, which is great for bread but terrible for this tender all butter pie crust. Just bring it together until it barely holds its shape.
Ingredients Needed for Your Flaky All Butter Pie Crust
Okay, planning is half the battle, so let’s look at what we’re working with here. Because this is an all butter recipe, every single ingredient has to pull its weight! You only need four things, but the quality and coldness truly matter, like I mentioned before. If you’re getting ready to whip up a batch of my famous apple pie, make sure you have these items waiting for you. You’ll need 2 1/2 cups of regular all-purpose flour and just one teaspoon of salt to keep things from tasting flat. The stars, though, are the butter and water.
You must have exactly 1 cup of unsalted butter, and I mean cold unsalted butter, cut into small cubes. Don’t grab it softened! And for the liquid, we need about 1/2 cup of serious ice water. That’s it! Now, go get your mixing bowl, and we can jump over to how to put this beautiful simple pastry together.
Step-by-Step Instructions for the Best All Butter Pie Crust
Alright, let’s get our hands messy! Making the structure for your filling is always the most satisfying part of pie making. Seeing those simple ingredients turn into something workable is just the best. Remember, we are moving fast, and we are being gentle. If you’re ready to roll, check out these steps to make sure you get that picture-perfect **All Butter Pie Crust**.
Mixing Dry Ingredients and Cutting in the Butter for All Butter Pie Crust
First things first, grab your biggest bowl and toss in that flour and salt. Give them a quick whisk just to mix things up uniformally. Now for the fun part: the cold butter! You can use a pastry blender if that’s your jam, but honestly, I just use my fingertips. Pinch the butter cubes into the flour mixture until what you have resembles coarse crumbs. You absolutely must leave some of those buttery chunks visible—make sure they are about the size of small peas. Those are your secret layers!
Bringing the Dough Together and Chilling Your All Butter Pie Crust
This is where control matters most! Start adding your ice water, just one tablespoon at a time. You’re going to mix gently with a fork after each addition until the dough *just* barely starts to cling together. If you see dry flour spots, add another teaspoon of water, but stop immediately when it looks shaggy. Don’t knead it smooth! Divide that shaggy dough into two equal parts, gently form each into a flat disk, wrap them super tight in plastic wrap, and get them into the fridge. They need a minimum of one hour to chill out before we even think about rolling them.
Rolling Out and Preparing the All Butter Pie Crust for Baking
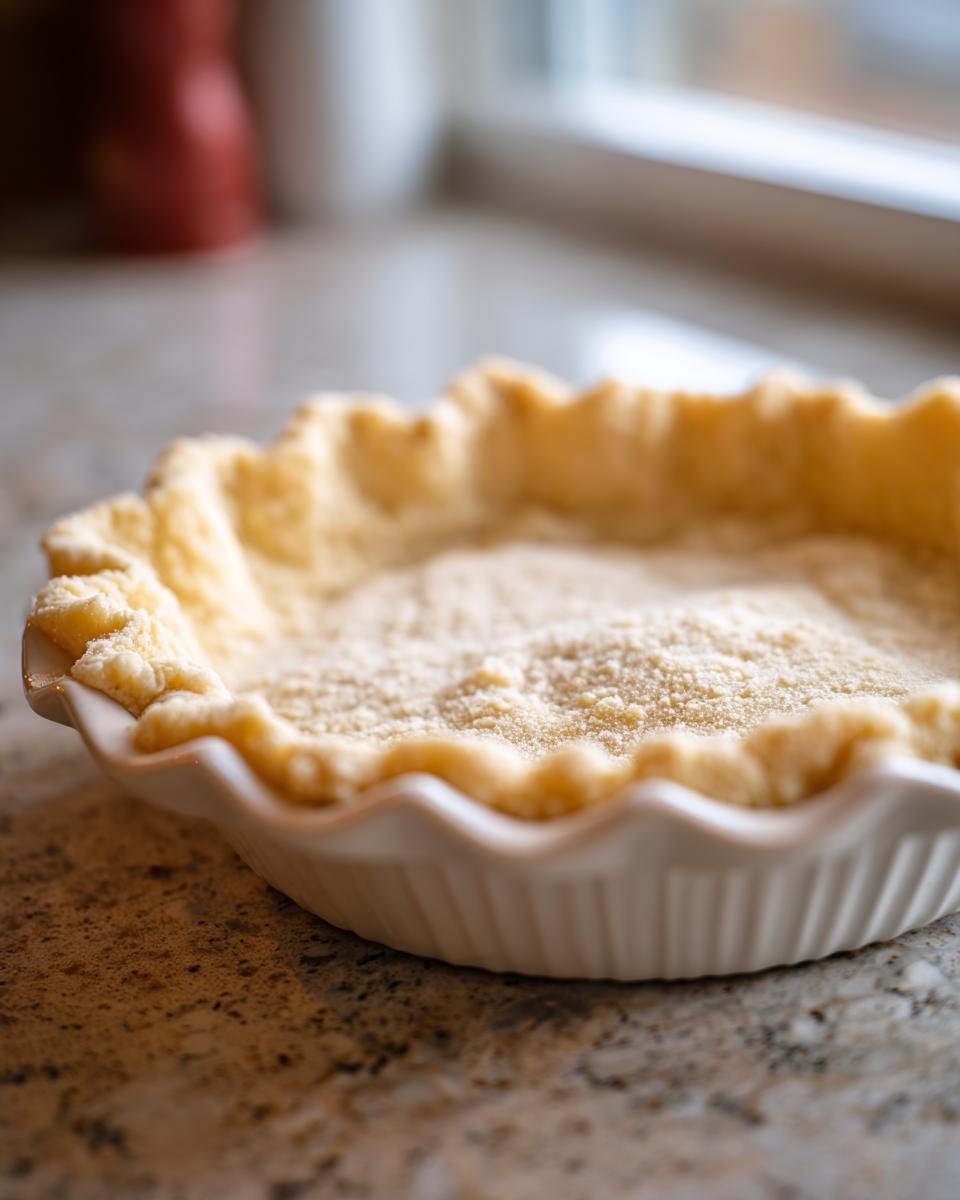
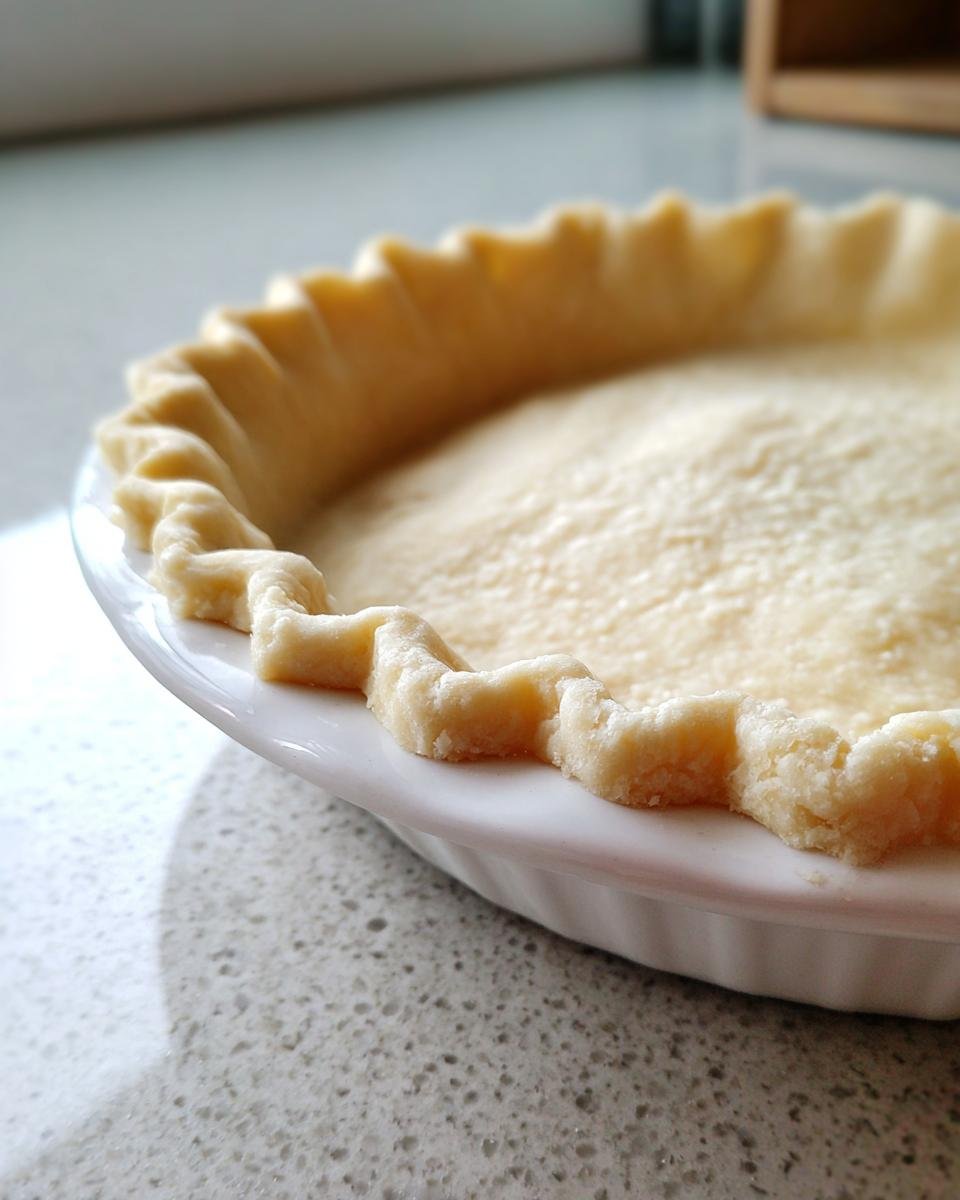
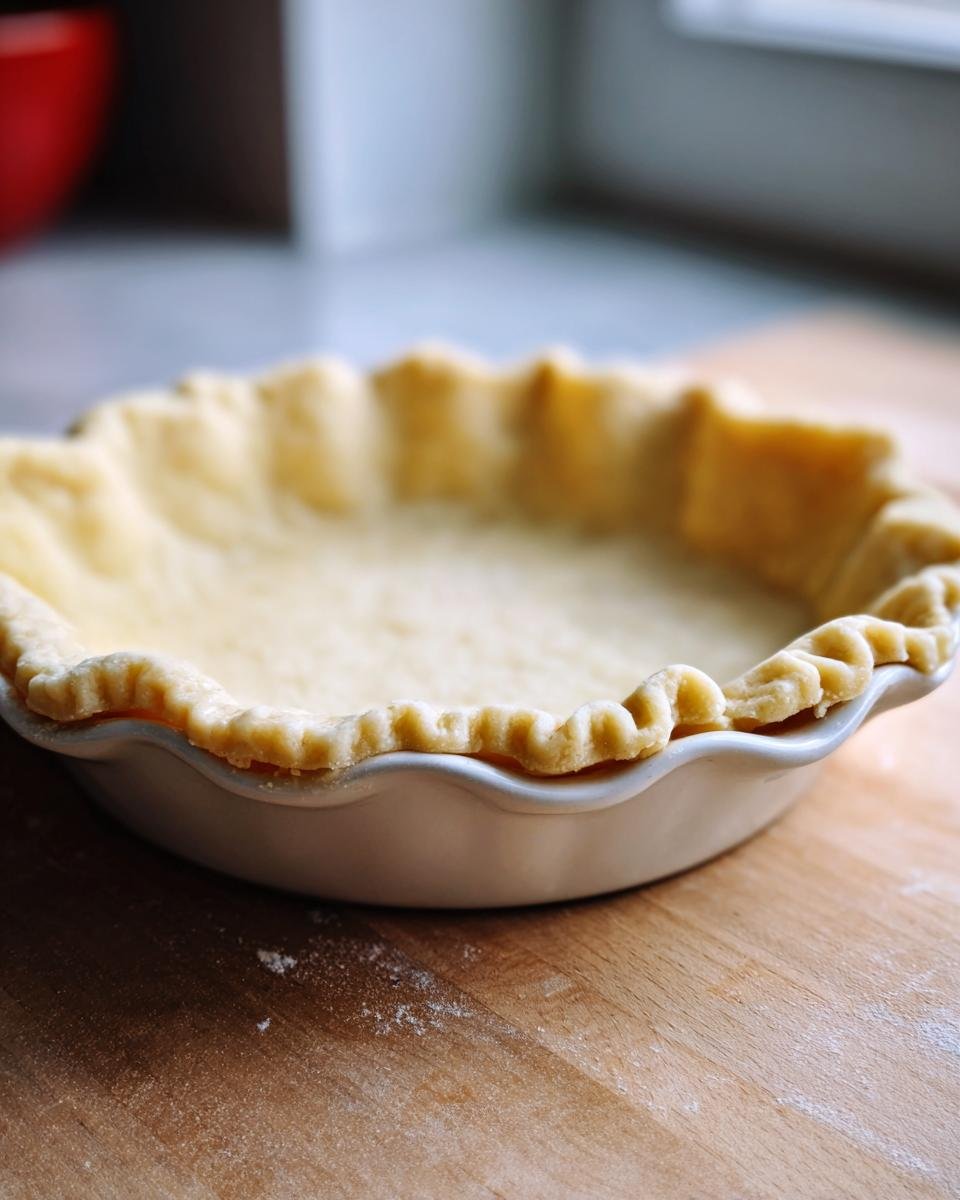
Once chilled, dust your counter super lightly with flour and take out one disk. Roll it from the center outward, turning it as you go so it doesn’t stick. If the edges start to look dry or crack, just let the dough sit there for five minutes so the butter warms up just a smidge—don’t rush it! Transfer that beautiful circle into your pie plate and trim the edges neatly. Once it’s nestled in there, pop that whole thing—crust and plate—back into the fridge. It needs to stay cold while you get your amazing filling ready for baking!
Tips for Success When Making Your All Butter Pie Crust
Even with the best technique, sometimes a little reminder helps! I’ve pulled the most crucial advice right off the recipe card for you, because these small details make the difference between a good crust and a legendary one. If you follow these few rules, you’ll have the flakiest **All Butter Pie Crust** every single time.
First, you simply cannot skip the cold factor. You must keep all your ingredients—the butter, the water, even your flour bowl—refrigerator-cold for the very best results possible. Also, if you are rolling it out and the dough starts fighting you by cracking up the sides, don’t panic! That just means the butter is getting too warm again. Give it a quick ten-minute break back in the fridge and it will relax right down for you.
Here’s my extra little trick for the **flaky crust**: after you line your pie plate, instead of just crimping loosely, I take a small, sharp paring knife and slice three or four tiny slits right into the bottom center of the dough before chilling again. Think of them as tiny steam valves! This lets out any trapped steam that might cause puffing, ensuring a flat, beautiful base. If you’re looking for more easy baking wins, check out my guide on melt-in-your-mouth biscuits!
All Butter Pie Crust: Make-Ahead and Storage Guidance
One of the best things about having this recipe in your back pocket is that you don’t have to make it the day you need a pie! Honestly, letting this **All Butter Pie Crust** chill longer is usually better for the overall flakiness, so I often make a double batch just to have one disk ready to go. If you’re planning ahead for a big holiday baking session, storage is key!
For the refrigerator, after you’ve wrapped those two disks tightly in plastic wrap, they are perfectly happy staying there for up to three days. Just remember that when you take them out to roll, you might need those few minutes on the counter to let them soften up just enough so they don’t snap while you’re working them flat.
If you are planning further ahead, this dough freezes beautifully! Wrap each disk really tightly in plastic first, then pop those into a heavy-duty freezer bag, squeezing out all the air. They should last easily for two to three months. When you’re ready to use a frozen disk, just transfer it to the fridge to thaw overnight. It thaws beautifully and rolls out like a dream the next day. For more totally no-fuss baking ideas, you should definitely check out my guide on quick and easy cinnamon rolls!
Serving Suggestions for Your Homemade All Butter Pie Crust
Now that you have this incredible, sturdy, and flaky base, the real fun begins—deciding what glorious thing to put inside! Because this is such a rich, all butter crust, it handles everything beautifully. If it’s autumn, you know I’m rolling one disk out and pre-baking it slightly for a classic, silky pumpkin pie. It’s the perfect contrast to that creamy soft filling.
In the spring, I take my time rolling out the bottom crust extra thin and filling it high with tart apples for a deep-dish classic. And don’t forget savory uses! This dough holds up amazingly well to heavy fillings, so it’s perfect for a Sunday brunch quiche. If you’re looking for a slightly different kind of sweet treat after your pie, you have to try my pecan pie brownies—they use a similar buttery base idea but turn it into pure decadence!
Troubleshooting Common All Butter Pie Crust Issues
Sometimes baking doesn’t go exactly to plan, and that’s okay! Don’t throw that dough away just because it looked grumpy. When you’re making a pure **All Butter Pie Crust**, the problems are almost always related to temperature or handling. If your crust is tough, I can almost guarantee you overworked it when you added the water. That gluten just got mad, honey. Next time, mix only until it *barely* holds together.
Now, if your crust shrinks dramatically in the oven, that is 100% a chilling issue. It didn’t rest long enough, so the gluten strands were tight when they hit the heat. Next time, chill those disks for a full two hours before you even try rolling! And if your beautiful shell looks like it’s slumping down the sides of the pie plate? That means you didn’t chill the crust *after* it was already in the pan. It needs to stay cold while you get your amazing filling ready for baking! See? Nothing is ever ruined, just needs a little patience next time around!
Frequently Asked Questions About Making All Butter Pie Crust
It’s so common to have questions when you transition from store-bought to homemade pastry! I’ve had all these exact same thoughts when I was first learning how to get that perfect **flaky crust**. This recipe is simple, but technique is everything, so let me clear up a few things I see folks ask about most often. Don’t worry if your first few tries aren’t perfect—we all start somewhere!
Can I substitute shortening for some of the butter in this All Butter Pie Crust?
You absolutely *can*, but then it’s naturally not an **All Butter Pie Crust** anymore, is it? Shortening gives a real lift because it stays solid at higher temperatures and prevents gluten bonding really well, so you’ll get a flakier texture, technically. But let’s be real: shortening tastes like nothing! Butter gives you that rich, slightly nutty flavor that makes homemade pie taste like comfort food. My honest advice? Stick with the butter for the flavor, even if it takes a tiny bit more work to keep it cold.
How long does the chilled All Butter Pie Crust dough last?
If you’ve wrapped those disks up tight like I showed you, they are perfectly happy chilling out in the fridge for up to three full days. That’s why I always suggest making a double batch—it saves you so much time later! If you need longer storage, wrap them even more securely and toss them in the deep freeze. They’ll be good there for about two months, ready when a sudden craving hits for a spectacular slice of pie!
Why is my homemade pie crust tough instead of flaky?
This is the number one rookie mistake, and it almost always boils down to one of two things. Either your butter wasn’t cold enough, so it melted into the flour before it could steam and flake, *or* you mixed the dough too much after adding the water. That mixing develops gluten strands, and those strands are what make things chewy, like bread dough. Remember: just press it together until it barely holds its shape. If you want to explore other ways to make lighter doughs, you might enjoy how I bake when I want light cake without butter and sugar.
Nutritional Estimates for Homemade All Butter Pie Crust
I know some of you are tracking everything, and while I’m usually too busy smelling the pie to worry about calories, I always like to provide a general idea of what’s in this fantastic **All Butter Pie Crust**. Since we are using only butter and simple flour here, we aren’t skimping on the richness that makes it taste so good! This information is really helpful for planning out the whole dessert.
Just keep in mind that these figures are based on the full yield for the dough (which makes two crusts) and then divided by 8 servings, as listed in my notes. Like any homemade pastry, these are just estimates, so don’t quote me on this if you’re a professional nutritionist, ha!
- Serving Size: 1/8 of dough
- Calories: Approximately 300
- Fat: Right around 20 g (and most of that is that lovely saturated fat from the butter!)
- Carbohydrates: About 28 g
- Protein: Around 4 g
- Sodium: 230 mg
We managed to keep the Sugar at 0 g since we aren’t adding any to the crust itself, which is fantastic! Every bit of flavor comes from that high-quality cold butter. It really proves that sticking to the basics—flour, salt, butter, and ice water—gives you the best, most flavorful results without needing all those extra stabilizers and ingredients you find in store-bought versions. Now go cover that base with a delicious filling!
Print
Simple All Butter Pie Crust
- Total Time: 1 hr 20 min
- Yield: One 9-inch double crust 1x
- Diet: Vegetarian
Description
A basic recipe for a flaky pie crust made only with butter.
Ingredients
- 2 1/2 cups all-purpose flour
- 1 teaspoon salt
- 1 cup (2 sticks) cold unsalted butter, cut into small cubes
- 1/2 cup ice water
Instructions
- Combine flour and salt in a large bowl.
- Cut in the cold butter using a pastry blender or your fingers until the mixture resembles coarse crumbs with some pea-sized pieces of butter remaining.
- Gradually add ice water, one tablespoon at a time, mixing until the dough just comes together. Do not overmix.
- Divide the dough in half, form each half into a disk, wrap tightly in plastic wrap, and chill for at least 1 hour.
- On a lightly floured surface, roll out one disk to fit your pie plate.
- Place the dough in the pie plate and trim the edges.
- Chill the lined pie plate while you prepare the filling.
Notes
- Keep all ingredients very cold for the flakiest results.
- If the dough cracks when rolling, let it sit at room temperature for a few minutes before continuing.
- Prep Time: 20 min
- Cook Time: 0 min
- Category: Baking
- Method: No-Bake
- Cuisine: American
Nutrition
- Serving Size: 1/8 of dough
- Calories: 300
- Sugar: 0 g
- Sodium: 230 mg
- Fat: 20 g
- Saturated Fat: 12 g
- Unsaturated Fat: 8 g
- Trans Fat: 0 g
- Carbohydrates: 28 g
- Fiber: 1 g
- Protein: 4 g
- Cholesterol: 50 mg
Keywords: pie crust, all butter, pastry, flaky crust, homemade pie