
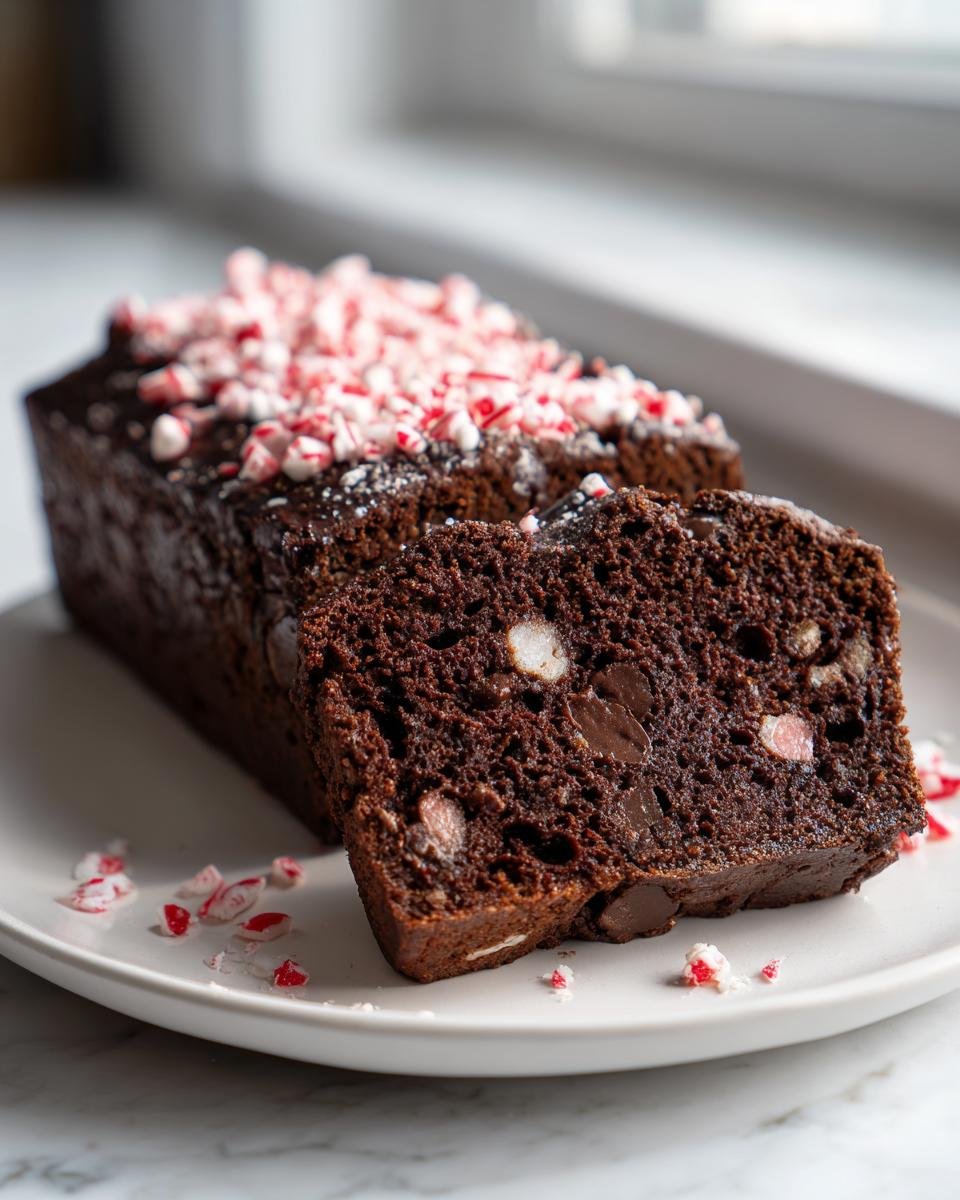
Oh my goodness, is it that time of year already? I swear, the moment the air gets that crisp little edge, all I want to do is fill my kitchen with the smell of spices and melted chocolate. Forget those fussy layer cakes; when the weather turns cold, I live for a good, honest quick bread. That’s why I’m obsessed with this Chocolate Peppermint Bread. It’s the absolute easiest recipe you’ll find, but the combination of rich, deep chocolate mixed with that cool, bright peppermint? It just screams cozy holidays.
This isn’t just some dessert; it’s my winter staple. Every year, about the second week of November, I pull out the cocoa and the candy canes, and suddenly my house smells exactly like Christmas morning. This bread is so incredibly moist—you won’t believe how little effort goes into it. Trust me, once you try slicing into this rich loaf during a cold afternoon, you’ll be hooked just like the rest of my family. If you’re looking for more easy baking wins, you should check out my guide on 5 delicious quick bread recipes!

Why You Will Love This Chocolate Peppermint Bread
I know we all have those baking recipes we pull out every single holiday, but this one has earned its permanent spot. It’s fast, it’s festive, and it just tastes like pure joy. You really can’t ask for more from a loaf!
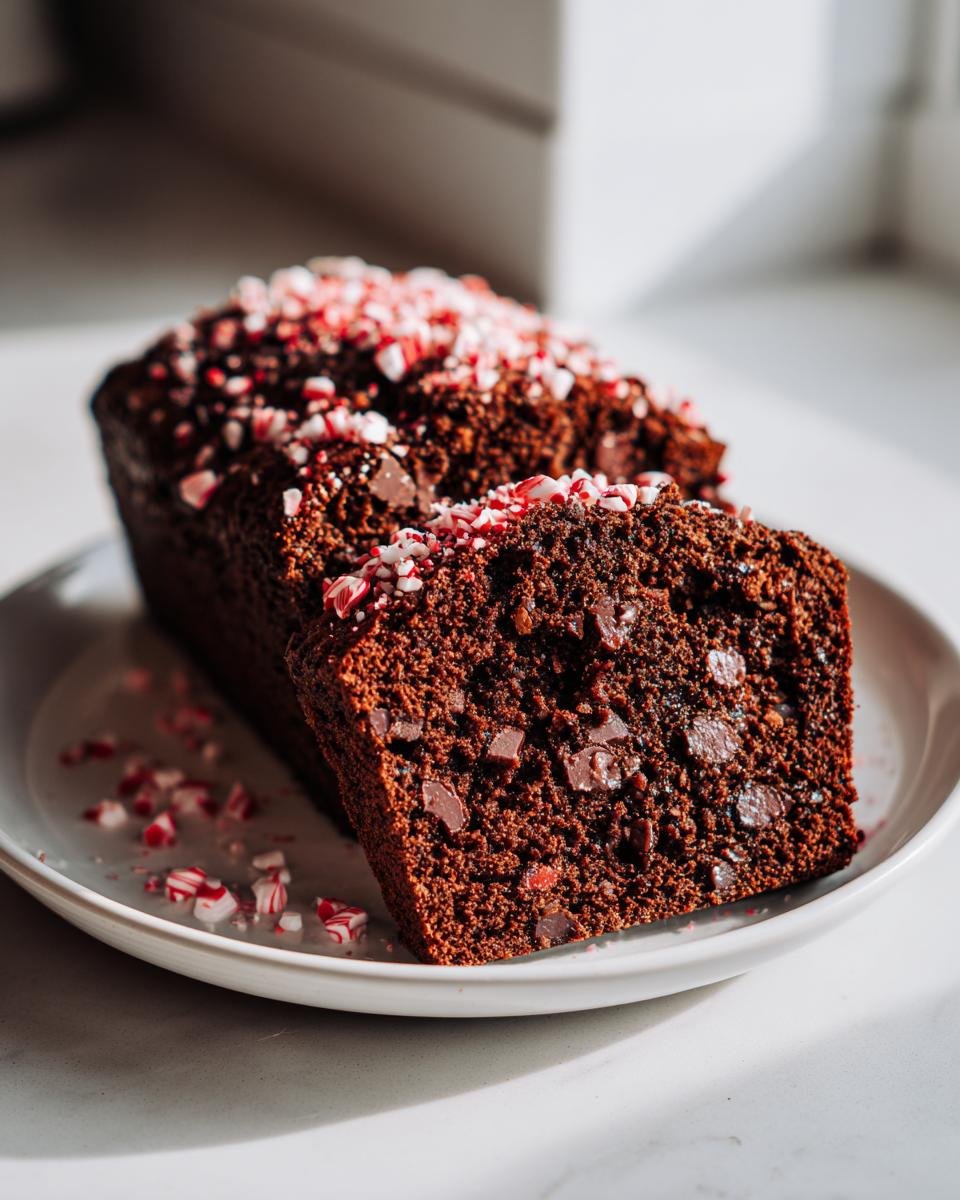
- It’s incredibly moist! That buttermilk and slightly thicker batter work magic to keep the crumb soft, even the next day.
- The flavor payoff is huge for minimal effort. You get that deep, dark chocolate flavor cut perfectly by the sharp, clean taste of real peppermint.
- It uses the quick bread method, which means no complicated creaming or waiting for yeast. You mix it and bake it, simple as that!
- It’s gorgeous! The little flecks of peppermint candy cane crunch on top make it look like you spent hours fussing over it when you really didn’t.
If you love this simple style, you might also enjoy my recipe for Pineapple Quick Bread—another winner that comes together fast!
Essential Ingredients for Perfect Chocolate Peppermint Bread
Okay, let’s talk about what goes into this loaf because the ingredients are actually what makes it so wonderfully deep in flavor and moist. You’ll notice we use both cocoa powder AND chocolate chips—we are not messing around on the chocolate front here! Don’t forget to check out my fantastic Cheddar Cheese Quick Bread if you want savory next time!
Here is everything you need, grab your list!
- 2 cups all-purpose flour
- 1 teaspoon baking soda
- 1/2 teaspoon salt
- 1/2 cup unsalted butter, softened to the perfect squish point
- 1 cup granulated sugar
- 2 large eggs, room temperature is best, if you can manage it
- 1 teaspoon vanilla extract
- 1 cup buttermilk—this is key for the tang and moisture!
- 1/2 cup unsweetened cocoa powder, the darker the better in my book
- 1/2 cup semi-sweet chocolate chips
- 1 teaspoon peppermint extract (measure this carefully!)
- 1/4 cup crushed candy canes, reserved just for the crown
Ingredient Notes and Substitutions for Chocolate Peppermint Bread
That buttermilk is non-negotiable for the texture, but don’t panic if you’re out. Just take a cup of regular milk, stir in a teaspoon of white vinegar or lemon juice, and let it sit for five minutes until it looks a little curdled. That’s your homemade substitute! Also, please buy a good quality peppermint extract. Seriously, if your bottle of peppermint smells like medicine instead of minty fresh, your finished Chocolate Peppermint Bread will taste off. This flavor needs to sing!
Step-by-Step Instructions for Making Chocolate Peppermint Bread
This is where the fun starts! Because this is a quick bread, we want to move fast through the mixing stage, especially the later steps. First thing’s first, get that oven preheated to 350 degrees Fahrenheit. While it warms up, make sure you grease and flour your standard loaf pan. You definitely don’t want this chocolate beauty sticking!
First, whisk your dry things—flour, baking soda, and salt—in a regular bowl; set that aside for a minute. Now, grab your big bowl and get that butter and sugar creamed until it looks light and airy. Beat in your eggs one at a time, making sure you mix well after each one, and then add the vanilla. Next, in a small bowl, mix your buttermilk and that crucial peppermint extract together.
Here comes the classic alternating dance: add a bit of the dry mix, then a splash of the buttermilk mix, going back and forth until everything is incorporated. **BUT PLEASE**, stop mixing the second you see the last streak of dry flour disappear. Overmixing quick bread batter is the fastest way to get a dense, tough loaf. Then, super gently, fold in your cocoa powder and those semi-sweet chips. Pour it all into your pan and sprinkle those crushed candy canes right on top for that festive crunch before baking for 50 to 60 minutes. Check it with a wooden skewer; if it comes out clean, you’ve done it!
After it’s done, let it rest in the pan for 10 minutes—I know, patience is hard when it smells this good—then flip it out onto a rack to cool completely. If you want even more quick bread magic, check out this best banana bread guide!
Expert Tips for the Best Chocolate Peppermint Bread Texture
I’ve learned a few little tricks over the years to make sure a quick bread like this turns out perfect every time, not dense or crumbly when you slice it. It’s all about how you handle that batter!
- When you alternate the dry and wet ingredients, make sure you are adding them in three or four additions, not just two dumps. This keeps the batter from deflating the air you worked so hard to cream into the butter and sugar.
- Always sift or vigorously whisk your dry ingredients before you start. It seems like an extra step, but it breaks up that cocoa powder so you don’t end up with random pockets of pure cocoa in a bite. Yuck!
- Don’t trust the clock alone for doneness! Always go with the skewer test. If the skewer has wet batter, keep baking for five more minutes. If it comes out with moist, clinging crumbs, it’s done. If it comes out totally dry, you’ve baked it a little too long, but it’ll still be tasty!
Tips for Success When Baking Chocolate Peppermint Bread
Quick breads are wonderful gifts, but they can sometimes give you attitude, right? The most common issues I see people run into with this Chocolate Peppermint Bread are either a big crack right down the middle or, worse, that sad, sunken center that looks like it collapsed from the weight of its own deliciousness.
The biggest thing that helps avoid the sunken middle is temperature! Make sure that butter is softened—not melted, but soft enough that your finger leaves an easy indent. When the butter and sugar cream up fluffy, they trap air. If your butter is too cold, it won’t cream right, and those air pockets vanish before we even add the eggs. Those air pockets are what give your bread its lift!
Also, I can’t stress this enough for this specific loaf: do not overmix after you add the flour and buttermilk. Once those wet and dry items meet, you’re building gluten, and we want this bread soft and cake-like, not chewy like a bagel. Mix only until no streaks remain. A couple of tiny lumps are fine! Seriously, trust the process.
For that perfect dome, try this little trick: when you think the bread is *almost* done—maybe five minutes before the toothpick test—carefully lift the pan just an inch or two and gently drop it back onto the counter. This is called ‘pancaking’ the batter. It pops any large air bubbles that might try to burst out unevenly during the final baking moments. It helps create a much more level top!
If you’re looking for other amazing ideas for unbelievably moist loaves that won’t let you down, check out my tips for making moist carrot, apple, and zucchini bread when summer rolls around!
Storage and Make-Ahead Options for Your Chocolate Peppermint Bread
The best part about a quick bread like this is that it often tastes even better the next day once those flavors really settle in. You can absolutely make this ahead! Once the loaf has cooled completely—and I mean completely, or you risk condensation making it soggy—wrap it up tightly in plastic wrap or foil. Store it at room temperature, and it stays wonderfully fresh for up to three days. That’s what the recipe notes say, and I stand by that for short-term storage!
If you need to keep it longer, freezing is the way to go. Make sure you wrap it super tight so that minty smell doesn’t escape into the freezer air. To thaw, just pull the tightly wrapped loaf out and let it sit on the counter for a few hours. Don’t unwrap it until it’s fully thawed; that seals the moisture right back into the bread. I love making a double batch just so I have one ready to go when the craving hits! For other fun coffee cake ideas, have a look at my Banana Bread Coffee Cake post.
Creative Variations for Chocolate Peppermint Bread
While this Chocolate Peppermint Bread is pretty much perfect in its standard form, sometimes a baker just needs to jazz things up a little, especially around the holidays when temptation is everywhere! I love keeping the core structure—the moist chocolate loaf, the peppermint zing—but adding small twists so it feels new every time I bake it.
Here are a couple of simple, foolproof ways you can change things up without ruining the magic:
Go for Double Chocolate Delight: Instead of using only semi-sweet chips, swap out half of them for white chocolate chips. The white chocolate brings a lovely creamy sweetness that cools down the intensity of the dark cocoa we used. Just fold those white beauties in right alongside the semi-sweet ones in Step 6.
Try a Subtle Flavor Shift: If you want to get really experimental, you can reduce the peppermint extract slightly—maybe use three-quarters of a teaspoon—and add just a tiny dash, say a quarter teaspoon, of almond extract along with the vanilla. Almond and chocolate are old friends, and it gives the bread a complex, almost marzipan-like background note underneath that peppermint finish. Be careful with extracts, though; that stuff is potent!
Ditch the Candy Cane Crunch (Sometimes!): The candy canes look amazing, but if you prefer a super smooth top, forget sprinkling them on before baking. Instead, let the bread cool completely, and then whip up a very simple, thin powdered sugar glaze. Just mix about a cup of powdered sugar with just a tablespoon or two of milk until it drizzles nicely. You can even add half a teaspoon of residual peppermint extract to that glaze before you drizzle it across the top. It looks elegant, and you still get the flavor punch!
If you’re looking for more easy baking projects that deliver big flavor, make sure you peek at my list of 5 delicious quick bread recipes for year-round inspiration!
Serving Suggestions for Chocolate Peppermint Bread
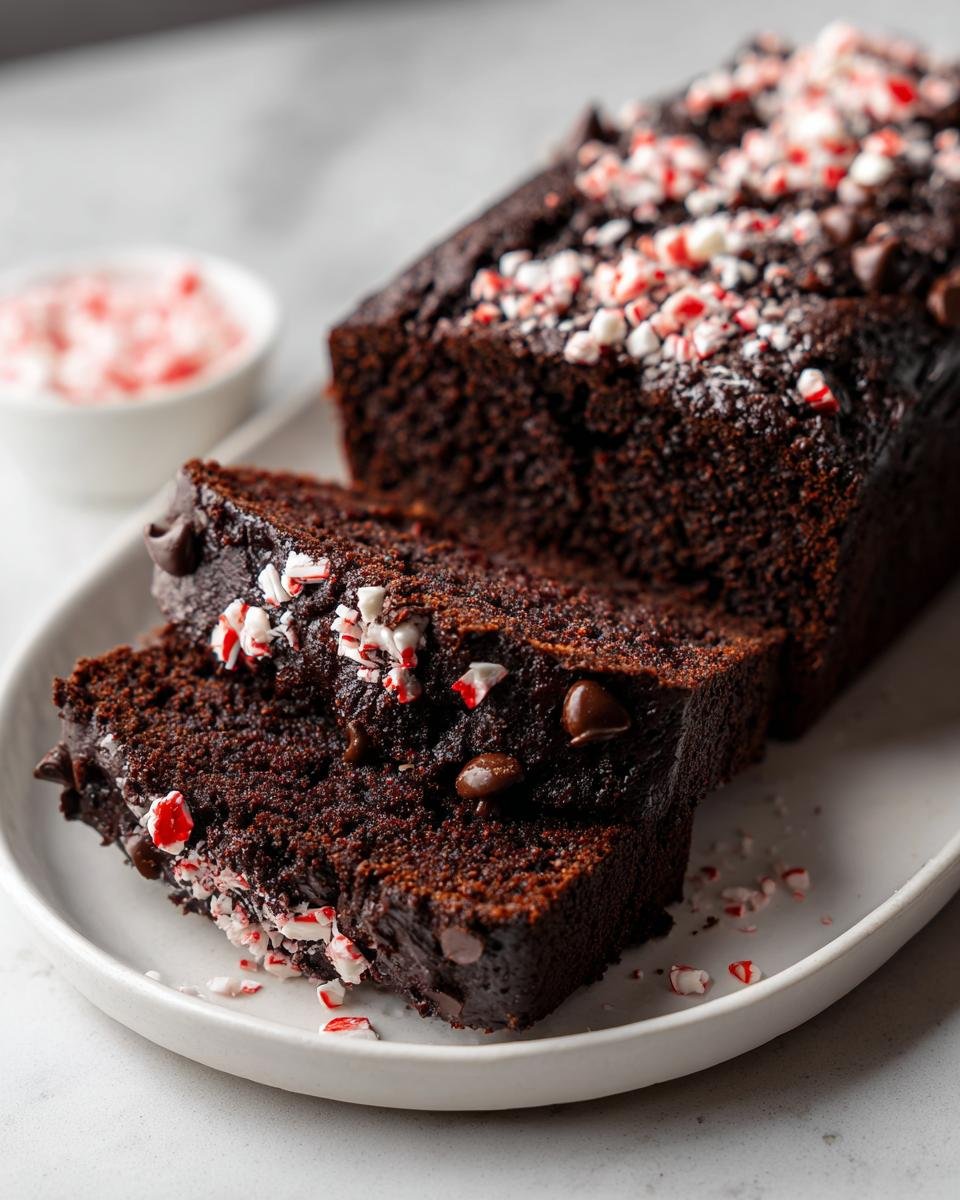
Now that you have this gorgeous, deeply flavorful loaf cooling on the rack, the real question is: how do you eat it? Honestly, you can just tear into it standing over the sink, and I won’t judge because I’ve definitely done that. But if you’re slicing this for guests or just want to make an afternoon special, I have a couple of favorite ways to serve it.
Since the bread already has that creamy chocolate and bright peppermint inside, you really don’t need much else. I find that keeping the accompaniments simple lets the bread shine. A light dusting of powdered sugar, sifted evenly across the top *after* it’s completely cool, is my presentation go-to. It looks so snowy and festive, just waiting to be sliced.
When it comes to pairings, think warm and cozy! This bread is phenomenal alongside a big mug of strong black coffee. The slight bitterness cuts through the sweetness of the chocolate perfectly. If it’s evening or you’re serving dessert, a rich, dark hot cocoa is the absolute best companion. The extra chocolate just doubles down on the richness, and the peppermint melts right into the drink.
If you happen to have leftovers that are a day or two old and maybe aren’t quite as springy, try slicing them thin and gently toasting them! That makes them amazing for dipping. For more amazing baked goods that pair wonderfully with a hot drink, you absolutely must check out my recipe for Pecan Pie Brownies!
Frequently Asked Questions About Chocolate Peppermint Bread
I know whenever I try a new recipe, especially a fun holiday one, I always come away with at least three little nagging questions! So, I gathered up the ones I get most often about this Chocolate Peppermint Bread so you don’t have to stress while baking.
Can I use standard mint extract instead of peppermint extract?
Oh gosh, I really wouldn’t recommend it for this recipe. Peppermint extract and mint extract come from different plants! Peppermint is sharp, cool, and refreshing—that classic candy cane flavor we are going for. Mint extract often tastes more like spearmint or wintergreen, and it can be a little duller in the final loaf. Stick to peppermint for the true holiday punch in your Chocolate Peppermint Bread.
How do I stop the candy canes on top from burning before the bread is done?
This is a super common issue because the sugar in the candy canes is basically pure sugar, and it melts and browns fast! If your oven tends to run hot, or if you notice the topping is getting too dark around the 35-minute mark, just use a sheet of aluminum foil. Tent it lightly over the top of the entire loaf pan for the remaining bake time. It shields the topping while letting the heat continue to cook the center of the bread through.
Can I make a chocolate glaze for the Chocolate Peppermint Bread instead of topping with candy canes?
Yes, you absolutely can, and that is such a great idea if you want a smoother finish! If you skip the candy canes before baking, you can make a simple chocolate glaze once the bread is totally cool. Just melt about a half cup of semi-sweet chocolate chips with a tablespoon of butter, and thin it out with a teaspoon or two of milk until it drizzles nicely. That looks stunning on a dark loaf!
Why do I need buttermilk? Can I just use regular milk?
Buttermilk is responsible for a lot of that signature moisture and tenderness we love in this bread, plus the slight tang helps balance the richness of the cocoa powder. As I mentioned earlier, if you don’t have it, you can create a substitute! Just take your regular milk, stir in about a teaspoon of white vinegar or lemon juice, and let it sit on the counter for five minutes. It curdles slightly and works beautifully as a stand-in. If you’re interested in other tangy quick breads, you should definitely check out my guide on the Pineapple Quick Bread!
Estimated Nutritional Snapshot for Chocolate Peppermint Bread
When we’re baking this kind of rich holiday treat, I try not to look too closely at the numbers, but I know some of you like to know what you’re getting into! Because we’re using butter, sugar, and chocolate chips, this bread definitely leans towards being a gorgeous dessert, not a health food, which is totally fine when it’s festive!
I pulled these numbers together based on the ingredient amounts listed in the recipe, but keep in mind that every brand of cocoa powder or chocolate chip is a little different. This is just a helpful guide, not a federal mandate!
- Serving Size: 1 slice
- Calories: Roughly 250
- Fat: About 12 grams (with 7 grams being saturated fat from that lovely butter!)
- Carbohydrates: Around 35 grams
- Sugar: Expect about 25 grams here—it’s a sweet treat!
- Protein: About 4 grams
- Sodium: Close to 200 milligrams
This is truly a delicious indulgence for a special occasion, so enjoy that slice with your morning coffee. We’re making memories here, not counting macros, but it’s good to have a rough idea!
Print
Chocolate Peppermint Bread
- Total Time: 75 min
- Yield: 1 loaf 1x
- Diet: Vegetarian
Description
A simple recipe for a moist quick bread flavored with chocolate and peppermint.
Ingredients
- 2 cups all-purpose flour
- 1 teaspoon baking soda
- 1/2 teaspoon salt
- 1/2 cup unsalted butter, softened
- 1 cup granulated sugar
- 2 large eggs
- 1 teaspoon vanilla extract
- 1 cup buttermilk
- 1/2 cup unsweetened cocoa powder
- 1/2 cup semi-sweet chocolate chips
- 1 teaspoon peppermint extract
- 1/4 cup crushed candy canes (for topping)
Instructions
- Preheat your oven to 350 degrees Fahrenheit. Grease and flour a standard loaf pan.
- In a medium bowl, whisk together the flour, baking soda, and salt. Set aside.
- In a large bowl, cream the softened butter and sugar together until light and fluffy.
- Beat in the eggs one at a time, mixing well after each addition. Stir in the vanilla extract.
- In a small bowl, whisk the buttermilk and peppermint extract together.
- Alternate adding the dry ingredients mixture and the buttermilk mixture to the wet ingredients, beginning and ending with the dry ingredients. Mix until just combined. Do not overmix.
- Gently fold in the cocoa powder and chocolate chips.
- Pour the batter into the prepared loaf pan. Sprinkle the top evenly with crushed candy canes.
- Bake for 50 to 60 minutes, or until a wooden skewer inserted into the center comes out clean.
- Let the bread cool in the pan for 10 minutes before turning it out onto a wire rack to cool completely.
Notes
- You can substitute milk for buttermilk if needed; add 1 teaspoon of white vinegar or lemon juice to the milk and let it sit for 5 minutes before using.
- For a stronger chocolate flavor, use dark cocoa powder.
- Store cooled bread tightly wrapped at room temperature for up to 3 days.
- Prep Time: 15 min
- Cook Time: 60 min
- Category: Dessert
- Method: Baking
- Cuisine: American
Nutrition
- Serving Size: 1 slice
- Calories: 250
- Sugar: 25
- Sodium: 200
- Fat: 12
- Saturated Fat: 7
- Unsaturated Fat: 5
- Trans Fat: 0
- Carbohydrates: 35
- Fiber: 2
- Protein: 4
- Cholesterol: 50
Keywords: chocolate, peppermint, bread, quick bread, holiday baking, dessert