
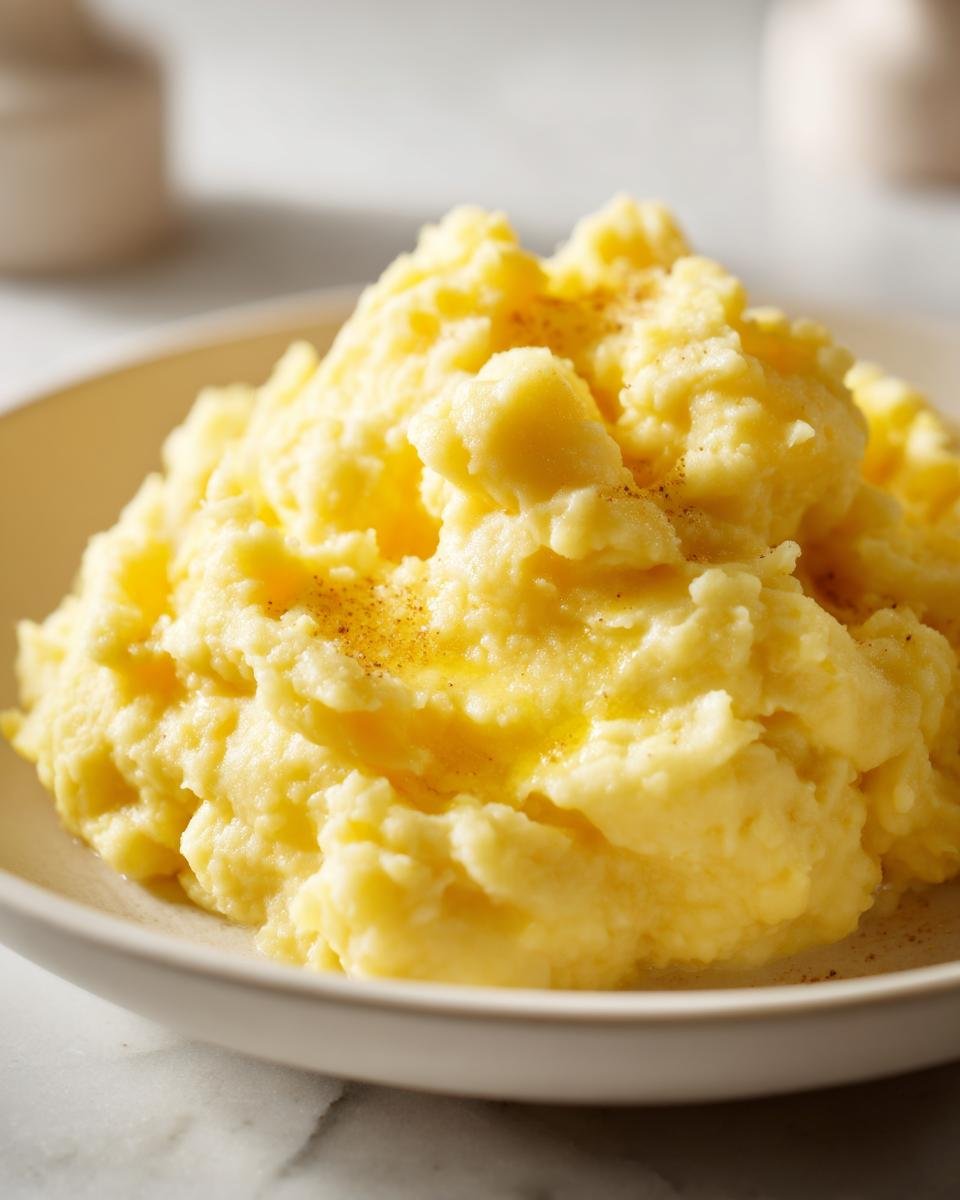
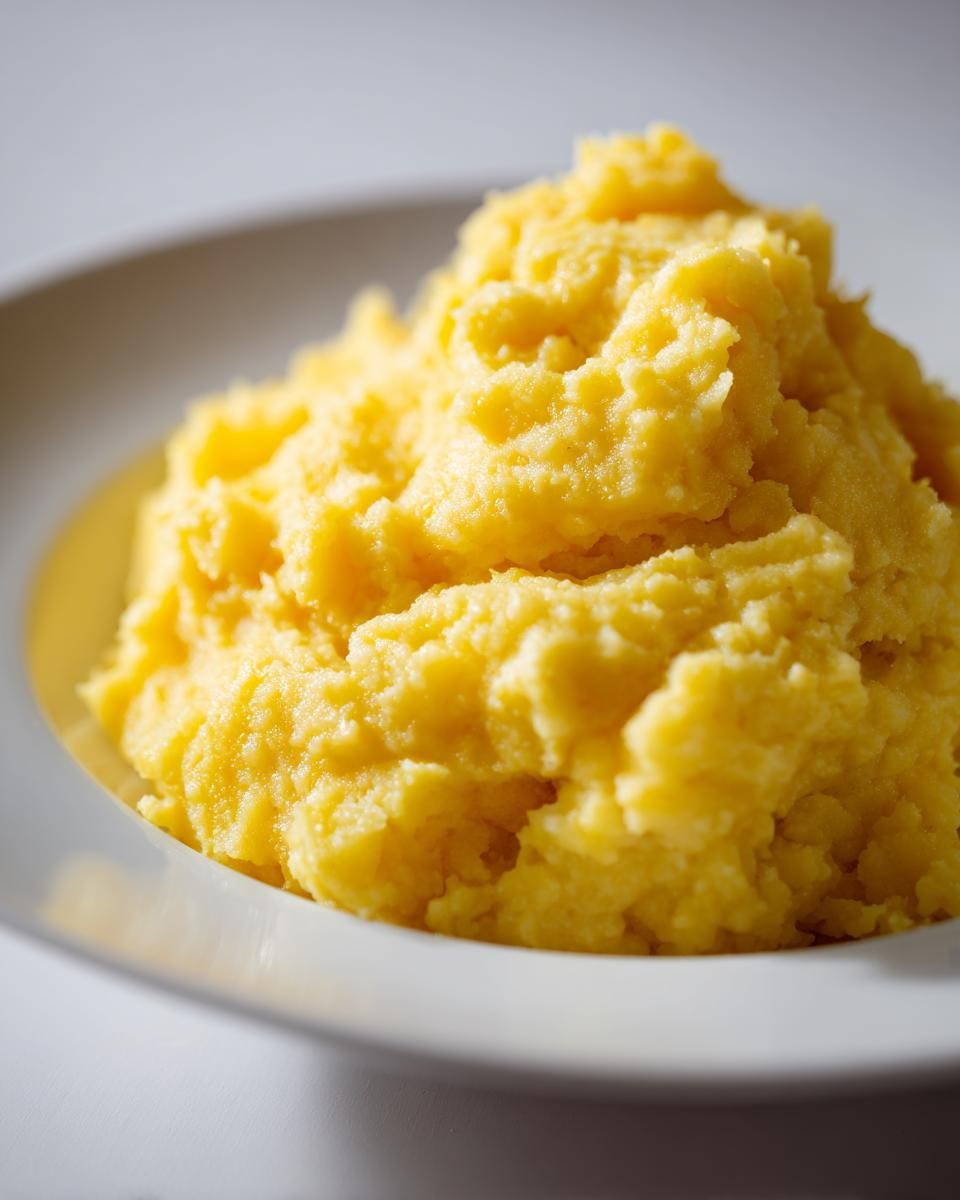
Oh, there’s just something about a comforting root vegetable mash, isn’t there? Potatoes get all the glory, but honestly, my heart belongs to rutabaga, especially when you get it just right. If you’ve been intimidated by this vegetable, stop right now! I’m sharing my ultimate, foolproof guide to the simplest **mashed rutabaga** you will ever make. It’s creamy, slightly sweet, and it tastes like a cozy Sunday afternoon. I make this dish anytime I need something familiar and deeply satisfying on the plate. Trust me, you won’t miss the other root vegetables once you try this simple method!

Why This Simple Mashed Rutabaga Recipe Works (E-E-A-T Focused)
Honestly, this recipe is a go-to because it demands next to no fuss, but the payoff tastes like you spent hours fussing. We’re not doing complicated roasting or adding weird spices here; we’re keeping it pure so the natural sweetness of the rutabaga shines. After making this hundreds of times—for busy weeknights and huge holiday spreads—I can guarantee this method delivers a reliably smooth, non-watery mash every single time. That consistency is everything when it comes to comfort food, and it’s why I trust this recipe completely. If you love simple sides, you should check out my homemade cornbread recipe too!
Quick Preparation for Perfect Mashed Rutabaga
You can get this entire beautiful side dish on the table in about 30 minutes flat. That’s right, just 10 minutes of chopping and peeling, and about 20 minutes bubbling away on the stove. When company drops by unexpectedly, or when you realize you forgot a side dish ten minutes before dinner, this recipe is your savior. Minimal effort means maximum flavor, which is honestly the best kind of cooking.
Tips for the Creamiest Mashed Rutabaga Texture
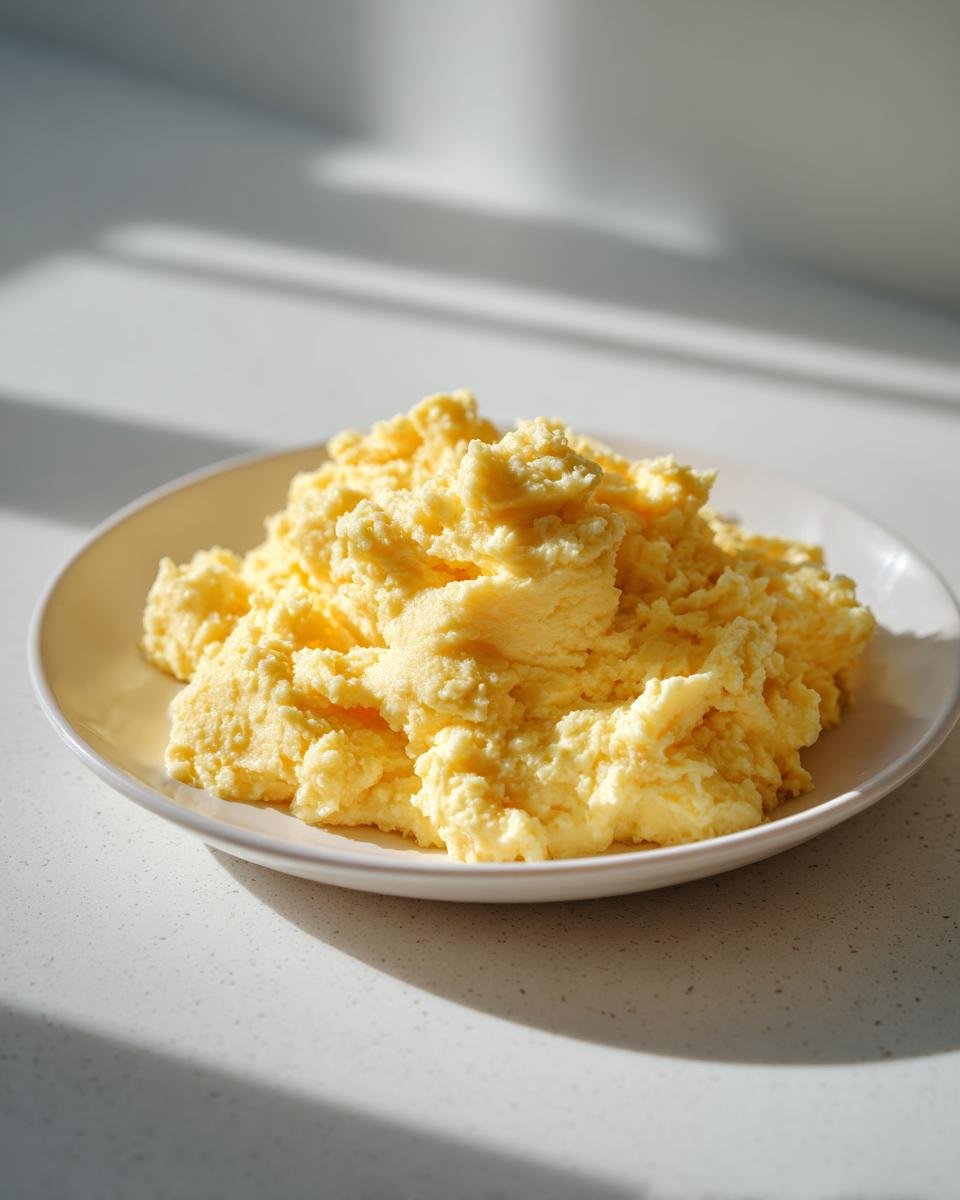
The secret to avoiding that sad, watery mash we all fear is draining, draining, and then draining some more! After boiling, transfer the rutabaga right away into a colander, and I mean *really* let it sit there for three or four minutes steaming off that excess moisture. If you skip that step, everything you add later just waters down the flavor. I also prefer using a hand-held masher rather than a food processor, just to keep a little bit of satisfying, hearty texture.
Ingredients Needed for Your Mashed Rutabaga
You won’t believe how few things you need for this lovely side dish. It’s proof that good things come from simple, quality ingredients! I always keep these staples stocked, so I can whip up a batch of **mashed rutabaga** whenever the craving hits. When you’re prepping, remember to handle that rutabaga with care—once peeled, it can be a little slick!
Here is what you’ll need sitting on your counter before you start cooking:
- Two pounds of rutabaga, peeled and cut into even-sized cubes. Keeping them similar sizes means they all cook at the same rate, which is super important!
- A half cup of milk. If you want to splurge a little, grab that heavy cream or half-and-half, but regular whole milk works great too.
- Four big tablespoons of real butter—don’t even think about using that stuff in a tub unless you absolutely have to.
- A half teaspoon of salt. Always start here, you can always add more later, but you can’t take it out!
- One quarter teaspoon of fresh ground black pepper.
That small list is all it takes! We use salt and pepper to let that earthy rutabaga flavor really sing. If you’re looking for other simple comfort foods, you have to try my ultimate potato delight recipe next time—it’s just as easy!
Step-by-Step Instructions for Mashed Rutabaga
Okay, this is where the magic happens, and I promise you, it really couldn’t be simpler. The main thing with any root vegetable is getting them tender *before* you try to mash them. If you rush the boiling water, you’ll end up with lumpy frustration, and nobody wants that after a long day. We want perfectly cooked, sweet rutabaga that practically melts under the masher. Grab your biggest pot; we’re starting with the vegetables!
Preparing and Cooking the Rutabaga
First things first: get your two pounds of rutabaga peeled. It takes a bit more elbow grease than peeling a potato, but trust me, it’s worth it. Cube the rutabaga into pieces that are roughly the same size—maybe about one inch square. You want them uniform so they cook evenly. Toss those cubes into a big pot and cover them generously with fresh, cold water. I always make sure the water level is about an inch or two above the veggies.
Now, crank that heat up until you get a rolling, enthusiastic boil. Once it’s bubbling hard, drop the heat slightly so it maintains a steady simmer. Let them cook away for about 15 to 20 minutes. How do you know they are done? You test them! Stick a fork into the thickest piece. If it slides in with zero resistance, they are perfectly tender and ready for the next step. This timing is crucial for a smooth mash later on.
Mashing and Finishing Your Mashed Rutabaga
This next part is vital for texture: drain those cooked cubes really, really well. Dump them into a colander set over the sink and let them sit there for at least three minutes to steam off that extra water. I often give the colander a gentle shake or two. Once you’ve done that, immediately return the drained rutabaga back into the empty, hot pot. That residual heat helps evaporate any last bits of moisture!
Now we add the good stuff! Drop in your four tablespoons of butter, the half cup of milk, your salt, and that pepper. Use your potato masher and start working that mixture until it’s as smooth or as slightly textured as you like it. I go for pretty smooth, especially since I’m using mine for soaking up gravy. Taste it right there—does it need more salt? Maybe a little more pepper? Once you like the seasoning, return the pot to very low heat for just a minute or two. You just want to warm it through gently before serving it up hot alongside dinner. If you’re making a big meal that involves things like my garlic breadsticks, you’ll want this mashed rutabaga served hot!
Ingredient Notes and Substitutions for Mashed Rutabaga
This recipe is built on simplicity, but that doesn’t mean we can’t talk about boosting the flavor just a little bit if we want to get fancy. Since we’re keeping the base recipe so quick and straightforward, the few dairy ingredients we use really make a big impact. I love experimenting with these small swaps because they show you how versatile this humble root vegetable mash really is. It’s all about tweaking it until it feels perfect for your own family dinner.
My approach is always to start with the base, taste it, and then decide if a little upgrade is needed. If you’re looking to take this dish up a notch from “simple” to “absolutely decadent,” I have two clear suggestions straight from my own testing notes.
Using Half-and-Half for Richer Flavor
The recipe calls for simple milk, which is great for volume and texture, but if you’ve got some half-and-half sitting around, now is the time to use it! Substituting half of the required milk with half-and-half (or even full-on heavy cream if you’re feeling indulgent) gives your mashed rutabaga this gorgeous, velvety mouthfeel. It’s richer, smoother, and just tastes luxurious without any extra cooking effort.
When I make this for Thanksgiving, I always make half the batch with straight milk for the kids and the other half with the cream swap—and trust me, the adult portions disappear first! You get that wonderful fatty richness that complements the rutabaga’s earthy notes beautifully. If you enjoy rich sides, you might also like my recipe for ultimate homemade cornbread.
Adding a Pinch of Nutmeg for Depth
This is my absolute favorite little secret for making mashed vegetables taste more grown-up! A tiny, tiny pinch of nutmeg stirred in at the very end, right when you are seasoning everything, warms up the whole flavor profile beautifully. It doesn’t make the rutabaga taste like dessert or eggnog, that’s for sure. Instead, the nutmeg just acts like an amplifier for the natural, slightly sweet flavor of the vegetable itself.
Be careful—nutmeg is potent! I’m talking about just a light dusting from the microplane grater. It’s amazing how that one subtle spice can lift the entire dish, making people wonder what “special ingredient” you added this time. It pairs really well with the butter, too!
Tips for Success When Making Mashed Rutabaga
Even though this recipe is wonderfully straightforward, there are a few little tricks I’ve picked up over the years that take your **mashed rutabaga** from good to absolutely unforgettable. Cooking root vegetables can sometimes be tricky—they hold onto water like crazy, or they can end up tasting a little bland if you don’t season them properly while they are piping hot. These aren’t hard rules, but they are certainly the things I swear by in my own kitchen to get that creamy, flavorful result every single time.
I find that paying attention to the temperature of the dairy and the act of mashing makes all the difference in the final texture. If you’re interested in other vegetable mash ideas that are packed with flavor, you need to see how I make my mashed cauliflower smooth and dreamy!
Mashing ONLY When Piping Hot
Never, ever let the boiled rutabaga cool down before you mash it with the dairy! As soon as you drain those pieces, get them back in that hot pot. If they cool even slightly, the butter and milk won’t incorporate easily, and you’ll end up forcing the issue with your masher, which can actually release more starches and make the mash gummy. Hot rutabaga means the butter melts immediately and the milk warms up, leading to a naturally smoother, creamier result. It’s temperature control, pure and simple!
Seasoning While Hot is Non-Negotiable
Just like with any vegetable, you need to salt the food while it’s hot so the salt crystals dissolve completely and penetrate the flesh. If you wait until you’ve mashed everything and then dump in the salt, you’ll end up with salty pockets next to bland spots. I always season the cooked pieces right before I mash them in with the butter and milk. If you taste it at the end and think it tastes a little flat, add a tiny pinch more salt, stir it well, and then taste again. You’ll be amazed how much flavor good seasoning brings out of this vegetable.
Using a Ricer for Restaurant Smoothness (If You Dare!)
If you are absolutely obsessed with that super-refined, silky texture you sometimes get in fancy restaurants, forget the hand masher entirely and grab a potato ricer. Now, this is extra work, but it forces the cooked rutabaga through tiny holes, creating strands of vegetable that are incredibly light and tender. Be warned: you must strain the rutabaga really well before ricer time, or you’ll end up with a massive mess and potentially break your ricer! For me, the hand masher gives enough texture, but the ricer is the ultimate tool for sheer smoothness.
Don’t Be Afraid to Use More Butter Than You Think
I know, I know, we’re all watching fat intake sometimes, but rutabaga is hearty, and it needs fat to carry its earthy flavor. If you feel like the mash is just a little too stiff, resist the urge to pour in excess milk, which just leads back to watery runoff. Instead, add one more tablespoon of butter. The extra fat will emulsify beautifully, creating that glossy, rich texture that makes mashed vegetables feel like a treat instead of just a side dish. It truly makes all the difference!
Serving Suggestions for Mashed Rutabaga
What’s the point of having a stunning, creamy side dish if you don’t have the perfect main dish waiting for it? Mashed Rutabaga has this wonderful, slightly earthy sweetness that really shines next to savory, rich meats. It’s a powerhouse side that can handle bold flavors without getting lost, and it adds such a lovely change of pace from standard mashed potatoes.
I always like to pair it with something hearty that can use all that buttery flavor you worked so hard to mix in. Plus, serving it alongside something familiar makes trying a new vegetable like rutabaga that much easier for skeptical eaters in the family! Here are a few favorites that always make an appearance when I serve up this delicious mash.
If you’re looking for a great protein to go with this, you absolutely must check out my recipe for onion and pepper steak—the savory juices mix perfectly with the rutabaga!
Roast Chicken or Turkey
You simply can’t go wrong with a beautifully roasted bird. The crisp skin and simple, herb-infused meat of a roast chicken or a holiday turkey offer the perfect savory counterpoint to the sweetness of the rutabaga. The mash acts like a wonderful sponge for all those delicious pan drippings you get while carving. It’s classic, comforting, and incredibly easy to pull together for a weeknight meal.
Pork Chops or Pork Tenderloin
Pork and root vegetables are just destined to be best friends! Whether you pan-sear thick, juicy pork chops or bake a simple tenderloin, the slight sweetness in the rutabaga plays incredibly well with the fattier flavor of the pork. It cuts right through the richness without being too sharp. I often simmer my pork chops in a bit of apple cider while cooking, and that little hint of tartness with the mash? Unbeatable!
Shepherd’s Pie Filling
This might seem like a different route, but when I make Shepherd’s Pie (or Cottage Pie, depending on the meat!), I often swap out the traditional potato topping for this mashed rutabaga. It gives the dish a gorgeous color and a subtly different flavor profile that tastes special without changing the whole structure of the hearty filling underneath. Seriously, try it just once—it transforms an old favorite!
With Other Roasted Root Vegetables
Sometimes, you just want a celebration of the harvest on your plate! I love serving a big spoonful of the smooth mash next to some hearty roasted carrots or parsnips. The different textures—the firm roast versus the extreme creaminess of the mash—make every bite interesting. It turns a simple side into a feature event on the dinner table!
Storage and Reheating Instructions for Mashed Rutabaga
Believe it or not, this **mashed rutabaga** holds up better than most creamy vegetable sides when it comes to leftovers! That being said, we have to be careful when reheating so we don’t turn our lovely mash into soup. The goal is always to reheat it slowly and gently, coaxing the butter and milk back into the vegetable without scorching the bottom of the pot. Nobody wants crispy, salty bits stuck to the bottom of the pan when they are craving comfort food!
If you’ve got leftovers—and I usually aim for at least one container in my fridge—here’s how I handle storing it and bringing it back to life the next day.
How Long Mashed Rutabaga Stays Good in the Fridge
For the best flavor and texture, I always recommend eating this mash within three to four days of making it. Anything beyond that, and you start risking the texture getting a little bit grainy or dull. When you’re ready to save it, make sure it cools down slightly after dinner, and then transfer the mash into an airtight container. Don’t just leave it sitting in the big serving bowl on the counter thinking you’ll get to it later—food safety first, always!
I’ve found that packing it into a shallower container helps it cool down faster, which is better for quality retention. If you’re planning on freezing it, I’d suggest omitting some of the milk initially, as freezing and thawing can really encourage separation in dairy-heavy dishes. If you do freeze it, try to use it within two months for the best results.
The Best Way to Reheat Leftovers
My number one tool for reheating this mash is the stovetop. It gives you the most control! Transfer the cold mash back into a heavy-bottomed saucepan. Add just a tiny splash of fresh milk or cream—maybe a tablespoon per cup of leftovers—just to loosen things up. Put the pan over very low heat. You need to stir it constantly, scraping the bottom frequently, until it’s steaming hot all the way through. That slow, constant stirring stops those dairy solids from clumping up or burning onto the bottom.
Now, if you are in a real hurry and only reheating a small portion, the microwave works in a pinch. Put the mash in a microwave-safe bowl and heat it in short bursts—maybe 30 seconds at a time. Stir really well between each blast. The downside here is that you sometimes get hot spots, so make sure you stir thoroughly before you taste it!
Fixing Consistency Issues After Storage
Sometimes, after refrigeration, even if you add that little splash of milk, your **mashed rutabaga** can seem a bit stiffer than when you first made it. Don’t panic! If it seems too thick, try adding just a teaspoon of boiling water at a time while stirring over low heat. The hot water works faster to soften the vegetable strands than cold milk does. A little bit of liquid, stirred patiently over low heat, always brings it right back to that beautiful creamy consistency you’re looking for.
Frequently Asked Questions About Mashed Rutabaga
I get so many emails asking about minor tweaks to this simple recipe, and honestly, I love helping you customize it! Sometimes it’s about texture troubleshooting, and other times people just want to know if they can swap out ingredients. Here are the most common questions I get regarding my go-to **rutabaga recipe**.
How do I prevent my mashed rutabaga from being watery?
This is the number one issue people run into with any root vegetable mash, and I hammered this point home earlier, but it bears repeating! The absolute best way to prevent watery mash is to drain those cooked rutabaga cubes aggressively. Once you drain them, put them back into the hot, empty pot for a minute or two *before* you add any milk or butter. That residual heat cooks off the surface water so your dairy doesn’t get diluted. A well-drained rutabaga is key to a thick, satisfying mash!
Can I use cream cheese instead of butter in mashed rutabaga?
Ooh, that’s a great idea if you want a tangier flavor! You absolutely can swap them out. If you substitute cream cheese for some or all of the butter, you’ll get a much thicker, almost fluffier texture because cream cheese is very dense. Start by using about two-thirds the amount of cream cheese you were going to use for butter, and then add a tablespoon of milk if it seems too stiff. It won’t taste exactly like the buttery version, but it is delicious!
Can I use a slow cooker or Instant Pot to cook the rutabaga?
You certainly can! If you’re making a big batch, using an appliance is wonderful because it frees up your stovetop. In the Instant Pot, you’d just add your cubed rutabaga and about a cup of water, then cook on High Pressure for about 7 minutes, followed by a Quick Release. If you use the slow cooker, add just a quarter cup of water and cook on LOW for about 4-5 hours, or until fork-tender. Remember: no matter how you cook them, the step where you drain them thoroughly afterward is still non-negotiable!
Can this be made ahead of time?
Yes, this makes it a fantastic **simple side dish** for big meals! I often cook the rutabaga the day before, drain it, and keep it covered in the fridge overnight. Right before serving, I reheat it gently on the stovetop with the butter and milk added in, as detailed in the storage section. It reheats beautifully—it might just need that extra splash of liquid we talked about to get it moving again.
Is this recipe vegetarian?
Yes, based on the ingredients listed, this is a completely vegetarian dish! We use milk and butter, which are dairy components, but there’s no meat, poultry, or fish involved in the preparation of the **mashed rutabaga** itself. It’s perfect for a veggie-friendly side that is really hearty and satisfying.
If you want some other fantastic side dishes to fill out your table, check out my recipe for ultimate potato salad—it’s a crowd-pleaser!
Estimated Nutritional Information for Mashed Rutabaga
I’m not a trained nutritionist, so please take these numbers as a general guideline based on the standard ingredients I listed for this recipe. Keep in mind that if you swap whole milk for heavy cream, or use extra butter (which I sometimes do!), these values will change slightly. This information is for one serving size, which is about one cup of the finished, creamy mash.
Here is what you can generally expect from the finished **rutabaga recipe**:
- Serving Size: 1 cup
- Calories: Approximately 180
- Fat: Right around 10 grams (including about 6 grams of saturated fat)
- Carbohydrates: About 22 grams, with 5 grams of that coming from healthy fiber!
- Protein: A modest 3 grams
- Sodium: Roughly 300 mg (This amount can vary depending on how much salt you personally add during seasoning!)
It’s a relatively low-sugar, high-fiber root vegetable mash, which is why I love serving it so often! If you’re tracking macros, you can find a neat little nutrient smoothie recipe here that uses totally different components, but it’s a great reference for healthy eating!
Print
Simple Mashed Rutabaga
- Total Time: 30 min
- Yield: 4 servings 1x
- Diet: Vegetarian
Description
A straightforward recipe for preparing creamy mashed rutabaga.
Ingredients
- 2 pounds rutabaga, peeled and cubed
- 1/2 cup milk
- 4 tablespoons butter
- 1/2 teaspoon salt
- 1/4 teaspoon black pepper
Instructions
- Place the cubed rutabaga in a large pot and cover with water.
- Bring the water to a boil and cook until the rutabaga is tender, about 15 to 20 minutes.
- Drain the rutabaga well.
- Return the drained rutabaga to the pot.
- Add the milk, butter, salt, and pepper.
- Mash the rutabaga until smooth or to your preferred consistency.
- Heat gently until warmed through before serving.
Notes
- For a richer flavor, substitute half-and-half for the milk.
- You can add a pinch of nutmeg for a different taste.
- Prep Time: 10 min
- Cook Time: 20 min
- Category: Side Dish
- Method: Boiling and Mashing
- Cuisine: American
Nutrition
- Serving Size: 1 cup
- Calories: 180
- Sugar: 8
- Sodium: 300
- Fat: 10
- Saturated Fat: 6
- Unsaturated Fat: 4
- Trans Fat: 0
- Carbohydrates: 22
- Fiber: 5
- Protein: 3
- Cholesterol: 25
Keywords: mashed rutabaga, rutabaga recipe, root vegetable mash, simple side dish