
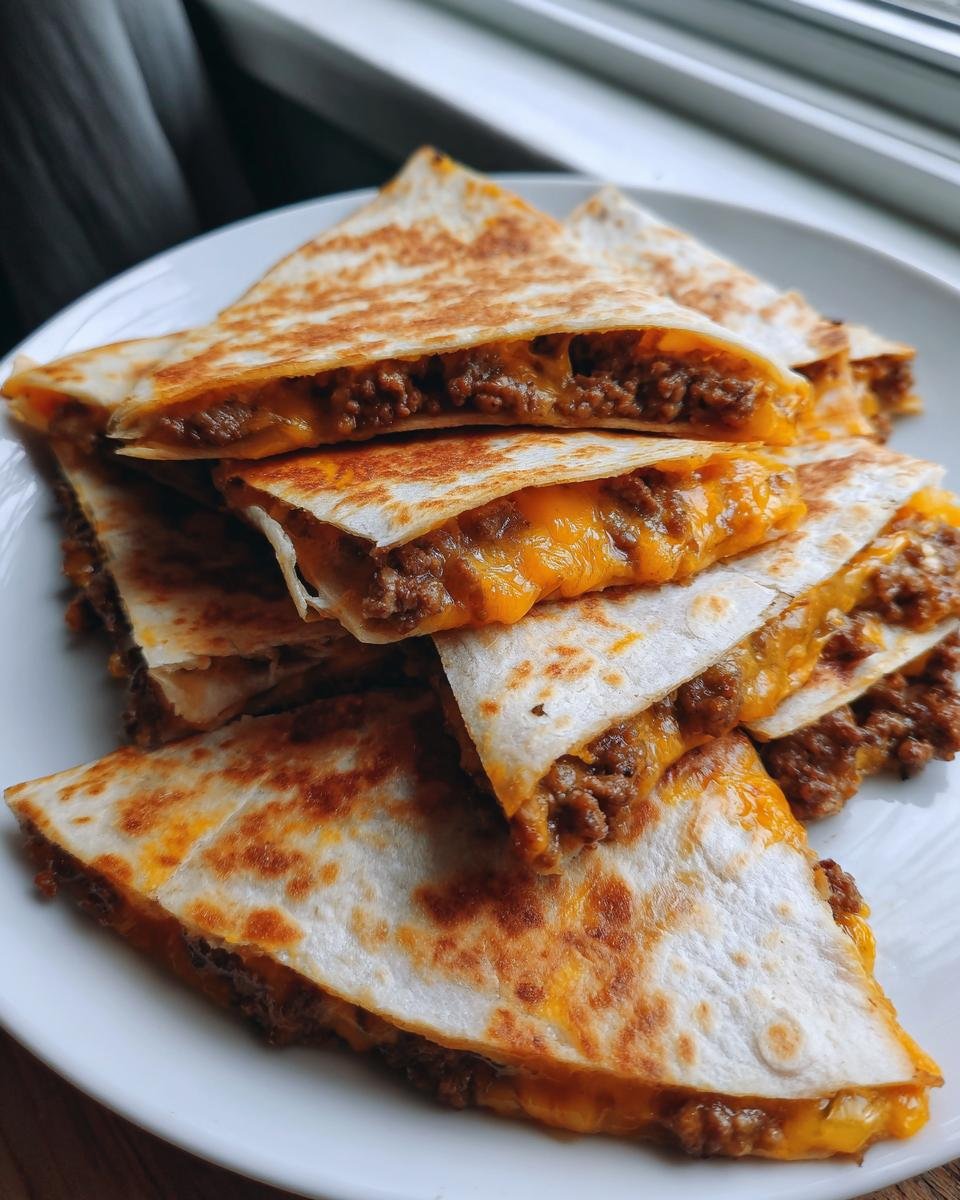
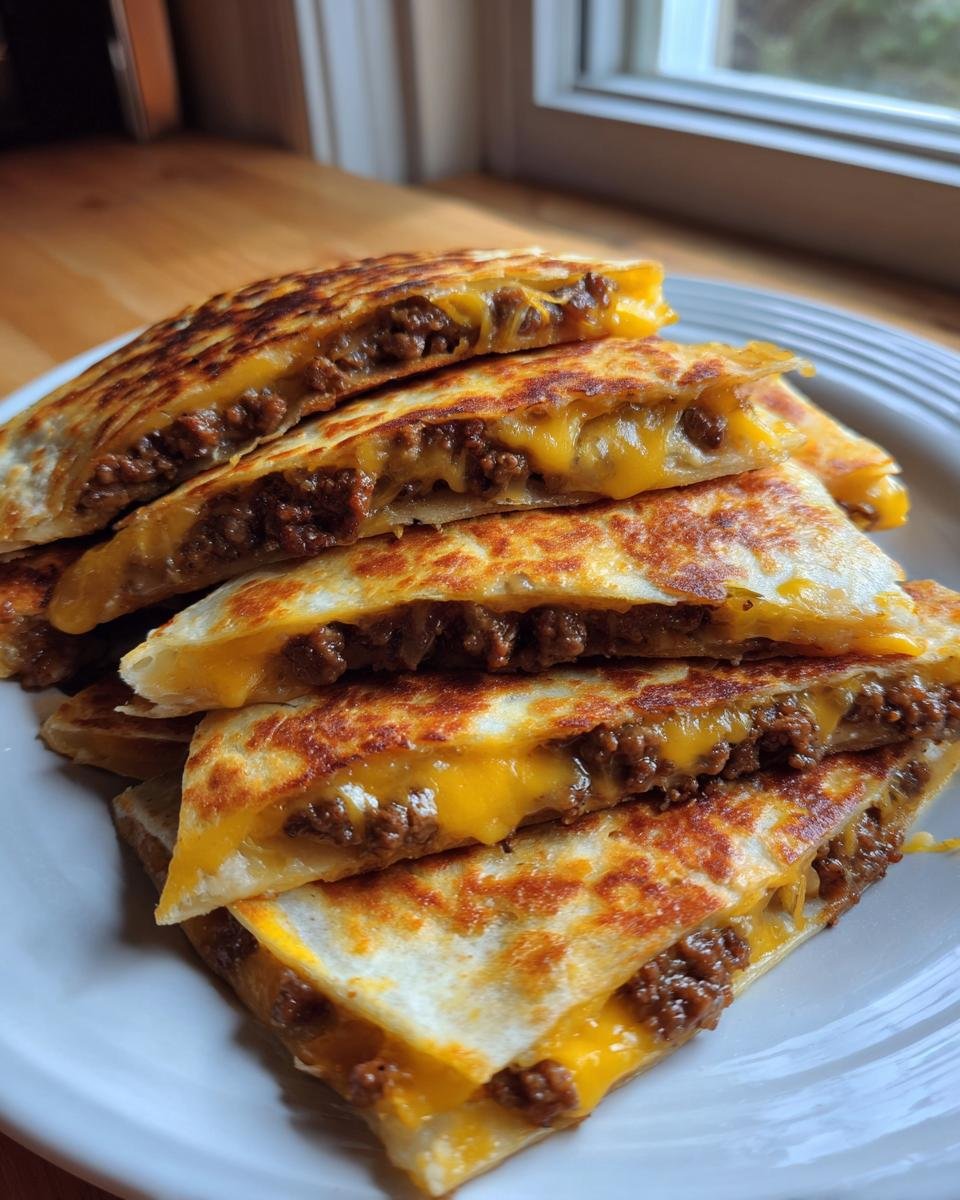
Oh my gosh, sometimes you just need that classic, juicy, savory taste of a cheeseburger, but you absolutely do *not* have time for buns, assembly, and dealing with pickle placement, right? Trust me, I get it. When that craving hits mid-week, I turn to the ultimate shortcut: Cheeseburger Quesadillas. We’re talking warm, melted cheddar oozing out from crispy tortillas packed with perfectly seasoned ground beef.
This is my absolute lifesaver on nights when dinner feels impossible. It takes about 25 minutes from start to finish! Honestly, mixing my famous burger seasoning blend inside a folded tortilla is the ingenious move that saves me at least a night a week from takeout menus. These aren’t just good; they are the quickest way to satisfy that beef-and-cheese craving, period.

Why You’ll Love Making These Cheeseburger Quesadillas
If you’re anything like me, you want big flavor without the big fuss. These quesadillas deliver that satisfying burger taste in a format that is frankly way more fun to eat. Prepare to fall in love, because this recipe is going straight into your quick-fix file.
- Speed Demons: Seriously, you’re looking at under 30 minutes total time. If you can brown meat and flip a tortilla, you’ve basically mastered this recipe. Perfect for those chaotic weeknights!
- Flavor Fusion That Works: We take that iconic cheeseburger profile—salty beef, tangy Worcestershire, sharp cheddar—and trap it in a perfectly crispy tortilla shell. It’s familiar but just different enough to feel special.
- Minimal Cleanup, Maximum Enjoyment: Because we use one skillet for the filling and then the same skillet (wiped out, of course!) for the actual quesadilla, cleanup is an absolute breeze. More eating, less scrubbing!
- Totally Customizable: Don’t like onions? Skip ’em! Want to sneak in some bacon? Go for it! These are the perfect blank canvas for your favorite burger toppings, just tucked inside.
Essential Ingredients for Perfect Cheeseburger Quesadillas
Okay, the beauty of this recipe is how simple the ingredient list is. You probably have most of this stuff in your fridge right now! We are keeping things really basic because the flavor combo is already a winner. Just make sure you have your beef ready to go smooth. It’s about trusting good, whole components here.
Ground Beef Mixture Ingredients
This is the heart of our flavor! You need that great savory base. Don’t skimp on seasoning here; this is what makes it taste like a burger and not just plain meat.
- 1 pound ground beef (don’t go super lean, a little fat helps with taste!)
- 1/2 teaspoon salt
- 1/4 teaspoon black pepper
- 1/2 cup chopped onion (make sure it’s nice and chopped small!)
- 1 teaspoon Worcestershire sauce (this is the secret burger tang!)
Quesadilla Assembly Ingredients
Time for the cheesy envelopes! The quality of your tortilla makes a huge difference here since we want that satisfying crisp factor.
- 8 large flour tortillas (I stick to the standard size, they fold just right)
- 2 cups shredded cheddar cheese (sharp or medium works best for melting!)
- 1 tablespoon vegetable oil (just a little bit for cooking them up)
And please, don’t forget the fun stuff! We usually serve ours with little bowls of ketchup, mustard, and some crunchy pickles on the side for dipping and topping!
Step-by-Step Instructions for Amazing Cheeseburger Quesadillas
Alright, let’s get cooking! This is where the magic happens, and honestly, it’s so quick you’ll wonder why you haven’t been making these Cheeseburger Quesadillas forever. The key here is managing the heat and making sure we get rid of that excess grease. If you want to see how I handle ground meat in other fun recipes, check out my ground turkey casserole!
Preparing the Cheeseburger Filling
First things first, we cook that beef. Toss your pound of ground beef into a skillet over medium heat. You want it wonderfully browned and crumbly. Once it’s cooked through, this is crucial: Drain off every single drop of excess fat! Soggy filling ruins a crispy quesadilla. After draining, toss in your salt, pepper, chopped onion, and that splash of Worcestershire sauce. Let that cook for about three minutes until the onion bits look soft and happy. Smell that? That’s real flavor developing!
Assembling and Cooking the Cheeseburger Quesadillas
Now, wipe your skillet clean—we need a dry, non-greasy surface for the perfect crisp shell. Get the heat back up to medium. Place one tortilla in the pan. Sprinkle cheese over just half of the tortilla, then load that cheese with one-fourth of your seasoned beef mixture. Fold the empty half over the filling to make a crescent. Cook this beauty for about 2 to 3 minutes per side. You’re watching for a golden brown, beautifully toasted tortilla and that cheese should be perfectly melted and gooey inside. Repeat until all four servings are done. Watch that heat! Medium is perfect for melting without burning your tortilla edges.
Expert Tips for Perfect Cheeseburger Quesadillas
You know I’ve made these more times than I want to admit, which means I’ve definitely made every mistake out there! Trying to rush the cooking or using low-quality tortillas will always result in disappointment. Here are the little secrets I learned that guarantee a success every single time you make these Cheeseburger Quesadillas.
First, if you want to take them up a notch, go ahead and toss in some bacon bits when you are stirring in the seasonings. That smoky flavor just screams ‘classic burger,’ and you can find some great bacon recipes all over the place for inspiration if you want to make your own!
The biggest game-changer for texture, and this comes straight from my desperate attempts to make them amazing for the kids, is brushing the outside. You don’t need much! Just lightly brush the surface of each tortilla with vegetable oil right before it hits the pan. It bumps up the crisp factor twenty notches and gives you that perfect golden color that makes you hungry just looking at it.
Also, don’t be afraid of pressing down slightly when you flip them. Use a sturdy spatula and press gently but firmly for about 10 seconds on each side. This helps the cheese glue everything together nicely and ensures the entire surface makes contact with the hot pan for uniform crispness. Don’t smash it flat, just give it a gentle encouragement to seal the deal!
Creative Variations for Your Cheeseburger Quesadillas
Once you nail the basic method—and trust me, you will after the first try—it’s time to start playing! This recipe lends itself so well to experimentation, which is why I love it so much. It’s basically a wrapper for all your favorite burger toppings in one tidy, crispy package. Why stick to ground beef when the possibilities are endless?
Don’t feel like you have to stop at cheddar! While sharp cheddar is my go-to because it has the best, strong flavor that holds up against the beef, you can absolutely mix it up. I often do a 50/50 blend of cheddar and Monterey Jack. The Jack gets super gooey and stretchy, which is always fun when you pull it apart for that perfect cheese pull!
If you want to go really wild, you can definitely change the protein. I’ve done this with ground turkey countless times, though you might need an extra dash of that Worcestershire to keep the flavor strong. Or, if you’re feeling ambitious, skip the chopping step and fry up some thinly sliced mushrooms until they’re beautifully browned.
And let’s talk about the toppings that should go *inside*. If you are a big fan of dill pickles—and who isn’t?—chop up a few of those crunchy dills really finely and mix them right into the cooked beef mixture with the onions. It’s a game-changer! The acidity pops against the richness of the beef and cheese. The same goes for those sweet, smoky caramelized onions; if you have time to cook those down slowly, they lift these Cheeseburger Quesadillas to a whole new level. Just remember to keep the filling relatively dry so your tortilla stays crispy!
Serving Suggestions for Your Cheeseburger Quesadillas
We’ve made the magic, now it’s time for the best part: eating them! Nobody wants to just pick up a floppy whole quesadilla; presentation matters, even when we’re making something this fast and easy. Cutting them correctly makes them perfect for dipping or just handling without dropping all that amazing filling everywhere.
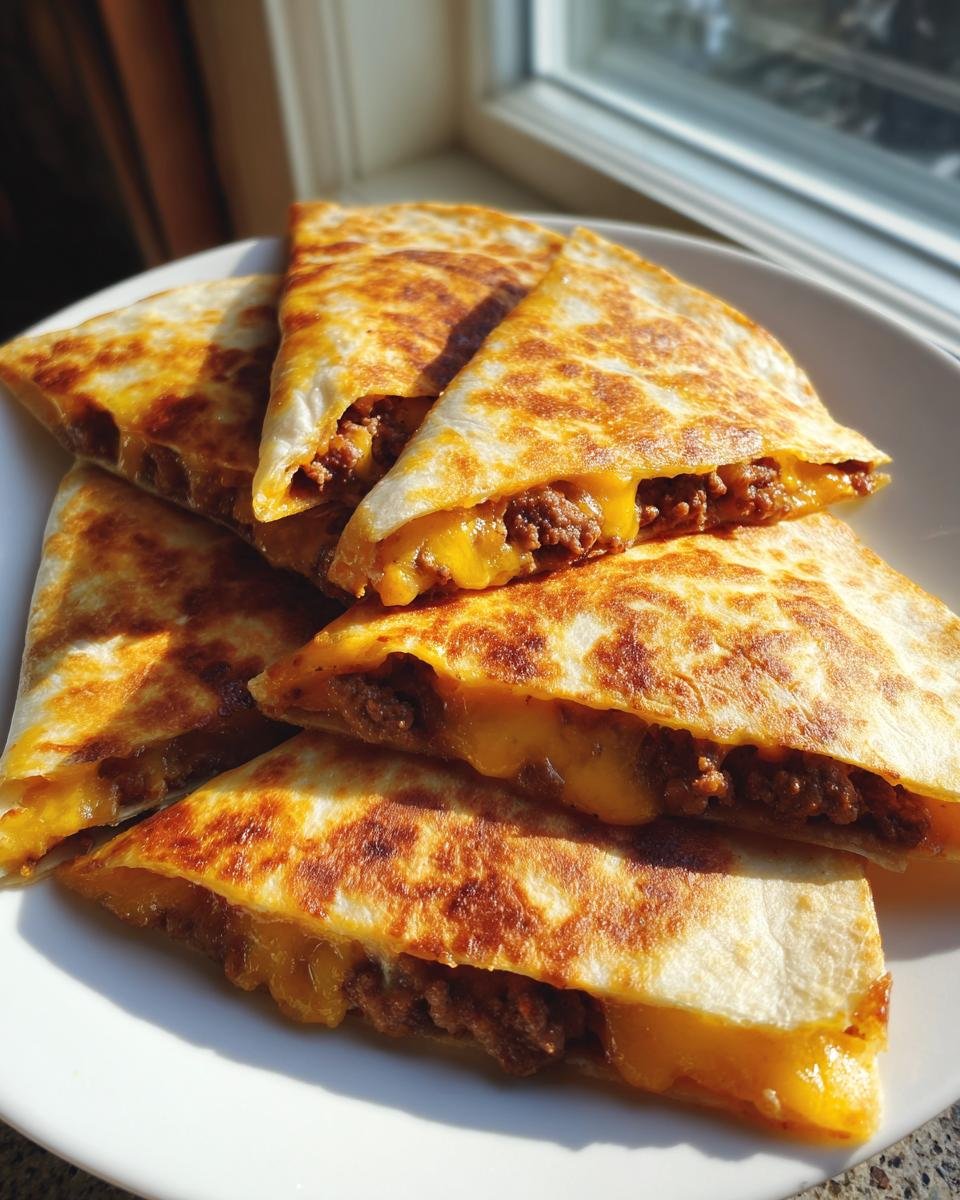
Once your Cheeseburger Quesadillas are cooked through and the cheese is happily melted, slide them onto a cutting board. Use a sharp knife—a pizza cutter works surprisingly well too!—and cut each large quesadilla into three neat wedges. This gives you six little triangles per full circle, which is just the right size for little hands or for grabbing one-handed while you’re busy!
Now, don’t forget those condiments! I always put out small bowls for dipping because everyone dips differently. Some people drown theirs in ketchup, others prefer a little mustard drizzle, and I’m always grabbing the pickles to stack right on top of the wedge. It brings back that fresh, sharp bite you’d get on a real burger.
If you want to make this feel like a full dinner instead of just a super snack, you need something fresh and green to cut through the richness of the beef and the cheese. You can’t go wrong with a simple crunchy side. I usually throw together a quick simple side salad—maybe some crisp lettuce, cucumber, and a light vinaigrette. It keeps the meal balanced and adds a fantastic textural contrast to the warm, soft center of the quesadilla.
Serve them immediately while they’re piping hot! That’s when the cheese is at its absolute peak stretchiness.
Storage and Reheating of Leftover Cheeseburger Quesadillas
Look, I know these things are so good you might not have any leftovers, but if you’re lucky enough to have a few stragglers, you definitely want to store them correctly so they taste amazing the next day. We don’t want sad, limp, microwave-steamed quesadillas, right? The texture is what makes these Cheeseburger Quesadillas special, so reheating needs a little strategy.
For storage, you want to keep any air away from them. Let them cool down completely on a rack first—don’t trap hot steam in a container, or they’ll get soggy fast. Once they are cooled off, stack them up with a piece of parchment paper or wax paper between each one. That prevents sticking! Then they go straight into an airtight container in the fridge. They usually stay pretty good for about three days, max. That’s usually the longest they last in my house!
The Best Way to Reheat for Crispness
Okay, here’s the deal: toss the microwave. I repeat, do not microwave these! You’ll save your fillings, but the tortilla turns instantly chewy, and that’s a tragedy we just can’t afford. We need heat to crisp up the outside again.
The absolute best way to revive leftovers is either in a standard oven or, if you have one, an air fryer. Set your oven to about 350°F (175°C). Lay the quesadilla wedges directly on a baking sheet—no oil needed—and heat them for about 8 to 10 minutes. You’re looking for that tortilla to feel firm and slightly crispy again, and for the cheese in the middle to get hot and melty once more. Keep an eye on them so the beef doesn’t dry out!
If you’re using an air fryer, that’s even faster! Set it to about 325°F and cook them for maybe 4 or 5 minutes. Seriously, it’s almost instant revival! It really does a great job of crisping up the surface without drying out the savory ground beef filling inside.
Frequently Asked Questions About Cheeseburger Quesadillas
I get so many questions when people try this recipe for the first time, which totally makes sense! It’s such a clever twist on a classic, so naturally you want to make sure you nail the texture and flavor. Here are the top things folks ask me about making these super simple Cheeseburger Quesadillas.
Can I make Cheeseburger Quesadillas ahead of time?
This is a smart question because prepping ahead is the key to easy meals! The short answer is yes, but with a big “but.” You can absolutely cook your ground beef filling mixture ahead of time—make a big batch and keep it stored in the fridge. It reheats beautifully in the skillet! However, you must wait until you are ready to eat to assemble and cook the actual quesadillas. The tortillas need to hit that hot pan to get crispy, and that only happens right before serving. If you assemble them too early, the moisture from the beef will soak into the tortilla and make everything soggy instead of golden brown and crunchy!
What other types of meat work well in Cheeseburger Quesadillas?
If beef isn’t your thing, or if you’re just running low, go right ahead and swap it out! I’ve made these with ground turkey countless times, and they are delicious, though turkey is naturally leaner. Because of that, I always add an extra half teaspoon of that Worcestershire sauce when using turkey to make sure we don’t lose that signature savory depth. Ground chicken works too, using the same approach. Just remember to cook it thoroughly, drain any extra liquid that might come out (especially with leaner meats), and stick to medium heat when you cook the final quesadilla so the cheese melts before the tortilla burns!
Estimated Nutritional Data for Cheeseburger Quesadillas
Now, I have to be totally honest with you here. I cook because my family loves the food, not because I’m obsessed with the numbers! I’m not tracking macros for every single bite, but I do keep a rough estimate handy just in case someone asks. Think of this list as a good ballpark figure for one of these wonderful little Cheeseburger Quesadillas—the size of one whole quesadilla cut into wedges, mind you.
Because we’re using ground beef and cheddar cheese, the numbers reflect a hearty, satisfying lunch or dinner. Keep in mind that if you load yours up with extra oil when cooking or pile on those bacon bits, things will definitely shift a little! This data is just a guide based on the core ingredients list for one serving.
- Calories: Approximately 450
- Fat: Around 25g (with about 12g of that being saturated fat)
- Protein: A solid 28g! Great for keeping you full.
- Carbohydrates: About 30g
- Sodium: Roughly 550mg
- Sugar: Very low, only about 3g per serving.
This information is what I pulled together based on the general ingredients, so please treat it as an estimate. If you’re substituting leaner meat or using a different type of cheese, the total fat and calorie counts will change right away. But hey, they taste amazing regardless of the exact macro breakdown, and that’s what matters most in my kitchen!
Print
Cheeseburger Quesadillas
- Total Time: 25 min
- Yield: 4 servings 1x
- Diet: Low Fat
Description
A simple recipe combining the flavors of a cheeseburger inside a crispy quesadilla.
Ingredients
- 1 pound ground beef
- 1/2 teaspoon salt
- 1/4 teaspoon black pepper
- 1/2 cup chopped onion
- 1 teaspoon Worcestershire sauce
- 8 large flour tortillas
- 2 cups shredded cheddar cheese
- 1 tablespoon vegetable oil
- Optional toppings: Ketchup, mustard, pickles
Instructions
- Cook the ground beef in a skillet over medium heat until browned. Drain off any excess fat.
- Stir in the salt, pepper, chopped onion, and Worcestershire sauce. Cook for 3 minutes until the onion softens.
- Wipe the skillet clean.
- Place one tortilla in the skillet over medium heat. Sprinkle one-fourth of the cheese over half of the tortilla.
- Spoon one-fourth of the cooked beef mixture over the cheese.
- Fold the empty half of the tortilla over the filling.
- Cook for 2 to 3 minutes per side until the tortilla is golden brown and the cheese is melted.
- Repeat with the remaining tortillas and filling.
- Cut each quesadilla into wedges. Serve with desired toppings.
Notes
- You can use pre-cooked bacon bits for added flavor.
- For crispier tortillas, brush the outside lightly with oil before cooking.
- Prep Time: 10 min
- Cook Time: 15 min
- Category: Lunch
- Method: Stovetop
- Cuisine: American
Nutrition
- Serving Size: 1 quesadilla
- Calories: 450
- Sugar: 3
- Sodium: 550
- Fat: 25
- Saturated Fat: 12
- Unsaturated Fat: 13
- Trans Fat: 0.5
- Carbohydrates: 30
- Fiber: 2
- Protein: 28
- Cholesterol: 80
Keywords: cheeseburger quesadillas, ground beef recipe, easy dinner, quick lunch, cheddar cheese