
Let’s be real: sometimes you need dessert served about five minutes ago, right? Life gets busy, but that doesn’t mean we have to skip the sweet stuff! That’s why this simple Oreo pudding is legendary in my kitchen. It’s the ultimate fuss-free treat that comes together faster than you can decide what movie to watch. After years of perfecting quick fixes and reliable family favorites, I can promise you this no-bake recipe proves fantastic flavor doesn’t require a culinary marathon. This Oreo pudding seriously saves the day every single time!
Why This Oreo Pudding Recipe is Your New Go-To Dessert
Why should you drop everything and make this Oreo pudding right now? Honestly, it earns its spot on my regular rotation for a few really great reasons. You’ll be amazed how quickly we get from pantry staples to dessert heaven. Trust me, once you see how easy this is, you’ll rely on it too!
- It’s shockingly fast! You’re mixing for about ten minutes of active time, and that’s the hard part done.
- Seriously minimal ingredients are required. If you have milk, Oreos, and instant pudding, you’re halfway there.
- It tastes exactly like cookies and cream heaven—rich, creamy, and totally decadent. It always gets rave reviews!
- This dessert is impossible to mess up. Instant pudding is wonderfully forgiving, which is why I trust it for my biggest crowds!
This is the kind of dessert that wins potlucks without you ever breaking a sweat. Doesn’t that sound perfect?
Gathering Ingredients for Your Simple Oreo Pudding
Okay, let’s talk supplies. For this super simple Oreo pudding, we are keeping the ingredient list tiny, which is what makes it so accessible! I always keep these things stocked because you never know when a craving will hit. We’re relying on instant pudding because, frankly, who has time for cooking pudding on a weeknight?
You’ll need:
- One standard package (that’s usually 3.9 ounces) of instant vanilla pudding mix.
- Exactly two cups of really cold milk—cold milk is crucial for that instant pudding to set up right!
- One cup of whipped topping, make sure it’s thawed completely so it folds in nicely.
- About 12 whole Oreo cookies. These need to be crushed up—a little coarse, a little fine, whatever you like!
If you’re feeling spicy and want a deeper, richer base, don’t hesitate to swap that cold milk out for chocolate milk. Trust me, it takes the cookies and cream flavor up about ten notches. It’s a small change with huge payoff!
Step-by-Step Instructions for Perfect Oreo Pudding
Now for the best part—putting it all together! This process is so straightforward; you’ll feel like a dessert wizard. The trick here is patience during the short resting periods. Seriously, don’t skip the waiting times, or you’ll end up with sweet milk instead of thick pudding!
Mixing the Pudding Base
Grab yourself a medium bowl—nothing fancy needed here. Pour in your instant vanilla pudding mix and the two cups of cold milk. Now, get that whisk going! You absolutely must whisk this for a full two minutes until everything is incorporated. I know two minutes sounds forever when you’re hungry, but this activation time is essential for the instant pudding to start doing its magic and thicken up. After whisking, just let that bowl sit on the counter for about five minutes. Don’t touch it! It needs that little bit of rest to set firmly.
Folding and Adding Oreos to the Oreo Pudding
Once the base has thickened up nicely, it’s time to lighten things up. Take your thawed whipped topping and gently, I mean gently, fold it in. You want to keep all those lovely air bubbles in there because that’s what makes this Oreo pudding creamy rather than dense. After the whipped topping is just combined—stop mixing! Now introduce the Oreos, but only use half of your crushed cookies right now. Stir them in just enough so they’re distributed through the pudding. We’re saving the other half for the grand finale topping!

Assembling and Chilling the Oreo Pudding
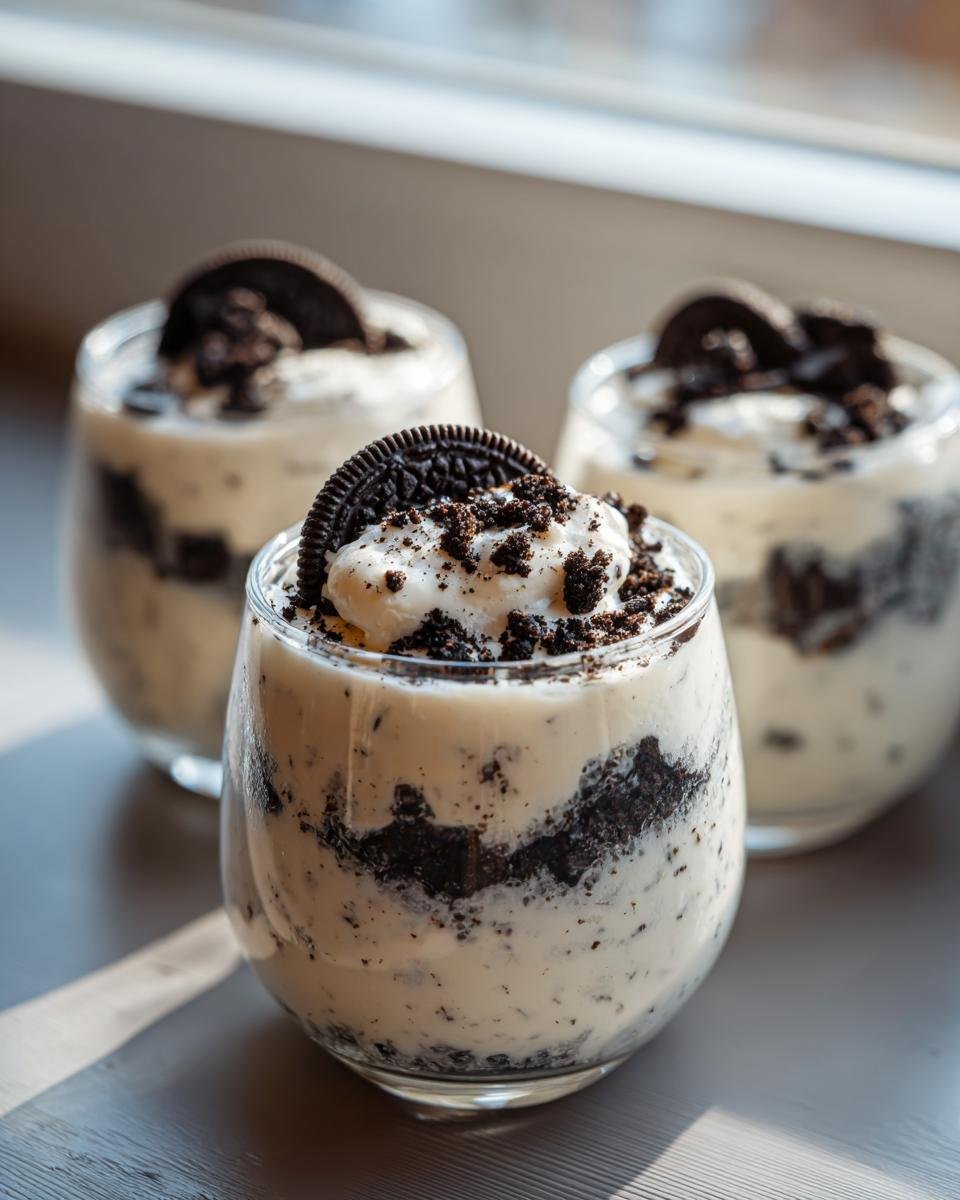
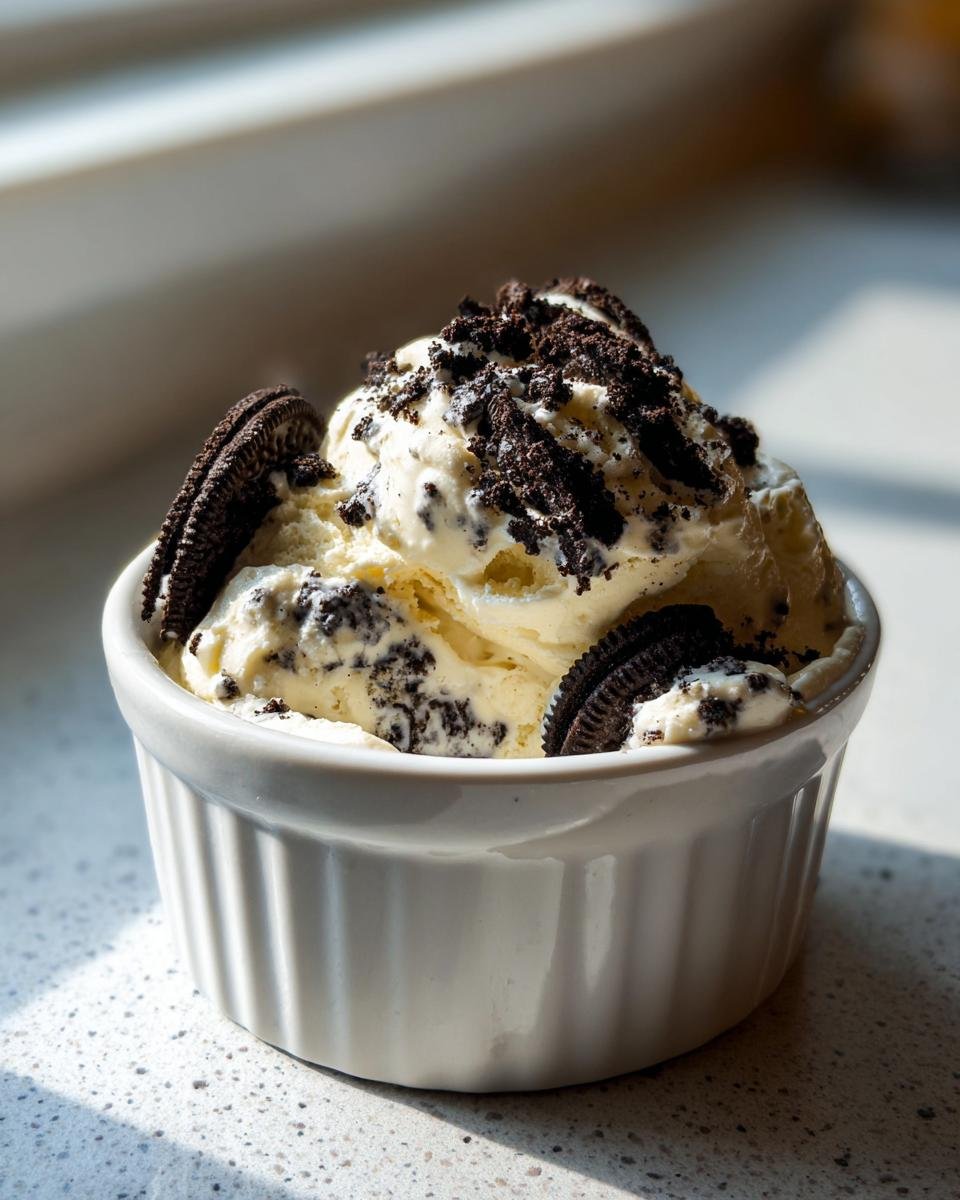
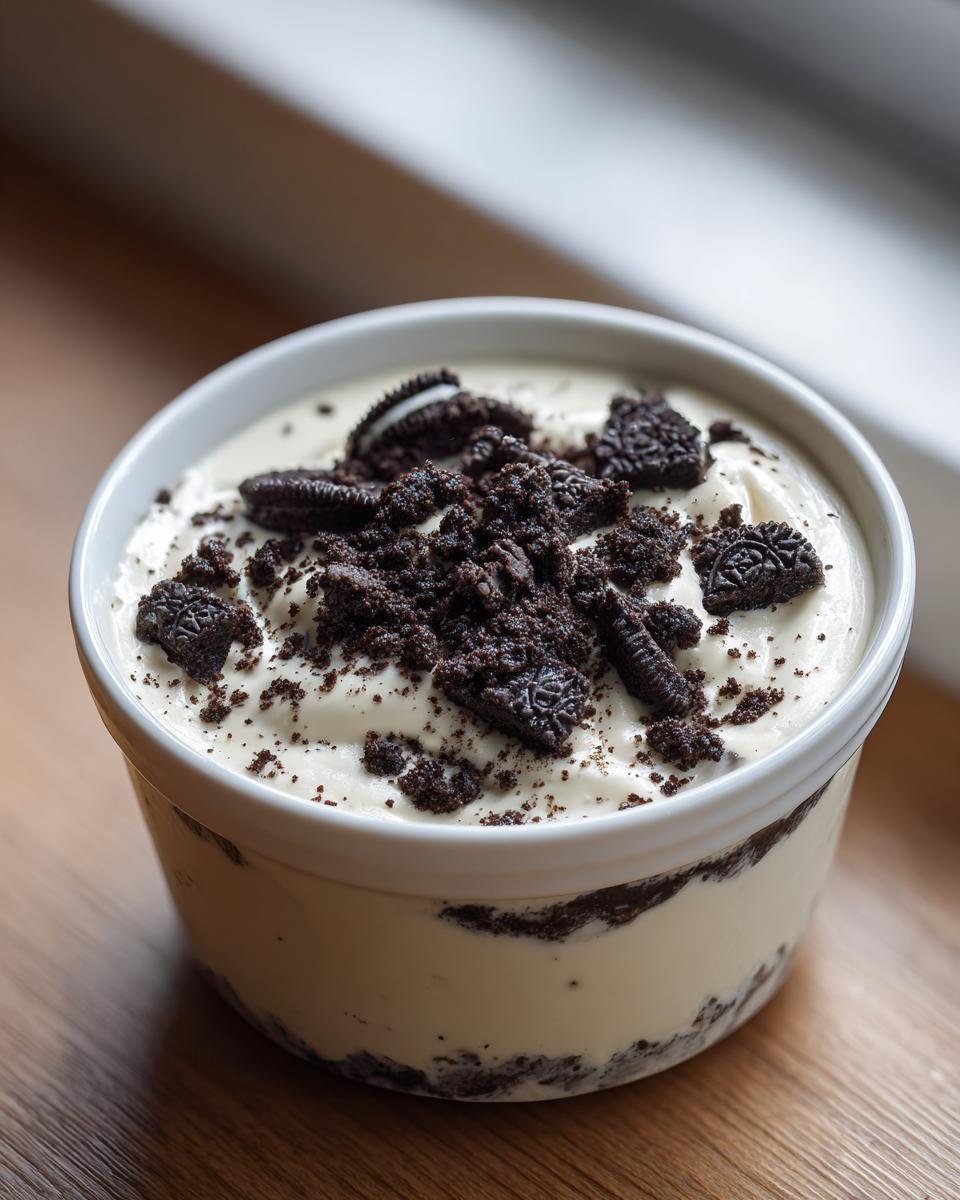
This is where presentation comes in, though you can totally skip individual dishes if you’re feeling lazy (I sometimes pour the whole thing into one big bowl!). Spoon the amazing mixture into four individual serving dishes—glasses or small bowls work perfectly to show off those cookie layers. Then, sprinkle that reserved half of the crushed Oreos right on top of each serving. This makes the crowning look great! The last and most important rule: you have to chill this! Pop those dishes into the fridge for a minimum of 30 minutes. Believe me, the texture deepens and becomes so much better after that chill time. If you want that beautiful layered look I love, you can alternate layers of pudding and cookies when you serve it, just like you see in those fancy dessert recipes like layered chocolate desserts!
Expert Tips for Next-Level Oreo Pudding
Even though this recipe is practically foolproof, I’ve been making versions of this cookies and cream magic for years, so I’ve picked up a few little secrets to make it truly restaurant-worthy. These aren’t swaps, they are just little tweaks that make your Oreo pudding shine brighter!
First, don’t just stick to vanilla pudding! Vanilla is classic, sure, but honestly, using instant chocolate pudding instead makes this taste ridiculously rich—like a super light chocolate mousse. Or, if you buy the chocolate sandwich cookies with the colored cream filling (like mint or golden Oreos), those are fun too! It adds a nice little visual surprise when you dig in. Think about trying those fun versions for holidays.
Secondly, when you’re crushing your cookies, don’t go totally powdery. I try to leave some small chunks of the black cookie and some larger bits of the creamy filling. That mix of textures—the fine sugar dust and the slightly bigger chunks—keeps the whole thing interesting. If you like that crunchy contrast, you can even reserve just a spoonful of the nicest crumbs and sprinkle them on right as you serve, rather than mixing them all in at the beginning.
Oh, and if you enjoyed the idea of mixing in different cookies, you absolutely have to check out recipes that play with combining elements, like funfetti icebox cakes. It shows how versatile these simple, cream-based desserts can be when you just get a little creative with your mix-ins!
Ingredient Notes and Substitutions for Your Oreo Pudding
I know you might look at my list and think, “What if I don’t have whipped topping on hand?” That’s totally okay! Life happens, and sometimes you’re missing that one specific item. The key to this Oreo pudding is the light, airy texture, so whatever you use must mimic that fluffiness. That’s the crucial part. If you’re out of the store-bought stuff, don’t panic!
My best substitution? Heavy whipping cream! You’ll want to whip that heavy cream yourself until it forms soft peaks. Don’t whip it too stiff, though; we want it to blend seamlessly into the pudding base without deflating all the air we just built up. It adds a wonderful richness, too, because it’s pure dairy fat goodness.
What about the cookies? Sometimes I only have leftover cookies from another baking project, or maybe a different brand is on sale. Go for it! While the classic black sandwich cookie is what gives us that iconic cookies and cream look, using Golden Oreos or even peanut butter Oreos creates a fun, totally new flavor profile. Just crush whatever you have, and it’ll work just fine. The pudding base is so forgiving; it really handles variations like a champ!
Serving Suggestions for This Easy Oreo Pudding
Once your Oreo pudding has chilled up and those flavors have really married—oh boy—it’s time to serve it! Because this dessert is so simple in structure, how you present it can make it feel way fancier than the 10 minutes of work it took. Presentation is everything when you’re serving something this wonderfully basic.
My absolute favorite way to serve this is in clear glass dessert cups or small mason jars. You get that gorgeous visual contrast between the stark white, fluffy pudding and the dark, chunky pieces of Oreo cookie. It looks intentional and layered, even if you just spooned it in quickly! You’ll find that when you layer it, it looks totally professional, almost like those incredible layered desserts such as the triple chocolate mousse cake recipes!
To really take it over the top for company without adding any real effort, try a final garnish right before walking it to the table. A tiny, perfect dollop of fresh, lightly sweetened whipped cream on top of the final cookie layer adds elegance. Or, if you really want to lean into the cookie flavor, drizzle just a touch of melted chocolate right over the top cookie crumbs. You don’t need much, just a little zig-zag pattern. It signals to everyone that this isn’t just a snack; it’s a proper, made-with-love dessert. Honestly, any way you serve this, people are going to devour it!
Storage and Make-Ahead Options for Oreo Pudding
One of the best things about this incredible Oreo pudding? You can totally make it ahead of time! This is fantastic news for busy people like us who are always trying to juggle dinner prep and dessert duty. Because this is a no-bake dessert relying on instant pudding, timing is key to keeping that creamy texture intact.
For make-ahead plans, I usually whip this up in the afternoon, say around 3 PM, and we eat it after dinner. The minimum chill time is 30 minutes, but honestly, eating it after two or three hours in the fridge is when it hits peak deliciousness. This gives the vanilla pudding plenty of time to firm up around those crushed Oreos. You can even prepare it a full day in advance if you’re hosting a party the next day!
Now, here’s where we run into a snag: freezing. Pudding does not like the freezer, period. When you freeze pudding mixtures, especially ones that contain gelatin from the instant mix and the structure from the whipped topping, thawing them usually results in a watery, weeping mess. Don’t even try to freeze the Oreo pudding mixture; it breaks down completely and you lose that beautiful creaminess. You’re better off making a batch of cookie dough bites, like these easy treats, if you need something freezer-friendly!
If you’ve made it ahead of time (say, 24 hours early), cover the serving dishes tightly with plastic wrap. If you put the wrap directly on the surface, it can sometimes stick weirdly to the pudding, so just try to tent it slightly, or use containers with lids. When you pull it out to serve, give it a quick stir if it seems a little stiff, and maybe sprinkle on any reserved cookie crumbs right before you bring it out, just to refresh that top layer!
Frequently Asked Questions About Oreo Pudding
I know once you get the recipe down, you start wondering about little tweaks and common issues. That’s how I learned everything I know about the best no bake desserts! Here are the questions I get asked most often about whipping up this easy Oreo pudding.
Can I use pre-made pudding instead of instant pudding mix for this Oreo Pudding?
You absolutely can, but I really have to warn you—the texture changes so much! The magic of this recipe comes from using instant pudding because when you whisk it with milk, it starts firming up before you even fold in the whipped topping. If you use pre-made pudding straight from the carton, it’s already fully set. When you fold in the whipped topping, you risk making it too runny, and it won’t hold that beautiful scoopable shape. If you must use pre-made, chill it for about an hour first, then gently fold everything else in.
What is the best way to crush the Oreo cookies?
Oh, the crushing! I used to put them in a heavy Ziploc bag and bash them with a rolling pin until my arm got tired, which worked okay, but you get uneven chunks. The fastest, best way, in my opinion, is using a food processor! Pulse it a few times, and you get perfectly sized crumbs—some fine dust and some crunchy bits—in about ten seconds. If you don’t have a processor, put them in a sturdy zip-top bag, push out most of the air, and then roll over them with the bottom of a heavy mug or can. Just avoid turning them into dust if you can!
How long can this no bake dessert stay fresh?
Since this Oreo pudding relies on stabilized instant pudding and whipped topping, it stays wonderfully fresh for about three to four days in the refrigerator when covered tightly. The longer it sits, the softer the Oreos become, which some people actually prefer! They absorb moisture and soften right into the pudding. But definitely don’t plan on keeping leftovers past day four or five. And remember what I said earlier: skip the freezer, as it just doesn’t thaw well. If you’re looking for freezer ideas, check out how simple it is to make Reese’s Oreo balls instead!
Estimated Nutritional Snapshot for This Oreo Pudding
Okay, let’s talk fuel! I always like to give a little heads-up on what you’re diving into, just so you know what deliciousness you’re consuming. Since this Oreo pudding uses standard commercial products, these numbers are estimates, and they can swing a bit depending on the exact brand of instant pudding or Oreos you grab. I always keep these things handy for my own peace of mind!
When we break down just one serving of this glorious cookies and cream confection, here’s roughly what you’re looking at:
- Calories are sitting around 350.
- Total Fat is about 16 grams.
- Carbohydrates come in around 50 grams.
- And you’ll get about 5 grams of protein per serving.
Don’t forget these figures are based on using milk and standard vanilla pudding mix. If you decided to use chocolate milk, those numbers will shift slightly! This is just a general guide, but it proves that something this easy and satisfying doesn’t have to send your day completely off the rails. Enjoy every bite guilt-free!
Print
Simple Oreo Pudding
- Total Time: 40 min
- Yield: 4 servings 1x
- Diet: Vegetarian
Description
A quick and easy dessert made with crushed Oreos and a creamy pudding base.
Ingredients
- 1 package (3.9 oz) instant vanilla pudding mix
- 2 cups cold milk
- 1 cup whipped topping, thawed
- 12 Oreo cookies, crushed
Instructions
- In a medium bowl, whisk the instant pudding mix and cold milk for 2 minutes.
- Let the mixture stand for 5 minutes to thicken.
- Gently fold in the whipped topping until just combined.
- Stir in half of the crushed Oreo cookies.
- Spoon the pudding mixture into individual serving dishes.
- Top each serving with the remaining crushed Oreos.
- Chill for at least 30 minutes before serving.
Notes
- Use chocolate milk instead of regular milk for a richer flavor.
- You can layer the pudding and cookies for a parfait look.
- Prep Time: 10 min
- Cook Time: 0 min
- Category: Dessert
- Method: No Bake
- Cuisine: American
Nutrition
- Serving Size: 1 serving
- Calories: 350
- Sugar: 45
- Sodium: 300
- Fat: 16
- Saturated Fat: 8
- Unsaturated Fat: 8
- Trans Fat: 0
- Carbohydrates: 50
- Fiber: 1
- Protein: 5
- Cholesterol: 15
Keywords: Oreo pudding, no bake dessert, vanilla pudding, easy dessert, cookies and cream