
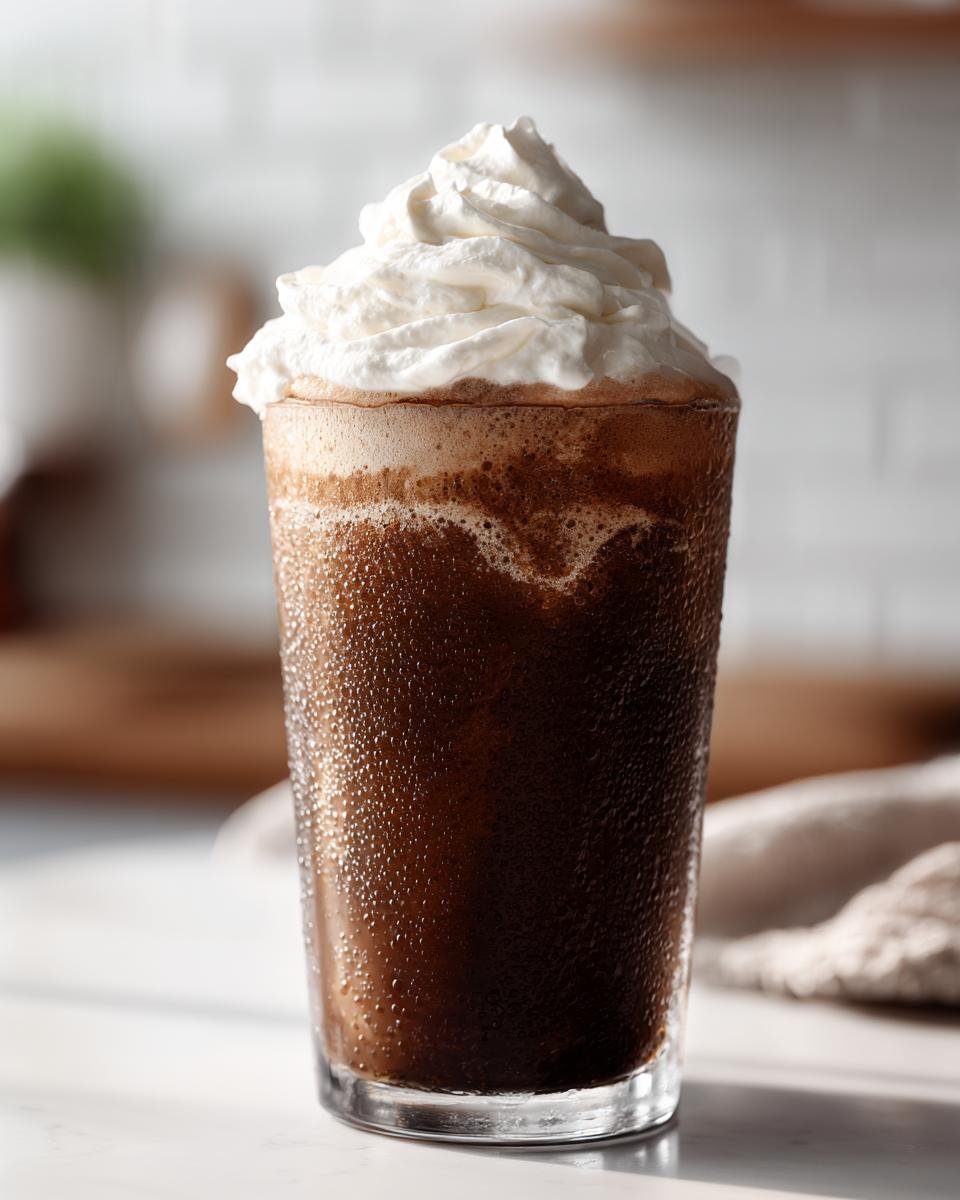
When you need a serious pick-me-up but you’re too hot or too tired to bother with anything complicated, you know what I reach for? My blender! Seriously, nothing beats the rush of flavor you get from a beautifully blended beverage that takes less time than brewing a pot of regular coffee. I’ve become obsessed with mastering the three-ingredient blender dessert, and this recipe is the king of them all. This super easy **Coffee Milkshake** is my go-to when those afternoon slumps hit hard. It’s icy, it’s sweet, and it tastes exactly like that expensive frozen coffee you order downtown, but you can make it in five minutes flat right here in your kitchen.
Why You Will Love This Quick Coffee Milkshake Recipe
I’m telling you, this isn’t just another blended drink; it’s a lifesaver when time is short and you need maximum flavor payoff instantly. I always keep the key ingredients stocked because you never know when a spontaneous iced coffee craving will strike!
- Speed Demon: We are talking five minutes total, start to finish. If you can measure ingredients, you can have this blended and in your hand before your frozen dessert anxiety fully sets in.
- Zero Mess Kitchen: The blender does 100% of the heavy lifting. Forget complicated sauce reductions or freezing trays—just toss it in, hit the button, and you’re done.
- The Perfect Combo: That marriage between rich, strong coffee and creamy vanilla ice cream? It’s unbeatable. It hits that sweet spot between dessert and your afternoon caffeine fix!
- Totally Adaptable: Feel free to mess with it! It’s so simple that half the fun is throwing in a spoonful of chocolate syrup or a dash of cinnamon before you blend.
Essential Ingredients for the Perfect Coffee Milkshake
Listen, the beauty of keeping a recipe simple means you need every single one of your ingredients to pull its weight, right? For this drink, we aren’t messing around with weird milk alternatives or frozen fruit chunks. We are going straight for the classic, creamy, coffee powerhouse flavor. Trust me, when you only have a handful of components, quality is what makes the difference between a decent drink and the best **Coffee Milkshake** you’ve ever made at home.
Ingredient Clarity and Specifics
I always pull my ice cream out about five minutes before I plan to start blending. If it’s rock hard, your blender will struggle and you’ll end up with chunks floating around, and nobody wants a half-blended surprise! Also, your coffee absolutely must be cold, preferably made the day before.
- 2 cups vanilla ice cream, slightly softened for easier blending
- 1 cup cold brewed coffee. Remember, this needs to be strong—if you use weak iced coffee, your flavor will get totally lost!
- 2 tablespoons granulated sugar. This is just a starting point, though; taste your ice cream first!
- 1/2 teaspoon vanilla extract. A little goes a long way to boost that creamy flavor.
- Whipped cream for topping (optional). Gotta have the cloud on top, right?
My absolute secret tip for these blended coffee drinks? Use super strong cold brew. If you buy store-bought cold brew that tastes watery, your final Coffee Milkshake will taste like sweet, thin milk. We want that intense coffee punch!
Tips for Success When Making Your Coffee Milkshake
Okay, so you’ve got your ingredients ready, but sometimes even the simplest blender recipe has a few little traps you can fall into! Don’t worry, I’ve made this blend enough times to know exactly how to avoid an overly thin, soupy mess, which is my ultimate nightmare when trying to make a proper **Coffee Milkshake**.
My biggest learning curve moment when I first started making these was realizing that adding the liquid before the ice cream always led to way too much splashing and not enough blending action happening at the bottom. Also, if you are using homemade coffee ice cream or maybe you’re trying out one of those cool zero-sugar alternatives, you might want to check out this recipe for almond milk ice cream to get you started!
Here are the three things I swear by to ensure this turns out thick, creamy, and perfect every single time, no matter how high the humidity is outside:
- The Softening Trick: I mentioned pulling the ice cream out early, but this is crucial. If your ice cream scoops easily but doesn’t melt when you look at it, you’re good. Too hard, and you burn out your blender motor. Too soft, and it’s soup!
- Coffee Last (Usually): I always put the heaviest, iciest stuff in first—that’s the ice cream. Then the sugar and vanilla go in. The cold brew goes in *last*. This lets the blades grab the ice cream first and pull everything down into the vortex, rather than just churning the liquid around uselessly.
- Control Your Sugar: If you used a really sweet store-bought vanilla ice cream, you might find you don’t need that extra two tablespoons of sugar at all. Always taste your ice cream before adding any sugar to the blender.
Achieving the Best Consistency for Your Coffee Milkshake
Consistency truly is everything here. We aren’t aiming for a thin, fast smoothie; we want something that’s going to hold its shape for a minute before slowly melting down.
When you first start blending, resist the urge to immediately turn it to high! Start on a low setting just to break up the ice cream chunks—maybe 15 seconds—and then crank it up to high or the ‘Smoothie’ setting. You’ll blend until it stops making that loud, chunky noise and starts sounding like a steady, thick whir. If after 45 seconds on high speed it still looks chunky, stop the blender, scrape down the sides with a spatula, and add maybe two tablespoons of plain milk—no more! Adding milk is like cutting the flavor, so only do it if thickening with more ice cream (if you have any left) isn’t an option.

How to Prepare Your Quick Coffee Milkshake Instructions
Okay, this is the easiest part, but still, rushing leads to disappointment! Follow these steps in order, and I guarantee you won’t end up with a watery mess. We move quickly because we want this drink to be ice-cold and thick the second it leaves the blender jar. Since we aren’t baking or waiting for anything to rise, your total time spent actively working here is probably closer to three minutes once you get the hang of it. It’s all about layering correctly!
Blending the Coffee Milkshake Base
First things first, let’s get those heavy, icy elements into the machine. Grab your blender—use whatever size you have, but if you’re only making one serving, be mindful of how high the ingredients might splash.
- Go ahead and drop in your 2 cups of slightly softened vanilla ice cream first. Make sure it’s distributed somewhat evenly around the blades if you can.
- Next, toss in your 2 tablespoons of sugar and that beautiful 1/2 teaspoon of vanilla extract.
- Now, slowly pour in the 1 cup of cold brewed coffee. Since it’s liquid, this goes last to help push the ice cream down toward the blade action.
Place that lid on nice and tight—you don’t want coffee splash-back!
Adjusting and Serving the Coffee Milkshake
This is where we blend until we hit that perfect, dreamy texture. You want it smooth, not grainy, and thick enough that it almost struggles to spin in the blender jar.
- Start your blender low for about 15 seconds to break up the chunks, then crank it up to high speed. Blend continuously until the mixture flows smoothly, usually about 45 seconds to a minute. You are looking for a thick, uniform consistency—it should look like soft-serve ice cream that’s just starting to melt.
- If, after a solid minute on high, you feel like it’s too hard for your blender to move, carefully open the top and add just a tiny splash (maybe 1 to 2 tablespoons) of regular milk. Blend again briefly until it loosens up slightly. Remember, adding liquid thins it out instantly!
- Once it’s perfect, pour it immediately into tall, chilled glasses. Milkshakes hate waiting around!
- Top generously with whipped cream if you’re feeling fancy—and honestly, why wouldn’t you be? Serve this **Coffee Milkshake** right away so you can enjoy that icy, thick texture at its absolute peak.
Variations on the Classic Coffee Milkshake
While I stand by the classic vanilla and coffee combo, sometimes you just need to spice things up a little, right? If your taste buds are tapping their foot and asking for an encore, I’ve got a few easy switch-ups that keep the blending process just as simple. These ideas let you tailor your **Coffee Milkshake** perfectly to whatever mood you’re in for a little boost!
I always think about what I might have leftover in the pantry. Sometimes I’ll make a big batch of cold brew, but other times I’ll have leftover chocolate pieces, and that’s when I get creative. For more ideas on shifting gears and making other blended drinks, you might want to check out this lineup of quick smoothies for inspiration!
Here are my favorite ways to transform this recipe:
- Go Chocolate Crazy: This is the easiest move! Add two tablespoons of chocolate syrup or a tablespoon of unsweetened cocoa powder right in with the other ingredients. It takes you instantly from a coffee treat to a mocha masterpiece. You might even want to skip the granulated sugar entirely here since the syrup is sweet enough.
- Spice It Up: If you want a grown-up flavor that feels cozy even though it’s ice cold, try adding just a tiny pinch of ground cinnamon or even a whisper of ground cardamom. Blend it in with the sugar and vanilla. It adds this unexpected warmth that is just divine with the coffee.
- Make it ‘Meal Replacement’ Strong: Sometimes I need this as a real lunch replacement. If that’s you, add one scoop of your favorite unflavored or vanilla protein powder. It will thicken the drink up even more, so be prepared to add an extra tablespoon or two of milk to keep things moving!
- Swap the Vanilla Base: Have you ever tried chocolate ice cream instead of vanilla? It changes the entire vibe! It leans heavier into the dessert category, but it still complements the coffee so well.
Serving Suggestions for Your Coffee Milkshake
Since this is truly a dessert—and a rich one at that—you don’t need a whole lot to go with it. Sometimes, a glass of this icy goodness is enough all by itself! But if you’re serving this after dinner or having friends over, a little something on the side makes it feel extra special.
I rarely make anything complicated to go alongside it because the milkshake is the star. Honestly, the best things to serve with a creamy **Coffee Milkshake** are simple, slightly less sweet baked items that let that coffee flavor shine through. If you’re looking for something super fast that complements these flavors, I highly recommend thinking about quick breads. You can find some fantastic, easy recipes for those right here, like these five quick bread recipes!
If you are serving it up:
- The Classic Dunk: Forget fancy cookies. A couple of crisp, plain shortbread fingers or simple vanilla wafers are perfect for dunking right into that frosty whipped cream.
- Mini Muffins on the Side: If you bake muffins, make them mini size. A few tiny blueberry muffins or even plain vanilla ones are great because they offer textural contrast without making the snack too heavy.
- Presentation Counts: Always use your tallest, nicest glass, even if it’s just for yourself! A fun paper straw doesn’t hurt, either—it makes the moment feel a little more celebratory, even if you made it five minutes ago.
Storage and Reheating Instructions for Coffee Milkshake
I gotta be upfront with you: this **Coffee Milkshake** is happiest the second it hits the glass. It’s a delicate balance of ice cream and liquid caffeine, and trying to save leftovers is usually an exercise in disappointment! Milkshakes are honestly designed to be an immediate gratification food, you know? The texture breaks down fast once the ice cream starts melting into the coffee.
If you absolutely, positively made too much—maybe you misjudged your serving size or you’re testing out a new blender capacity—you can salvage some of it, but it takes a little effort. Please, for the love of creamy desserts, do not put this in the microwave or try to heat it up! That’s just asking for trouble.
Here is the only semi-successful way I’ve found to store any extra serving:
- Tuck It In: Pour any leftovers into a small, tightly sealed container—an airtight mason jar works best. You want as little air trapped in there as possible, which prevents freezer burn, not that this lasts long enough to worry about that!
- Deep Freeze Only: Pop that sealed jar straight into the bottom or coldest part of your freezer. You’re essentially going to freeze it again into a very hard, coffee-flavored ice block.
- Plan for Re-Blending: When you are ready to try and revive it later (maybe the next day), you absolutely cannot just let it thaw on the counter. It will become thin and weird. You’ll need to scoop that frozen chunk into your blender and treat it like a brand-new shake. You will likely need to add an extra scoop of ice cream and maybe a splash of milk to get the blades moving again, but it’s better than pouring it down the drain!
Seriously though, the best advice I can give you is to adjust your ingredients slightly before blending so that you only make exactly enough for the number of people drinking it immediately. That intense, thick texture is too good to waste time trying to resurrect later!
Frequently Asked Questions About Making a Coffee Milkshake
I totally get it—when you’re making something this fast, you want to make sure you get every small detail right the first time! Most of the questions I get revolve around what kind of coffee to use or how to stop the shake from separating mid-blend. I’ve put together the three most common ones I hear so you can jump straight to the perfected flavor!
Can I use hot coffee instead of cold coffee in my Coffee Milkshake?
Oh, please don’t! If you try to use hot or even room-temperature coffee, you are asking your ice cream to melt instantly before the blender even has a chance to whip it up. You’ll end up with a sweet, lukewarm puddle rather than a frosty, thick milkshake. Cold coffee is essential; in fact, if your cold coffee is already ice-cold right out of the fridge, it actually helps keep the mixture colder for longer while blending, which means a thicker result!
What is the best type of coffee to use for this recipe?
For the absolute best flavor payoff here, you really need to lean into a strong brew. Don’t worry about what kind of bean variety you use, but focus on the strength. That means using a very strong batch of cold brew concentrate, or perhaps some leftover espresso shots that you’ve allowed to cool completely. If you use standard diner-style iced coffee, the flavor gets totally washed out by the richness of the vanilla ice cream, and you lose that punch you want in a great **Coffee Milkshake**.
My milkshake turned out too thin, what did I do wrong?
This usually happens for one of two reasons, and I’ve done both things myself more times than I care to admit! First, your ice cream wasn’t cold enough, or you added too much liquid (coffee or milk) too fast. If your ice cream is already soft when you scoop it, you’ve started off on the wrong foot. Second, check your blending time. If you blend for too long, the friction from the blades actually warms the mixture up, melting the edges and making it runny. Next time, blend only until it’s smooth, then stop immediately!
Nutritional Estimates for This Simple Coffee Milkshake
Okay, so here’s the real talk section. When we’re whipping up something this quick and delicious, we’re usually prioritizing speed and comfort over counting every little thing, right? That’s completely fine! But I know some of you are curious about what’s in your frosty glass, so I always like to throw in a small disclaimer about the numbers.
Please keep in mind that all the nutritional data you might see floating around for this simple **Coffee Milkshake** is purely an **estimate**. Since everyone’s brand of vanilla ice cream is different—some are packed with sugar, others are richer in fat—the final calorie count or sugar content is going to shift around quite a bit based on what you personally decide to use.
This information is just a general guideline, especially if you’re adding things like extra sugar, chocolate syrup, or if you end up needing to add milk to thin it out. If you’re using a budget vanilla ice cream versus a gourmet brand, trust me, the numbers will look different. Just enjoy the treat, and if you need exact details, you’ll have to track the specific items you use in your favorite nutrition app!
Print
Simple Coffee Milkshake
- Total Time: 5 min
- Yield: 2 servings 1x
- Diet: Vegetarian
Description
A quick recipe for a cold, blended coffee and ice cream drink.
Ingredients
- 2 cups vanilla ice cream
- 1 cup cold brewed coffee
- 2 tablespoons granulated sugar
- 1/2 teaspoon vanilla extract
- Whipped cream for topping (optional)
Instructions
- Place the vanilla ice cream, cold brewed coffee, sugar, and vanilla extract into a blender.
- Blend on high speed until the mixture is smooth and thick.
- If the milkshake is too thick, add a small amount of milk until desired consistency is reached.
- Pour the milkshake into glasses.
- Top with whipped cream, if using.
- Serve immediately.
Notes
- Use strong cold brew for a more intense coffee flavor.
- Adjust sugar amount based on the sweetness of your ice cream.
- Prep Time: 5 min
- Cook Time: 0 min
- Category: Dessert
- Method: Blending
- Cuisine: American
Nutrition
- Serving Size: 1 serving
- Calories: 450
- Sugar: 65
- Sodium: 150
- Fat: 18
- Saturated Fat: 11
- Unsaturated Fat: 7
- Trans Fat: 0
- Carbohydrates: 70
- Fiber: 0
- Protein: 10
- Cholesterol: 60
Keywords: coffee milkshake, iced coffee, blended coffee drink, vanilla milkshake, easy dessert