
Oh, mornings! There is nothing quite like the smell of a truly fantastic breakfast wafting through the house when the sun is barely up. Most people think great waffles mean complicated batters and tons of whisking, but trust me, I’ve cracked the code for those hectic days when you only have twenty minutes. We are talking about the most incredibly simple, fluffy, and naturally sweet **Banana Waffles** you’ve ever made.
I remember standing on a stool in my grandmother’s kitchen just learning to measure flour. She always said a good waffle batter should be the color of sunshine and smell like happiness. These are definitely sunshine waffles! The genius here is leveraging that forgotten, mushy banana sitting on your counter. It replaces a ton of other stuff and delivers flavor you just can’t beat.
Seriously, we’ve streamlined this so much that you can have piping hot, golden-brown waffles ready before the coffee maker finishes its first cycle. Forget those sad, boxed toaster pastries; these are quick, delicious, and use ingredients you almost always have on hand. You ready to revolutionize your breakfast game?

Why You Will Love These Banana Waffles
I promise you, once you make these, you’ll never look at a box of mix the same way again. These aren’t just good waffles; they are built for real life, which means they are fast and packed with flavor from that one neglected piece of fruit in your bowl. They come together incredibly fast, using simple pantry staples we all keep stocked.
Quick Prep Time for Easy Mornings
Do you have ten minutes? That’s all it takes! The prep time is genuinely only ten minutes because we aren’t beating eggs for ages or trying to unfold complicated instructions. This recipe is your secret weapon for when you desperately want a homemade breakfast but can’t afford to spend an hour over the stove. Weekday mornings just got a whole lot better, believe me.
Naturally Sweetened Banana Waffles Flavor
This is my favorite part. When your banana is perfectly ripe—you know, almost black and very soft—it brings tons of concentrated sweetness to the batter. That banana does the heavy lifting, so you only need a tablespoon of sugar. It gives our **Banana Waffles** a rich, almost caramelized taste that feels decadent, even though it’s super easy!
Essential Ingredients for Perfect Banana Waffles
Okay, let’s talk about what you need because getting the ingredients right is half the battle, especially when you are making something as simple as these **Banana Waffles**. You don’t need a whole specialty shopping trip for this! We’re using standard things you probably have right now, but I need you to pay attention to the banana step—it’s crucial, just like making sure your flour is measured correctly. If you need a refresher on basic ratios, taking a peek at my classic pancake batter can help you understand why we separate our wet and dry components.
Dry Ingredients for Your Banana Waffles Batter
We start with the dry stuff. This keeps everything super straightforward before we get to the moist chaos of the mashed fruit. Trust me; mixing the dry items first ensures you don’t end up with clumps of baking powder hiding out.
- 1 cup all-purpose flour
- 2 teaspoons baking powder (don’t substitute this, we need the lift!)
- 1/2 teaspoon salt
- 1 tablespoon white sugar
Wet Ingredients and the Star Banana for Banana Waffles
Now for the wet side, which brings all the moisture and that lovely banana flavor. The ripeness of the banana here isn’t just a suggestion; it’s the law! You want those ugly, spotty things that are about to turn into banana bread. If they aren’t spotty, they aren’t sweet enough to do their job!
- 1 large egg (make sure it’s whisked a little first)
- 1 cup milk (any kind works fine for me)
- 1/4 cup melted butter (let it cool just slightly before adding)
- 1 very ripe banana, mashed until it’s practically liquid
Step-by-Step Instructions to Make Banana Waffles
Okay, deep breath! This part moves fast, which is why we prepared our ingredients ahead of time. We want to work quickly but gently, especially when mixing. If you are worried about mixing technique, I highly recommend reading my notes on making fluffy pancakes because the rule about not overmixing batter applies 100% here too!
Mixing the Dry and Wet Components of Banana Waffles
First things first, you must preheat that waffle iron! Get it ripping hot while you mix. Take your dry ingredients—the flour, baking powder, salt, and sugar—and give them a good whisk in the big bowl. This just incorporates everything evenly.
In a separate bowl, quickly whisk together the egg, milk, and that melted butter. Now comes the critical moment: pour the wet ingredients into the dry. Mix them gently—I mean, lightly—until you see just a few streaks of flour remaining. Do not beat it smooth! That ruins the lift. Finally, gently fold in your mashed banana. Don’t mix it until it disappears; a few chunks are fine!
Cooking Your Delicious Banana Waffles
When the iron is hot, pour in your batter as directed by your machine—don’t fill it right to the top, or you’ll have a messy overflow adventure!
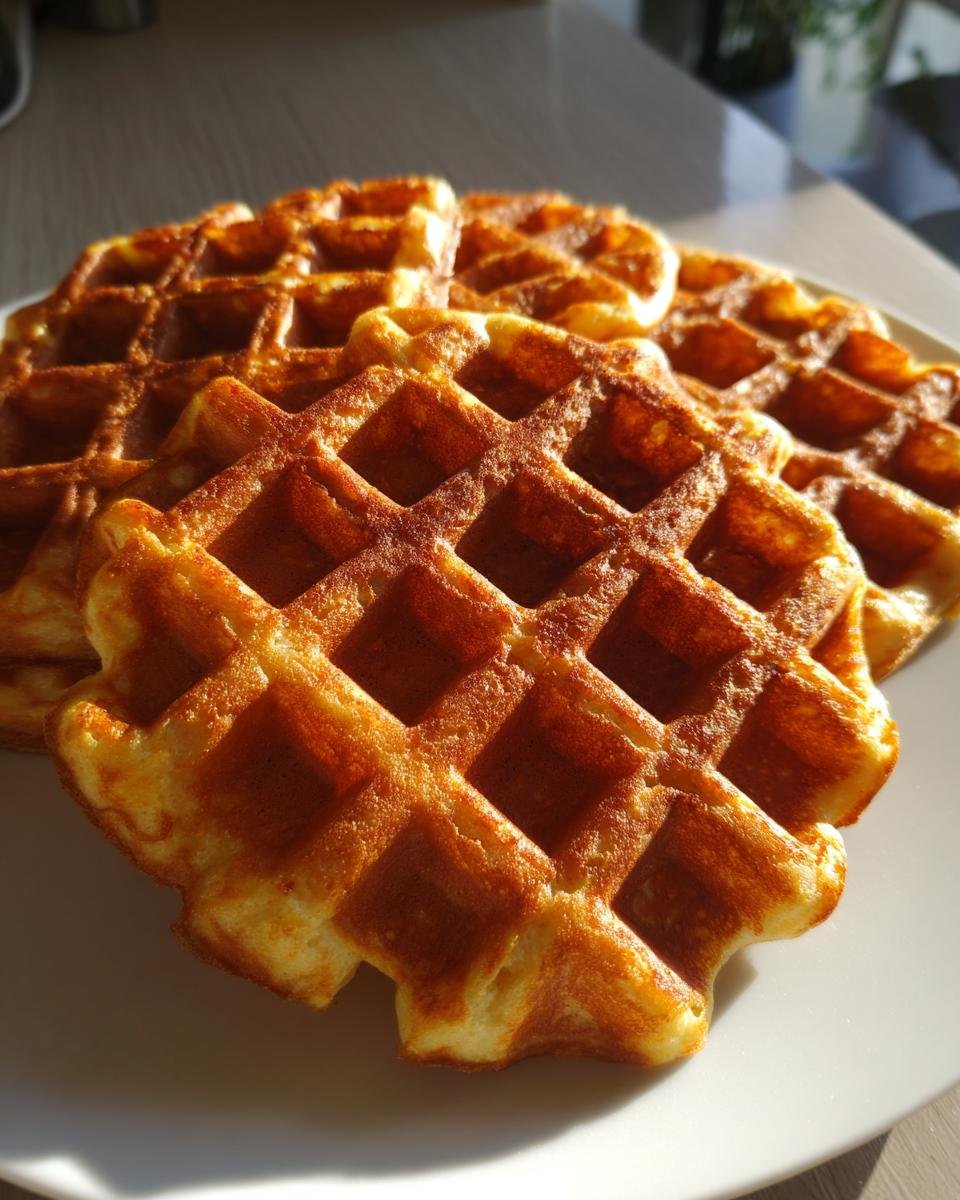
Cook these babies until they are beautifully golden brown and have that perfect crispness—you’ll see visually when the steam stops pouring out. If you want them extra crisp, try this: let that batter rest covered on the counter for about five minutes before you even start pouring. It lets the flour relax. Serve them immediately so they stay crispy!
Tips for Achieving the Best Banana Waffles Texture
Listen, texture is everything when it comes to waffles. You want that satisfying crunch when you bite in, followed by that soft, fluffy inside that melts away. With **Banana Waffles**, the main texture challenge is making sure those mashed bananas don’t make things too heavy or gummy. I’ve got a couple of tricks that totally ensure a beautiful result every single time.
First, let’s talk about that resting period again. I mentioned it before, but it’s worth repeating—it’s the little secret that moves your waffle from ‘okay’ to ‘OMG, what is this magic?’ Skipping the rest is inviting a dense waffle to your breakfast table. When you let the batter sit for five minutes, it gives the flour a little time to hydrate completely and allows the gluten you *just* developed to relax. When gluten is relaxed, you get tender goods, not tough ones!
My second big texture tip revolves completely around the star fruit. You absolutely must use the ripest banana you can find. I mean the kind of banana that you wouldn’t even want to look at uncooked. If it’s just slightly yellow, it doesn’t have enough natural sugar or moisture content to really change the batter for the better. You want those dark spots because the starch has converted to sugar, giving you that deep, sweet flavor and ensuring the finished waffle isn’t dry or crumbly around the edges. If you press a super-ripe banana with a fork, it should practically collapse into itself. That’s the one you want!
Also, whatever you do, resist the urge to smooth out all the lumps when you stir in the banana. Those little pockets of unincorporated banana slightly steam differently inside the iron, creating pockets of extra tenderness. Just gently fold it in until you feel like you’ve done enough, and then stop mixing immediately! That’s how you beat the dreaded heavy waffle.
Serving Suggestions for Your Banana Waffles
Look, a perfect **Banana Waffles** recipe demands a perfect topping, right? They are already sweet and flavorful thanks to that lovely mashed fruit, so you don’t need to drown them in sugary garbage. I like to keep it classic for everyday eating, but sometimes you have to dress them up for the weekend!
The no-brainer accompaniment is good, pure maple syrup. Warm it slightly in the microwave first—it makes all the difference in how it coats the waffle. Slicing up some fresh berries is also a fantastic pairing. The tartness of a strawberry or blueberry really cuts through the richness of the butter and the sweetness of the banana. Plus, it makes the plate look beautiful; aesthetics matter, even for breakfast!
But if you want to get a little more interesting, try this simple trick I picked up. Skip the syrup entirely on half the waffle and dust the other half with a fine layer of cinnamon and brown sugar. If you’ve ever had my cinnamon brown sugar pancakes, you know what I mean here. It adds this fantastic, warm crusty layer that complements the banana perfectly. You get sweet, spiced, and classic fresh flavor all on one plate!

Another easy idea is peanut butter! A thin smear of creamy peanut butter across the freshly cooked waffle before you drizzle any syrup at all adds healthy fat and a protein boost. It turns a sweet snack into a real, sturdy breakfast that keeps you full until lunch. Try it—you won’t regret it!
Storage and Reheating Instructions for Banana Waffles
Okay, so you made a huge batch because that’s the only way to be sure you have leftovers for tomorrow, right? Smart human! These **Banana Waffles** are delicious fresh, but the real trick is knowing how to store them so they don’t turn into sad, floppy sponges overnight. This banana batter gets a little moist, so structure management is key for storage.
First, you have to cool them down completely. Do not—I repeat, do not—put warm or even slightly warm waffles into an airtight container. That traps steam, and steam equals sogginess. Lay them out on a wire rack for like ten minutes after they come off the iron until they are totally room temperature. That step is non-negotiable if you want them crispy later.
Once cooled, you want to store them in layers, but you need a buffer between them. Grab an airtight container, but instead of just stacking them, put a small piece of parchment paper or wax paper between each waffle. This stops the moisture from transferring between layers and keeps that lovely crisp exterior intact. They’ll be good in the fridge for about three to four days this way. I wouldn’t push it past four; the banana starts to change things up too much after that.
The Secret to Crispy Reheating
Reheating from the fridge is where most people mess up. Microwaving them is a tragedy; it makes them rubbery. We need heat that dries them out slightly while warming them through. The best weapon in your arsenal here is the toaster!
If you have a standard pop-up toaster, just pop the cooled waffle in for one cycle. It heats the whole thing and crisps the outside perfectly. If you have thicker Belgian-style waffles, the toaster might struggle to fit them, so break out your oven or, better yet, your air fryer. Set your oven to about 350°F (175°C) and lay the waffles directly on the rack—not a baking sheet—for about five minutes.
The air fryer is my absolute favorite for these, though. It cycles the heat so perfectly. Put them in a single layer, crank the air fryer to 350°F, and give them about three minutes. They come out tasting almost as fresh as when they first came off the iron. Seriously, you won’t believe the texture comeback!
Variations on Classic Banana Waffles
While this recipe for **Banana Waffles** is perfect just the way it is—simple, sweet, and quick—I know some of you like to customize, and honestly, I don’t blame you! Adding an extra ingredient or swapping out a component is a great way to make the recipe truly yours. You can easily turn this basic batter into something wildly different with minimal extra effort.
My favorite place to start is by tossing in some mix-ins right at the very end, exactly after you add the mashed banana. You don’t want to overmix them, so just a quick fold will do. If you’re looking for different ways to incorporate fruit and veggies into your baking arsenal, you might want to check out my recipe for banana zucchini muffins; it uses a similar approach to hiding produce for maximum flavor!
Here are a few ways I’ve messed around with this batter over the years that always seem to be a hit:
- Chocolate Chip Banana Waffles: This is a classic for a reason! Fold in about 1/2 cup of mini chocolate chips along with your mashed banana. The little pockets of melted chocolate mixed with the warm banana are just divine when drizzled with a little extra syrup.
- Nutty Crunch Addition: If you like texture, toss in about 1/3 cup of chopped walnuts or pecans. Toasting them briefly in a dry pan beforehand really wakes up their flavor, giving the resulting waffle a wonderful earthy crunch.
- Swap the Flour for Whole Wheat: If you want to sneak in a little more fiber, you can instantly swap out half of the all-purpose flour for whole wheat flour. Now, I won’t lie, it might make the waffle slightly denser, but you gain a nuttier, earthier flavor that pairs surprisingly well with maple syrup. Just be prepared to cook these a minute longer to ensure they are cooked through. Sometimes I even add an extra splash of milk if the batter feels too tight after the swap.
See? It’s so versatile! These are sturdy enough to handle whatever goodies you throw in, making your breakfast routine exciting again.

Frequently Asked Questions About Banana Waffles
I know when you start baking from scratch, you always end up with a few little questions poking at the back of your mind. Don’t worry about those! Since these **Banana Waffles** are so straightforward, any issues are usually easily fixed with a quick adjustment. Here are the things I get asked about the most whenever I share this recipe with friends!
Can I make the Banana Waffles batter ahead of time?
You absolutely *can* mix the batter ahead of time, but I recommend keeping it short because of the baking powder. Baking powder starts doing its job the second it gets wet! If you mix the batter and let it sit for more than 30 minutes, you might find your waffles don’t get quite as fluffy as they should. If you need to prep ahead, chop your banana, whisk your dry ingredients, and keep them separate. Mix the wet ingredients (minus the banana) and store that in the fridge. Then, whisk everything together fresh in the morning. It’s still super fast!
What kind of banana is best for these easy waffles?
If you only take one thing away from this whole recipe, please let it be this: use the mushiest, darkest, spotty-as-you-can-find banana! Seriously, the browner the better. We need that banana to be practically liquid when you mash it because that starch has converted into natural sugar, giving our **easy waffles** that deep, sweet flavor we are aiming for. A slightly yellow banana just won’t cut it flavor-wise for this recipe.
How do I keep my Banana Waffles from getting soggy?
Soggy waffles are the worst; they feel heavy and sad. The number one defense against sogginess is letting the batter rest for those five minutes before cooking. That resting period helps create a batter that cooks up with a better internal structure. Beyond the batter itself, make sure your waffle iron is piping hot—high heat seals the exterior quickly, creating that necessary crisp crust.
Also, remember not to overcrowd the iron! Pour just enough batter so it spreads naturally when you close the lid. If you smash too much batter in there, the middle won’t cook correctly, and that trapped steam turns your beautiful crunch into mush. Always serve them right off the iron if possible, or use that toaster trick if you are eating leftovers later!
Estimated Nutritional Snapshot for Banana Waffles
Look, I’m not a nutritionist—I’m just a lady who loves feeding people—so please take these numbers with a grain of salt! When we talk about the nutrition for these **Banana Waffles**, we have to remember this is based on standard white flour, whole milk, and no extra toppings like butter or gobs of syrup. It’s just what’s in the waffle itself based on the recipe measurements.
That said, it’s good to know what we’re working with! Because we rely so much on that banana for natural sweetness, sometimes the sugar count is lower than you might expect for a sweet breakfast treat. It’s a nice little bonus when you’re enjoying something that tastes so indulgent!
Here’s a quick look at what one serving (one waffle, based on dividing the recipe into four yields) generally looks like:
- Serving Size: 1 waffle
- Calories: 250
- Sugar: 10g
- Total Fat: 10g (with 6g saturated fat)
- Carbohydrates: 35g
- Protein: 7g
Remember, this is just the waffle! If you load it up with butter and drowning it in high-fructose corn syrup masquerading as “pancake syrup,” those numbers shoot right up. If you use skim milk or whole wheat flour, you’ll see slight variations in the fat and fiber content, too. This basic estimate should give you a good idea of what you are serving up for a super satisfying and relatively quick breakfast!
Print
Simple Banana Waffles
- Total Time: 20 min
- Yield: 4 waffles 1x
- Diet: Vegetarian
Description
A straightforward recipe for making waffles with mashed banana.
Ingredients
- 1 cup all-purpose flour
- 2 teaspoons baking powder
- 1/2 teaspoon salt
- 1 tablespoon white sugar
- 1 large egg
- 1 cup milk
- 1/4 cup melted butter
- 1 ripe banana, mashed
Instructions
- Preheat your waffle iron.
- In a large bowl, whisk together the flour, baking powder, salt, and sugar.
- In a separate bowl, whisk the egg, milk, and melted butter.
- Pour the wet ingredients into the dry ingredients and mix until just combined. Do not overmix.
- Stir in the mashed banana.
- Pour the batter onto the hot waffle iron according to the manufacturer’s directions.
- Cook until golden brown and crisp.
- Serve immediately.
Notes
- For crispier waffles, let the batter rest for five minutes before cooking.
- Serve with maple syrup or fresh fruit.
- Prep Time: 10 min
- Cook Time: 10 min
- Category: Breakfast
- Method: Waffling
- Cuisine: American
Nutrition
- Serving Size: 1 waffle
- Calories: 250
- Sugar: 10
- Sodium: 300
- Fat: 10
- Saturated Fat: 6
- Unsaturated Fat: 4
- Trans Fat: 0
- Carbohydrates: 35
- Fiber: 2
- Protein: 7
- Cholesterol: 60
Keywords: banana waffles, breakfast, easy waffles, sweet waffles