
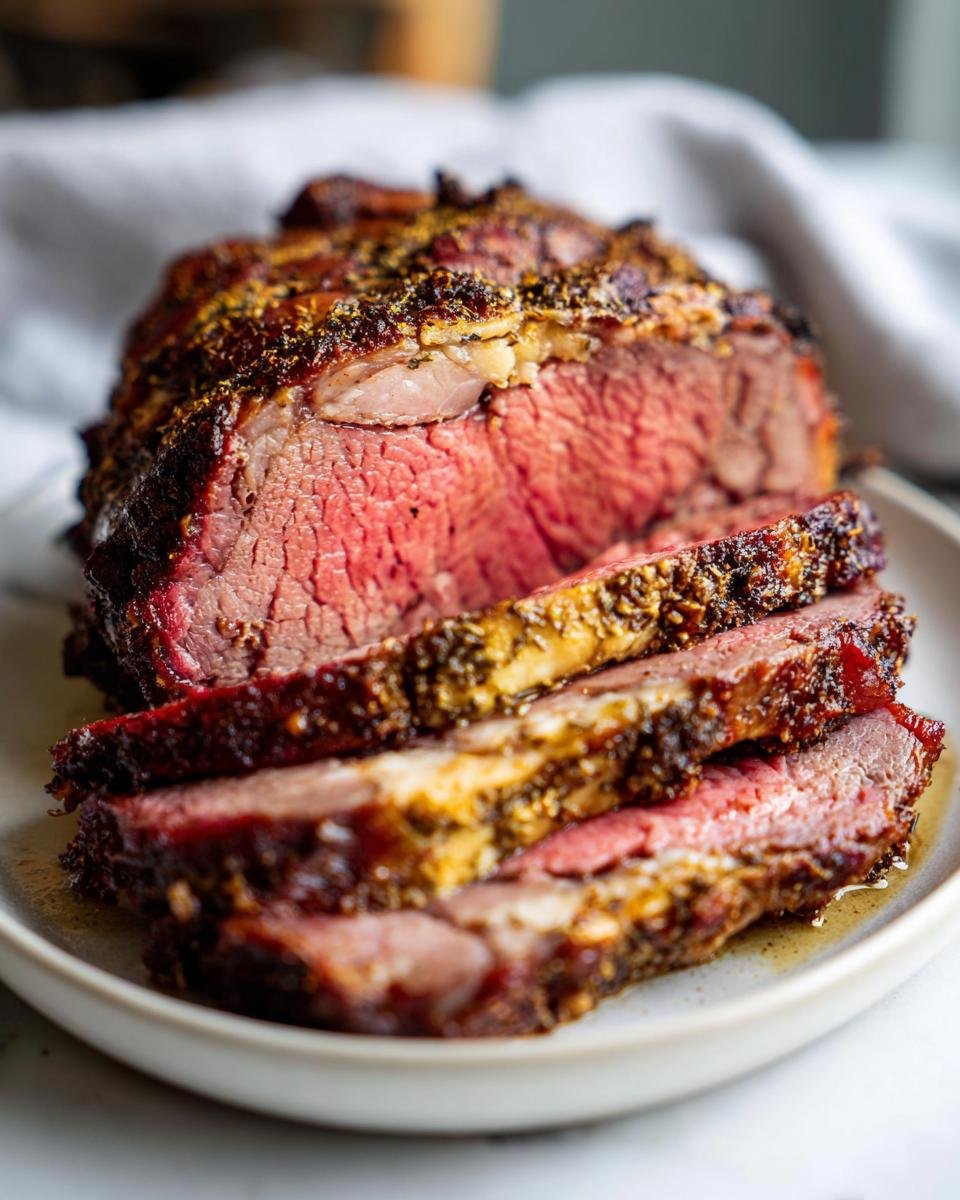
Oh, when that aroma hits you—that rich, garlicky, fennel-infused scent wafting from the oven—you know you’ve made something truly special. There’s nothing quite like slicing into a perfect Italian roast, the meat collapsing beautifully under the knife, immediately followed by that glorious, audible CRACK of crisp skin.
I know what you’re thinking: authentic, shatteringly crisp Porchetta sounds like something you need three days and a Roman Nonna to pull off. But trust me on this, friend, that’s just not true anymore. This recipe I’m sharing? It strips away the fuss but keeps every single bit of flavor and that incredible texture we all dream about. I’ve tweaked the heat settings over many attempts to make sure you get that incredible herb-crusted pork roast without needing professional equipment. This is the simple method that actually works every single time. Get ready for the best crackling of your life!
Why This Simple Porchetta Recipe Works So Well
I honestly believe this version is the easiest way to get that textbook Italian roast right in your home oven. We’ve managed to lock down the two things that intimidate home cooks the most: the unbelievably tender meat and the loud, shattering crackling!
It’s a winner because it relies on technique, not ten thousand ingredients. We’re focusing sharp attention on the beginning and the end of the cook. Check out why this method keeps making it onto our Sunday dinner rotation:
- It uses a straightforward trio of high heat, low heat, and high heat again—foolproof for texture contrast.
- The herb rub is intensely flavorful, but it stays put, meaning maximum flavor penetration without drying out the meat.
- You don’t need fancy equipment; just a good oven and some twine. If you want to dive deeper into pork roasting secrets, you can check out my thoughts over at this post!
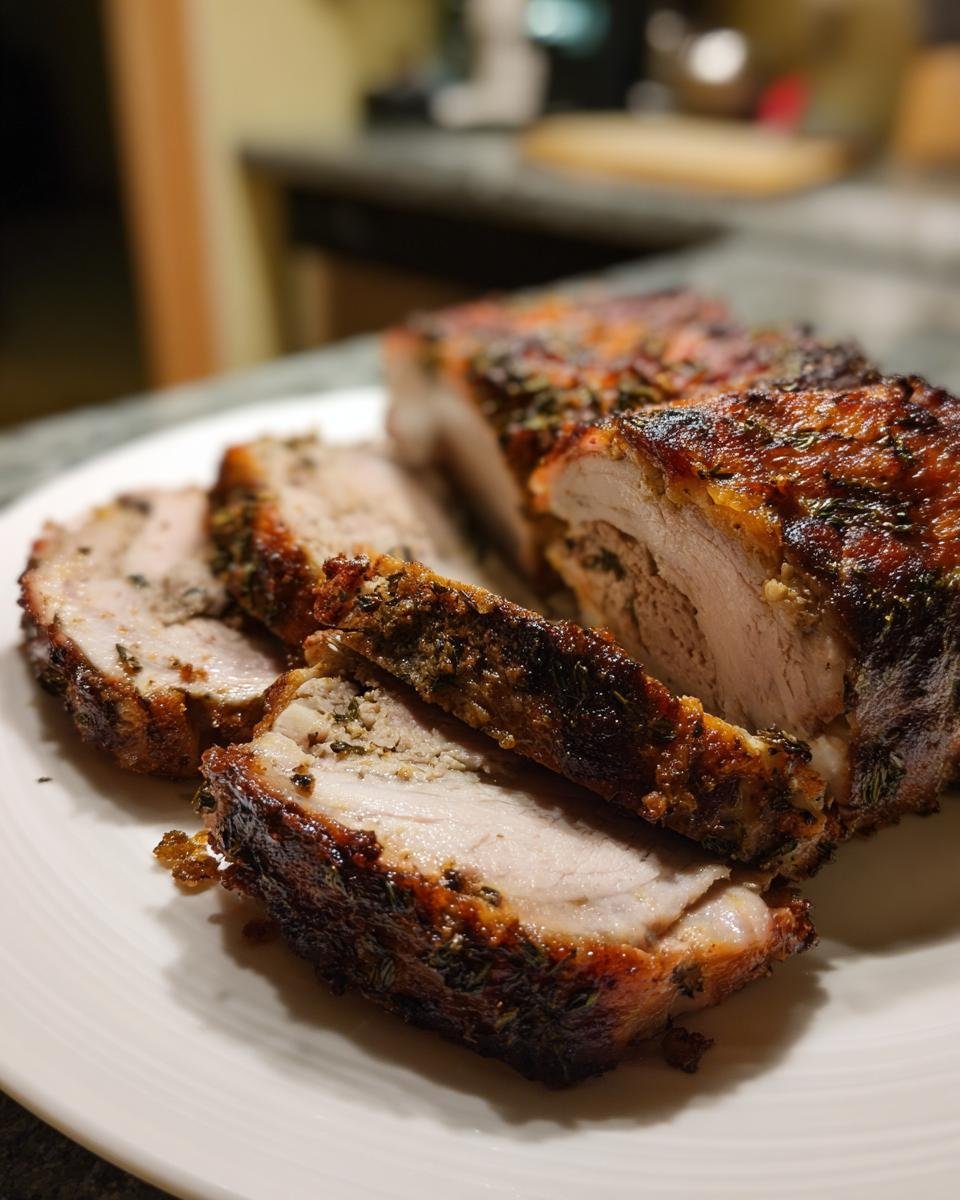
Achieving the Perfect Crispy Skin on Your Porchetta
The crackling is all about the three-stage heat blasting! First, we score that skin deeply so the fat can render out evenly. Rubbing it with oil right before the blast-off ensures that skin gets angry at the heat instead of just scorching. That final crank to 450 degrees is pure magic for texture, turning rubbery skin into brittle perfection.
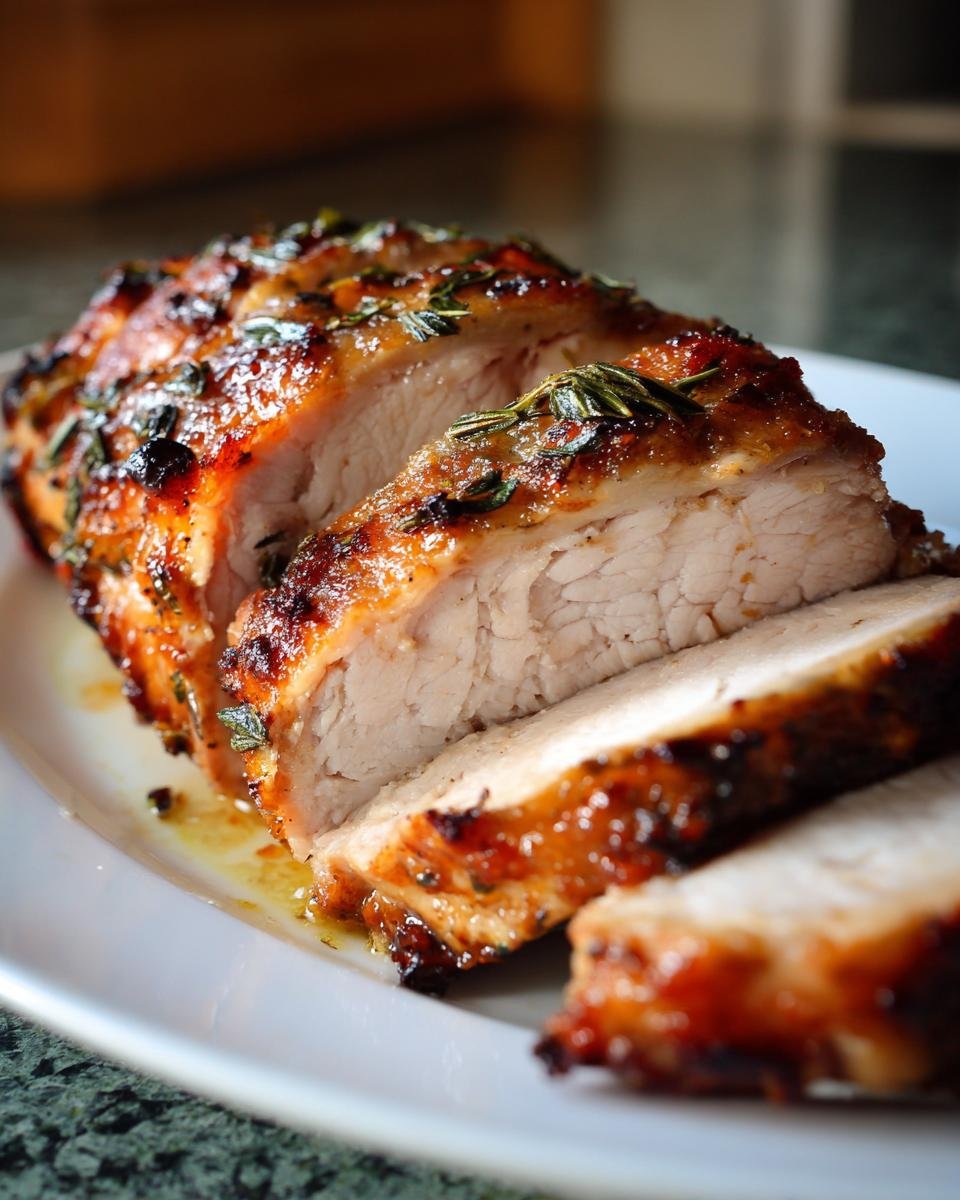
Flavor Profile of This Herb Crust Porchetta
Forget subtle herb notes; this Porchetta shouts flavor! We’re packing it with bold rosemary, thyme, and fennel, mixed with salty garlic. Because the meat is rolled tight, those herbs essentially steam themselves into the pork belly as it cooks slowly. Every slice has that signature Italian savory punch.

Ingredients Needed for Authentic Porchetta
To make a true, mouthwatering Italian Porchetta, you don’t need complicated components, just a few high-quality items handled correctly. The star, of course, is the gorgeous pork belly with the skin left completely on. This is absolutely non-negotiable for getting that amazing crackling!
For the filling, we’re relying on an aggressively flavorful herb and salt paste. You’ll need about five pounds of pork belly for 8 generous servings. Gather up your coarse salt—don’t grab the fine stuff, remember we need texture here! We crush the peppercorns ourselves; that makes a huge difference in releasing the oils. Don’t skimp on the fresh rosemary and thyme either. If you ever want tips on how to preserve those amazing fresh herbs using olive oil, I have a little guide available right here.
The remaining players are simple: robust garlic, fennel seeds for that classic Italian anise note, and a little olive oil just to lubricate the skin before roasting.
Ingredient Preparation Notes for Porchetta
My biggest piece of advice? Source the best pork belly you can find; look for good marbling in the meat under that skin. When you’re prepping, make sure your salt is coarse—like sea salt consistency. It helps draw moisture out of the skin as it sits, which is step one toward ultimate crispiness.
Also, be generous when mincing your garlic. We want it intense here because it mellows out during the long roast. If you use dried herbs instead of fresh? Well, I won’t tell anyone, but you’ll need to use about a third of the amount, and honestly, the flavor just won’t compare to that fresh, bright herbaceous bite.
Step-by-Step Instructions to Make Porchetta
This is where the magic happens, but don’t let the amount of steps scare you off! Once you get the pork prepped, the oven does virtually all the heavy lifting. Just set your timers and try not to peek too much. If you’ve ever cooked other roasts, like my oven-baked chops, you’ll recognize some of our early steps!
Preparing the Pork Belly and Herb Rub for Porchetta
First up, we have to get that skin ready. You need your sharpest knife out. Score the skin deep in a diamond pattern across the whole thing—this is how the fat releases and the skin cracks later. Be careful not to slice into the actual meat underneath; we just want to score the skin layer. Seriously, take your time here!
Now, flip that belly over to the flesh side. In a separate bowl, mix up all those goodies: the coarse salt, crushed pepper, minced garlic, rosemary, thyme, and fennel seeds. Get this herb mixture rubbed in everywhere on that raw meat side. Don’t be shy; press it into every nook and cranny. Once it’s fully coated, it’s rolling time! Roll the pork belly up as tightly as you can, making sure that beautiful scored skin is on the outside the whole way. You have to tie it up securely with butcher’s twine every inch and a half or so. If you skip the twine, it unravels, and you end up with sad, floppy pork instead of glorious Porchetta!
Roasting Technique for Tender Porchetta with Crispy Skin
Preheat your oven to 400°F. Rub the outside skin with just a little olive oil, then pop that tied roast onto a rack set in a roasting pan. We start hot: roast it at 400°F for exactly 30 minutes. This initial blast sets up the crust.
After those 30 minutes, drop the temperature way down to 325°F. This is the slow-cook stage where the fat renders beautifully and the meat cooks through gently. Let it hang out here for about 2.5 to 3 hours. You are aiming for an internal temperature of 150°F in the thickest spot. The final secret weapon? Crank that heat back up to 450°F for the very last 15 minutes. This is what turns the skin into true crackling. Keep an eye on it during this blast, though, because high heat means high risk of burning!
Resting Your Porchetta Roast
When it hits that magic 150°F, pull the Porchetta from the oven immediately. Now, this is the hardest part, I know, but you absolutely must let it rest on a cutting board, tented loosely with foil, for a full 20 minutes. If you slice it now, all those beautiful juices you fought so hard to keep inside will run right onto the board. Resting lets them redistribute. Trust me, that extra twenty minutes of waiting makes the meat melt-in-your-mouth tender.
Tips for the Best Ever Porchetta Roast
Okay, you’ve done the hard work: the tying is tight, the herbs are fragrant, and it’s cooked through. But sometimes, even following the temperature stages to the letter, that skin can look more tanned than cracked. Don’t panic! We have tricks up our sleeve for those final moments. Remember how we talked about how moisture is the enemy of crackling? Before you even start, make sure you patted that skin bone-dry with paper towels. I usually do it twice!
If the slow roast didn’t get you there, we move to the finisher. Get your oven rack as close to the top heating element as you dare, and switch that bad boy to the broiler setting. This is where you watch like a hawk! It can go from perfect crackling to black charcoal in about 30 seconds flat. You just want to hear those satisfying pops.
Troubleshooting Crispy Skin on Your Porchetta
If that final 450°F blast didn’t yield the results, grab that broiler, but be super cautious. Only use the broiler for a few minutes at a time—maybe set a timer for two minutes and check! If you see one spot getting too dark, rotate the pan. Sometimes, just cracking the oven door open a hair helps keep the ambient temperature from getting too intense while the direct heat works the skin. If you have leftovers later, you can reheat them slowly, maybe even in a low oven, but try to crisp them up again under the broiler just before serving. Need inspiration for another slow-cooked meat that needs similar attention? Check out my easy recipe for tender brisket!
Serving Suggestions for Your Porchetta
This Porchetta is so rich and intensely flavorful that it really just asks for simple partners on the plate. Keep the sides light so they don’t compete with that magnificent herb crust!
My absolute go-to is a big, bright salad dressed with sharp lemon vinaigrette. It cuts right through the richness of the pork belly fat. If you need something warm, roasted potatoes tossed with a little rosemary and salt are amazing because they soak up any juices left on the cutting board.
And, of course, you need something for mopping up the plate! I always have my garlic breadsticks ready. Honestly, who can resist tearing off a piece of bread to swipe through the rendered pork juices? Dinner is served!
Storing and Reheating Leftover Porchetta
The absolute best-case scenario is an empty cutting board, but let’s be real—sometimes you end up with glorious leftovers of this amazing Porchetta. Luckily, it stores pretty well, though the skin is the part that always suffers the most.
Once your roast has cooled down completely after resting, you want to slice it. Storing it whole is fine, but slicing it helps manage portions and, crucially, helps you target the crispy bits when reheating. Wrap those slices tightly—and I mean tightly—in plastic wrap, and then tuck them into an airtight container or a zip-top bag. You can keep that leftover pork in the fridge for about three to four days. Any longer than that, and I start worrying about the flavor profile changing.
The Trick to Reviving Crispy Skin
Reheating is tricky because moisture trapped in the fridge is the enemy of crackling. Microwaving is a big no-no unless you enjoy soft, chewy pork belly! If you’re just heating a single slice or two, the best approach is dry heat.
Pop those slices in a dry skillet over medium heat. This brings the meat back to temperature nicely while giving the skin a chance to re-crisp a little bit. You’re essentially dry-frying it for a few minutes per side. If you have a ton of leftovers, line a baking sheet with foil (to catch any drips) and put them in a warm oven—say, 325°F—for about 10 to 15 minutes until the meat feels hot all the way through. Sometimes, if they aren’t quite popping, I’ll hit the skin side with the broiler for literally 60 seconds at the end. Just stand there and stare at it; trust me, you don’t want to look away!
Frequently Asked Questions About Making Porchetta
I get so many questions about this recipe because, while I’ve made it simple, there are a few spots where folks worry they might mess it up. Let’s clear up the most common concerns about getting that perfect, juicy roast!
Can I use a different cut of pork instead of belly for Porchetta?
Here’s the thing: traditional Porchetta demands pork belly because you need that thick layer of fat under that beautiful skin. That fat is what melts and bastes the meat while it roasts, giving you that signature moisture. If you absolutely can’t find pork belly with the skin attached, you could try using a nice strip loin, but you MUST ask your butcher to score the skin heavily for you and perhaps add a layer of pork fatback over the top to mimic the needed richness. It honestly won’t be the same, but it’ll still be tasty! If you’re looking for other pork ideas, check out my Pork Milanese sometime, which is totally different but equally delicious.
How thick should the scoring be on the skin?
This is crucial! You want to cut deep enough through the skin and the fat layer but stop right before you hit the actual meat muscle. Think of it like halfway through the thickness of the skin and fat layer combined, maybe about an eighth of an inch deep, depending on how thick your skin is. You are scoring the skin into diamonds, right? If you cut too shallow, the skin won’t crackle evenly. If you cut too deep and nick the meat, the meat juices will seep up into the skin during the long roast and basically steam your crackling into chewiness. Slow and steady with a very sharp knife is the only way to do it right!
Estimated Nutritional Data for This Porchetta Recipe
Now, I’m going to be completely honest with you: when I’m making something this indulgent—a massive, herby, fatty pork roast—I try not to think too hard about the numbers! It’s party food, right? But for those of you who track macros or just like to know what you’re eating, I pulled the estimates based on the recipe yield. My calculations suggest this Porchetta is wonderfully high in protein, as you’d expect from a solid hunk of pork.
As per my notes, this estimate is generally for an 8-serving batch, so one slice should clock in around 450 calories. You are definitely getting solid protein around 40 grams, and yes, there is fat—it’s pork belly, after all—but it’s mostly unsaturated fat which is a little better for you, I tell myself! Carbs are right at zero, which is nice if you are eating low-carb.
Here’s a quick look at what I came up with. Just remember, this is my best guess after years of just eyeballs and measuring cups! Every different cut of meat, every pinch of salt you add, changes things just a tiny bit. So take these numbers as a general guideline, especially since the fat rendering during the roast will affect the final weight of the meat.
- Serving Size: 4 oz cooked
- Calories: 450
- Protein: 40g
- Fat: 30g (10g Saturated Fat)
- Carbohydrates: 0g
Don’t stress over these figures too much, though. This Porchetta is about celebration! Just enjoy that perfectly seasoned meat and that fantastic crackling; that’s the real payoff here, not the nutritional breakdown!
Share Your Simple Porchetta Experience
Wow, if you made it this far, you are ready for greatness! I’m so excited for you to try this simple Porchetta recipe. Seriously, when you pull that roast out of the oven and hear that skin start to sizzle and pop, you’ll understand why I rave about it so much.
I want to hear all about your success—or if you ran into any little snags along the way! Did your crackling shatter perfectly? What sides did you serve with it? Tell me everything!
Please, take a moment to leave a star rating right below this post. It really helps other home cooks see that this recipe is reliable. If you have specific questions about your scoring or tying technique that you need a little personalized advice on, drop a comment below!
If you want to send me a picture of your finished masterpiece, or you just want to chat about Italian cooking in general, you can always reach out to me directly via my contact page. Happy cooking, and I can’t wait to see your incredible Porchetta!
Print
Simple Porchetta Roast
- Total Time: 4 hr 15 min
- Yield: 8 servings 1x
- Diet: Low Fat
Description
A recipe for preparing a traditional Italian rolled pork roast with herbs and garlic.
Ingredients
- 5 lb pork belly with skin attached
- 1/4 cup coarse salt
- 2 tablespoons black peppercorns, crushed
- 4 cloves garlic, minced
- 2 tablespoons fresh rosemary, chopped
- 1 tablespoon fresh thyme leaves
- 1 tablespoon fennel seeds
- 2 tablespoons olive oil
Instructions
- Score the pork skin deeply in a diamond pattern, being careful not to cut into the meat.
- In a small bowl, mix the salt, pepper, garlic, rosemary, thyme, and fennel seeds.
- Rub the herb mixture thoroughly over the flesh side of the pork belly.
- Roll the pork belly tightly, with the skin facing out, into a log shape. Secure the roast tightly with butcher’s twine every 1.5 inches.
- Rub the outside skin with olive oil.
- Preheat your oven to 400 degrees Fahrenheit (200 degrees Celsius).
- Place the roast on a rack in a roasting pan.
- Roast for 30 minutes at 400°F.
- Reduce the oven temperature to 325°F (160°C) and continue roasting for 2.5 to 3 hours, or until the internal temperature reaches 150°F (65°C).
- Increase the oven temperature to 450°F (230°C) for the last 15 minutes to crisp the skin, watching closely to prevent burning.
- Remove from the oven and let the roast rest for 20 minutes before slicing.
Notes
- For extra crispy skin, pat the skin dry with paper towels before applying the oil.
- If the skin is not crackling after the final high-heat blast, you can use the broiler for a few minutes, watching constantly.
- Prep Time: 30 min
- Cook Time: 3 hr 45 min
- Category: Main Course
- Method: Roasting
- Cuisine: Italian
Nutrition
- Serving Size: 4 oz cooked
- Calories: 450
- Sugar: 0
- Sodium: 550
- Fat: 30
- Saturated Fat: 10
- Unsaturated Fat: 20
- Trans Fat: 0
- Carbohydrates: 0
- Fiber: 0
- Protein: 40
- Cholesterol: 120
Keywords: porchetta, pork roast, Italian, crispy skin, rolled pork, herb crust