
Listen, there’s nothing sadder than pulling a whole grilled chicken off the fire only to find it dry as dust! I used to struggle with that, especially when trying to cook a whole bird on the grate. Then I discovered the glory of turning that bird completely upright. The Beer Can Chicken method? It’s an absolute game-changer, trust me. I’ve spent years grilling in my backyard, tweaking spice rubs, and getting that chicken skin crispy while keeping the breast meat outrageously juicy because the steam from the beer is doing all the heavy lifting. If you’ve been intimidated by grilling a whole chicken, stop right there. This guide is going to walk you through every little secret I’ve learned to make the most succulent, flavorful Beer Can Chicken you’ve ever tasted.
Why This Beer Can Chicken Recipe Delivers Juicy Results
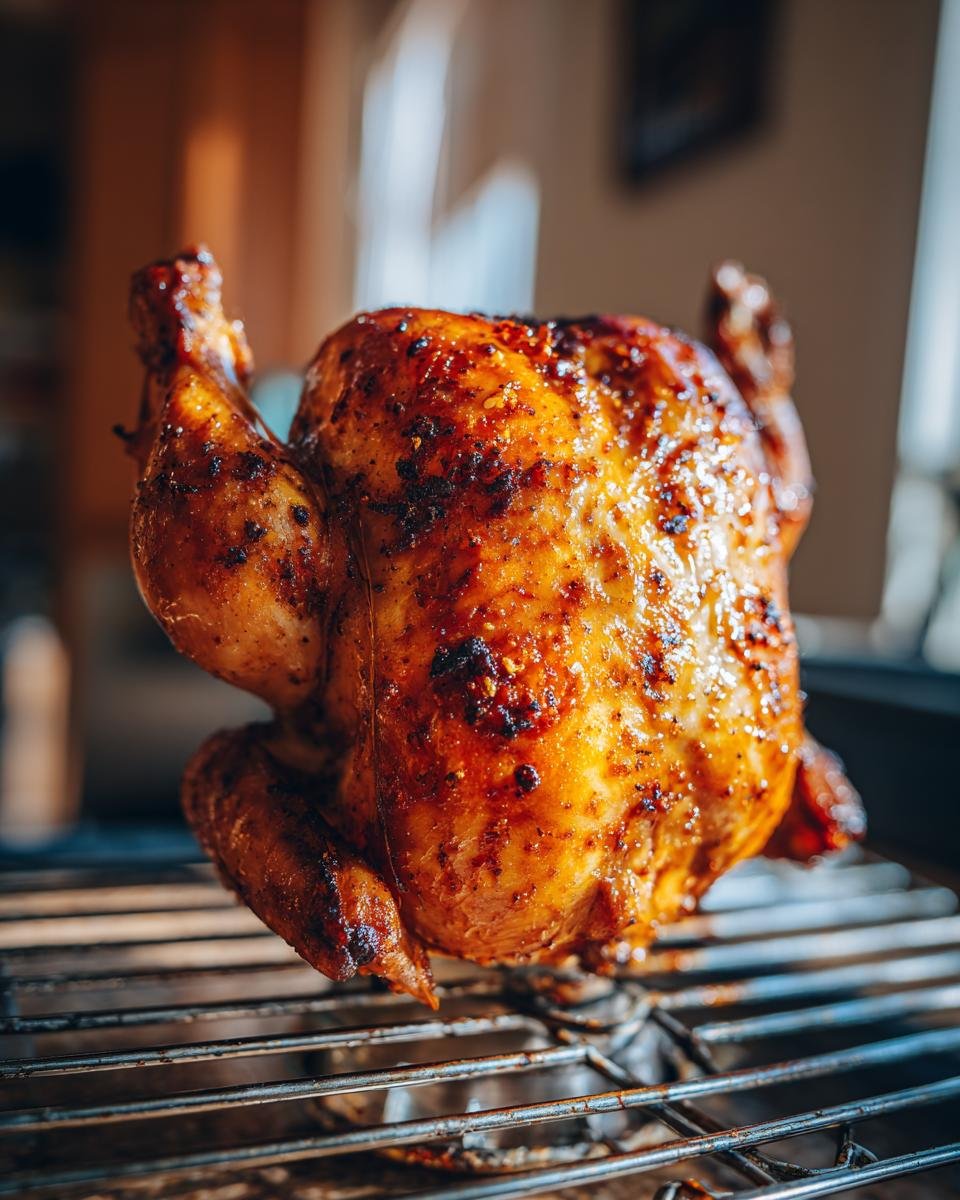
This upright position isn’t just for kicks, folks; it’s the secret sauce to fantastic texture! When that beer heats up inside, it creates a super-moist, steamy environment right where the chicken needs it most—the cavity. It’s cooking from the inside out while the outside gets that beautiful char.

- Constant steam keeps the meat incredibly moist.
- Heat radiates evenly, helping both the outside skin and the interior cook perfectly at the same time.
- The beer (or whatever you use!) subtly infuses flavor right into the core of the chicken.
If you’re looking for alternatives to grilling, you should check out my recipe for irresistible garlic herb roasted chicken—it tackles moisture a different way!
Key Details for Your Beer Can Chicken
For planning purposes, here’s the quick breakdown you need to clear your schedule:
- Prep Time: 15 min
- Cook Time: 90 min
- Total Time: 105 min
- Yield: 4 servings
Gathering Ingredients for Perfect Beer Can Chicken
Okay, let’s talk about what you need to grab from the fridge and pantry before we get this party started. The star, obviously, is your whole chicken. You absolutely must use one that’s around 4 pounds. Any bigger, and you’re going to be holding your breath for hours waiting for it to finish cooking!
Then there’s the beer. Don’t use the good craft stuff; we just need a standard 12-ounce can, and yes, it needs to be partially consumed—about half of it needs to go! That leaves room for the steam to build up.
For the coating, you’ll need 2 tablespoons of olive oil—this helps the spice rub stick beautifully. The dry blend requires 1 tablespoon of paprika (for color!), and then 1 teaspoon each of salt, black pepper, garlic powder, and onion powder. That’s it! Simple ingredients delivering massive flavor. When you pull this recipe out next time, maybe you can pair it with my ultimate homemade cornbread.
Preparing the Spice Rub for Your Beer Can Chicken
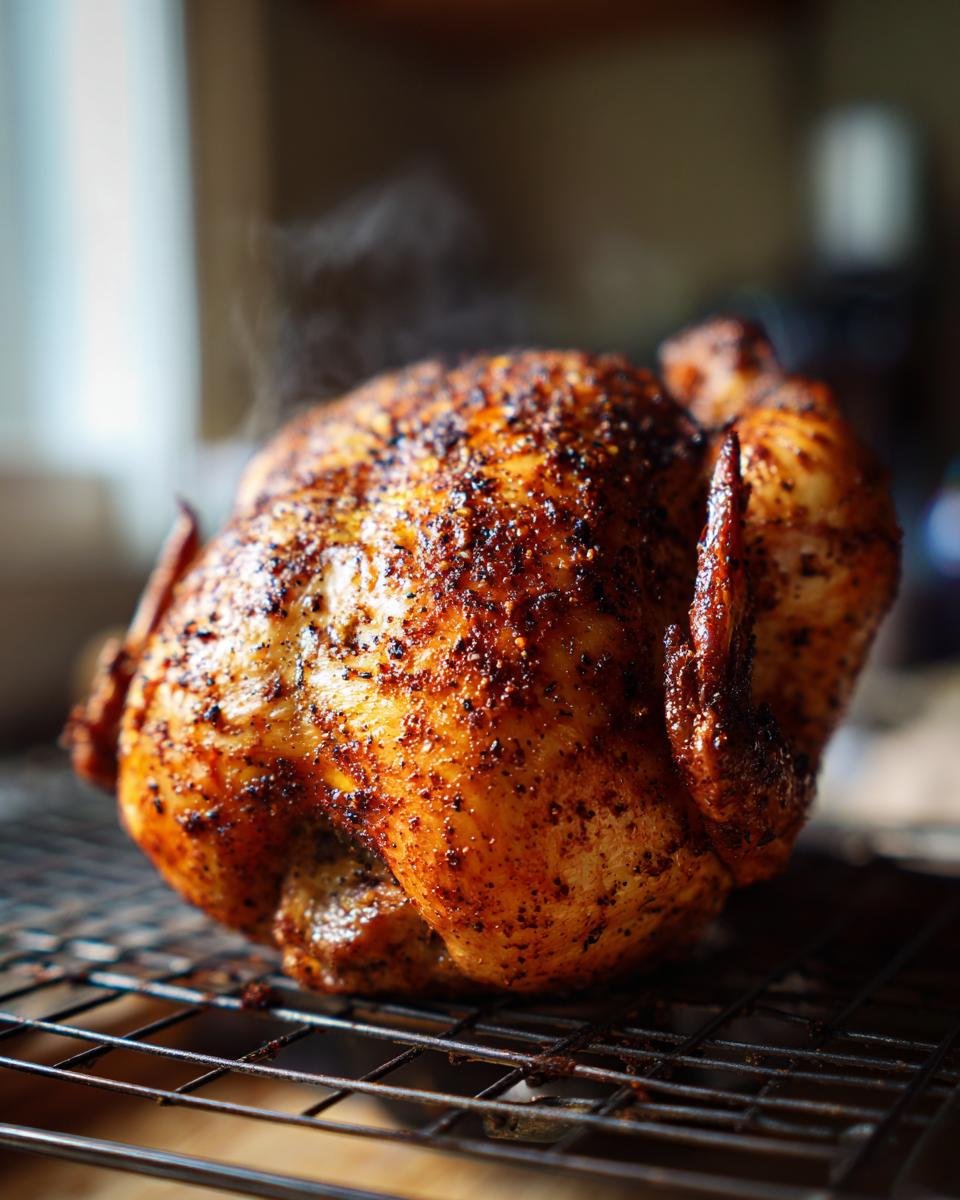
This spice blend is what makes the skin turn that gorgeous reddish-brown color we all dream about. Don’t just throw this mixture onto the chicken; we need to make it adhere like glue! Grab a small bowl and mix up that paprika, salt, pepper, garlic powder, and onion powder until it’s completely uniform.
Now, this is important: before the spices go on, brush the entire outside of your patted-dry chicken with that olive oil. The oil is the binder! Rub that seasoning mixture all over every single inch of the skin, getting under the wings and legs if you can reach. I like to use my hands for this part because you need to really press it in for maximum flavor penetration. It just tastes better when you put a little elbow grease into it, doesn’t it? If you want to try these flavors on something smaller, check out my recipe for crispy garlic herb butter chicken bites!
Step-by-Step Instructions for Grilling Beer Can Chicken
Alright, execution time! This is where the magic that we spent all that time prepping finally pays off. Remember, patience is key here, especially when dealing with high heat and a somewhat precarious chicken setup. We need this chicken standing tall and proud over those flames.
First things first—get that grill fired up! We are aiming for a steady medium heat, which means holding about 350 degrees Fahrenheit (that’s 175 Celsius for my international friends). Don’t rush this preheating step; a nice, even temperature is way more important than blasting it with high heat to cook it fast.
Grill Setup and Positioning the Beer Can Chicken
Once your grill is humming along nicely, take your seasoned chicken and carefully open that beer can—remember, pour about half out first so it doesn’t boil over everywhere right away! You place the open can end firmly into the chicken’s cavity. You want the chicken to stand stable on the can bottom and its own little legs. Safety first: I usually brush the outside skin with any leftover olive oil right before it hits the heat. Gently set the whole assembly onto the grill grate. If you aren’t using a fancy stand, just make sure it balances securely on the can and the outside edges of those drumsticks. We need it stable for the whole hour and change!
Monitoring Temperature and Resting the Beer Can Chicken
Now, we wait! Grill this beauty for about an hour and 15 minutes up to an hour and a half. You absolutely must check the temperature because nobody likes undercooked poultry. Insert your thermometer into the thickest part of the thigh—don’t hit bone—and you are looking for 165 degrees Fahrenheit (74°C). Pull it off immediately once you hit that magic number. Then, the hardest step: let it rest for 10 minutes before you even think about carving! This resting time lets all those amazing juices redistribute. If you skip the rest, you are just going to pour that moisture right onto the cutting board. This method ensures it’s always moister than my recipe for irresistible garlic herb roasted chicken!

Expert Tips for Making the Best Beer Can Chicken
I learned so much trial-and-error over the years, and avoiding a few common pitfalls can take your Beer Can Chicken from good to legendary. When I first tried this, the steam escaping the can wasn’t venting fast enough and I ended up with an oddly cooked top layer. So, here’s my biggest pro tip: grab a can opener and put a few extra holes right on the top of that beer can!
That little modification ensures a steady, glorious release of steam throughout the cooking time. Also, maybe you don’t love beer, or perhaps you’re cooking for someone who doesn’t? No biggie! You can substitute that beer with chicken broth or even apple juice. I saved a Fourth of July cookout once when I realized I was totally out of beer; chicken broth worked like a charm! You’ll still get that awesome moisture infusion. If you want something saucy next time, try my irresistible honey garlic chicken thighs.
Serving Suggestions for Your Beer Can Chicken
Now that you have this perfectly juicy, smoky chicken crowning your grill, you need sides that can keep up! Since we’re keeping this classic American grilling style, simplicity is the name of the game. You want fresh flavors that balance out the rich flavor of the chicken.
I always go for something cool and creamy right next to that hot grilled skin. My absolute favorite pairing is a big bowl of potato salad—make sure you check out my recipe for ultimate delicious potato salad! Corn on the cob, lightly charred, is another must-have. And if you want something green without too much fuss, just grill some asparagus with a little lemon juice and salt. Easy peasy, and the whole meal screams summer celebration!
Storage and Reheating Instructions for Leftover Beer Can Chicken
Gosh, I hope you have leftovers because this chicken tastes amazing cold the next day! Once everything has fully cooled down, tuck that meat safely into an airtight container. It’ll keep well in the fridge for about three to four days—that’s my personal safe limit.
When it’s time to reheat, don’t even think about the microwave if you want to keep that moisture! Slow and low is the way to go. Slice the meat off the bone and warm it up gently in a baking dish covered tightly with foil, maybe with a tiny splash of water or broth underneath. That way, it steams slightly and stays tender instead of drying out all over again.
Frequently Asked Questions About Beer Can Chicken
Is it safe to cook chicken on a beer can like this?
That’s a worry I hear all the time! As long as you are using a standard, solid aluminum can—not a thin plastic cup or anything weird—it’s perfectly safe. The heat won’t affect the integrity of the container, and you aren’t ingesting any of it. Just make sure that when you finish grilling, you let the *can* cool down completely before you try to handle it. Burn risks are real there!
What can I use instead of beer if I don’t want the alcohol?
You have great options if beer isn’t your jam! Remember, the goal is steam, so anything liquid works. I always stock up on chicken broth just in case, but apple juice adds a wonderful subtle sweetness that complements the rub beautifully. Pour in enough to fill the can about halfway, just like you would with beer.
I don’t have a grill; can I still do this Beer Can Chicken?
Absolutely! You can totally make this recipe in the oven, although you miss out on that smoky barbecue flavor. If you bake it, you need to place the upright chicken setup on a sturdy baking sheet. This catches all those amazing drippings—don’t let those go to waste! Baking generally takes a little longer than grilling, so keep an eye on the temperature, just like you would with my irresistible garlic herb roasted chicken recipe.
How do I know when the chicken is fully cooked?
The look test is fine, but the temperature test is non-negotiable for safety! You must use a meat thermometer inserted into the absolute thickest part of the thigh, making sure you don’t touch any bone. When that thermometer reads 165°F (74°C), you’re done! That internal reading is the only way to guarantee it’s perfectly cooked without drying out the breast meat.
Estimated Nutritional Data for Beer Can Chicken
Okay, so if you followed the directions and are dividing this bird up for four hungry people, here’s a general idea of what you’re looking at nutritionally per serving. I always tell people to take these figures with a grain of salt, though, because what kind of beer you used or how thick your spice rub was can totally change things!
This recipe is wonderfully low-carb, which is a bonus for me, but it certainly packs a protein punch! Always remember these numbers are just estimates to give you a ballpark idea of what you’re enjoying.
- Serving Size: 1/4 chicken
- Calories: 450
- Fat: 25g (Watch that Saturated Fat at 8g!)
- Protein: 55g (Wow, that’s a lot of grilling power!)
- Carbohydrates: 0g
- Fiber: 0g
- Cholesterol: 180mg
These numbers reflect the chicken cooked with the spices and oil. If you make a rich potato salad to go with it—like the one I shared—make sure you add those side dish totals in! I always find grilling keeps the fat content lower overall compared to deep frying any old bird, which is why I love this method so much.
Print
Beer Can Chicken
- Total Time: 105 min
- Yield: 4 servings 1x
- Diet: Low Calorie
Description
A simple method for cooking a whole chicken upright using a partially filled can of beer for moisture.
Ingredients
- 1 whole chicken (about 4 lbs)
- 1 can (12 oz) beer, partially consumed
- 2 tablespoons olive oil
- 1 tablespoon paprika
- 1 teaspoon salt
- 1 teaspoon black pepper
- 1 teaspoon garlic powder
- 1 teaspoon onion powder
Instructions
- Preheat your grill to medium heat (around 350°F or 175°C).
- Remove giblets and neck from the chicken cavity. Pat the chicken dry with paper towels.
- In a small bowl, mix the paprika, salt, pepper, garlic powder, and onion powder. Rub the spice mixture all over the outside of the chicken.
- Brush the outside of the chicken with olive oil.
- Carefully open the beer can and pour out about half of the beer.
- Position the chicken upright by inserting the open end of the beer can into the chicken’s cavity. The chicken should stand stable on the can and its legs.
- Place the chicken on the grill, balancing it on the can and the outer edges of the legs or on a specialized beer can chicken stand if you have one.
- Grill for approximately 1 hour and 15 minutes to 1 hour and 30 minutes, or until an internal thermometer inserted into the thickest part of the thigh reads 165°F (74°C).
- Carefully remove the chicken and the can from the grill. Let the chicken rest for 10 minutes before carving.
Notes
- Use a can opener to create extra holes in the top of the beer can for better steam release.
- If you do not want to use beer, substitute with chicken broth or apple juice in the can.
- If using an oven, place the chicken on a baking sheet to catch drippings.
- Prep Time: 15 min
- Cook Time: 90 min
- Category: Main Course
- Method: Grilling
- Cuisine: American
Nutrition
- Serving Size: 1/4 chicken
- Calories: 450
- Sugar: 1
- Sodium: 450
- Fat: 25
- Saturated Fat: 8
- Unsaturated Fat: 17
- Trans Fat: 0
- Carbohydrates: 0
- Fiber: 0
- Protein: 55
- Cholesterol: 180
Keywords: beer can chicken, grilled chicken, whole chicken recipe, upright chicken, easy grilling