
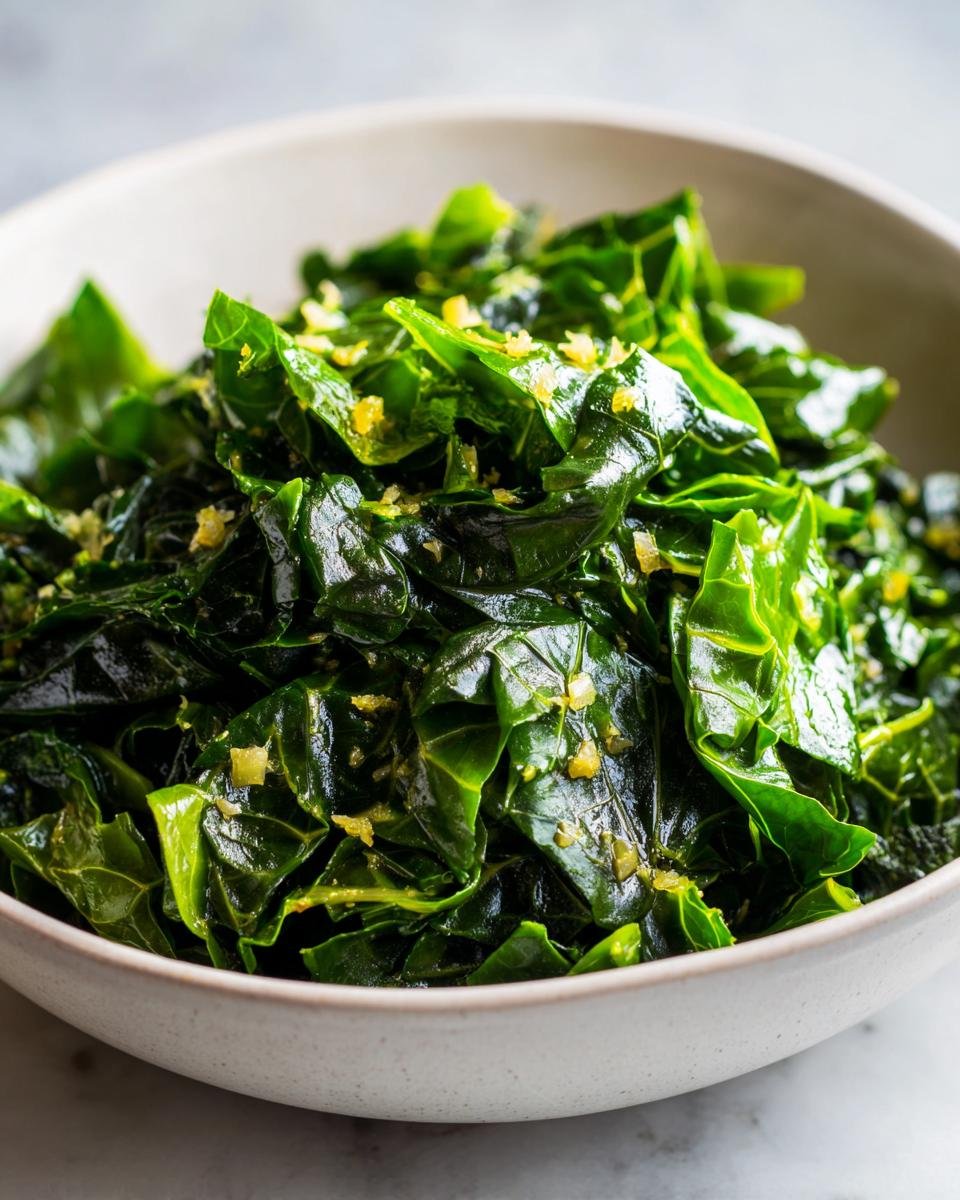
Look, I get it. Collard greens sound intimidating. They conjure up images of all-day simmering or something your Aunt Mavis makes that’s way too tough. But I am here to tell you that you can completely change your mind about them in under 30 minutes! Seriously, this recipe for **Garlic Butter Collard Greens** is my secret weapon for weeknight dinners.
Before I figured out this quick approach, my husband wouldn’t touch them. He grew up on the mushy, overly smoky kind. But the moment those greens hit the pan and you smell the butter and fresh garlic mingling? He was instantly converted. This isn’t a heavy, hours-long braise; it’s bright, simple, and packed with savory flavor. You’re going to have perfect, vibrant greens ready before your main dish is even finished cooking. Trust me on this one!
Why You Will Love These Garlic Butter Collard Greens
I know you’re looking for recipes that don’t require standing over the stove all day, and thankfully, this one delivers big flavor without the commitment. You can have these greens on the table faster than ordering takeout!
- They are ready in just 25 minutes total—quick enough for any busy weeknight.
- The flavor is totally addictive; that hot garlic butter coating the greens is just heavenly.
- Zero difficult techniques here, I promise. If you can melt butter, you can nail this recipe.
Quick Prep and Cook Time for Garlic Butter Collard Greens
Listen, I don’t have time for things that take three hours unless it’s, like, a holiday turkey. This recipe? You’re looking at 10 minutes of chopping and about 15 minutes on the stove. That’s less than half an hour from start to finish, which is amazing for a vegetable side dish!
Flavor Profile: Rich Garlic Butter Collard Greens
It’s all about that base! When you sauté fresh garlic in real butter, the smell alone is enough to make you hungry. The butter melts right into the folds of the bright green leaves, giving them this incredible richness. They taste earthy, savory, and just perfectly seasoned—not bitter at all, I swear!

Essential Ingredients for Perfect Garlic Butter Collard Greens
The beauty of this recipe is seriously how few things you need. We are keeping it super simple here, letting the quality of the few ingredients really shine through. Grab your sharpest knife and let’s check the list. You’ll want fresh greens; don’t try to fake this one!
- One nice big bunch of collard greens—you’ll be surprised how much they cook down!
- Two tablespoons of real butter. And yes, use the good stuff here; it makes a difference.
- Three cloves of garlic, and I mean minced, like tiny little flavor bombs.
- About a quarter cup of water or broth. This creates the steam bath we need.
- Salt and freshly cracked black pepper for seasoning, you’ll adjust this at the end.
Ingredient Notes and Substitutions for Garlic Butter Collard Greens
Okay, let’s talk about leveling up slightly. While water works fine, I almost always swap it out for chicken broth if I have some handy. It just adds a deeper, savory background note that water can’t compete with. Honestly, it’s worth keeping some stock around for this very reason. You can even freeze leftover broth in ice cube trays for future use!
Also, don’t skip the tang at the very end! After they are seasoned, I add just a tiny splash of apple cider vinegar. It doesn’t make the greens taste like vinegar, but it wakes up the whole dish. It cuts through the richness of the butter and makes the final bite feel so much brighter. It’s my little pro move!
Equipment Needed for Making Garlic Butter Collard Greens
You don’t need a whole arsenal of fancy gadgets for this recipe. That’s another thing I love about these simple greens! We rely on basic kitchen workhorses for this one, so grab these things before you start washing your leaves so you’re ready to go!
- A big cutting board and a good, sharp knife. You’ll be doing some chopping, so make sure your knife is up to the task.
- A large skillet—and I mean large. Collard greens look like a mountain when raw but shrink down to nothing once they wilt. You need a wide surface area to sauté properly.
- A tight-fitting lid for that skillet. This is non-negotiable because we need to trap that steam to get them tender!
- A sturdy spatula or wooden spoon for stirring everything around in the butter bath.
That’s literally it! No immersion blender, no stand mixer, just your everyday tools. Getting your space set up first makes the actual cooking feel smooth and fast, especially once that garlic starts smelling incredible.
Step-by-Step Instructions for Delicious Garlic Butter Collard Greens
This is where the magic happens, and honestly, it moves fast! Don’t wander off when you start cooking because you don’t want to miss that perfect moment of fragrance. Follow these steps closely, and you’ll see how quickly these greens go from a giant pile to a tender side dish perfect for any plate. The key here is timing, especially with that lovely garlic!
- First things first, we need to prep the greens. You must wash your collards really well—I mean soak and swirl them! They hide grit between their folds. Once they are clean and gently patted dry, slice out those tough, thick center stems. You can rip them with your hands or chop them out. I like to chop them out with a knife because they tend to stay chewy even after cooking, and we want everything tender. Then, just coarsely chop the leaves into manageable pieces.
- Time to turn on the heat! Set your large skillet over medium heat. Drop in those two tablespoons of butter and let it melt until it’s shimmering slightly.
- Once that butter is ready, toss in your minced garlic. This is a fast step, so pay attention! You want to cook the garlic for just about one minute, stirring constantly. We are aiming for wonderfully fragrant—that means the kitchen smells amazing—but if that garlic starts to turn brown, you’ve gone too far and it’s going to taste bitter. Pull it off the heat immediately if you see any color creeping in.
- Now, dump in all those chopped collard greens! They will look like too much, but just stir them around with your spatula so they all get coated in that gorgeous garlic butter. You might need to do this in batches if your pan isn’t huge. Don’t worry about the volume.
- Pour in your water or broth right over the top of the greens. This liquid is what’s going to create the steam blanket we need to soften them up quickly.
- Quickly slap that lid on tight. Let them cook covered for 10 to 15 minutes. You need to check them and give them a good stir every few minutes just to make sure everything is wilting evenly and nothing is sticking to the bottom. This steaming process is vital for tenderizing them without boiling out all the flavor.
- When they look wilted and soft, take the lid off. If there’s a lot of pooled liquid left, let it cook uncovered for just a few more minutes until most of it has evaporated. We want them moist, not swimming.
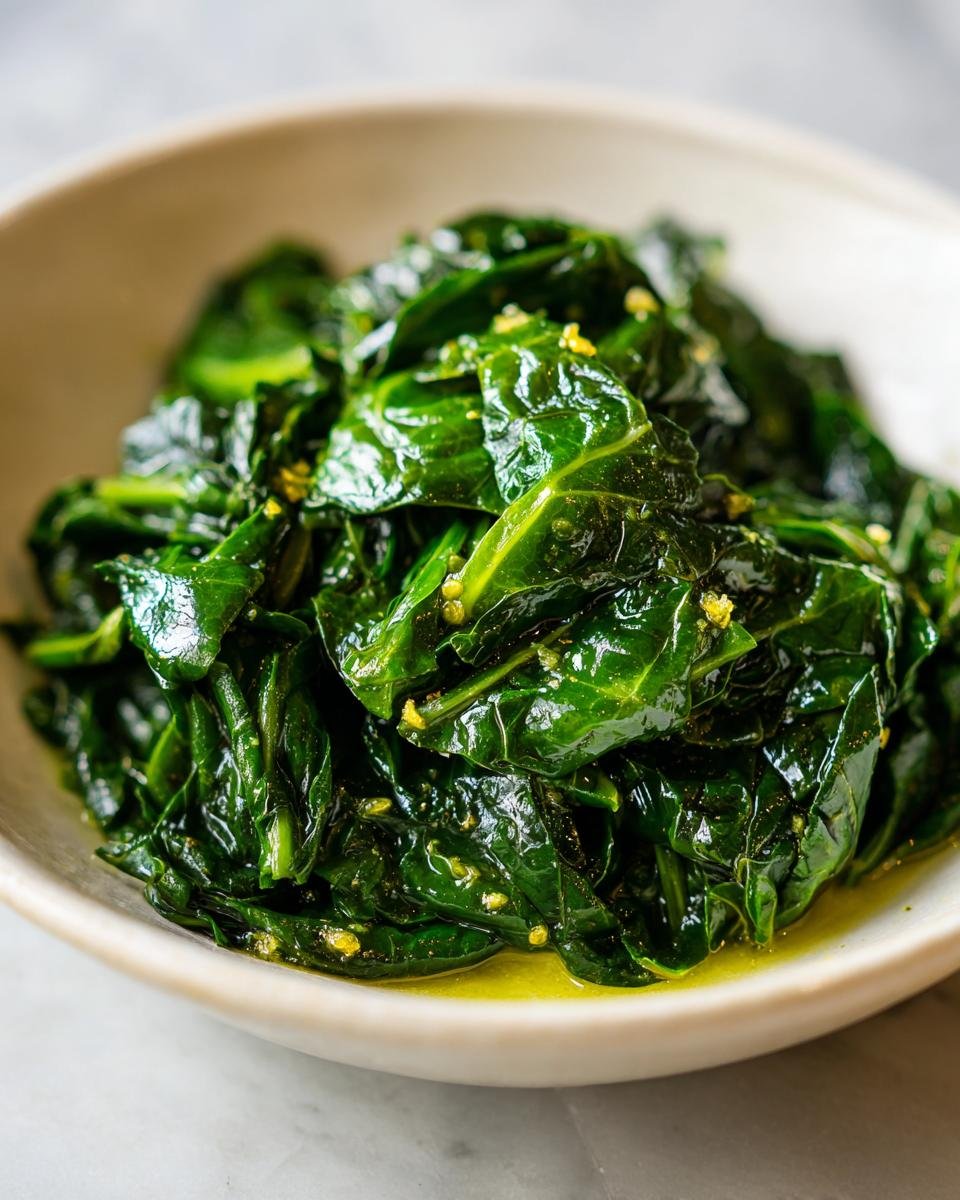
- Finally, taste them! Add in salt and pepper until they taste exactly how you want them to taste. Serve them piping hot! I love placing a little pat of extra butter on top right before serving so it melts gorgeously all over them.
Preparing the Greens: Washing and Chopping
Seriously, don’t rush the washing, especially if you bought conventional greens. I usually fill my sink basin with cool water, dunk the greens in whole, swish them around, and then lift them out. If you pull them straight out of the murky water, the grit stays at the bottom. Repeat that process until the water looks clear. Once they are clean, focus on de-stemming. Those large center ribs are almost like wood after cooking, so cut them away cleanly. You’ll be amazed at the difference in texture when you go for a mouthful of Garlic Butter Collard Greens without those fibrous bites!
Sautéing the Garlic and Butter Base
This is where many people panic and burn the garlic, so please listen up! Medium heat is your friend here. If the butter is smoking, it’s too hot. Everything needs to gently sizzle. You’re looking for the garlic to dissolve into the butter—it should look pale blonde and smell intensely aromatic within sixty seconds. The moment you get that amazing, sweet garlic perfume, throw the greens in immediately to stop the cooking process before browning starts. We want garlic *flavor*, not garlic *char*.
Simmering the Garlic Butter Collard Greens to Tenderness
Once you cover the pot, the greens start throwing off their own moisture, which combines with the butter and broth to create a little flavor sauna. I like to check them right at the 10-minute mark. Poke one with your fork—does it yield easily? If they still feel a bit stiff, give them another five minutes covered. It’s really up to you how tender you want them, but resist the urge to cook them for 45 minutes; that’s when they turn into baby food. Aim for tender-crisp after about 12-15 minutes total under the lid for the best result.
Tips for Achieving the Best Garlic Butter Collard Greens Texture
Okay, so you nail the main steps, but maybe your greens are coming out a little too limp or maybe they still have a little too much bite? That’s totally normal when you’re learning how to cook greens properly! I’ve got a couple of little tricks I use that push these from “good” to “I need the recipe right now.” It’s all about managing that moisture and heat!
My number one goal is always that beautiful tender-crisp texture. I don’t want them swimming in liquid, and I certainly don’t want them dissolving into a bitter pile. We want them wilted but still having some structure, you know?
- Before you add the liquid, try cooking the greens uncovered for about 2 minutes after you stir them in the butter. I know I told you to cover them soon after, but giving them a quick blast of direct heat first helps the leaves seize up a tiny bit. This prevents them from releasing *too* much water later on when you cover them for the steam phase.
- If you are using a very large bunch, try adding half the greens first, letting them wilt slightly in the butter/garlic mixture, and *then* adding the second half. Layering them this way ensures all parts get equal exposure to the fat and heat base before they start steaming. It’s extra work, but it guarantees even cooking throughout the whole batch.
- When you season at the end, don’t just reach for the salt shaker! Adding a tiny bit of texture or crunch near the finish line is fantastic. I sometimes toss in some toasted, chopped walnuts or—even better—some crispy fried onions just before serving. It contrasts wonderfully with the smooth, tender greens and buttery coating. Little textural surprises make everything better!
Follow these finishing moves, and you’ll be an expert in perfectly textured greens in no time. Enjoy that fresh flavor!
Serving Suggestions for Your Garlic Butter Collard Greens
Now that you have this wildly simple, flavorful side dish ready to go, the natural question is: What do I put it next to? Honestly, because these Garlic Butter Collard Greens are so savory and rich with that garlic, they play well with almost anything that needs a vibrant green counterpart. You don’t need to slave over a complicated side dish when this is ready in 25 minutes!
My absolute favorite way to serve these is when we have something grilled. The saltiness and char from the grill just scream for that buttery richness. It’s a perfect match, no contest!
- Grilled Steak or Pork: If you’re having a steak night, skip the creamed spinach! These greens offer more brightness and texture. They are fantastic with a heavy, seasoned ribeye. They pair just as well with a simple smoked pork chop.
- Simple Roasted Chicken: When I roast a whole chicken on a Sunday, these greens are the side that makes the meal feel complete. The pan drippings mix with the residual garlic butter on the greens—it’s heavenly. If you’re making roasted potatoes, check out this great recipe to go alongside! See? Garlic Herb Roasted Potatoes would be heaven next to these greens.
- Seafood (Hear Me Out!): If you’re making something light like baked salmon, these greens add the necessary savory punch. The sweetness of a good salmon fillet is cut beautifully by the sautéed garlic. Just make sure you use the chicken broth instead of water for that savory base when pairing with fish!
See? They aren’t just for barbecues! Keep them simple, keep them fresh, and enjoy how quickly your dinner plate comes together with these beauties on it. They really shine as the main vegetable component!
Storage and Reheating Instructions for Leftover Garlic Butter Collard Greens
Don’t stress if you made too much—these Garlic Butter Collard Greens are honestly even better the next day, assuming you store them correctly! I always try to make a double batch because leftovers mean an easy lunch or a quick side addition to a second dinner later in the week.
The key to successful storage is letting them cool down completely before you put them away. Never put hot food directly into the fridge; it’s not good for your appliance or the food quality! Once they are totally cool to the touch, scoop them into an airtight container. Glass containers are my favorite because they don’t absorb the garlic flavor, but any sturdy container will work just fine.
They keep beautifully in the refrigerator for about four days. That garlicky butter mixture lasts a surprisingly long time, keeping the greens from drying out too much.
The Best Way to Reheat Your Greens
Now, when it comes to reheating, we have to talk about texture control. If you throw these into the microwave, the greens can get rubbery and the butter tends to separate weirdly. Microwave reheating is fine if you’re truly desperate, but I strongly recommend keeping them stovetop savory!
Get your large skillet back out—yes, the same one you cooked them in! Place the skillet over medium-low heat. Add about half a teaspoon of fresh butter or a drizzle of olive oil if you think they look a little dry in the container. Gently scrape the leftover greens right into the pan.
Cook them gently, stirring every minute or so, until they are heated through evenly. This slow warming allows the residual liquid to redistribute the garlic butter flavor perfectly. They will come back to life looking almost as good as they did fresh!
Don’t crank the heat high! If you reheat them too fast, you’ll end up steaming them again, and they’ll get overly soft. Low and slow is the secret here for maintaining that perfect, tender bite we worked so hard to achieve!
Frequently Asked Questions About Garlic Butter Collard Greens
I know you probably have a few lingering questions—everyone does when they first try my quick method for greens! It’s totally normal to wonder about substitutions or how to make sure they last through the week. I’ve gathered the three most popular questions I get asked about serving up these savory little wonders!
Can I use olive oil instead of butter in this Garlic Butter Collard Greens recipe?
Oh, you totally can substitute! But I have to give you a friendly warning: you are swapping out flavor depth. Butter carries the garlic flavor so much better than olive oil does, and it gives the finished greens that rich mouthfeel we are aiming for. Olive oil works fine, especially if you’re aiming for lighter fat content, but the final taste won’t have that deep, savory quality that makes this **Garlic Butter Collard Greens** recipe so famous around here. It tastes good, just not *as* incredible!
How do I reduce the sodium when making Garlic Butter Collard Greens?
That’s a super smart question, especially if you are watching your salt intake. The main sodium hit comes from the salt you add at the end, plus any broth you use. If you’re using store-bought chicken broth, switch to a low-sodium version, or just use plain water, which is salt-free! My biggest tip is to wait until the very end to season. Taste the greens after they finish simmering before you sprinkle in any salt. Often, the butter and any broth you used provide enough background flavor that you need far less salt than you think! You can always add more, right?
Are these Garlic Butter Collard Greens suitable for meal prepping?
Absolutely! As I mentioned in the storage section, these are fantastic for prepping ahead. They hold up really well because we cook them until they are tender but not completely disintegrated. When you store your leftovers in the fridge—make sure they are fully cooled first—they stay great for about four days. If you are planning ahead for lunches, these are perfect! Just reheat them slowly on the stovetop, maybe adding a tiny splash of water or broth to bring back that lovely moisture, and they are good to go. This recipe is the definition of a make-ahead superstar, much like my quick garlic butter pasta!
Nutritional Snapshot of Garlic Butter Collard Greens
For anyone keeping an eye on their macros or just curious about what they’re eating, I snapped a quick look at the nutritional breakdown based on serving size. Remember, these numbers really just reflect the core recipe and don’t account for any big additions like extra salt or using rich chicken broth instead of water.
When you look at the numbers, you see a side dish that’s low in sugar, packed with fiber, and gives you a nice little protein boost, too. Not bad for something that tasted like pure indulgence!
- Serving Size: 1 cup cooked
- Calories: About 85 calories
- Fat: Roughly 6 grams (mostly from that wonderful butter!)
- Carbohydrates: About 6 grams, with 3 grams coming from healthy fiber.
- Protein: A solid 3 grams per serving.
Take these numbers with a grain of salt, haha! If you load them up with extra bacon fat or drown them in butter, those counts are going up. But for this standard, quick **Garlic Butter Collard Greens** recipe? I think you’ll agree it’s a winner for taste *and* balance!
Nutritional Snapshot of Garlic Butter Collard Greens
For anyone keeping an eye on their macros or just curious about what they’re eating, I snapped a quick look at the nutritional breakdown based on serving size. Remember, these numbers really just reflect the core recipe and don’t account for any big additions like extra salt or using rich chicken broth instead of water.
When you look at the numbers, you see a side dish that’s low in sugar, packed with fiber, and gives you a nice little protein boost, too. Not bad for something that tasted like pure indulgence!
- Serving Size: 1 cup cooked
- Calories: About 85 calories
- Fat: Roughly 6 grams (mostly from that wonderful butter!)
- Carbohydrates: About 6 grams, with 3 grams coming from healthy fiber.
- Protein: A solid 3 grams per serving.
Take these numbers with a grain of salt, haha! If you load them up with extra bacon fat or drown them in butter, those counts are going up. But for this standard, quick Garlic Butter Collard Greens recipe? I think you’ll agree it’s a winner for taste *and* balance!
Print
Garlic Butter Collard Greens
- Total Time: 25 min
- Yield: 4 servings 1x
- Diet: Vegetarian
Description
Simple recipe for cooking collard greens with garlic and butter.
Ingredients
- 1 bunch collard greens
- 2 tablespoons butter
- 3 cloves garlic, minced
- 1/4 cup water or broth
- Salt to taste
- Black pepper to taste
Instructions
- Wash the collard greens thoroughly. Remove the tough stems and coarsely chop the leaves.
- Melt the butter in a large skillet over medium heat.
- Add the minced garlic to the skillet and cook for about 1 minute until fragrant. Do not let the garlic brown.
- Add the chopped collard greens to the skillet. Stir to coat with the butter and garlic.
- Pour in the water or broth.
- Cover the skillet and cook for 10 to 15 minutes, or until the greens are tender. Stir occasionally.
- Remove the lid and cook for a few more minutes if excess liquid remains.
- Season with salt and pepper to your taste. Serve hot.
Notes
- For a richer flavor, use chicken broth instead of water.
- If you prefer softer greens, cook them longer.
- You can add a splash of vinegar at the end for brightness.
- Prep Time: 10 min
- Cook Time: 15 min
- Category: Side Dish
- Method: Sautéing
- Cuisine: American
Nutrition
- Serving Size: 1 cup cooked
- Calories: 85
- Sugar: 1
- Sodium: 150
- Fat: 6
- Saturated Fat: 3.5
- Unsaturated Fat: 2.5
- Trans Fat: 0
- Carbohydrates: 6
- Fiber: 3
- Protein: 3
- Cholesterol: 12
Keywords: collard greens, garlic, butter, greens, side dish, vegetable