
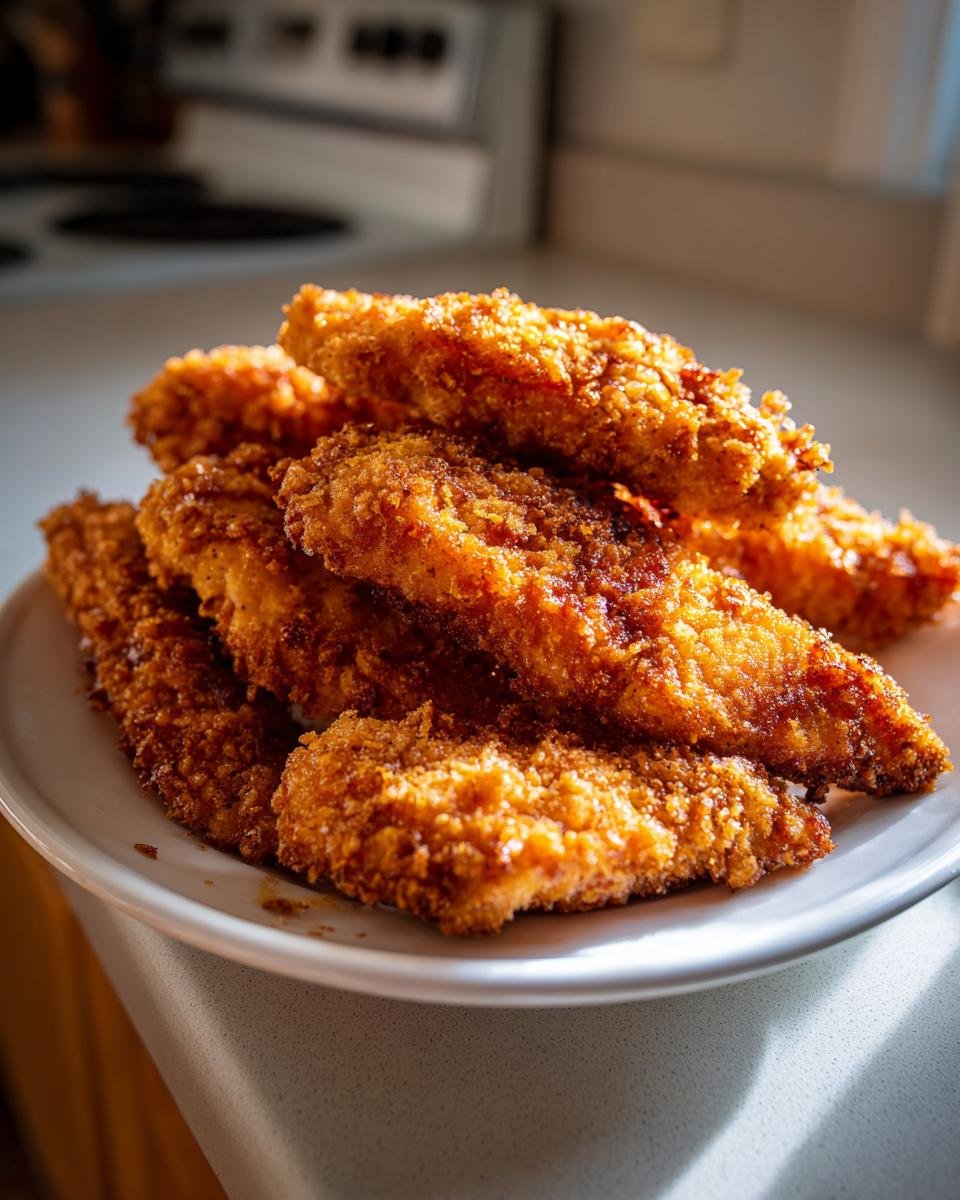
Oh my goodness, who doesn’t love a perfectly crispy chicken tender? I swear, I’ve tinkered with this recipe for ages, trying to get that *just right* crunch and amazing flavor. It’s funny, I remember a time when my kids were little, and dinner felt like a battle. Then I whipped up a batch of these homemade crispy chicken tenders, and suddenly, dinner was a win! This recipe, “Crispy Chicken Tenders Recipes A Flavorful Delight,” is my secret weapon. It’s so darn simple, but the results? Pure magic. You get that incredible crispiness without all the fuss, and the flavor is just out of this world. Trust me, once you try these, you’ll never go back to the frozen stuff!

Why You’ll Love This Crispy Chicken Tenders Recipe
Seriously, what’s not to adore about these chicken tenders? I’ve poured my heart into making them just right, and I think you’re going to be obsessed!
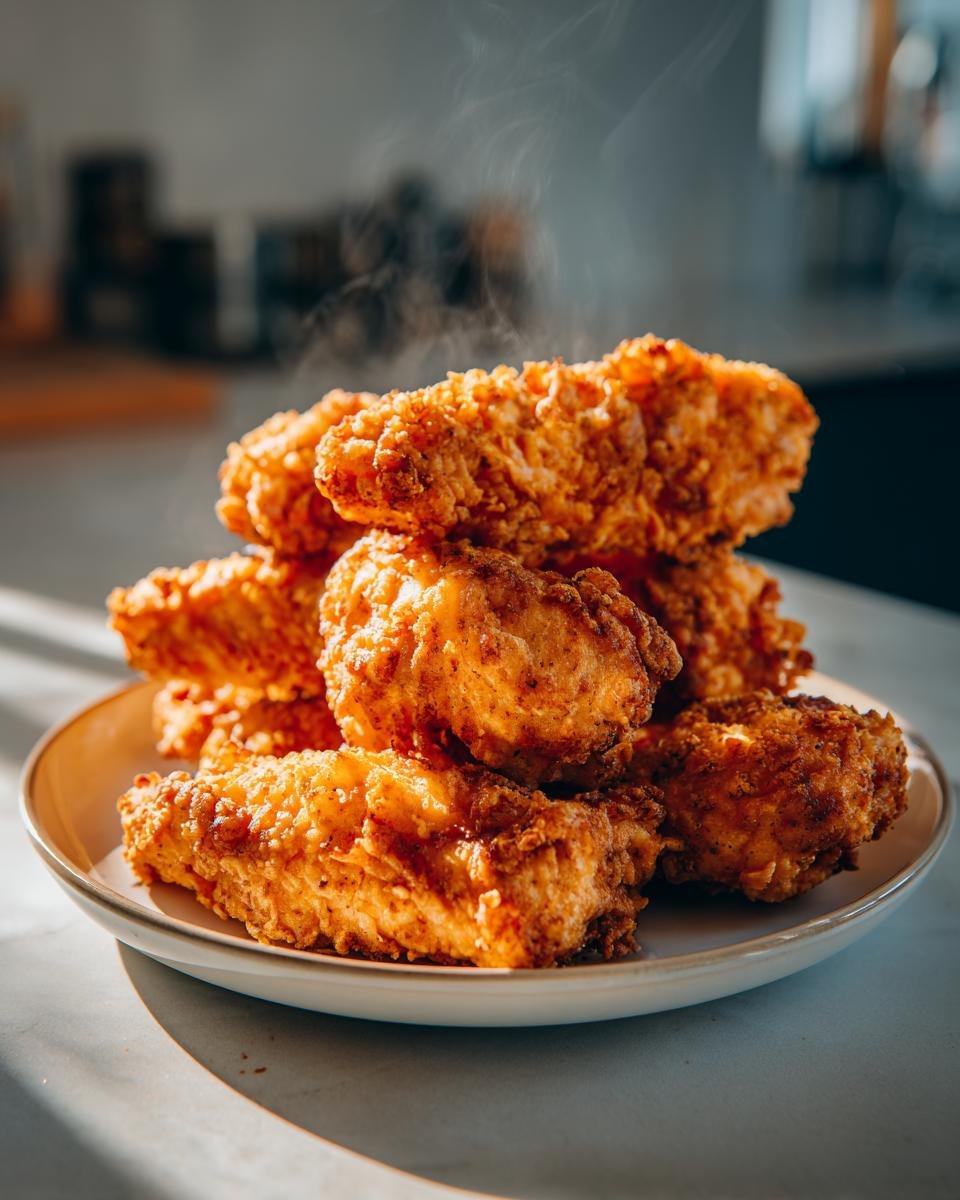
- Super Duper Crispy: We’re talking serious crunch here, folks. The panko breadcrumbs and a little bit of frying magic make these tenders irresistibly crispy.
- Crazy Simple to Make: Even if you think you’re not a baker (or fryer!), you can totally nail this. It’s just a few straightforward steps, and you’ll have amazing tenders in no time.
- Kid-Approved (and Adult-Approved!): These disappear faster than you can say “dip me!” They’re perfect for picky eaters and sophisticated palates alike.
- So Versatile: Serve them with your favorite sauce, pile them on a salad, or tuck them into a sandwich. They’re the ultimate blank canvas for flavor!
- So Much Better Than Store-Bought: You can taste the love and the fresh ingredients. No weird stuff, just pure, delicious, homemade goodness.
Essential Ingredients for Crispy Chicken Tenders
Alright, let’s talk about what you’ll need to whip up these amazing crispy chicken tenders. Trust me, it’s nothing fancy, just good old pantry staples that work like a charm. Having everything prepped makes the whole process go by so much faster, so get yourself organized before you even think about turning on the stove!
Here’s the lineup:
- Chicken Breasts: About a pound of boneless, skinless chicken breasts. I like to cut them into strips about an inch thick so they cook evenly.
- All-Purpose Flour: A cup should do it. This is our first layer for getting that breading to stick.
- Eggs: Two large ones, beaten up good. This is the glue that holds everything together!
- Panko Breadcrumbs: This is the secret weapon for *super* crispy tenders! You’ll need about two cups. Don’t skimp here; regular breadcrumbs just don’t give you that same amazing crunch.
- Salt & Pepper: A teaspoon of salt and half a teaspoon of pepper are essential for good basic flavor.
- Spices: Half a teaspoon of paprika and a quarter teaspoon of garlic powder add just that little something extra to the coating.
- Vegetable Oil: You’ll need enough to fill about an inch in your skillet for frying. This is where the magic happens!
Expert Tips for Perfect Crispy Chicken Tenders
Alright, listen up, because I’ve learned a few things over the years that make these chicken tenders go from good to absolutely phenomenal. It’s all about the little details, you know? Don’t be afraid to experiment a bit, but definitely keep these tips in mind. They’re my go-to’s for getting that perfect crunch every single time!
First off, oil temperature is your best friend. You want it around 350°F (175°C). If it’s too cool, you’ll get greasy tenders, and nobody wants that. Too hot, and the outside burns before the inside is cooked. Keep a thermometer handy if you can; it really makes a difference. Trust me on this one!
Also, don’t overcrowd the pan! I know, I know, you want to get them done fast, but frying them in small batches is KEY. Give those tenders some space so they fry evenly and get super crispy on all sides. They need room to swim, people!
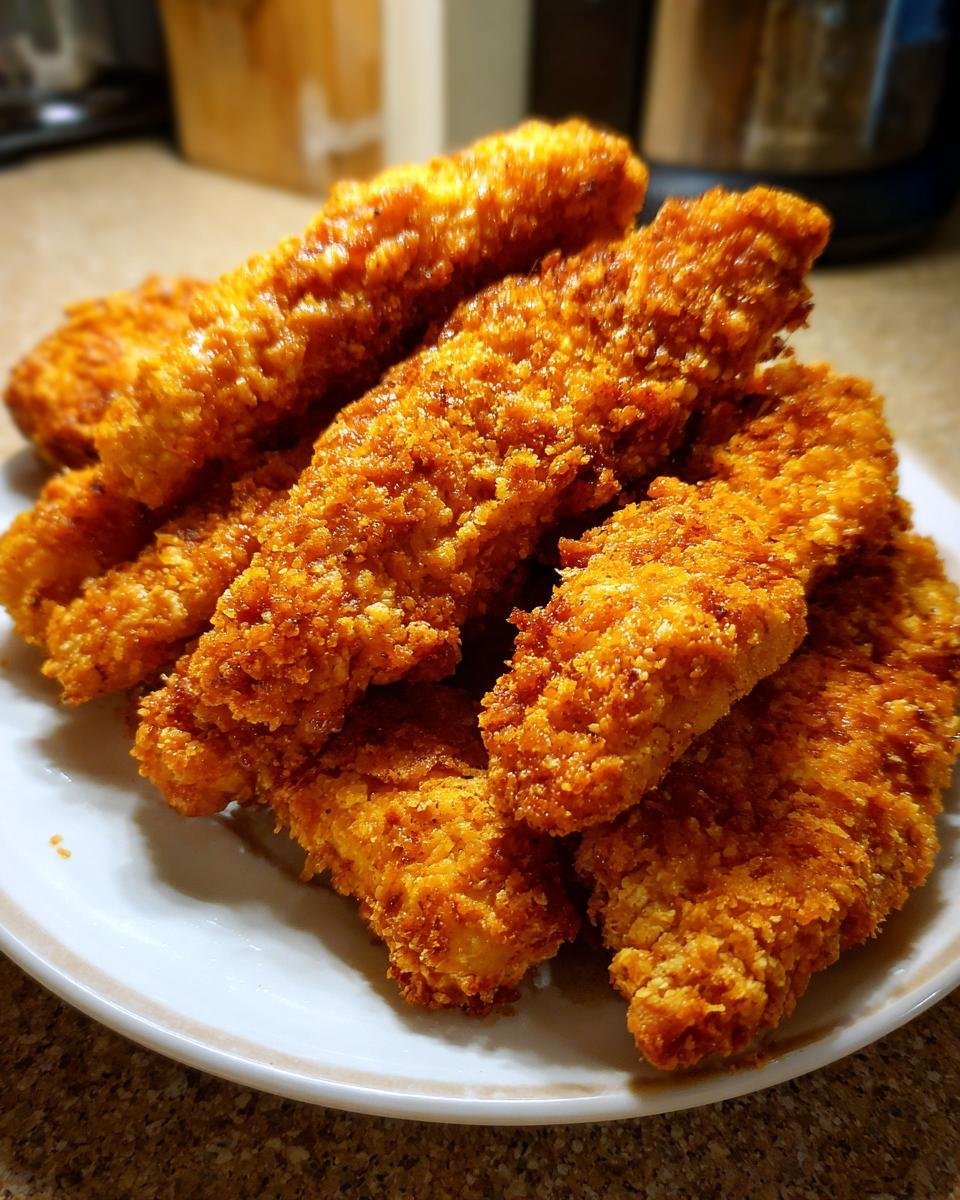
And for that extra-special crunch? I sometimes do a double dip! Flour, egg, panko, then egg again and panko one more time. It takes an extra minute, but wow, the coating holds up so well and gets unbelievably crisp. It’s my little trick for when I’m feeling fancy.
Once they’re out of the oil, a wire rack is your savior. Seriously, ditch the paper towels for draining. Laying them on a wire rack lets the air circulate, keeping that beautiful crispy coating from getting soggy underneath. You want ALL the crisp, all the time!
If you’re looking for a slightly healthier but still awesome option, check out these Crispy Baked Chicken Tenders. They’re a great alternative if frying isn’t your jam right now!
Step-by-Step Guide to Making Crispy Chicken Tenders
Alright, let’s get down to business! Making these crispy chicken tenders is really a straightforward process, and I promise, by the time we’re done, you’ll be a pro. It’s more about getting your setup right and moving with a little bit of confidence. I’ve made these so many times, I can almost do it with my eyes closed!
First things first, let’s get your dredging stations ready. You’ll need three shallow dishes. In the first one, I like to mix up my dry ingredients – that’s your flour, salt, pepper, paprika, and garlic powder. Give it a good whisk to make sure everything is nicely combined. In the second dish, pour in your beaten eggs. And in the third, pile up those lovely panko breadcrumbs. Think of these as your little assembly line!
Now, grab your chicken strips. You want to give each piece a good coating. Start by dredging a tender in the seasoned flour, shaking off any excess. Then, dip it into the beaten egg, letting any extra drip off. Finally, press it firmly into the panko breadcrumbs, making sure it’s totally covered. I like to really pat the crumbs on so they stick like glue! If you’re feeling extra ambitious, you can totally do a double coat here – egg, then panko again – for an even thicker, crispier crust. Just set your breaded tenders aside on a clean plate while you finish up the rest.
While your chicken is getting all dressed up, it’s time to heat up that oil. You’ll need to add about an inch of vegetable oil to a large skillet. Let it heat up over medium-high heat until it reaches about 350°F (175°C). A kitchen thermometer is super handy here, but if you don’t have one, you can test it by dropping a tiny bit of breadcrumb into the oil. If it sizzles happily and floats up, you’re good to go!
Now for the satisfying part – the frying! Carefully place your chicken tenders into the hot oil, but don’t crowd the pan! Seriously, do this in batches. You don’t want to lower the oil temperature too much. Fry them for about 3 to 4 minutes on each side. You’re looking for that gorgeous golden brown color and of course, to make sure they’re cooked all the way through. Once they’re perfect, use a slotted spoon or tongs to lift them out and place them on a wire rack that’s set over a baking sheet.
This wire rack trick is crucial, folks! It lets all that extra oil drain away, keeping your tenders perfectly crispy and not greasy. They’ll be ready to serve hot and delicious. If you’re looking for another method, I’ve got some sweet Crispy Oven-Baked Chicken Wings that are really great too!
Serving Suggestions for Your Crispy Chicken Tenders
Okay, now that you’ve got these golden, glorious chicken tenders, what do you serve them with? This is where the real fun begins! They’re so versatile, they practically beg to be paired with something delicious. For me, it’s all about the dipping sauces. Ketchup is a classic, of course, but you HAVE to try them with honey mustard – the sweet and tangy combo is divine! Ranch is another winner, or even a spicy sriracha mayo if you like a little kick.
If you’re building a whole meal, these tenders play so nicely with sides. Imagine them alongside some fluffy, garlicky Garlic Breadsticks – perfect for soaking up any leftover sauce. Or, for a more substantial meal, they’re incredible next to a scoop of creamy, dreamy Ultimate Delicious Potato Salad. They’re also fantastic chopped up and tossed into a big green salad for some added protein and crunch!
Storage and Reheating Crispy Chicken Tenders
So, what happens if you miraculously have leftovers? Don’t you worry! These crispy chicken tenders store and reheat like a dream. Once they’ve cooled down completely, just pop them into an airtight container or a zip-top bag. They’ll keep nicely in the fridge for about 3 to 4 days. If you want to freeze them for later, that works too! Just make sure they’re totally cooled, then wrap them well and pop them in the freezer for up to a month. They’re perfect for a quick lunch or dinner whenever the craving strikes!
Frequently Asked Questions About Crispy Chicken Tenders Recipes
Got questions about making the most amazing crispy chicken tenders ever? I’ve got answers! This is honestly one of my favorite comfort foods to make, and I’ve learned a thing or two along the way. Let’s dive in!
Can I bake these chicken tenders instead of frying them?
Oh, absolutely! If frying just isn’t your thing, or you’re looking for a slightly lighter option, baking works great. You’ll want to do the same dredging and breading process, then lay them on a wire rack set over a baking sheet. Bake them in a preheated oven at around 400°F (200°C) for about 20-25 minutes, flipping them halfway through, until they’re golden and cooked through. They won’t be *quite* as intensely crispy as fried, but they’ll still be delicious! You could also try my Crispy Baked Parmesan Zucchini Fries recipe for a similar oven-baked goodness factor!
What is the best oil for frying chicken tenders?
For frying chicken tenders, you want an oil with a high smoke point so it doesn’t burn and make your tenders taste funky. Vegetable oil is a fantastic, budget-friendly choice that works perfectly and gets super crispy. Canola oil is another great option. You can also use peanut oil if you like that flavor. Just make sure you use enough to come up about an inch in your pan so the tenders can fry nicely!
Why aren’t my chicken tenders getting crispy enough?
Okay, this is a common one! A few things could be happening. First, make sure your oil is hot enough – 350°F (175°C) is the sweet spot. If it’s too cool, the tenders will absorb oil and get soggy instead of crispy. Second, don’t overcrowd the pan! Frying in batches and giving them space is crucial for crispiness. And finally, make sure you’re using panko breadcrumbs; they really are the secret weapon for that extra crunch!
Can I use chicken thighs instead of breasts?
For sure! Chicken thighs are actually super forgiving and stay really moist. Just trim off any excess fat and cut them into strips. The cooking time might be a little longer than breasts, so keep an eye on them. They’ll still get beautifully crispy with the same breading process!
Nutritional Information (Estimated)
Just a heads-up, these numbers are estimates, okay? They can totally change depending on exactly what you use and how much oil you get on there. But, as a general idea, one serving (about 4 oz of these yummy tenders) is roughly:
- Calories: 450
- Fat: 25g
- Protein: 25g
- Carbohydrates: 30g
- Sodium: 600mg
It’s always good to keep in mind that using less oil or serving with lighter sides can adjust these numbers, but this gives you a good snapshot!
Print
Crispy Chicken Tenders
- Total Time: 30 min
- Yield: 4 servings 1x
- Diet: Vegetarian
Description
A simple recipe for making flavorful and crispy chicken tenders.
Ingredients
- 1 pound boneless, skinless chicken breasts, cut into strips
- 1 cup all-purpose flour
- 2 large eggs, beaten
- 2 cups panko breadcrumbs
- 1 teaspoon salt
- 1/2 teaspoon black pepper
- 1/2 teaspoon paprika
- 1/4 teaspoon garlic powder
- Vegetable oil, for frying
Instructions
- In a shallow dish, combine flour, salt, pepper, paprika, and garlic powder.
- In another shallow dish, beat the eggs.
- In a third shallow dish, place the panko breadcrumbs.
- Dredge each chicken tender strip first in the flour mixture, then dip in the beaten eggs, and finally coat thoroughly with panko breadcrumbs.
- Heat about 1 inch of vegetable oil in a large skillet over medium-high heat to 350°F (175°C).
- Fry the chicken tenders in batches for 3-4 minutes per side, or until golden brown and cooked through.
- Remove tenders from the skillet and place them on a wire rack set over a baking sheet to drain excess oil.
- Serve hot.
Notes
- For extra crispiness, you can double-coat the chicken tenders.
- Serve with your favorite dipping sauces like ketchup, honey mustard, or ranch.
- Prep Time: 15 min
- Cook Time: 15 min
- Category: Main Course
- Method: Frying
- Cuisine: American
Nutrition
- Serving Size: 4 oz
- Calories: 450
- Sugar: 2g
- Sodium: 600mg
- Fat: 25g
- Saturated Fat: 5g
- Unsaturated Fat: 20g
- Trans Fat: 0g
- Carbohydrates: 30g
- Fiber: 2g
- Protein: 25g
- Cholesterol: 100mg
Keywords: crispy chicken tenders, chicken tenders recipe, fried chicken, easy chicken tenders, homemade chicken tenders